Starting with .NET Core and Docker on LINUX
In this tutorial, you will be able to create a simple ASP.NET Core MVC app working with Docker. But before starting code, let’s talk about these technologies: I’m sure, you have listened about .NET Framework, but what about .NET Core? What about Docker? Well, it’s time to put all on site.
The .NET family
What is .NET?
That answer can be found at Microsoft’s .NET home page, which gives us the next definition:
.NET is a free, cross-platform, open source developer platform for building many different types of applications. With .NET, you can use multiple languages, editors, and libraries to build for web, mobile, desktop, gaming, and IoT.

The .NET implementations
.NET has different implementations depending on the Operating System (Windows, Linux, MacOS, iOS, Android, UWP) and the target (server, desktop or mobile). We have 3 implementations:
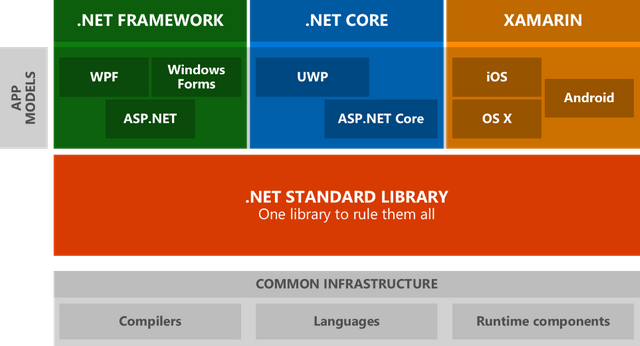
- .NET Framework is the original .NET implementation that has existed since 2002. It contains additional Windows-specific APIs. The .NET Framework is optimized for building Windows desktop applications.
- .NET Core is a cross-platform and open source implementation of .NET for creating web apps, micro services, libraries and console applications that run everywhere (Windows, macOS and Linux).
- Xamarin is a .NET implementation that you can create native Android, iOS, macOS and Windows apps.
If you’re an observer and you have looked at the image, I’m sure you’re wondering what is .NET Standard: Immo Landwerth (program manager on the .NET Framework team at Microsoft) writes in his blog:
.NET Standard solves the code sharing problem for .NET developers across all platforms by bringing all the APIs that you expect and love across the environments that you need: desktop applications, mobile apps & games and cloud services.
Why .NET Core?
In the past, we only had a .NET Framework that is mainly a large and monolithic framework that has to be installed in full per machine (or you can’t use it) and allows the creation of console, desktop, web and mobile applications, where they run only on Windows.
At present, .NET Core is the new generation of .NET technologies and unlike its traditional version, .NET Core is based and developed with the following goals in mind:
- Lighter and more modular: you don’t have to install the entire .NET. Instead, you can choose what you want for developing.
- Multi-platform: The applications created with this technology will work on Windows, Linux, and MacOS.
- High performance: .NET Core has a higher performance than the traditional version, which is very important for Cloud environments, where this translates into a lot of money saving over time.
Now we know that .NET Core is a powerful implementation of the .NET platform that allows us to develop, for example, a modern cross-platform web app with the C# program language on a Linux OS! Can you believe it?
Docker
- The software Docker is a platform that allows you to build, test and deploy applications quickly.
- The open source Docker community works to improve these technologies and benefit all users for free.
- The company, Docker Inc., is behind the development and maintenance of the Docker software.
With Docker, you will never say the phrase “but it worked in my computer!”, because you can package all dependencies together with the software code to make your app working in a container and run it everywhere!
Is Docker a Virtual Machine?
Docker is not precisely a Virtual Machine. Virtual machines are a sandboxed environment, which contains an entire computer with its virtual hardware, OS and software; booting up a virtual machine can sometimes take a few minutes to boot up.
Containers are a lightweight alternative to full machine virtualization since they are commonly used to sandbox a single application. Containers use the host OS’ kernel, and thus no bootup time is needed. So, containers are faster than Virtual Machines.

Containers
Containers, containers, containers… What is that and why it’s so important? Well, here is the core of Docker: Containers are standardized units that have everything the software needs to run including libraries, system tools, code, and runtime. Docker packages software into containers that lets you quickly deploy and scale applications into any environment and know your code will run.
Images
How can we run our containers? To do that, we need images. An image is an executable package that includes everything needed to run an application: the code, a runtime, libraries, environment variables, and configuration files. So, we can say that a container is a runtime instance of an image. Another important thing about images is that we have available to download official images in the repositories that Docker offers at Docker Hub, which is a cloud-based registry service that includes private and public image repositories.
Let’s code our first .NET Core app!
Requirements
- .NET Core SDK: the Software Development Kit (SDK) of .NET Core. We need it to create applications and libraries.
- Docker (if you have any problem with the installation of this software, you can try with Docker Toolbox)
- Visual Studio Code: optional. VS Code is a powerful cross-platform text editor from Microsoft. It’s very handful for its integration with and Docker.
As you saw at the beginning of this tutorial, we’re going to use a Linux OS. In my case, I will be using Manjaro, which is an Arch-based Linux distro. But don’t worry: the only difference is mainly the installation phase of .NET Core and Docker. If you’re using Windows/macOS, you can still follow me!
Installation
OK! First of all, we need to install .NET Core SDK and Docker in our machine (links under requirements). For linux users, we have this page to install Docker with depending on your Linux distro.
Manjaro (Arch and Antergos) users have available in the AUR repository all we need:
$ sudo pacman -S dotnet-runtime dotnet-sdk docker
Now check if everything was installed correctly. You have to see some info about .NET Core and Docker:
$ dotnet
$ docker
If you have problems with docker, be sure that the service is turned on:
$ sudo systemctl status docker
If the service it’s OK, try to put “docker info”. If you read “cannot connect to the Docker daemon” or similar, maybe your user is not included in the Docker group:
# groupadd docker
# usermod -aG docker ${USER}
Create your first .NET Core MVC app
In your terminal, run the following commands:
$ dotnet new mvc -o awesomeMVC  --no-https
$ cd awesomeMVC
What do these commands mean?
- The
dotnetnew command creates a new application. - The
mvcparameter selects what template to use when creating your app. - The
-oparameter creates a directory named awesomeMVC where your app is stored. - The
--no-httpsflag specifies not to enable HTTPS.
What files were created?
Startup.cscontains all the settings and configurations.- The
awesomeMVC/Viewsdirectory contains some example web pages for the application. awesomeMVC.csprojdefines what libraries are referenced, etc.
Run awesomeMVC
Can we run our app? YES! In your terminal, run the following command:
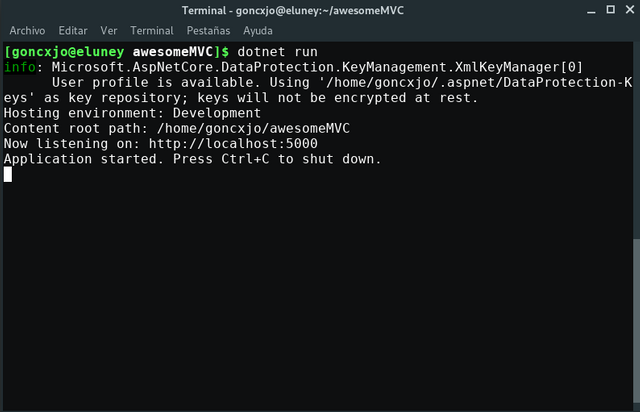
$ dotnet run
Once the command completes, browse to http://localhost:5000/
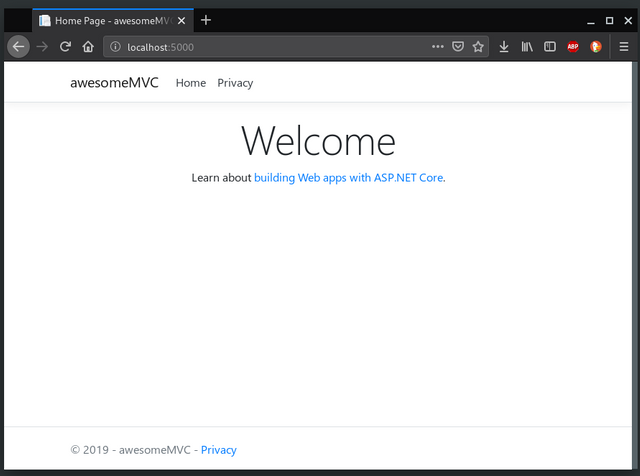
Yaaaay! It works 😃
Make it better
Let’s make some changes: open Views/Home/Index.cshtml in VS Code and replace all of the code with the following:
@{
    ViewData[“Title”] = “Home Page”;
}
<div class=”text-center”>
    <img class=”image-responsive”
         src="https://nunit.org/img/dotnetfoundation.png"
         height=”200em”>
    <p>The time on the server is @DateTime.Now</p>
</div>
Save and refresh the browser.
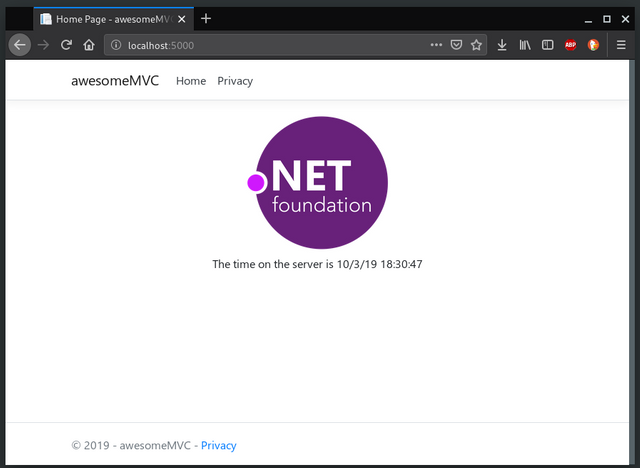
It looks better!
Dockerize awesomeMVC
How can we do that? First, we have to know that:
Docker can build images automatically by reading the instructions from a “Dockerfile”. A Dockerfile is a text document that contains all the commands a user could call on the command line to assemble an image.
Create a Dockerfile
So, in the project’s folder, create a file named “Dockerfile” and add the text below. The Dockerfile assumes that your application is called awesomeMVC. Change the Dockerfile to use the DLL file of your project.
# Take a base image from the public Docker Hub repositories
FROM microsoft/dotnet:sdk AS build-env
# Navigate to the “/app” folder (create if not exists)
WORKDIR /app
# Copy csproj and download the dependencies listed in that file
COPY *.csproj ./
RUN dotnet restore
# Copy all files in the project folder
COPY . ./
RUN dotnet publish -c Release -o out
# Build runtime image
FROM microsoft/dotnet:aspnetcore-runtime
WORKDIR /app
COPY --from=build-env /app/out .
ENTRYPOINT [“dotnet”, “awesomeMVC.dll”]
Create a .dockerignore file
To make your build context as small as possible add a .dockerignore file to your project folder and copy the following into it.
bin\
obj\
Build and run the Docker image
Open a terminal and navigate to your project folder. Use the following commands to build and run your Docker image:
$ docker build -t awesome-mvc .
$ docker run -d -p 8080:80  -- name myapp awesome-mvc
You can check if the container is active with:
$ docker container ls

View the web page running from a container
- Go to http://localhost:8000 to access your app in a web browser.
- If you are using the Nano Windows Container and have not updated to the Windows Creator Update there is a bug affecting how Windows 10 talks to Containers via “NAT” (Network Address Translation). You must hit the IP of the container directly. You can get the IP address of your container with the following steps:
- Run
docker inspect -f "{{ .NetworkSettings.Networks.nat.IPAddress }}" myapp - Copy the container IP address and paste into your browser. (For example, 172.16.240.197)
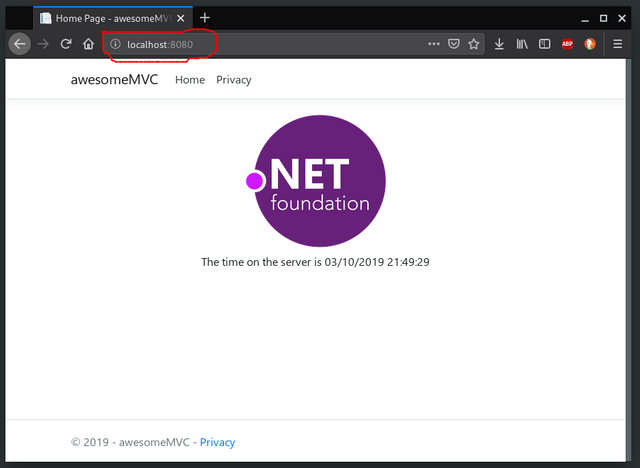
Congratulations! 🎊 You’ve created your first .NET Core app running in a Docker Container! 😄
Let’s get harder: Docker Compose
If you need to run more than one image at the same time and they have to be connected, you need to know about Docker Compose. In the official documentation of Docker says:
Compose is a tool for defining and running multi-container Docker applications. With Compose, you use a YAML file to configure your application’s services. Then, with a single command, you create and start all the services from your configuration.
So, what needs our app? A database? Do you like SQL Server? OK! Let’s see…
New requirements
- Docker Compose: with this tool, we can build our multi-container app, as we said.
- Azure Data Studio: Linux/Mac users don’t have Management Studio for SQL Server, but we have this beautiful, lightweight, cross-platform database tool for manage SQL Server databases and cloud
SQL Server image
First, we have to pull down the image of our database. As we say, we will use SQL Server for Linux:
$ docker pull microsoft/mssql-server-linux
Also, you can use this SQL image: mcr.microsoft.com/mssql/server:latest
Now that we have the image, we need to start it up and connect to it to make sure it is operating as we expect. Let’s run the container:
$ docker run \
  -e 'ACCEPT_EULA=Y' \
  -e 'SA_PASSWORD=yourStrong(!)Password' \
  -p 1433:1433 \
  --name sqlserver \
  -d microsoft/mssql-server-linux
-especifies an environment variable, here we specify password and acceptance of EULA (end user license agreement),-ppecifies the port to forward so that we can connect from the host (our local machine),--namespecifies the name used to identify the container — this is useful to start/stop/delete the container — ,-dspecifies that we want to start a detached container (runs in background).
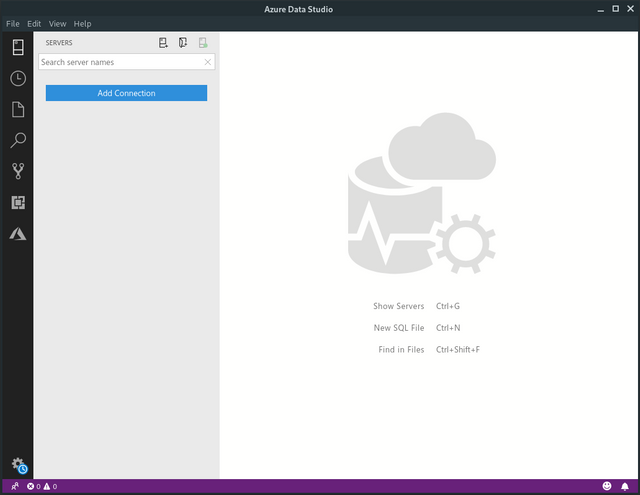
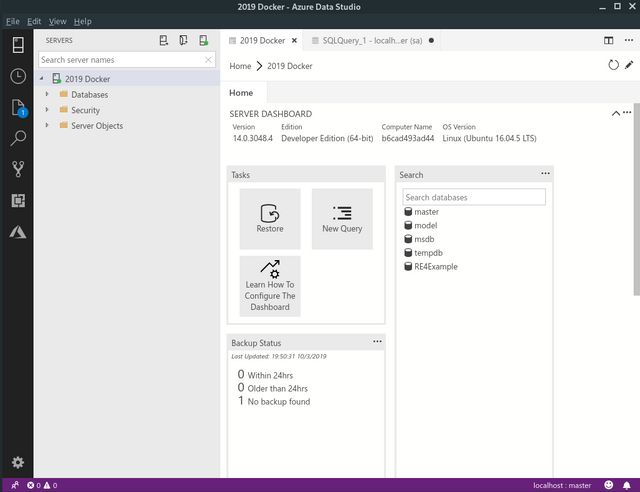
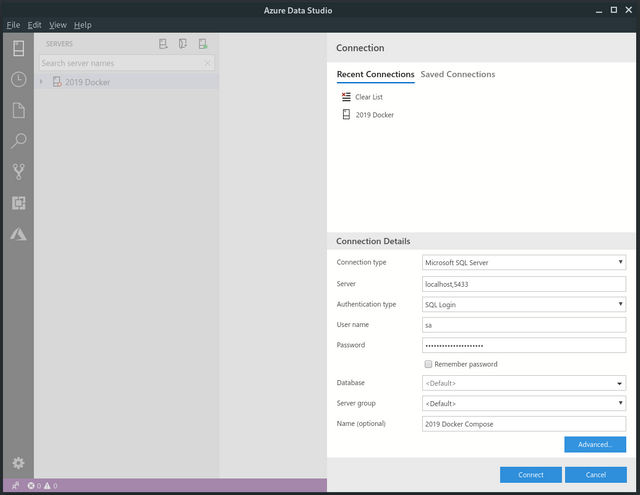
Once that the container is up and running, open *Azure Data Studio so we can connect to the database. Click on “Add Connection”:
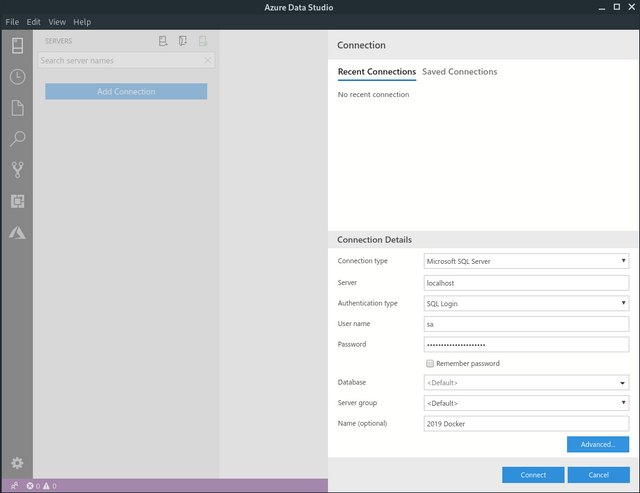
Now, complete with localhost as server, sa as username and yourStrong(!)Password as password. Then connect to the db:
Entity Framework Core: modeling your Database
Let’s back to our project “awesomeMVC” and we will replace the entire text at awesomeMVC.cproj:
<ItemGroup>
    <PackageReference Include="Microsoft.AspNetCore.App" />
    <PackageReference Include="Microsoft.AspNetCore.Razor.Design" Version="2.2.0" PrivateAssets="All" />
    <PackageReference Include="Microsoft.EntityFrameworkCore.Design" Version="2.2.2" />
    <PackageReference Include="Microsoft.EntityFrameworkCore.SqlServer" Version="2.2.2" />
    <PackageReference Include="Microsoft.VisualStudio.Web.CodeGeneration.Design" Version="2.2.2" />
</ItemGroup>
<ItemGroup>
    <DotNetCliToolReference Include="Microsoft.VisualStudio.Web.CodeGeneration.Tools" Version="2.0.4" />
    <DotNetCliToolReference Include="Microsoft.EntityFrameworkCore.Tools.DotNet" Version="2.0.3" />
</ItemGroup>
Then, install all the dependencies typing this in the terminal:
$ dotnet restore
Great! Now let’s get to creating our models. We are going to model some characters from Resident Evil 4 (man, I like this game!) and we will define items in a single file since it is such a simple example.
Let’s start by creating the model: navigate through the “Models” folder in our project and create a file named Model.cs. Next, enter the following code:
using Microsoft.EntityFrameworkCore;
using System.Collections.Generic;
namespace awesomeMVC.Models {
    public class CharactersContext : DbContext {
        public CharactersContext(DbContextOptions<CharactersContext> options) : base(options) {}
        public DbSet<Character> Characters { get; set; }
    }
public class Character {
       public int CharacterId { get; set; }
       public string FirstName { get; set; }
       public string LastName { get;set; }
    }
}
Now we need to wire up the database context with the dependency injection framework. To do this open `Startup.cs`` and add the add the new lines.
First, add the new using statements:
using awesomeMVC.Models;
using Microsoft.EntityFrameworkCore;
With those added to the list of using statements, we can now modify the ConfigureServices method to add our code.
public void ConfigureServices(IServiceCollection services)
{
    ...

    // This is the new code.
    var connection = Configuration.GetConnectionString("DefaultDatabase");
    services.AddDbContext<CharactersContext>(options => options.UseSqlServer(connection));
    services.AddMvc().SetCompatibilityVersion(CompatibilityVersion.Version_2_2);
}
Now let’s add our connection string information to our appsettings.Development.json by adding the following code:
{
    "Logging": {
        "LogLevel": {
            "Default": "Debug",
            "System": "Information",
            "Microsoft": "Information"
        }
    },
    "ConnectionStrings" : {
        "DefaultDatabase": "Server=localhost;Database=RE4Example;User Id=sa;Password=yourStrong(!)Password;"
    }
}
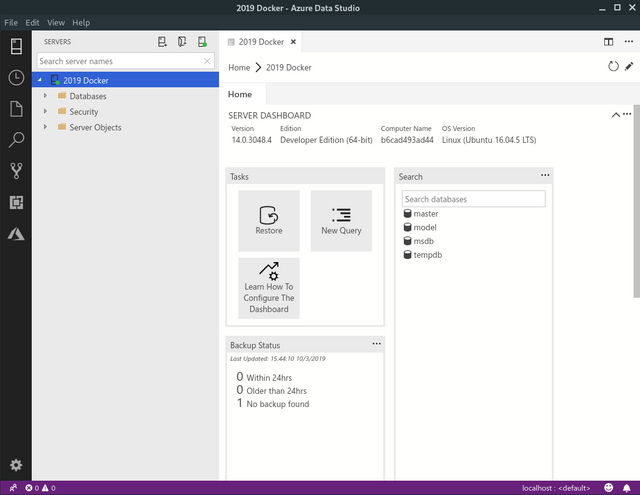
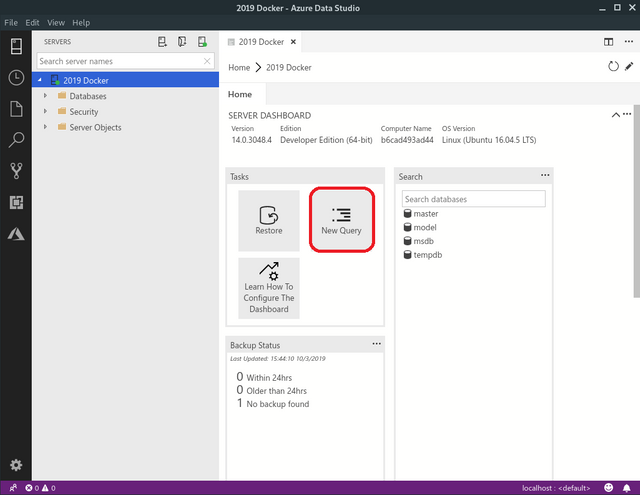
With our connection string, the last step to do before we run our migrations is to create our RE4Example database. We can do this with Data Studio. Open it up and click on New Query.
With that window open, type “sqlCre” and a snippet will pop, just hit enter.
Now we are ready to create our Entity Framework migrations and create our tables. Run the following command to create the migration.
$ dotnet ef migrations add InitialCreate
If was succesful, you have to see something similar to this:
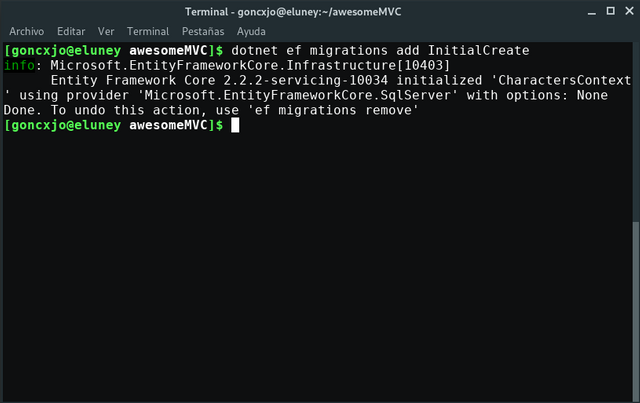
Now run the migration to create the tables.
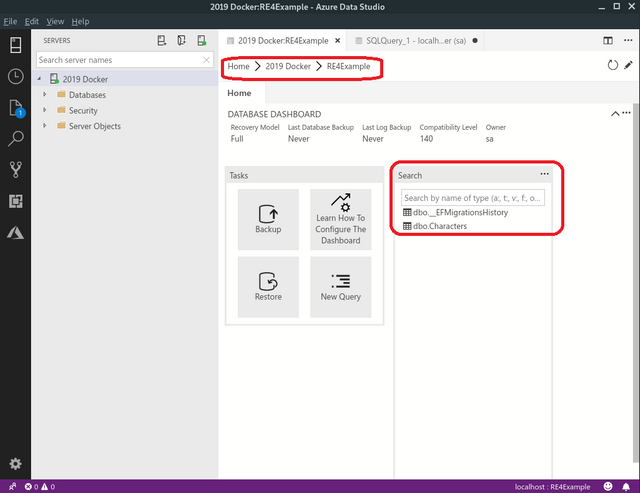
$ dotnet ef database update
If ran successfully, let’s use Azure Data Studio to verify it:
Now we just need to create our controller and views. We are going to use scaffolding for this tutorial because this isn’t the interesting part:
$ dotnet tool install -g dotnet-aspnet-codegenerator
$ dotnet restore
Now we can generate our controllers and views with the scaffolding tools.
$ dotnet aspnet-codegenerator controller \
         -name CharactersController \
         -m Character \
         -dc CharactersContext \
         -outDir Controllers \
         -udl \
         -scripts
If you don’t understand what you’re doing, here’s a reference:
--controllerName|-name : Name of the controller
--model|-m : Model class to use
--dataContext|-dc : DbContext class to use
--referenceScriptLibraries|-scripts : Switch to specify whether to reference script libraries in the generated views
--useDefaultLayout|-udl : Switch to specify that default layout should be used for the views
--relativeFolderPath|-outDir : Specify the relative output folder path from project where the file needs to be generated, if not specified, file will be generated the project folder
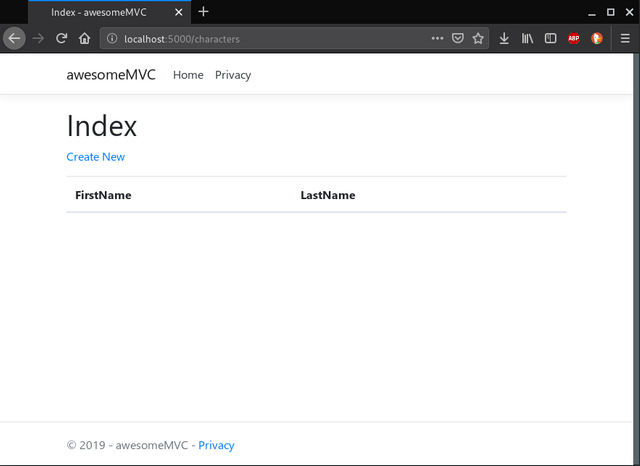
Now let’s run the application.
$ dotnet run
Navigate to https://localhost:5000/characters and you should see this:
Now add a few Characters and let’s see if they show up in the SQL Server running on Linux in a docker container:
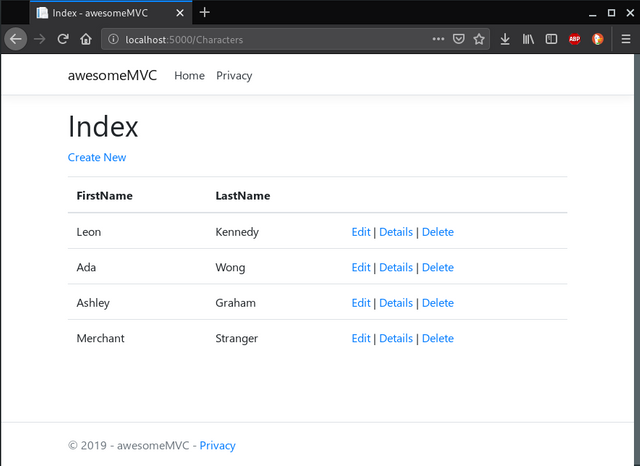
Characters in the database:
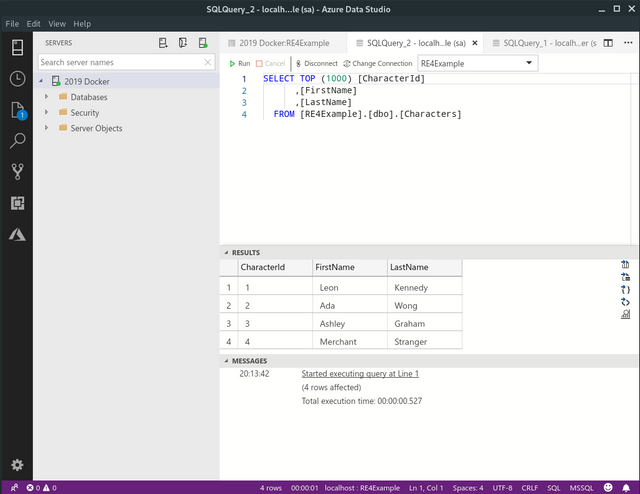
IT WORKS! 🙌 🙌
Compose everything
Now, we’re going to dockerize everything. To do so, we have to use Docker Compose. We need these files:
- Dockerfile: this file defines how to build the web app image.
- entrypoint.sh: this script restores the database after it starts up, and then runs the application. This allows some time for the SQL Server database image to start up.
- docker-compose.yml: this file defines the web and db micro-services, their relationship, the ports they are using, and their specific environment variables.
Before working with those files, we have to edit the server name in our connection string inappsettings.Development.json:
“DefaultDatabase”: “Server=db;Database=RE4Example;User Id=sa;Password=yourStrong(!)Password;”
Now, edit the Dockerfile with the next code:
FROM microsoft/dotnet:latest
COPY . /app
WORKDIR /app
RUN ["dotnet", "restore"]
RUN ["dotnet", "build"]
EXPOSE 80/tcp
RUN chmod +x ./entrypoint.sh
CMD /bin/bash ./entrypoint.sh
Create a file named entrypoint.sh and paste this:
#!/bin/bash

set -e
run_cmd="dotnet run --urls http://*:80"

until dotnet ef database update; do
>&2 echo "SQL Server is starting up"
sleep 1
done

>&2 echo "SQL Server is up - executing command"
exec $run_cmd
Create a docker-compose.yml file and write the following code:
version: "3.4"
services:
    web:
        build: .
        ports:
            - "8000:80"
        depends_on:
            - db
    db:
        image: microsoft/mssql-server-linux
        environment:
          - SA_PASSWORD=Password=yourStrong(!)Password
          - ACCEPT_EULA=Y
        ports:
            "5433:1433"
That is it! we just need to build this solution in Docker and then run it:
$ docker-compose build
$ docker-compose up
Then, go to http://localhost:8000/characters on your favorite browser.
You can also connect to the database in the localhost,5433 server:
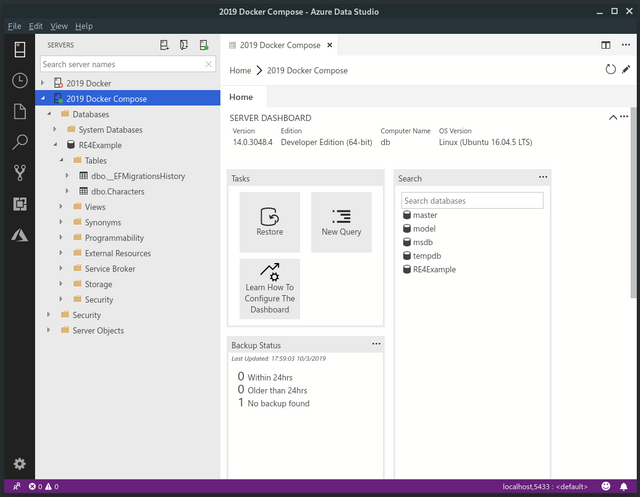
Congratulations! Your app .NET Core app with SQL Server is working thanks to Docker Compose!
If you can’t wait, you can clone and run this project in this github repository.
Thanks for reading! 💚
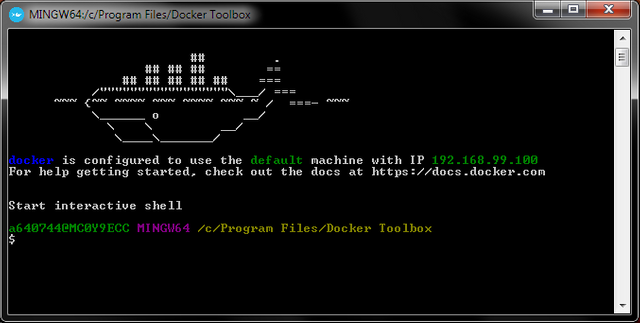
Troubleshooting for Windows users using Docker Toolbox:
- I can’t build the project: Have you allocated at least 4GB of RAM in your virtual machine?
- It hangs on after db startup: If you see some errors with the
entrypoint.shfile, maybe are compatibility problems between Windows and Linux scripts. Try the next command and rebuild:dos2linux entrypoint.sh - I can’t connect to the localhost: be sure to connect to the IP indicated at the start of Docker Toolbox CLI.
What’s next?
Host ASP.NET Core in Docker containers | Microsoft Docs
Build a real-world app with ASP.NET Core and Angular 2
Tutorial: Creating ASP.NET Core + Angular 4 app in Docker container connected to SQL Azure Database — Infopulse
Enter ASP.NET Core 2 and Angular 5 Applications with Docker
References
Official documentation
What is .NET?
Introduction to ASP.NET Core | Microsoft Docs
.NET architectural components | Microsoft Docs
Announcing .NET Standard 2.0
EF Core tools reference (.NET CLI) — EF Core | Microsoft Docs
ASP.NET Tutorial | Hello World in 10 minutes | .NET
Dockerize a .NET Core application | Docker Documentation
Quickstart: Compose and ASP.NET Core with SQL Server | Docker Documentation
Other links
.NET Core, .NET Framework, Xamarin — The “WHAT and WHEN to use it” — Cesar de la Torre [Microsoft] — BLOG
.NET Core vs .NET Framework — Wolox — Medium
Fix: Cannot Connect to the Docker Daemon — Appuals.com
Jamie Phillips — Working with SQL Server on Linux for .NET Development Code Generator Error Creating Controller — Developer Community
Are shell scripts sensitive to encoding and line endings?
Congratulations @goncxjo! You received a personal award!
You can view your badges on your Steem Board and compare to others on the Steem Ranking
Do not miss the last post from @steemitboard:
Vote for @Steemitboard as a witness to get one more award and increased upvotes!
Mi vidas, ke vi havas Esperantan flagon. Ĉu vi parolas Esperanton? Se jes, mi volonte legos viajn venontajn artikolojn en Esperanto 😀 Elkore, Adriĉjo.
Posted using Partiko Android
Jes, mi parolas la lingvon! Mi certe verkos novajn artikolojn pri Programlingvoj en Esperanto :)
Dankon!