The loft gets boarded.
I hate Artex. When we first moved into our house in October 2015, every room had a ceiling covered in Artex. Smooth swirly Artex. Rough stalactite-style swirly Artex. Regular stalactite Artex. All of it vile and a spider’s dream surface on which to spin multiple complex webs.

The Artex had to go. Taking down the ceilings and putting up new plasterboard was too expensive, so we opted to have it skimmed over with lovely smooth plaster. When we decided to go for it and have the rest of the upstairs room and thee hallway ceilings plastered, we knew we’d have to work on the loft first. Not a glamorous job by any means, and we’re not going to be inviting guests up into the loft to view the work; but it does give us a whole new room to store stuff until we have the box room and spare bedroom sorted.
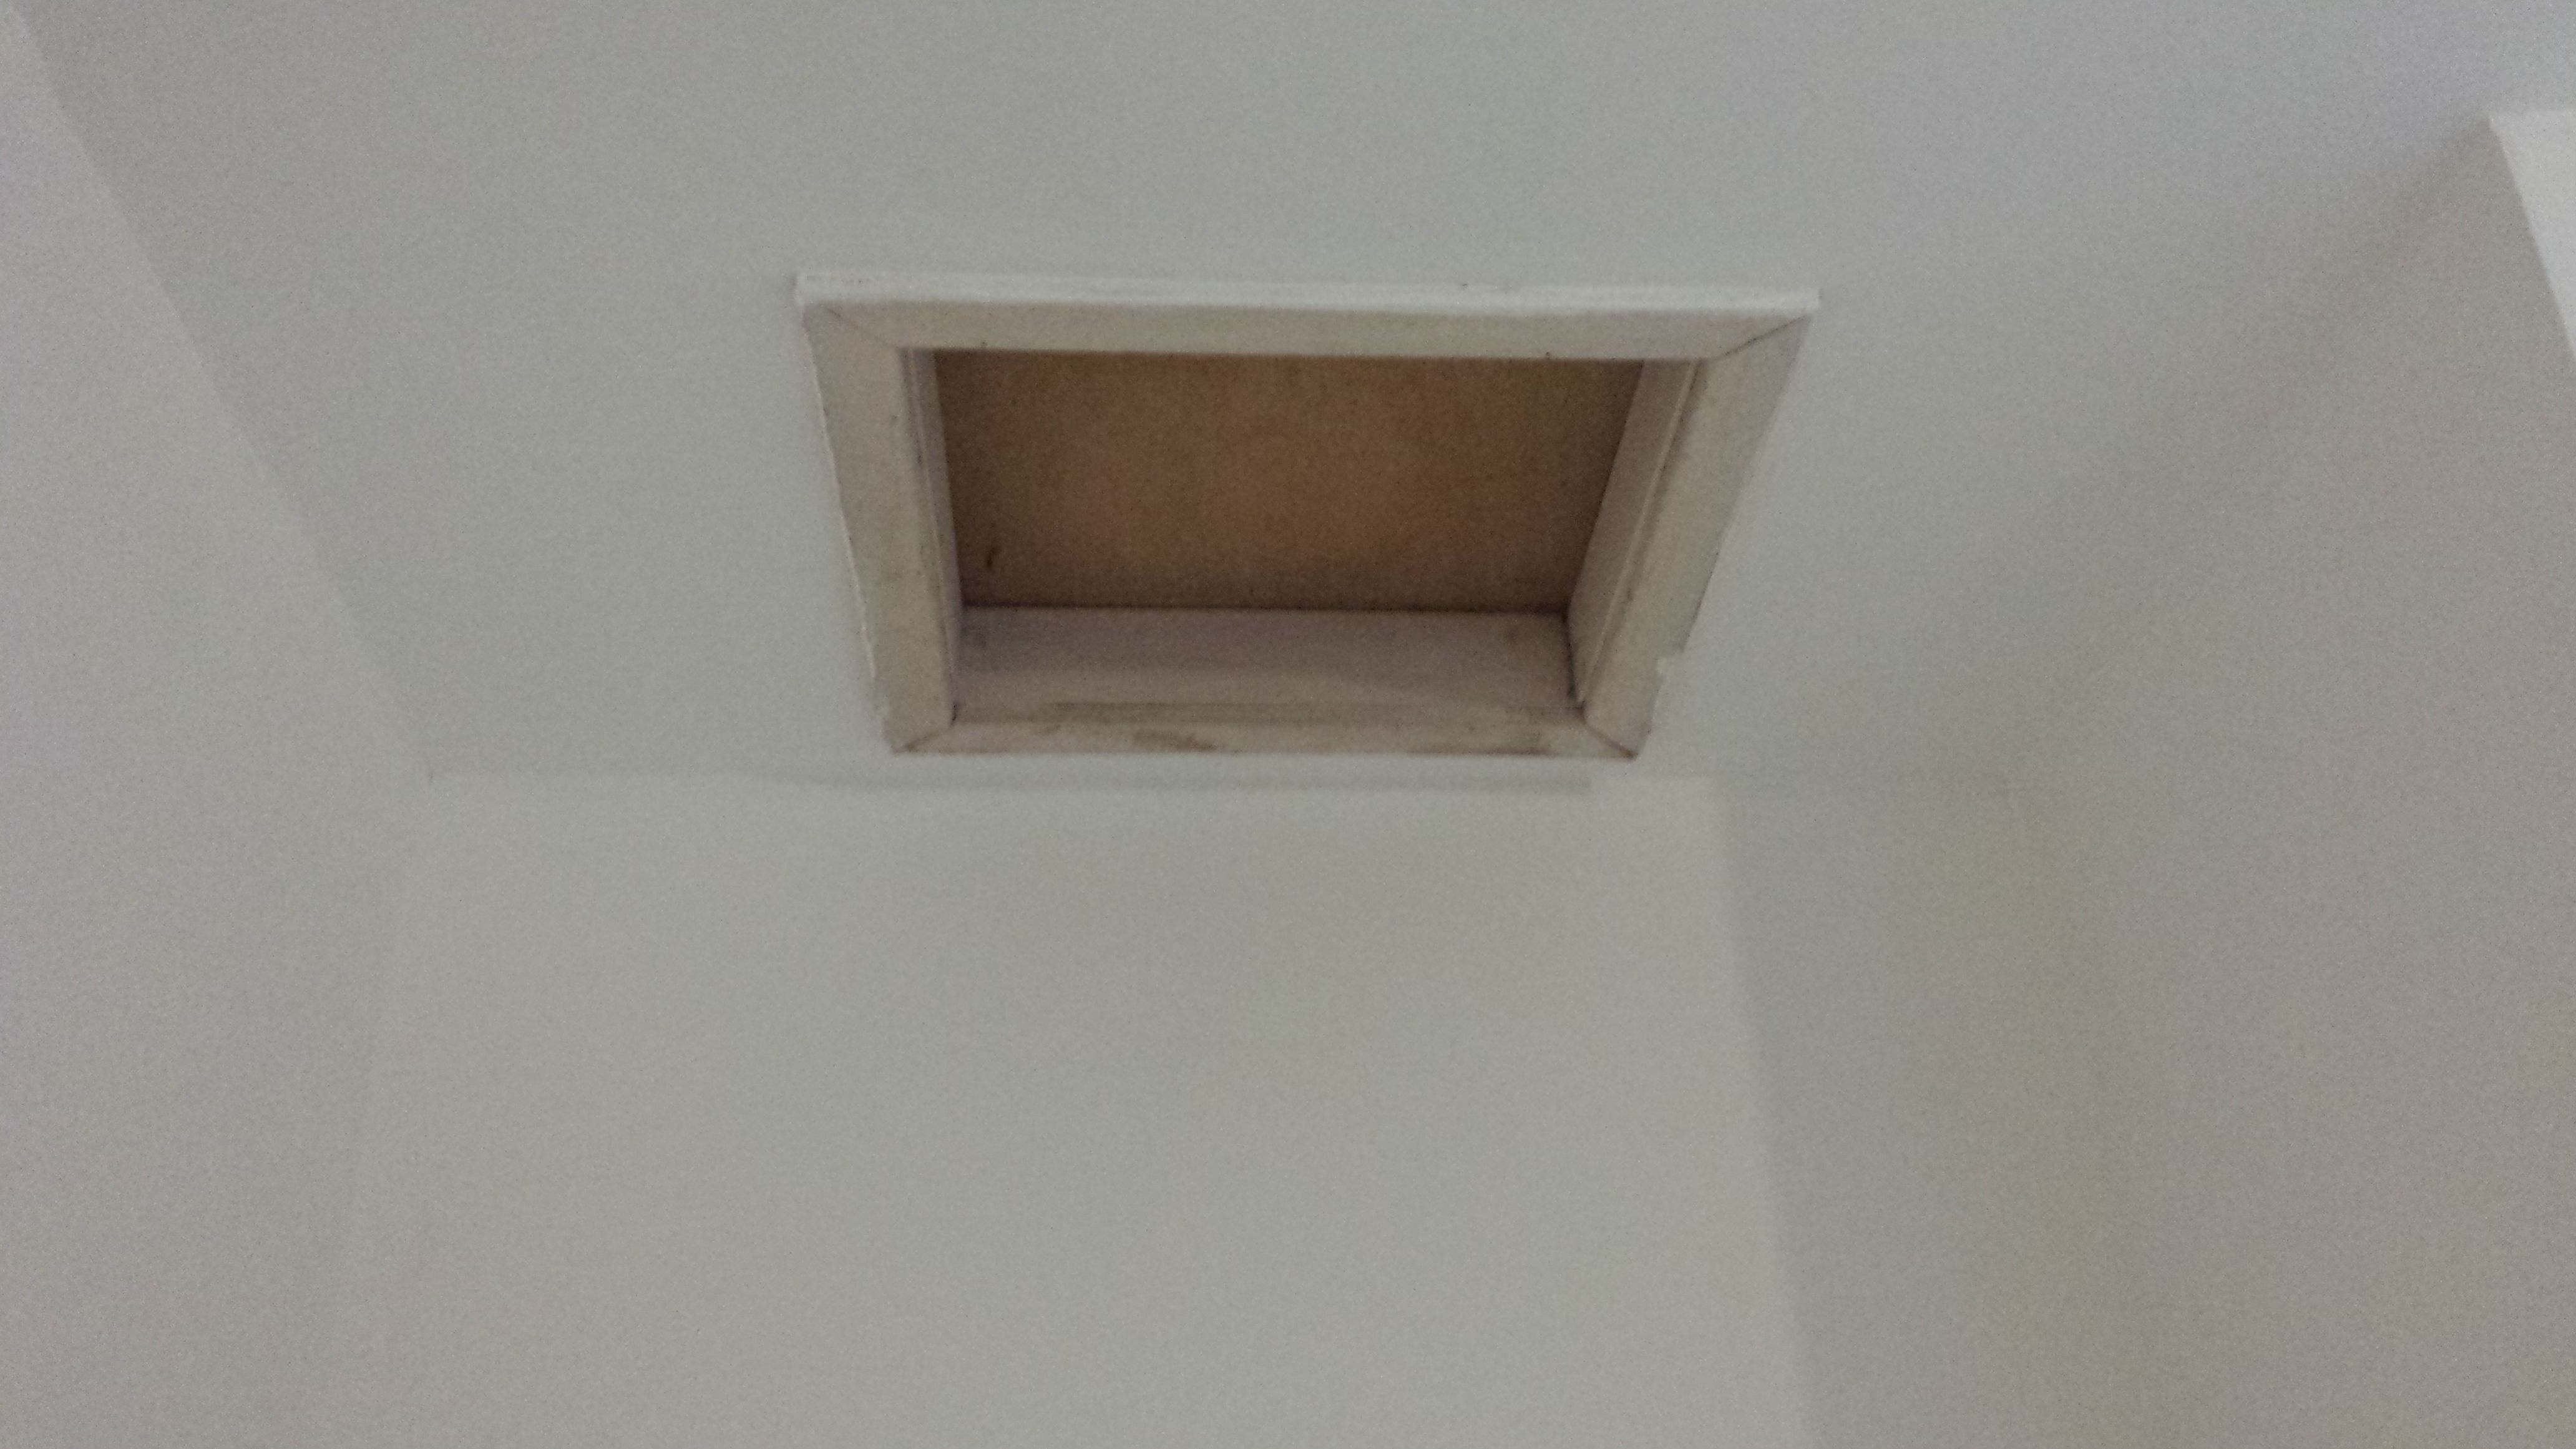
The loft also needed a bigger hatch. As it was, the loft hatch was small and awkwardly situated. It was over the top of the banisters/ landing half wall, so you have to have a free-standing ladder at the side of the wall, climb onto the wall, use your other leg to use the top of the ladder to push yourself up, and pull yourself into the loft by holding into the sides of the hatch. Once in the loft, you had to balance on the beams, and make sure not to fall through the ceiling. There was another even smaller hatch in the hanging closet in the spare bedroom. You could just about get your head through this hatch, and being in a closet there was no point in using this as a point of entry.
My husband spent just over a week working on the loft with help from my Dad getting it into a usable and safe space.
Here’s how they proceeded:
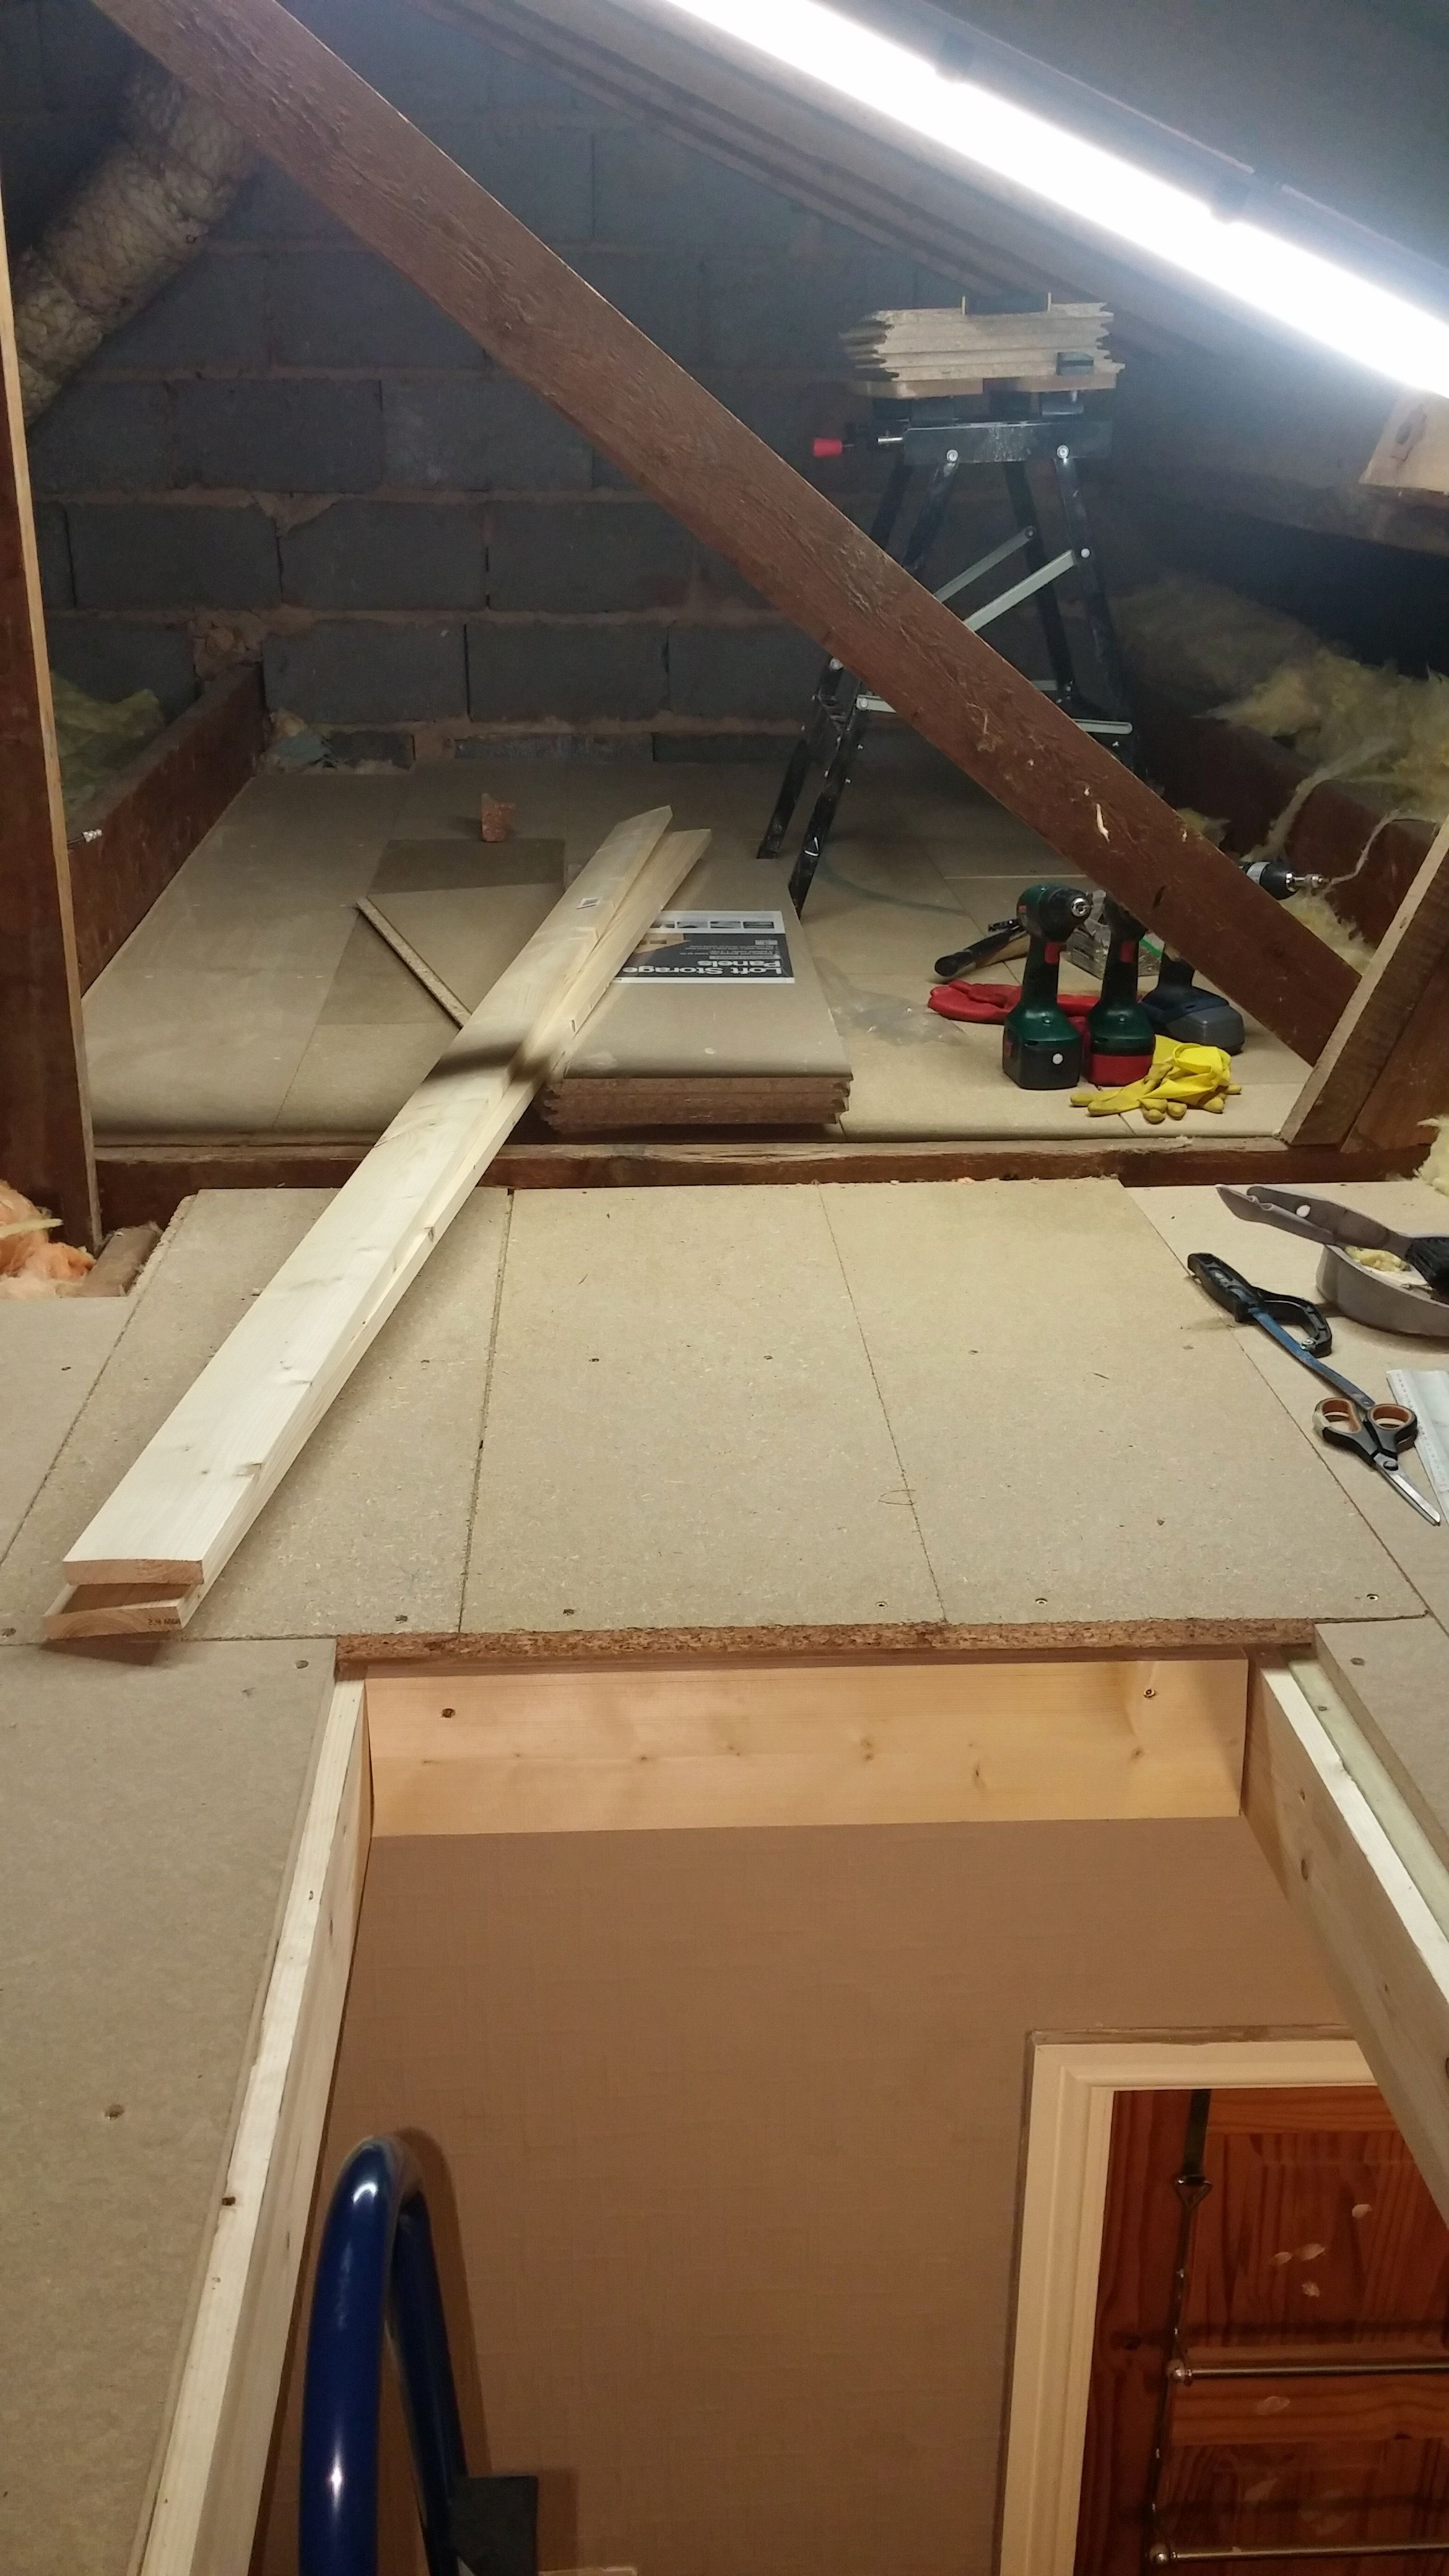
• They used these 1220 x 320 x 18mm chipboard loft panels from Homebase.
• Approximately 100 billion chipboard screws.
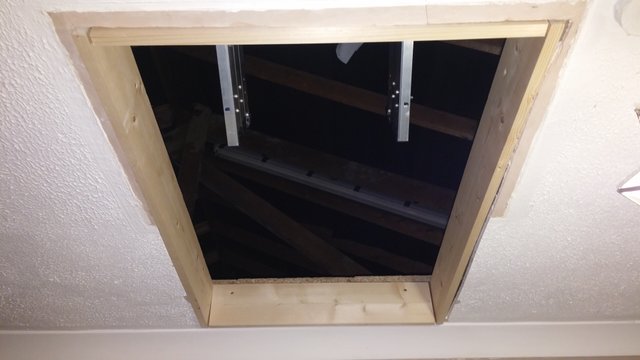
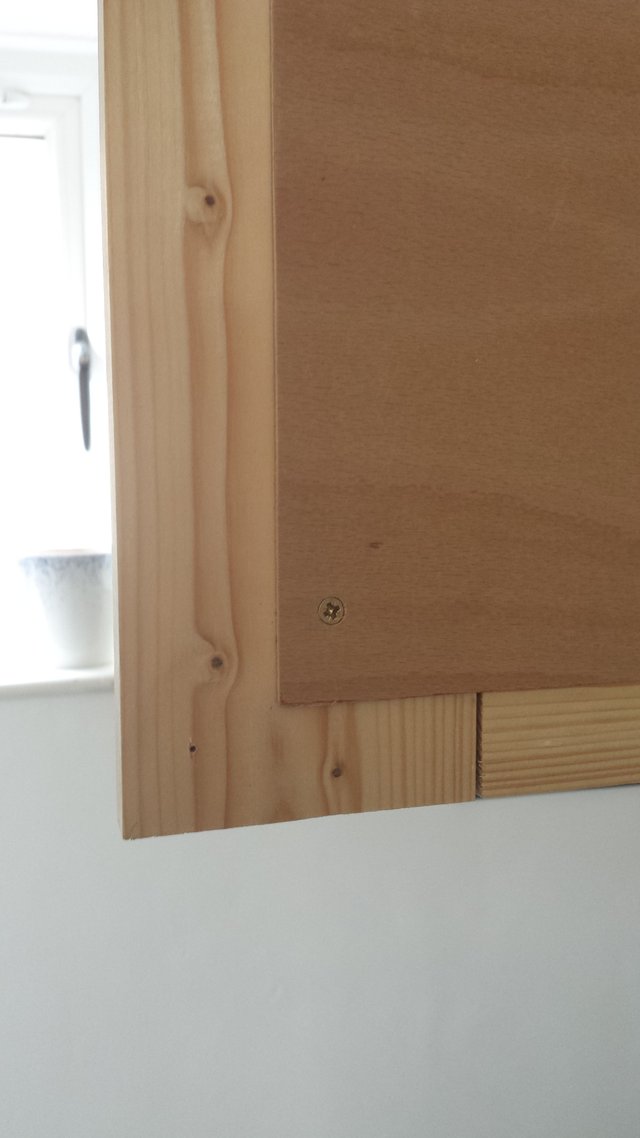
• The new loft hatch was constructed from a sheet of thin plywood cut to just under the size of the hole, 4 pieces of 10cm by 2cm pine cut to size, and another piece of thin plywood on the back and all screwed together. It’s hinged so the door swings out away from the wall and out over the stairs. Ready-made loft hatches are available, but we could only find a rather cheap looking white plastic one from Screwfix. I really didn’t like it, so I gave the long-suffering duo another job to do.
• The frame is regular pine door frame, cut to size.
• This is the loft ladder they installed. It folds up. It's fixed. It has a hand rail. It's safe.
The tiny hole in the closet in the spare bedroom.
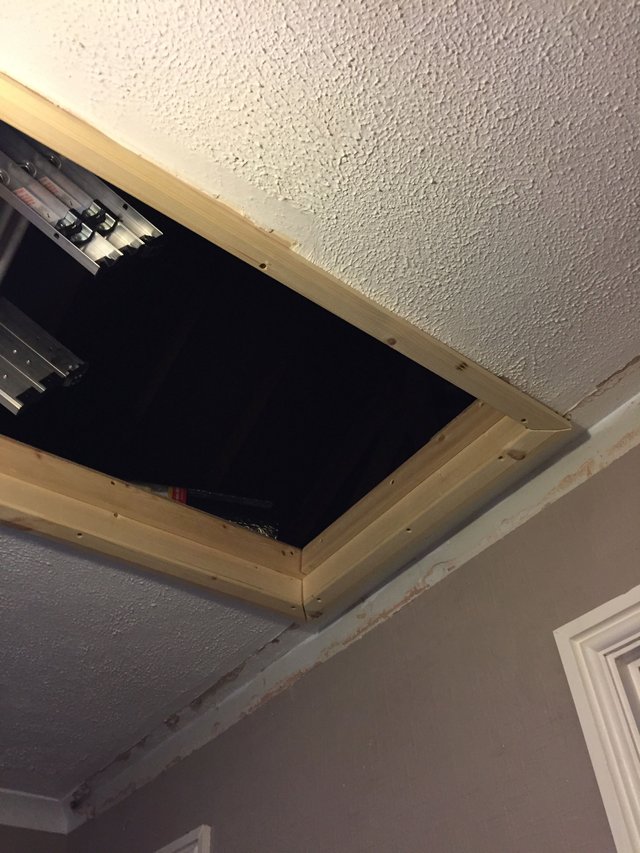
The freshly cut, bigger hatch hole.
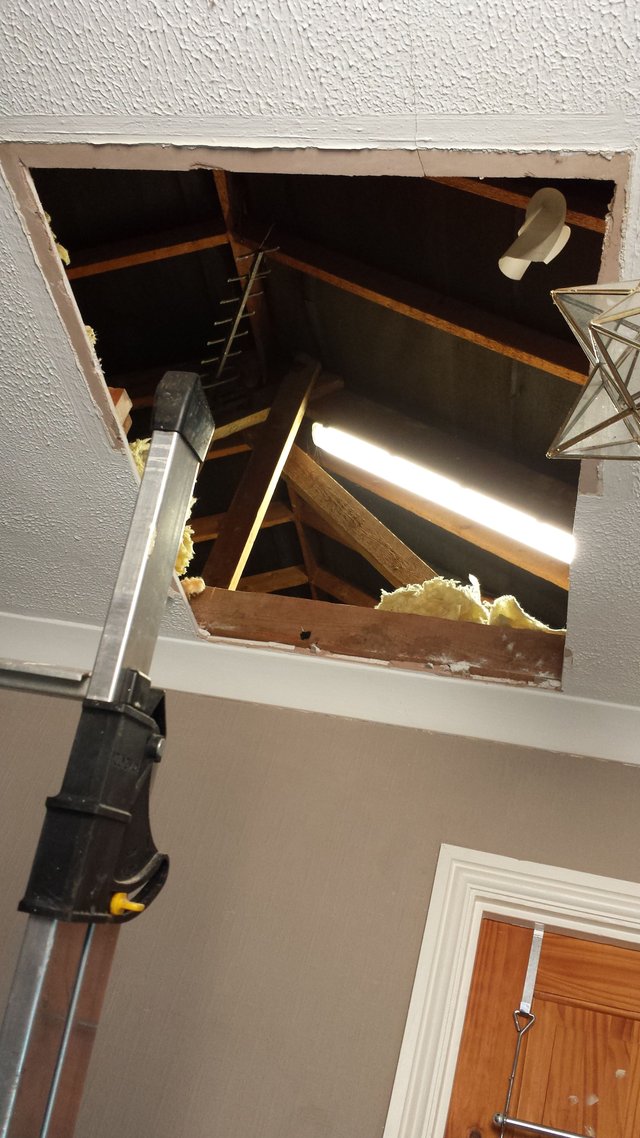
If you look closely at the edge of the hole in the photo below, you can see where the Artex was spread around the original hatch. What an alluring feature. There's a line of bare plaster around the original hole, so you can see how far we extended it. Also check out the grey walls and white coving. Mmmmm, drab.
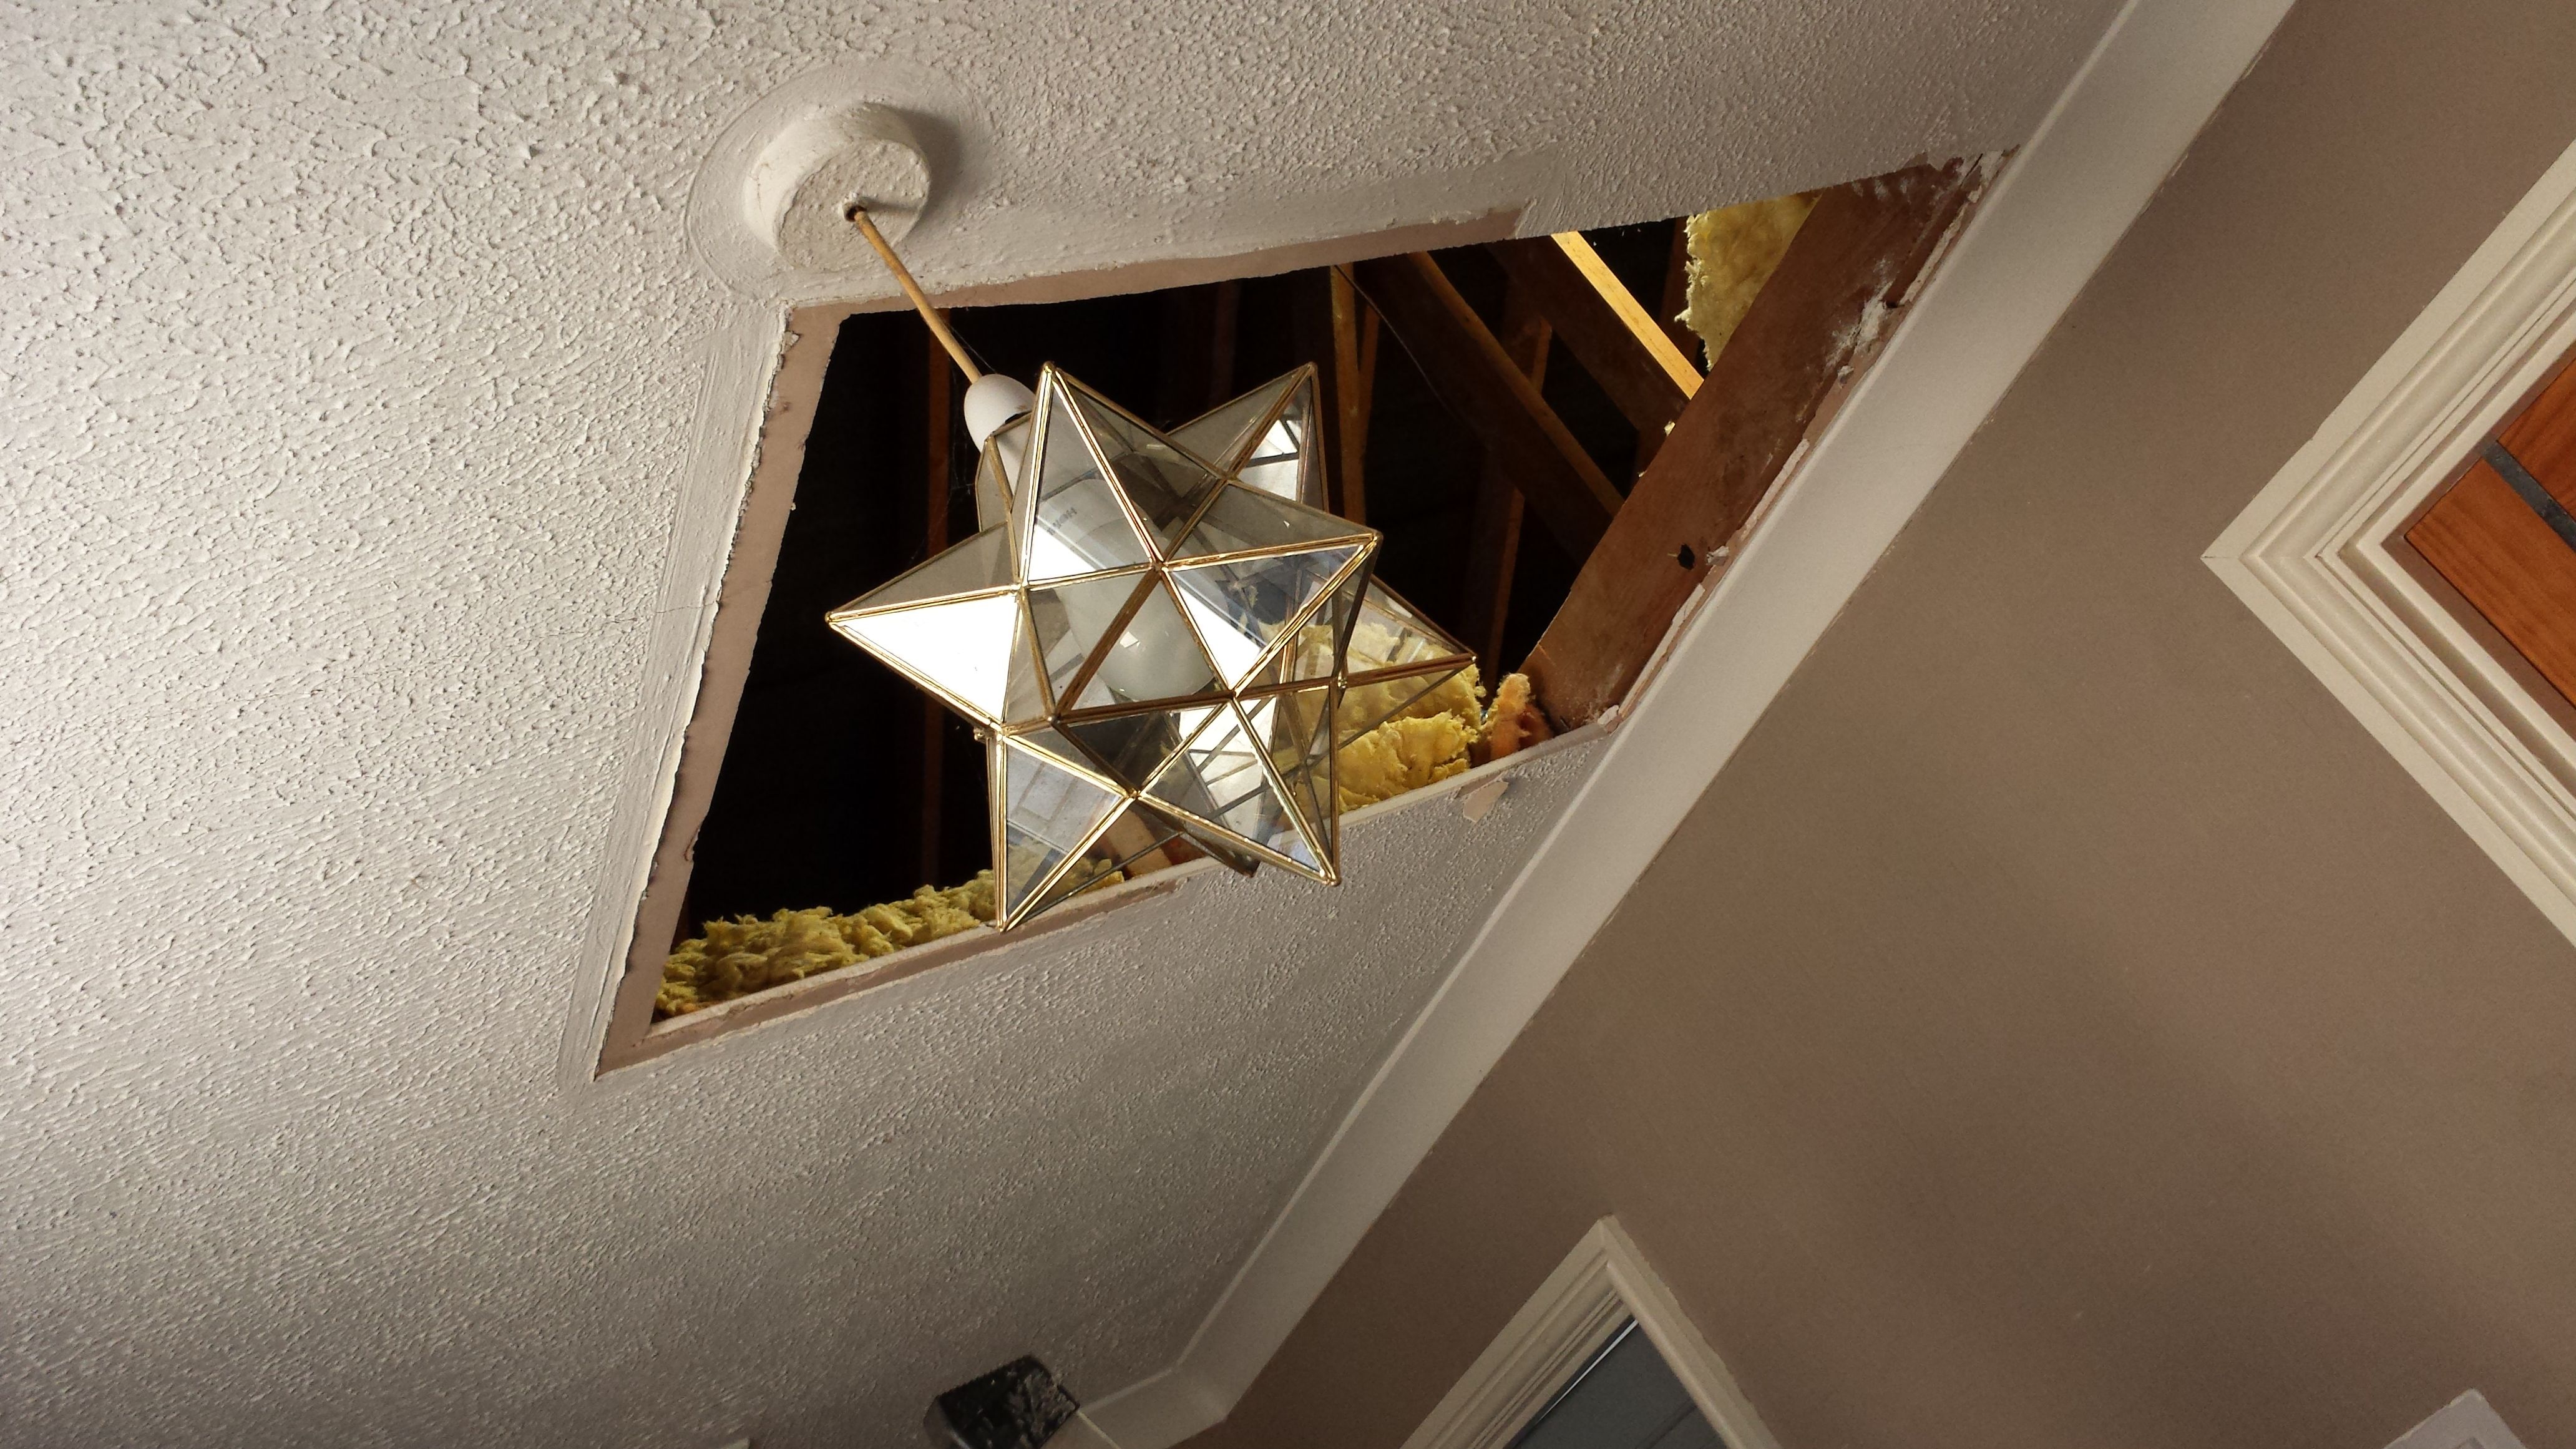
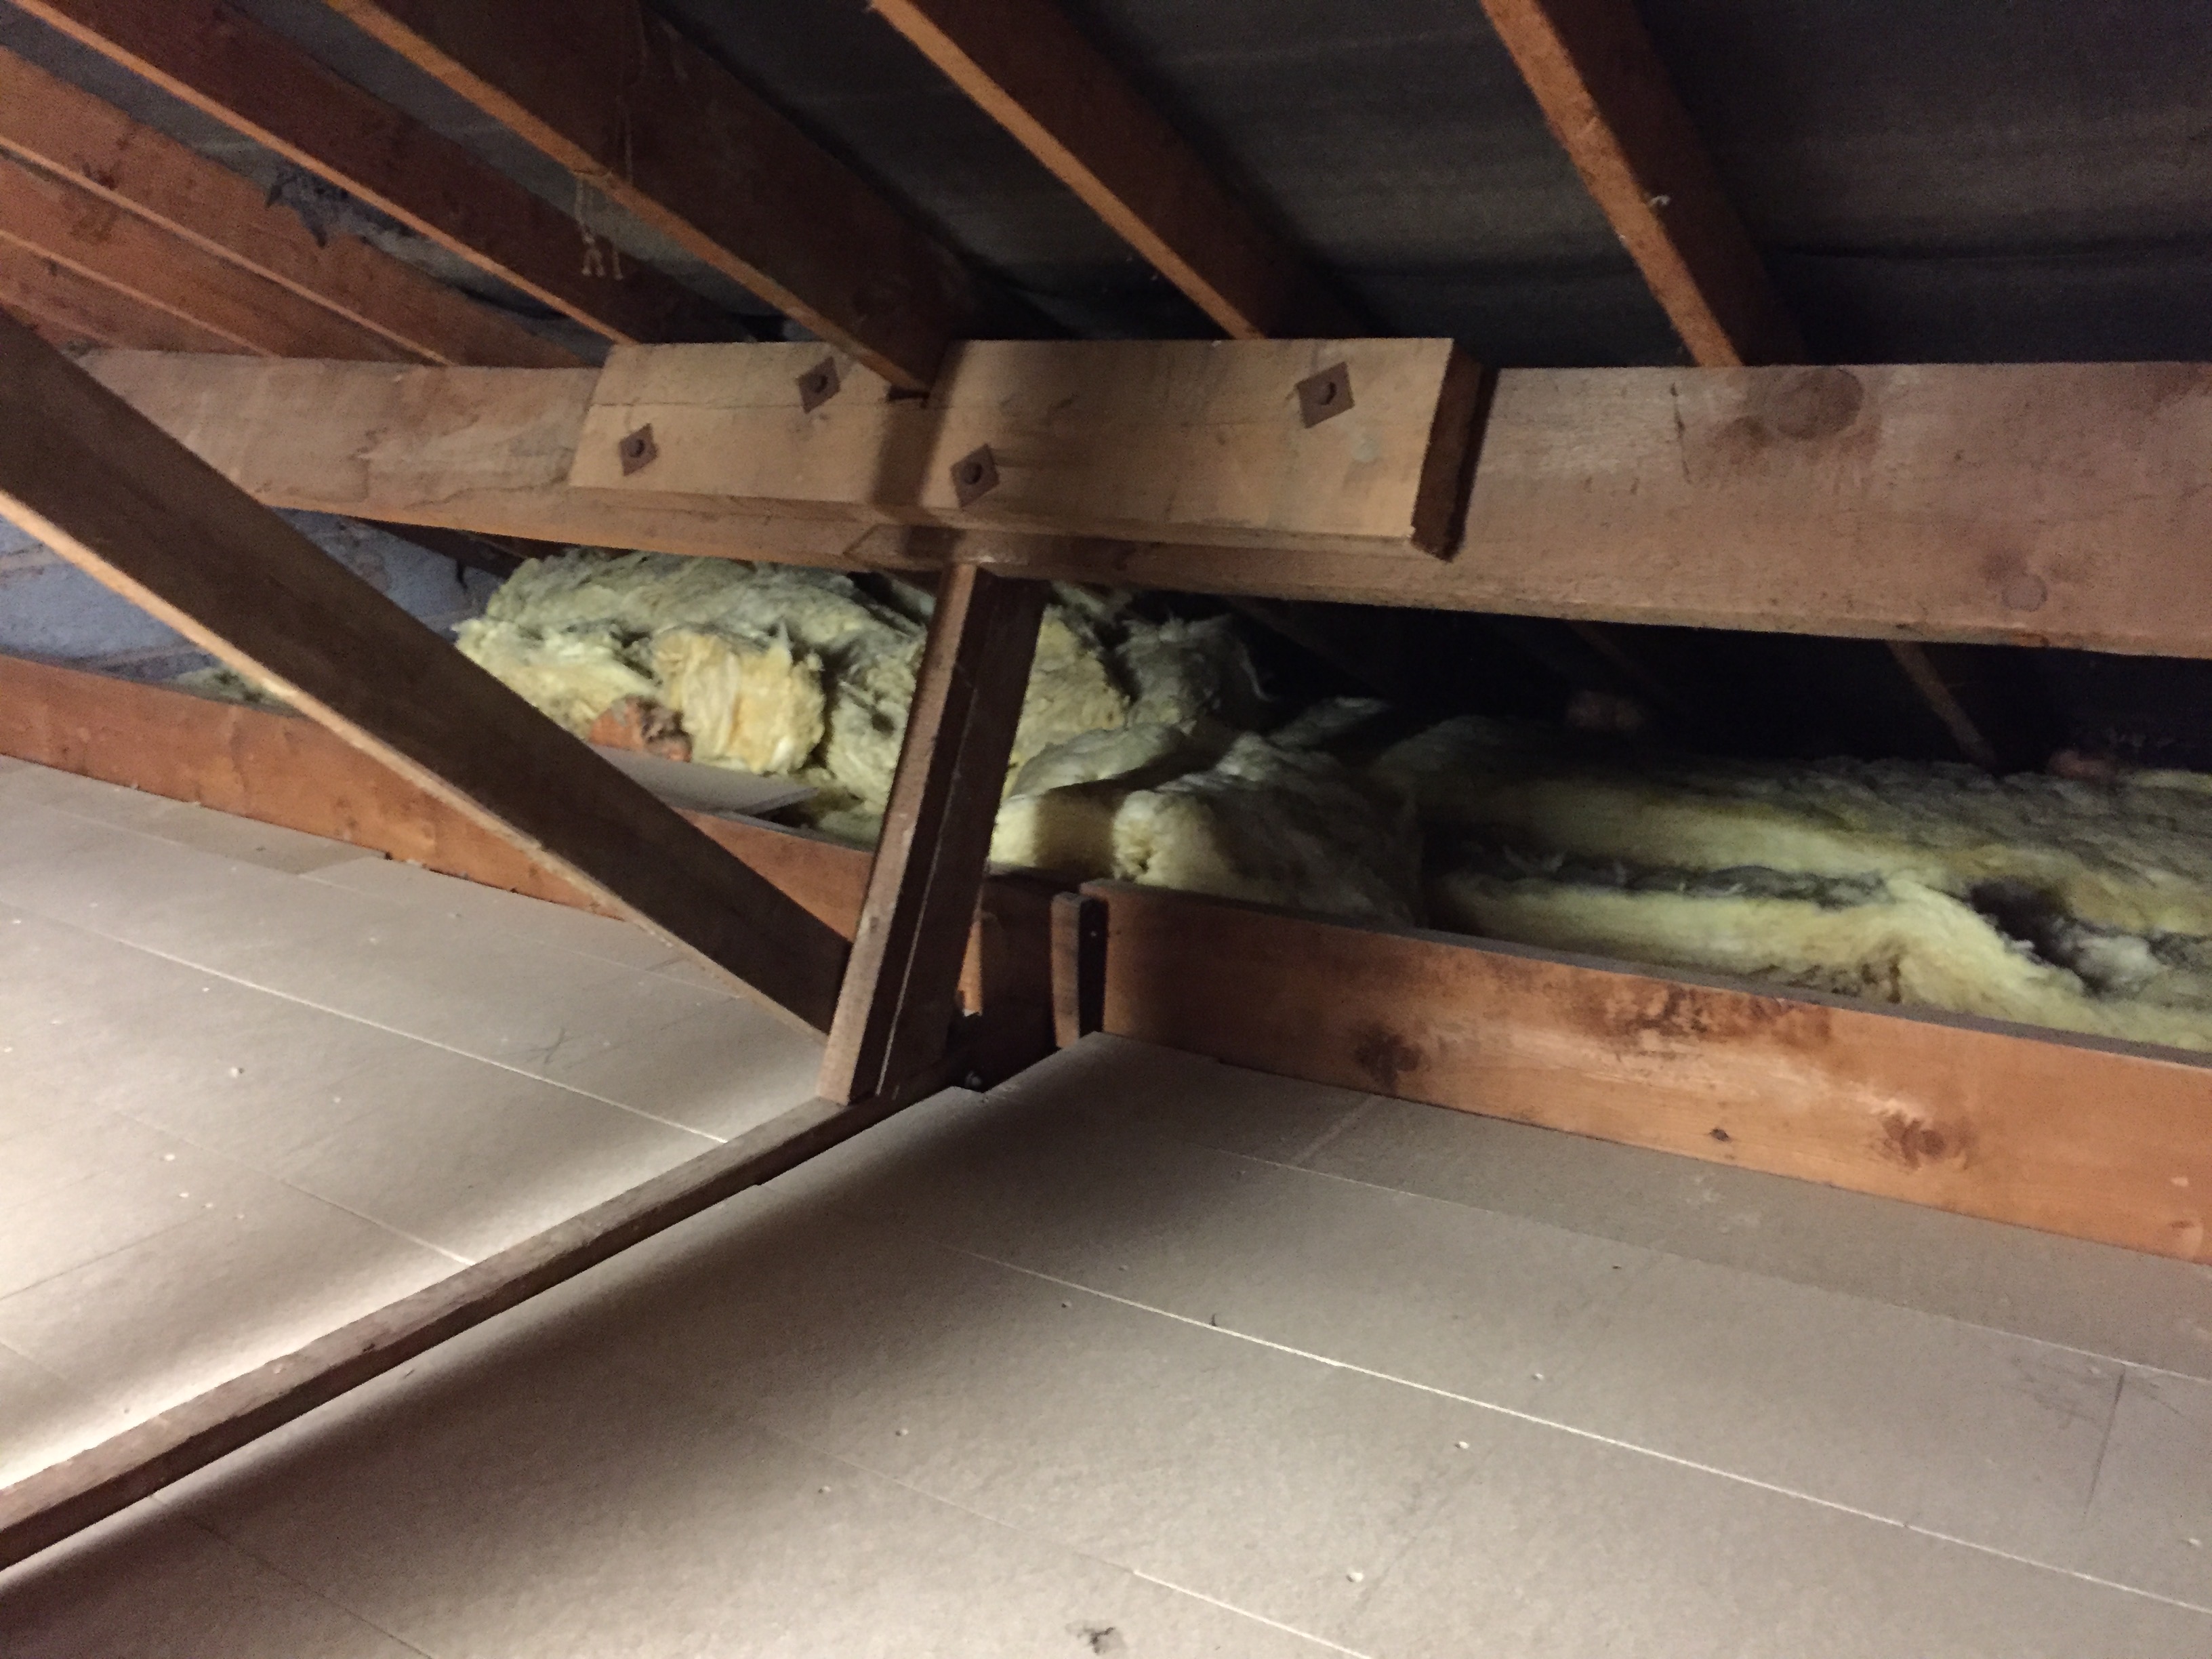
The loft beams run parallel to the short side of the hole, and are as far apart as the the two short sides are. To extend the hole, you remove the original frame, them cut out the plasterboard between the two loft beams. The two beams form two of the sides to the hole. To make the other sides for the hatch frame, you cut two piece of timber to size and fix them in place between the beams at the size you want the hole to be. Once this is done, you can put in a new frame, and start boarding around the hole.
The new inner frame.
Work station set up in the loft.
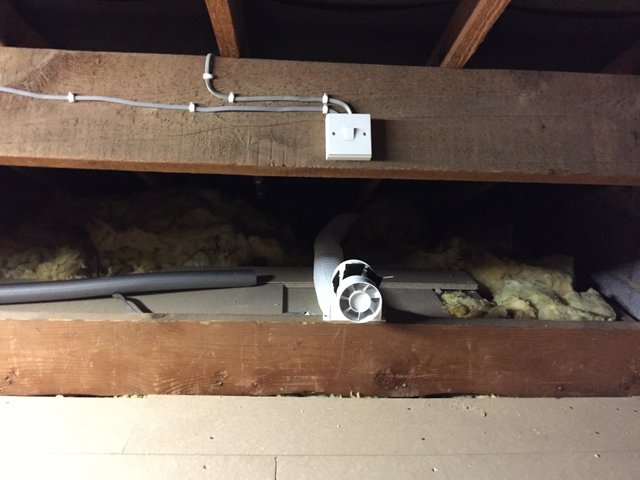
Boarding around the extractor fan.
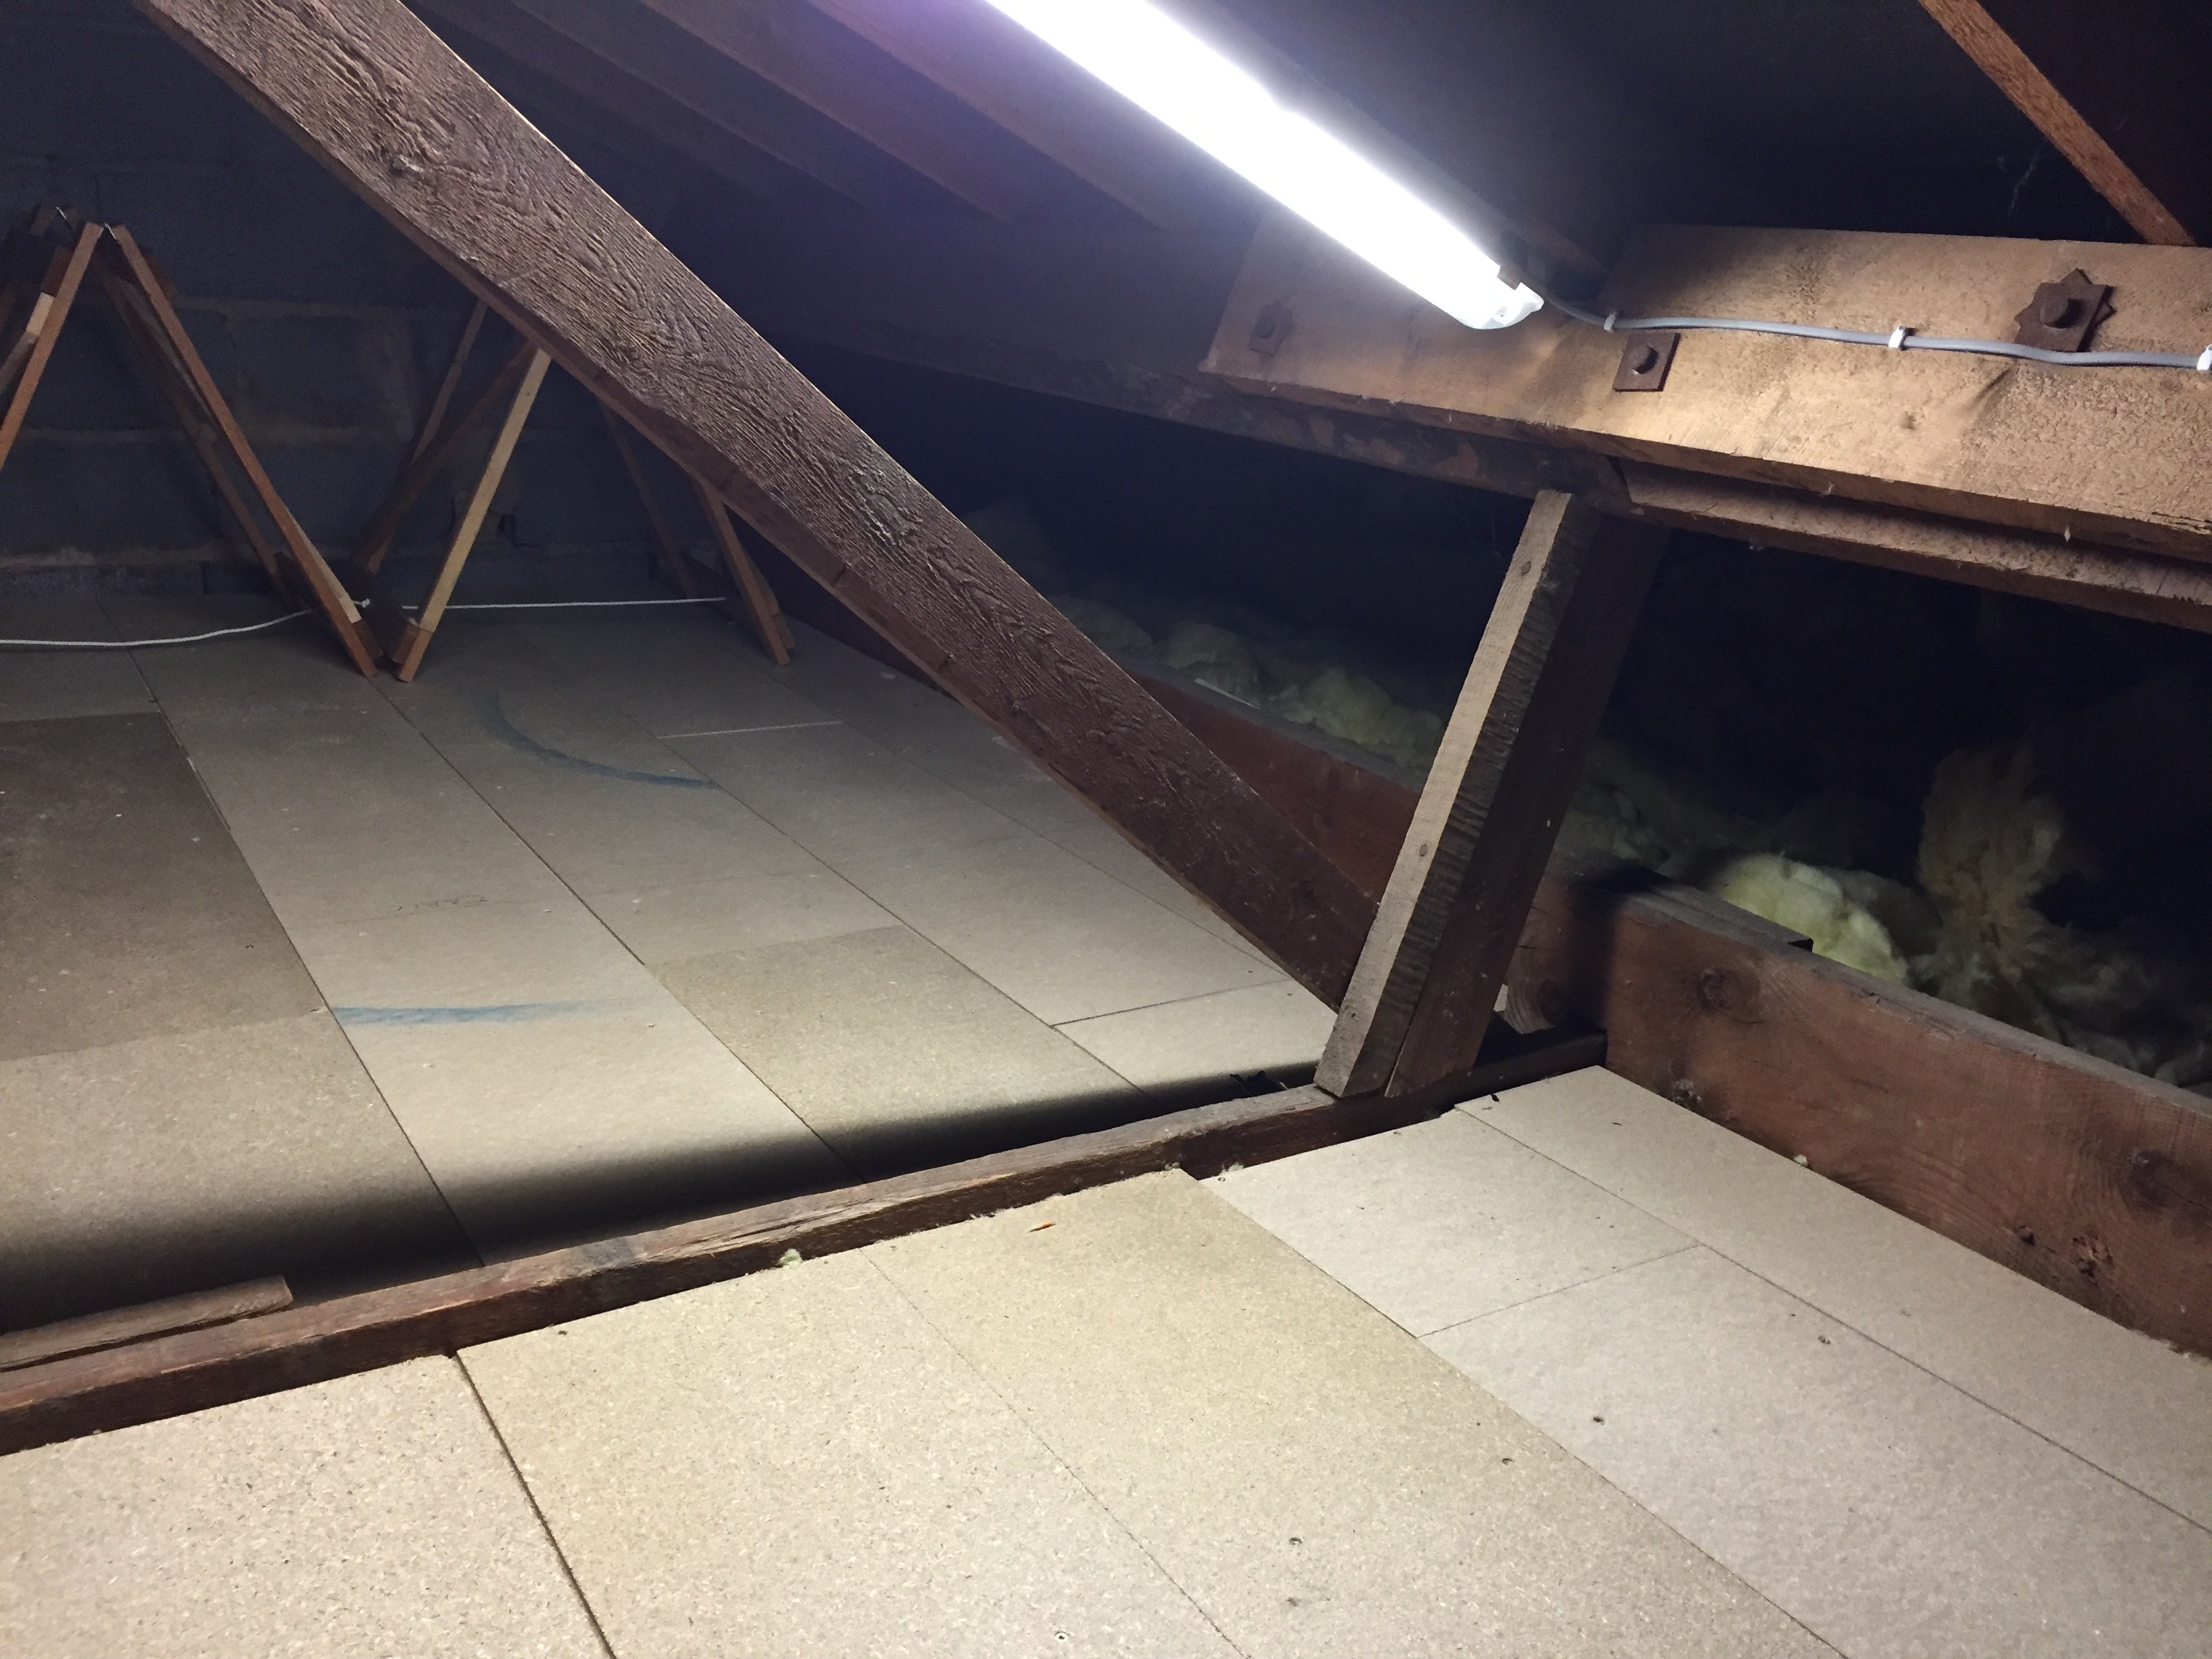
Boarding the other half of the loft.
The new loft ladder is fixed in place on top of the boards. It has a arm which fixes it in place, and from which it extends down.
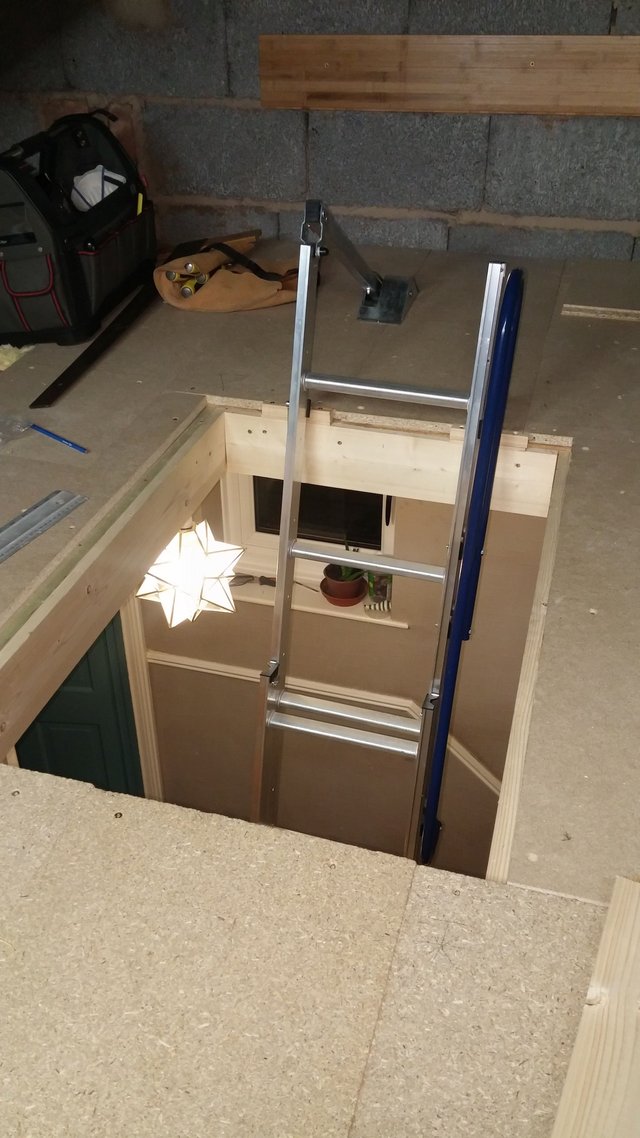
The ladder has a pole with a hook on the end to pull it safely down.

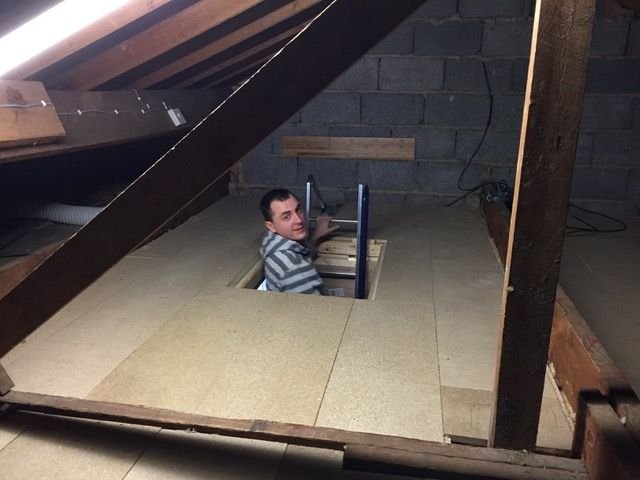
There's Wally! Or Waldo, depending on which side of the Atlantic you reside. There's a piece of wood batoned to the wall behind. This is where the ladder rests, so the wood protects the wall and the top of the ladder.
We've not boarded all the way under the eaves. As you can see, the roof has a very low pitch.
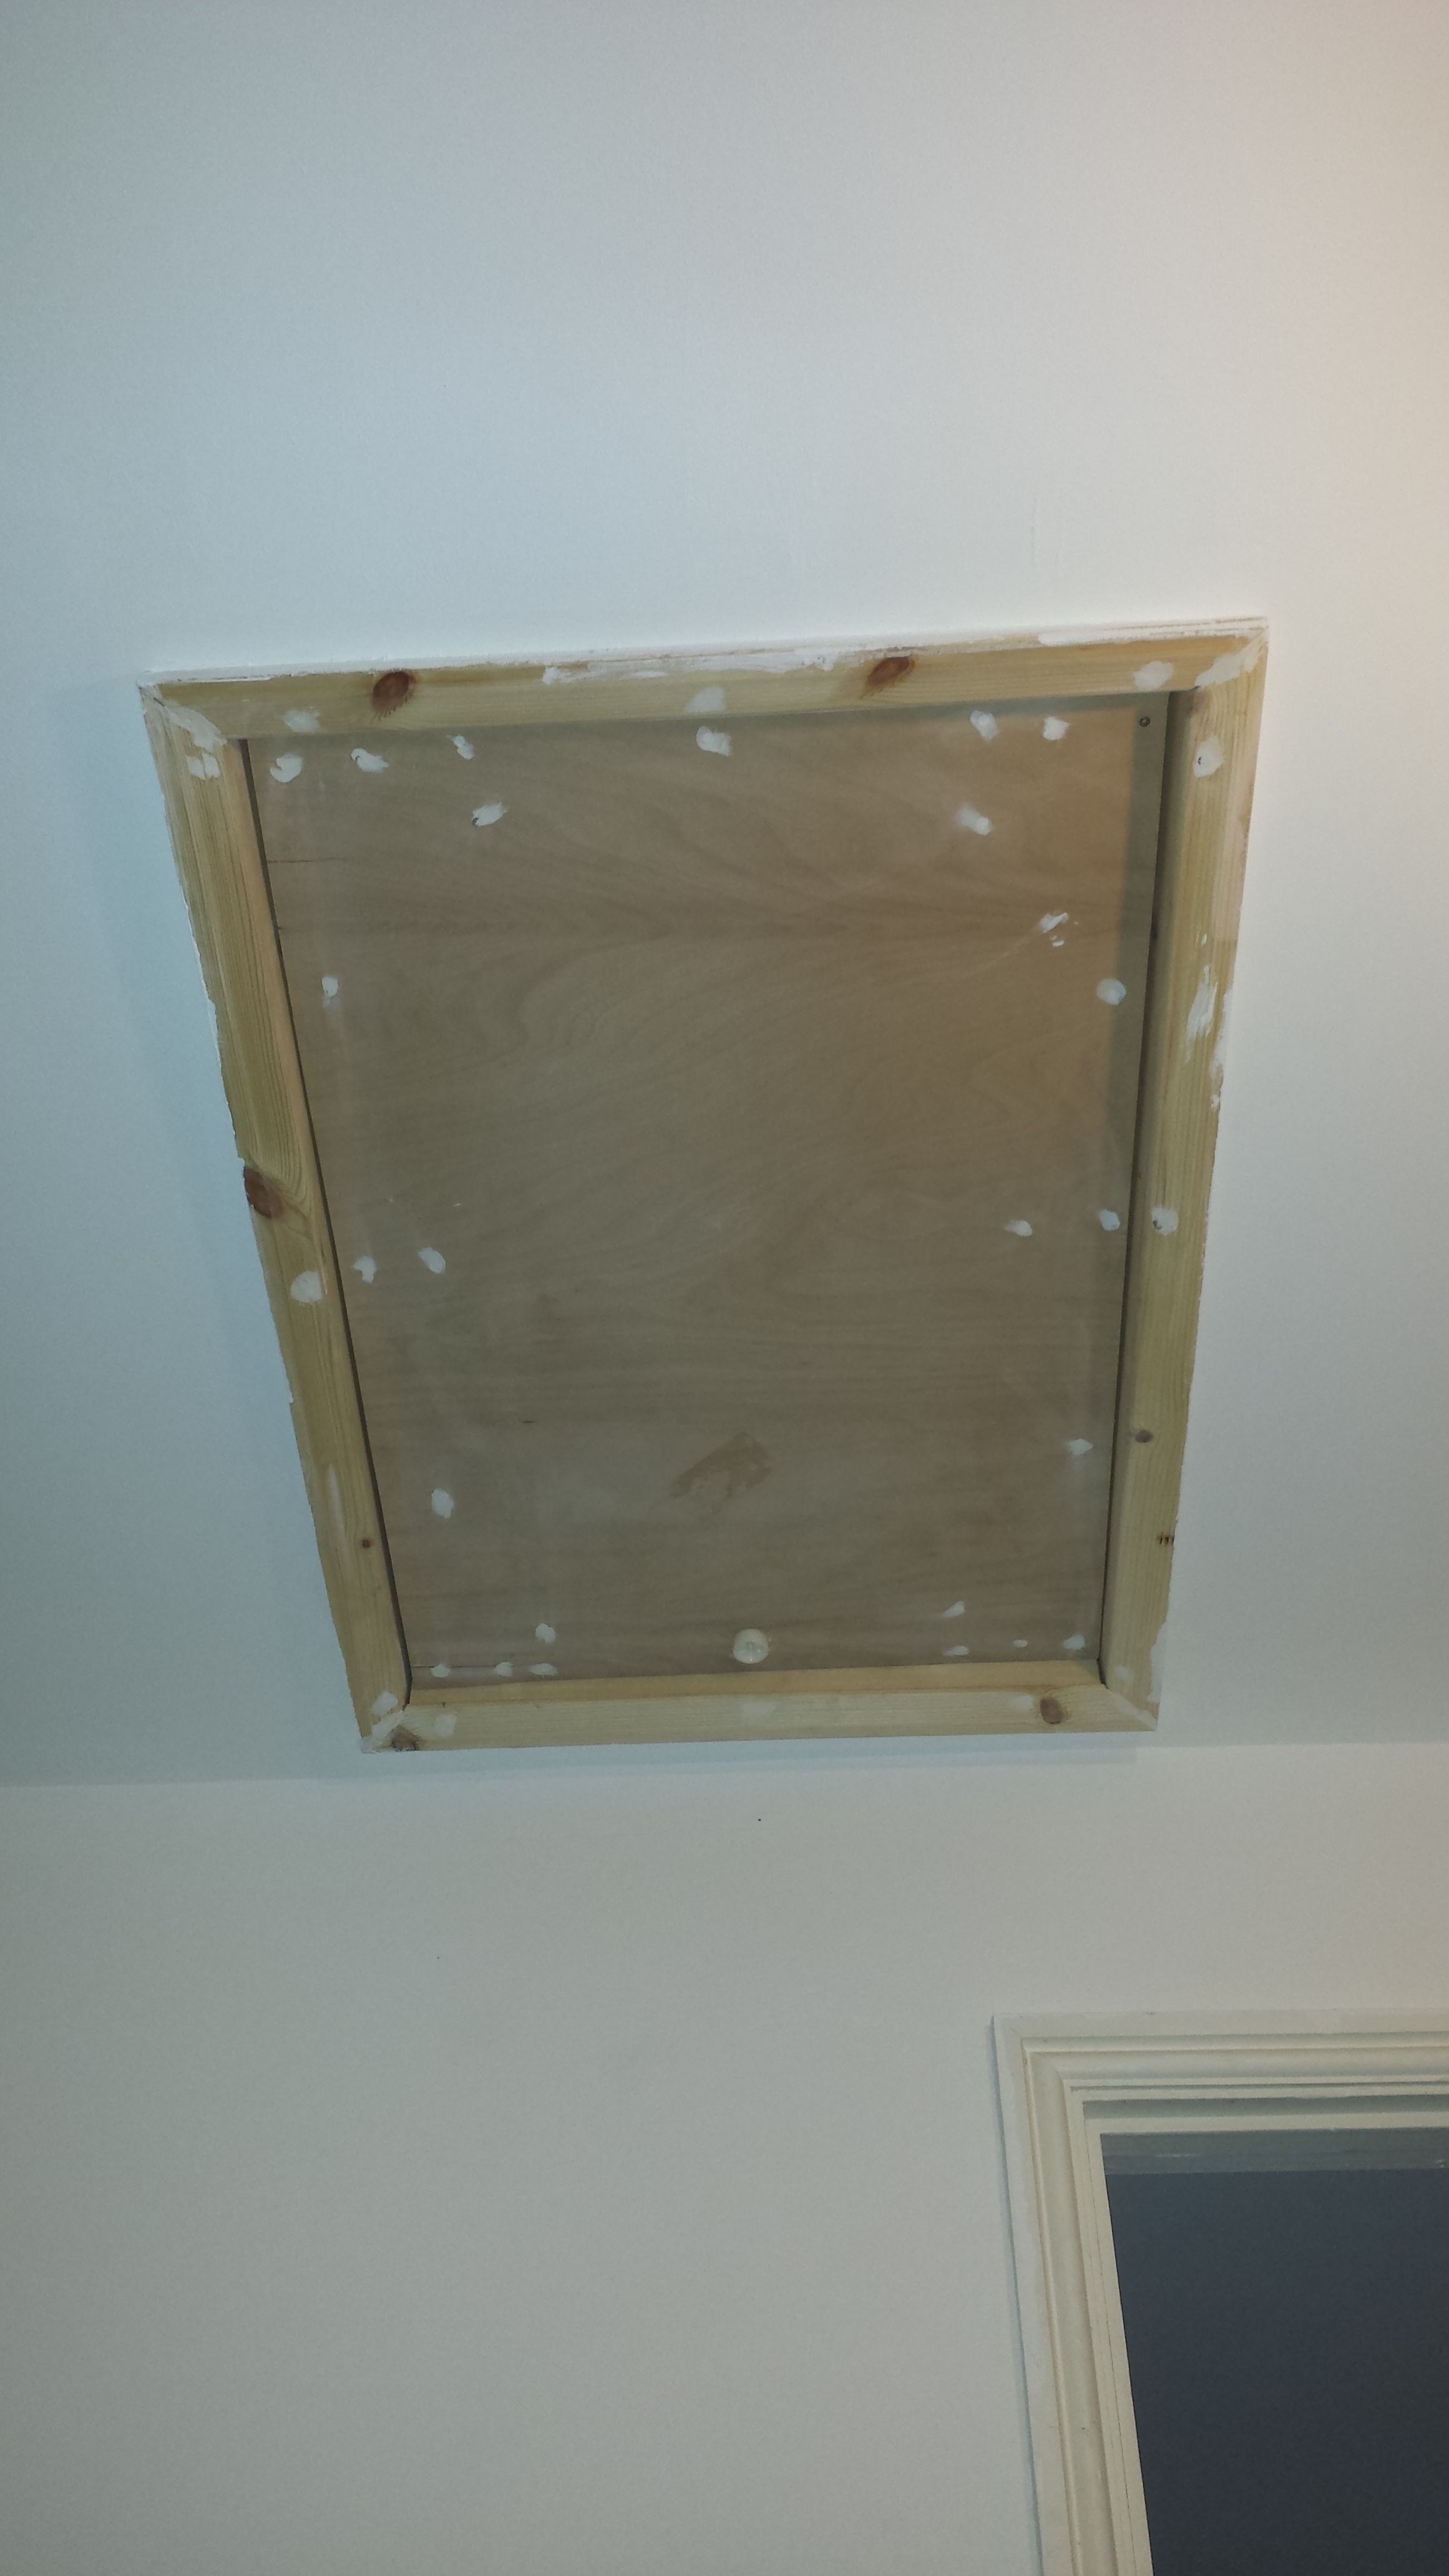
The final outer frame. This is what the door will be secured to.
The door hanging down.

Reverse side of the door.
The finished article.
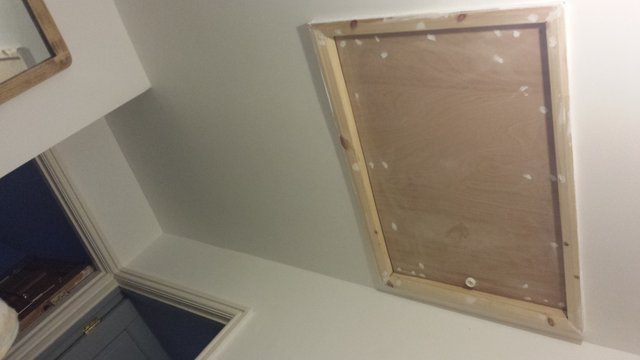
This photo was taken after the ceilings had been plastered and painted, but you get the idea.
After this job was done, we had a safe way of entering the loft and were able to use the space to its full potential. We could then move forward with the next stage of the project: stripping the walls.
Thanks for reading! If anyone has any questions re. boarding a loft, just give me a shout.
Was this done under professional guidance?
There are a few things that look a bit iffy.
I don't like the look of the switch for the fan directly fixed onto the wood beam and the insulation stuffed into the eaves - depending on the type of roof and required airation this could be disasterous.
If it has passed inspection, fair enough.
I also have a problem with the statement,
"Approximately 100 billion chipboard screws"
It should be at least twice this amount! :)
Just so that people know that, no matter how many boxes of screws you buy at the first estimate, it may seem a lot, but it's never enough!
The switch it for the light in the loft, not the extractor fan; that switch is the the bathroom. We had the light switch and the extractor fan (and all other electrical items) put in by a friend who is a professional electrical engineer .
The insulation was what was there when we got the house, and it passed the inspection we had done before we bought the house.
The house hasn't burnt down yet, so it seems ok.
I'm also thinking of investing in shares in the screw manufacturing industry :)