Making Terrain for War Games, Model Railroads, and Dioramas
Hello there, ladies and gents (and trolls too, I guess). Here, I show how I used trash to build scatter terrain for war games like Infinity, Warhammer 40,000, Warpath/Deadzone, Dark Age, or any other similar near-future or sci-fi game. This same technique can also work for model railroad structures or military dioramas. This example is intentionally built to look a bit slapdash and decrepit, but whatever level of detail you may want can be achieved.
Gathering the Materials
I will cover using plastic bottle caps, broken toys, leftover pieces of sprue, scraps of styrene foam left over from carving larger projects, and other junk to build a good-looking terrain piece. The design even allows it to be used as an objective marker in some games! For the purpose of this project, I will try to avoid using commercial styrene sheets and shapes, and I will try to avoid using any bitz box extras from any specific game company.
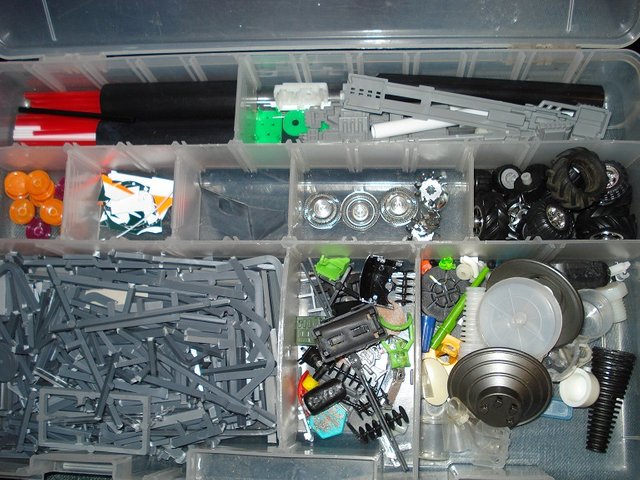
I have a stash of miscellaneous interesting bits of plastic and metal that I have accumulated in anticipation of building stuff. I am trying to sort it in these old divided trays so I can find that piece that I KNEW I HAD STASHED AWAY JUST IN CASE BUT WHERE THE @#$% IS IT NOW??? For this project, take note of the coffee stir sticks in the top left compartment and the various round things in the bottom right. Any gamer or model builder should tear apart anything getting thrown away to scavenge parts. Circuit boards from electronics, motors, plastic housings, and more can all be re-purposed by an inventive builder. Reduce, reuse, and recycle!
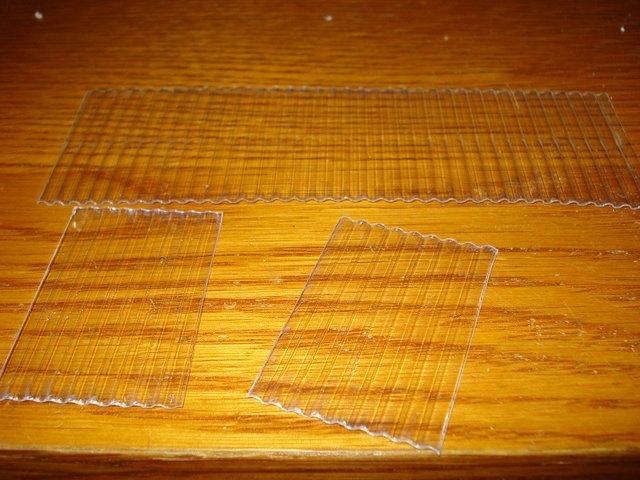
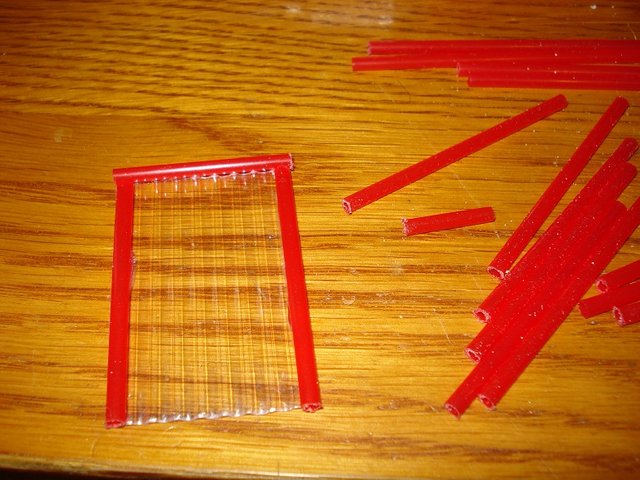
I also thought this corrugated plastic from a grocery store muffin package might be useful as a tin roof or siding analog. I hope the picture shows it well enough.
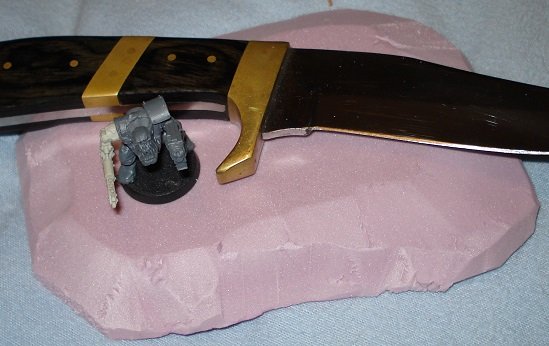
Like most of my other small terrain pieces, the base will be a piece of 1/2″ pink insulation foam, carved into a rough shape with a knife. The Ork miniature on a 25mm/1" base is included for scale. This piece will be carved down and detail will be added once the rest starts to come together.
Putting it Together
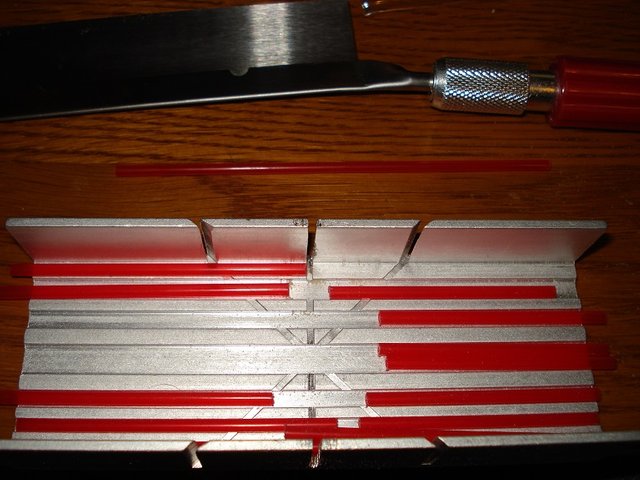
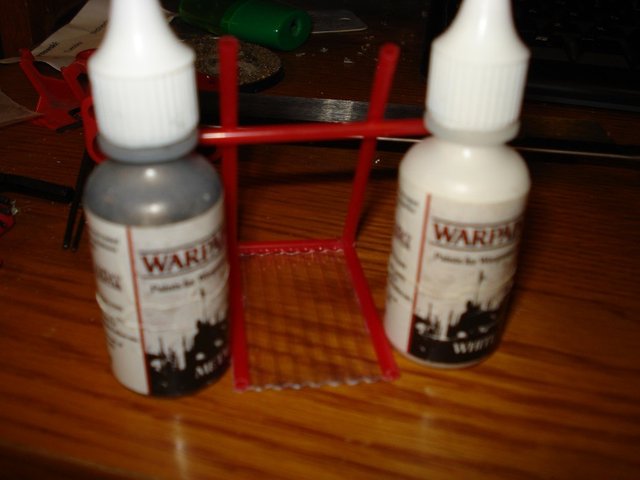
I used the coffee stirrers as a frame. I cut them to size and glued them to the plastic with super glue, a.k.a. cyanoacrylate or CA glue. In hindsight, I should have chosen a sturdier material that would be easier to cut, but the price was right, and this worked. Note the use of paint bottles and a spare piece of stick to prop up the pieces so the glue could cure at the proper angle.
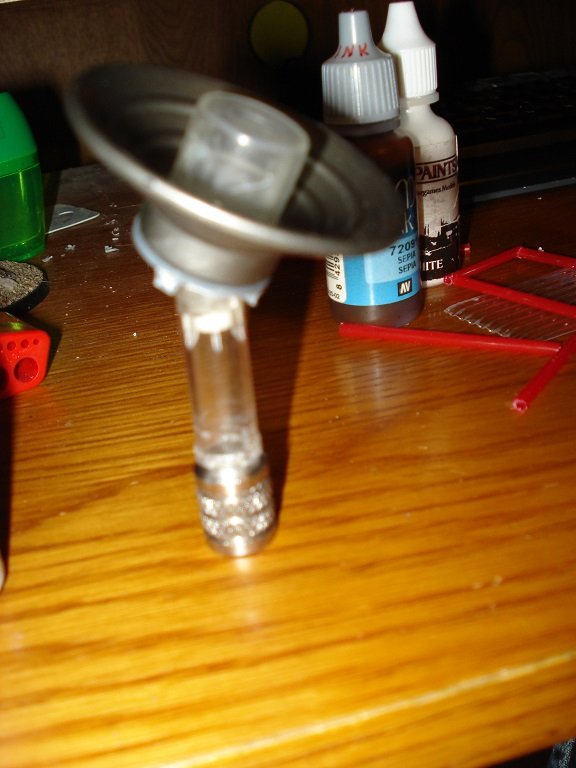
I also started building up the dish structure. There are pieces of a ballpoint pen, a threaded insert discarded by a foundry where a friend works, and other odd pieces that seemed suitable to me.
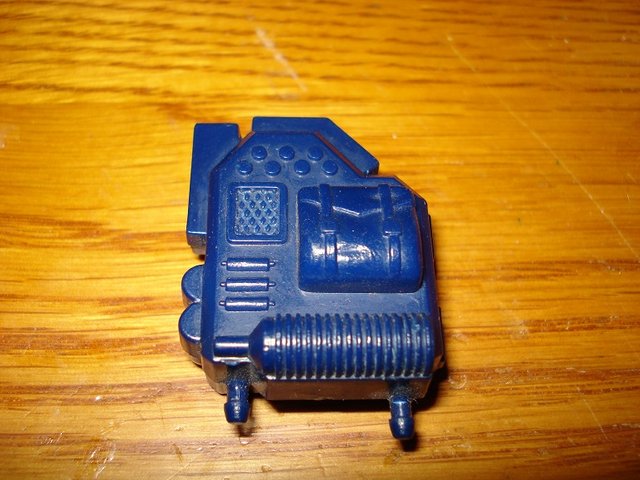
Every technological installation requires some kind of control panel, generator, or circuit breaker box. I used this broken accessory from an old action figure.
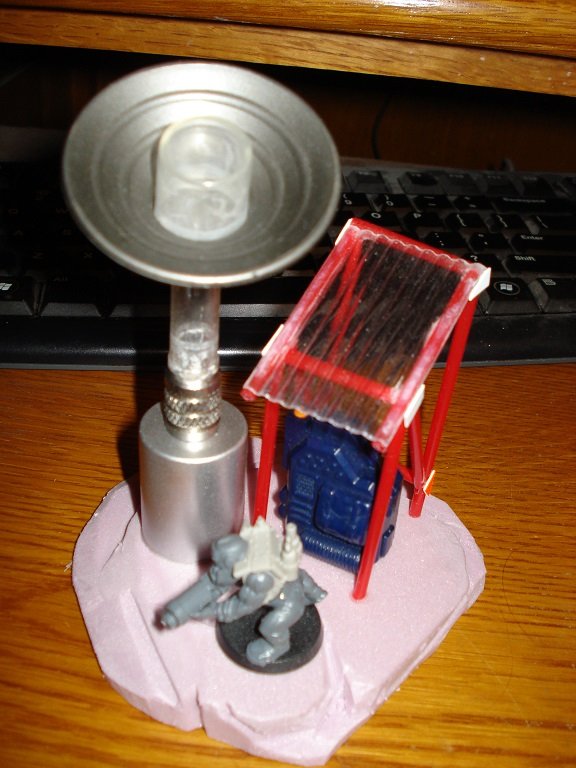
And now the parts come together. I used some scraps of plasticard to make gussets for the framework that reinforce the joints. The base has been cut down, and then carved with a hobby knife so it looks more rocky. Again, the Ork is included for scale.
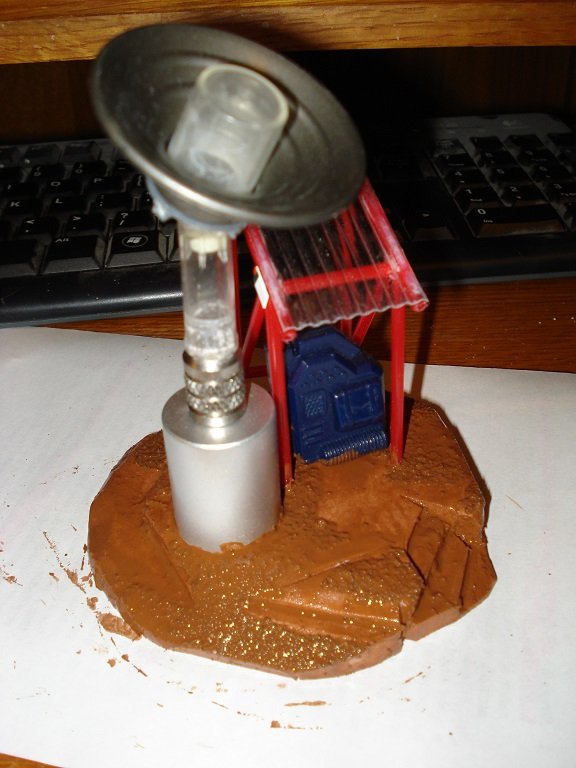
I forgot to take pictures of this last step, but before moving on to painting, use basic white glue, a.k.a. PVA glue, to spread sand on parts of the foam base. This adds a gravel-like texture and breaks up the flat surfaces.
Painting
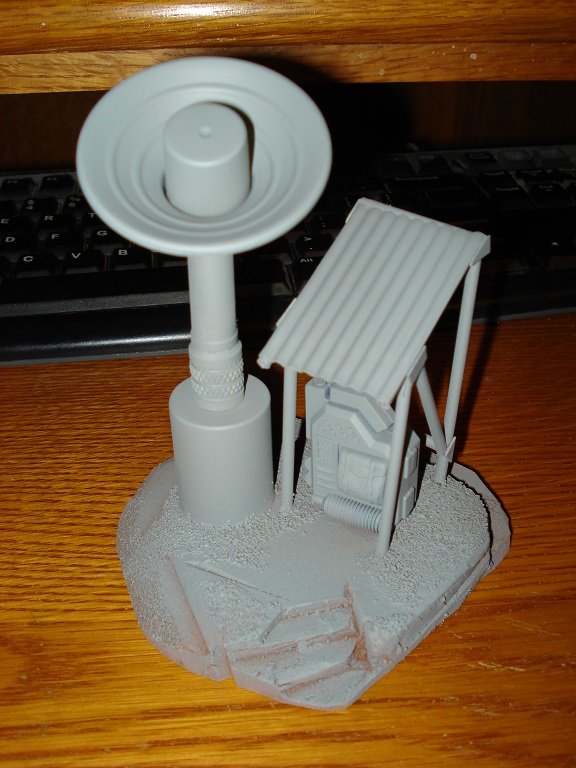
Plastic needs a primer coat in order for paint to adhere, but polystyrene foam doesn't handle pray paint well at all. To avoid eating away the base, I spread a layer of cheap craft paint over everything that was pink. I didn't worry about splatter on the other components, but your design may require more concern for tidiness depending ion your intended results.
After that paint had dried, I took it outside and applied a layer of gray primer. Gray is an ideal base color for the distressed metal look I wanted in the end, and it saved the step of painting gray. The plastic needs an even coat, but the base has effectively been primed in brown already so there's no need for a careful coat there.
The first step to adding color was a brown layer of sponging and drybrushing. I used cheap craft paint because I don’t mind its rougher texture for weathering. It's awful for models, but superb for terrain effects.
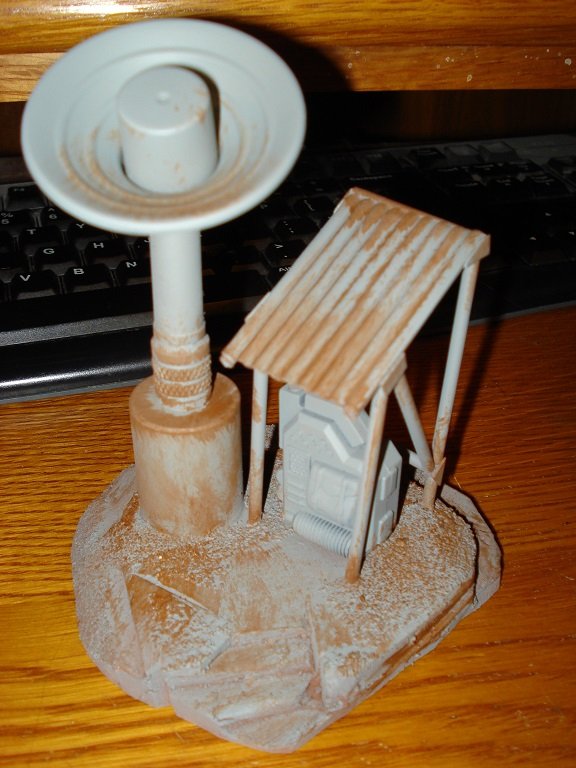
More color is added next. The green is not as vibrant in person as it looks in this image, by the way. Brown is added again in drybrushed and stippled layers to keep everything looking worn out and abandoned. It is also thinned as a wash to start a rusted look on the "tin" roof. Grass tufts from Army Painter also break up the terrain and add great detail.
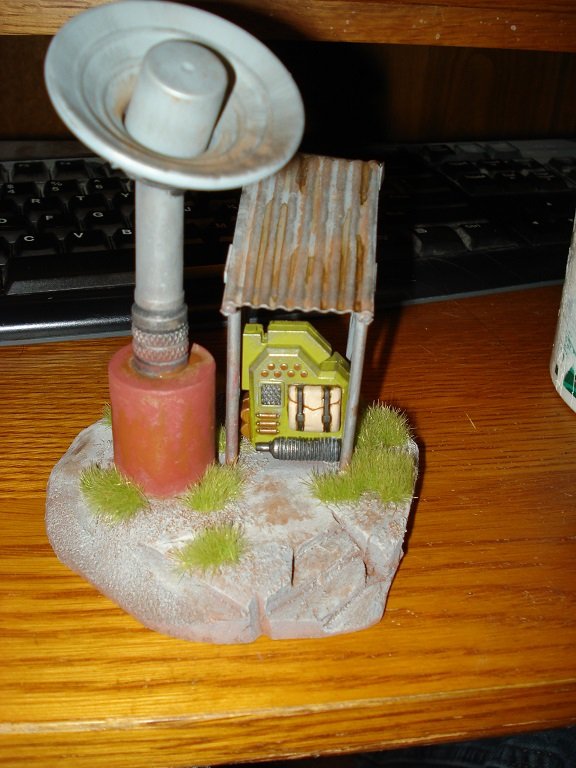
After this point, any extra paint work can be done to achieve whatever level of detail you might want. I stopped here, because terrain gets abused a lot, and there's little point in working too hard on something that WILL get broken. For more detail, scraps of wire and other details could be added. Tall wire antennas can make it look more like a multipurpose comms array if you don't think it will snag sleeves or stab flesh. A well-stocked scrap selection means the sky is the limit.
Apologies for the occasional gaps where I got too focused on building things to take pictures of them. I hope this helped inspire you to build something!
All photos by me using various devices. Apologies for the poor quality. This was before I got my new phone with a good camera. Adapted from a project post I wrote at Beasts of War
Cool! That's nice work. Any idea how much time you spent on that item, start to finish?
No clue. Each step takes little time, but waiting for glue and paint to dry along with working on multiple projects at once or watching movies while working skews the time scale. Taking pictures and writing up the process also added time.
Well, it's very nicely done.
There are so many great looking armies in WH40k, I wonder what is your favorite army to paint?
Orks all the way. I am planning Kill Teams with Space Marines and Sisters of Battle though.
I would jump on Chaos Space Marines or Tyranids. Dark Eldar are also cool looking, Necrons also. Come to think of it Grey Knights are also great, Blood Angels even.. Let's just say I would have a hard time deciding what to start with :) Imperial Guard tanks perhaps..
Necrons are cool, and I have seen some nice paint schemes that are different from basic silver. Chaos marines are also tempting, but I don't want to jump on that bandwagon yet. I have too much unpainted stuff as it is now.