Peashooter (Plants vs Zombies) Step by step
Hello friends of steemit I want to share with you another tutorial of the famous game Plants vs Zombies, this time I bring the Peashooter step by step to use it as a keychain. I hope you like it and are encouraged to do it too
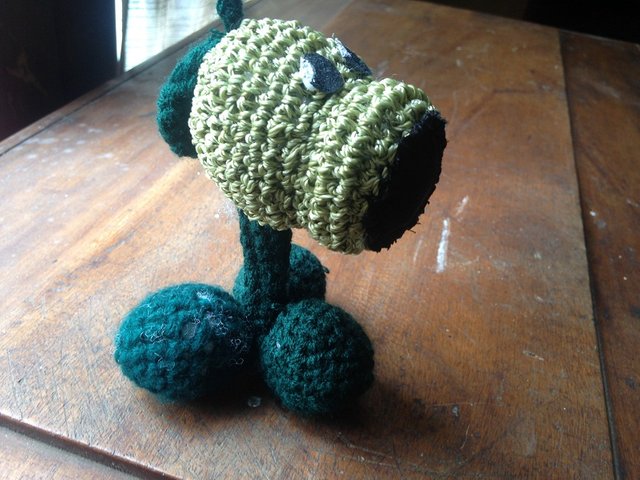
Here I leave the character.

Materials
| Dark green wool | Green wool |
| Black fabric | Ring |
| Sewing thread | Sewing needle |
| Knitting needle | Black and white paint |
| Brush and glue | Stuffed animal |
Process
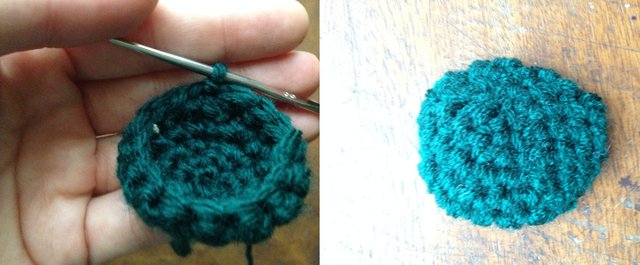
-We start making a magic ring with eight single crochet stitch, the second round will be increases to complete 16 points. The third round one point and one increase to complete 32 points, round 4, 5 and 6 will be only single crochet stitch to complete the same 32 points, round 7 will be decreases, two single crochet and one decrease, round 8 we will have 24 single crochet, the 9th of a point and a decrease, round 10 we will make increases to make the mouth, it will be two points and an increase the next round a single crochet and an increase and we almost have the head. Add padding.
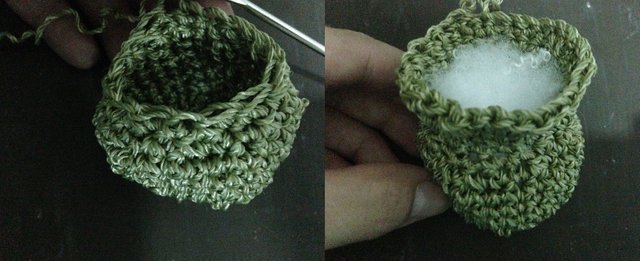
-To finish the head we will do one more row of decreases, two single crochet stitch and one decrease and then we will make a point and a decrease in the next round remaining in this way.
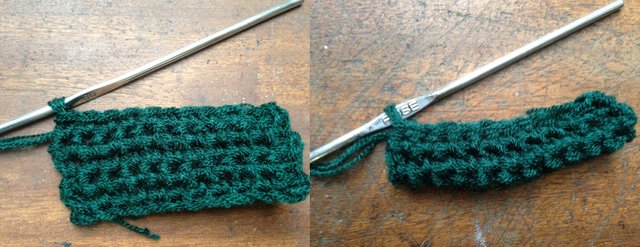
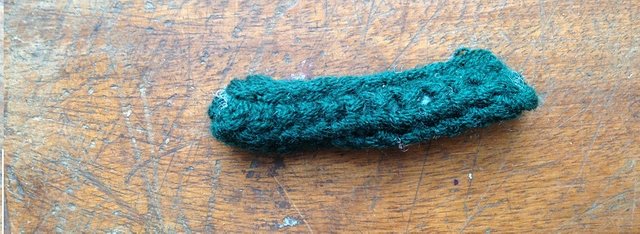
-For the body of the Peashooterr we will make a simple chain of 13 points and make 5 row of 12 single crochet stitch. Once ready, we will join the fabric with a slip stitch.
-Fill with stuffed.
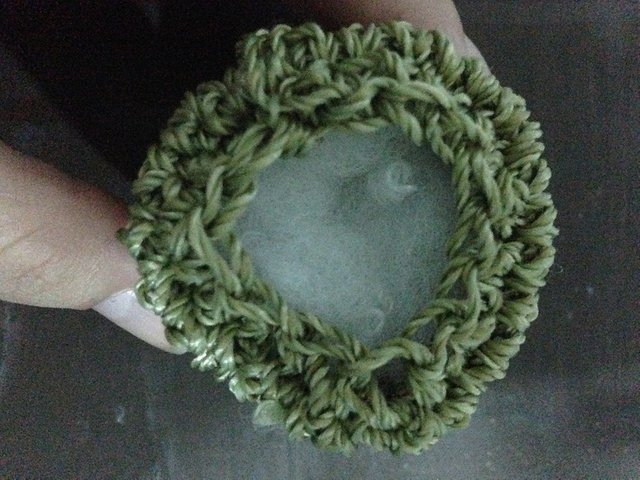
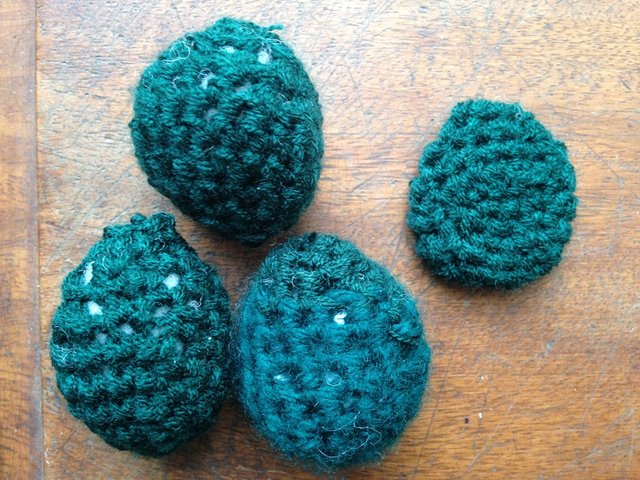
-For the leaves, we will make a magic ring of 3 single corchet stitch, the next round will be increase to complete 6, the next one point and an increase and the fourth two points and an increase. Round 5 of only single crochet stitch and then 6 row with decreases, two points and one decrease, round 7 a single crochet and a decrease, and round 8 of only decreases, we cut and hide the remaining thread.
-Add Stuffed and will be this way, repeat the same procedure 4 times and one of the petals are not going to fill.
-We proceed to join the pieces with thread and needle, three petals first, then the body and last the head, the leaf that we don't fill, we will place it on the head of the Peashooter
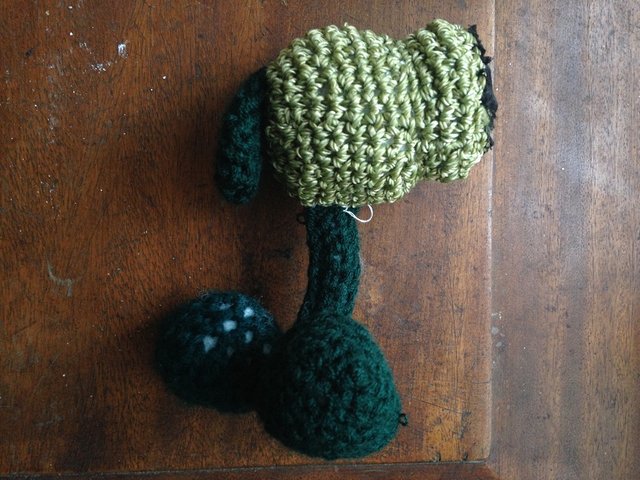
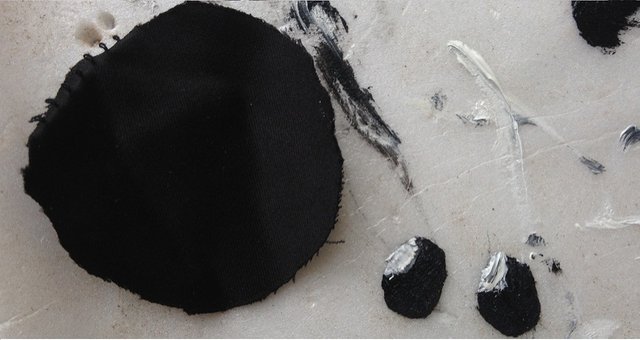
-The black background of the head will be a circle with black fabric sewn to the head with thread and needle. The eyes with painted fabric and taped with glue.
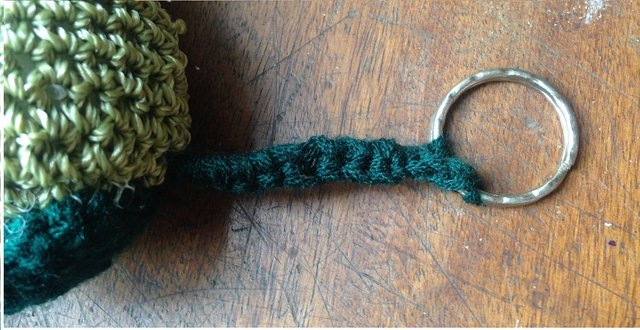
-Finally make a simple chain attached to the Peashooter, knit 3 points attached to the ring, make a second row and make single crochet stitch in the points of the simple chain returning to the beginning, and ready you have your Peashooter.
Aaawww.. this pea shooter is sooo cute! Thanks for sharing the steps @carovargasv!
Thank to you for reading
Congratulations @carovargasv! You have completed some achievement on Steemit and have been rewarded with new badge(s) :
Click on the badge to view your Board of Honor.
If you no longer want to receive notifications, reply to this comment with the word
STOPTo support your work, I also upvoted your post!
Do not miss the last post from @steemitboard!
Participate in the SteemitBoard World Cup Contest!
Collect World Cup badges and win free SBD
Support the Gold Sponsors of the contest: @good-karma and @lukestokes
Que bonita pieza, eres muy buena en lo que haces.
Muchas gracias