How to germinate cannabis seeds -
Today we teach you how to germinate marijuana seeds easily. Many people are starting in the Cannabis Autoculture, either because it is increasingly accepted socially, either by a disease that has been recommended or for the mere pleasure of smoking your own herb. Many people are very slow to plant their marijuana seeds, because they see it difficult, or because they tend to die when they germinate. This is because they do not have enough information on how the process should be done, and either they are too cold, too hot, too flooded, or too dry ...
With this article, we will try that when you germinate your seeds, you do not have hardly any losses, and if it does not turn out to be a 10 and you do not die 9 out of 10. You just have to follow some simple steps that we detail one by one
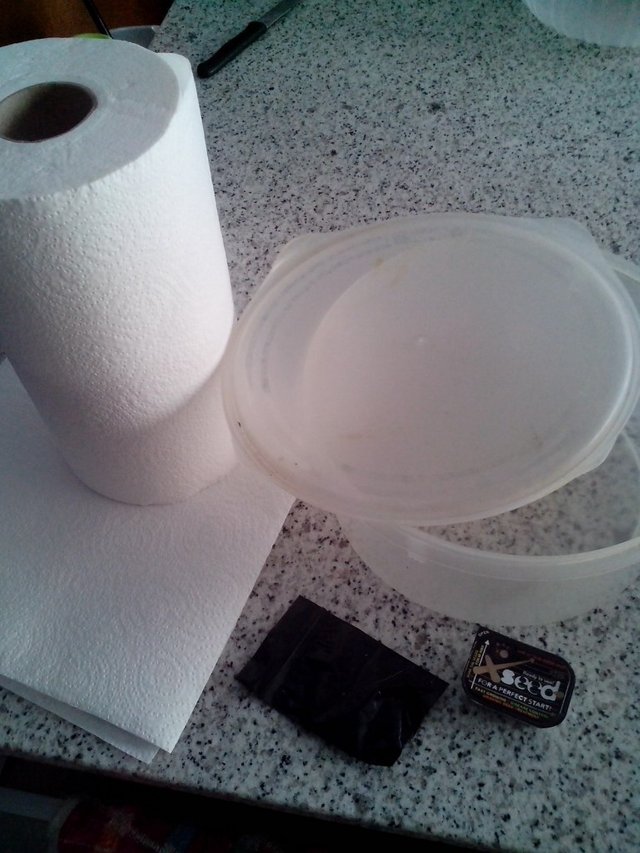
Materials needed to successfully germinate seeds
Papel de cocina.
Tupper de plástico.
X-Seed de B.A.C.
Papel de aluminio (si el tupper tiene partes transparentes)
Las semillas de marihuana que queremos germinar.
Steps to germinate marijuana seeds
Now that we have it all, we start with the germination process of the seeds:
Step 1: Preparation
Prepare all the necessary material by hand, so as not to have problems when picking one thing or another.
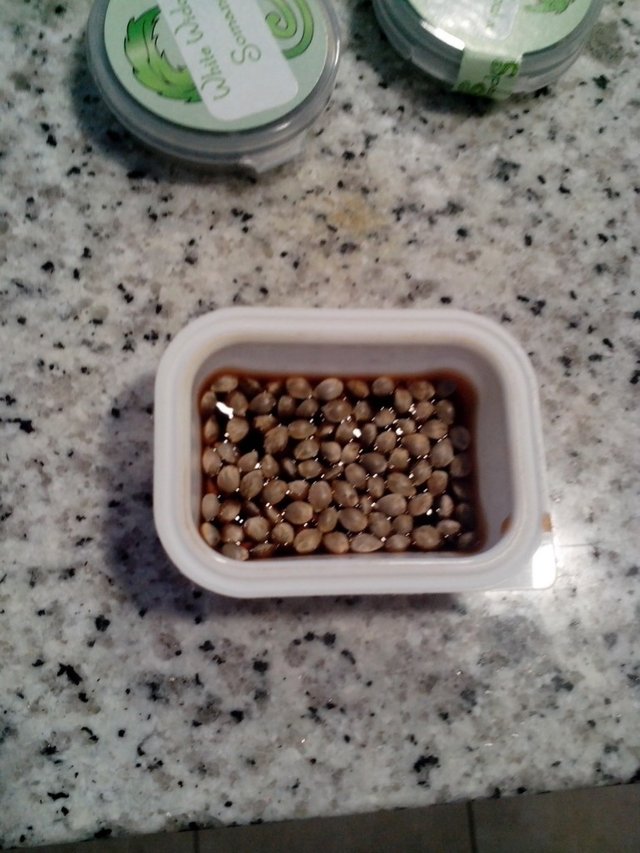
Step 2: Soak the seeds
Immerse the Marijuana Seeds in the X-Seed liquid of B.A.C for an entire hour. Give him a wig with a spoon from time to time so that the seeds are well soaked.
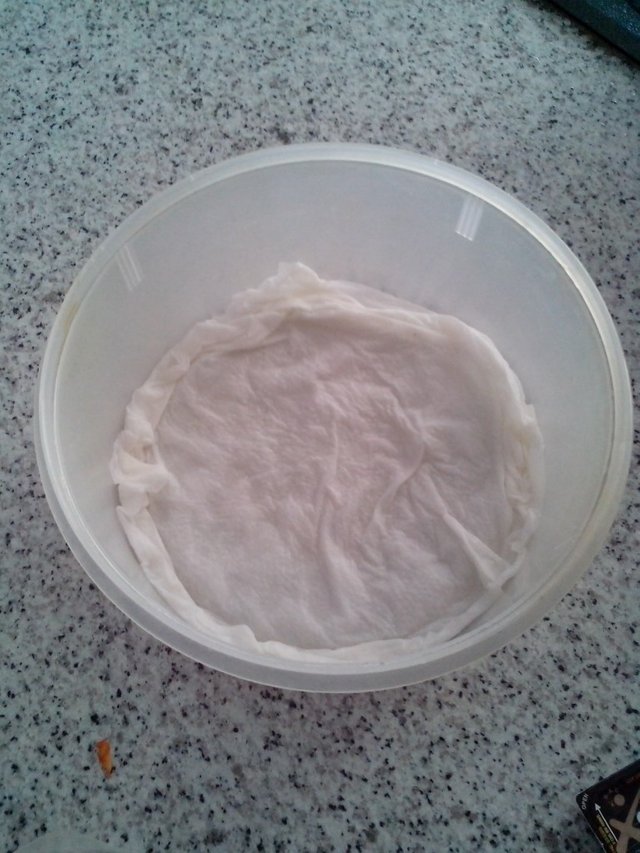
Step 3: Germination
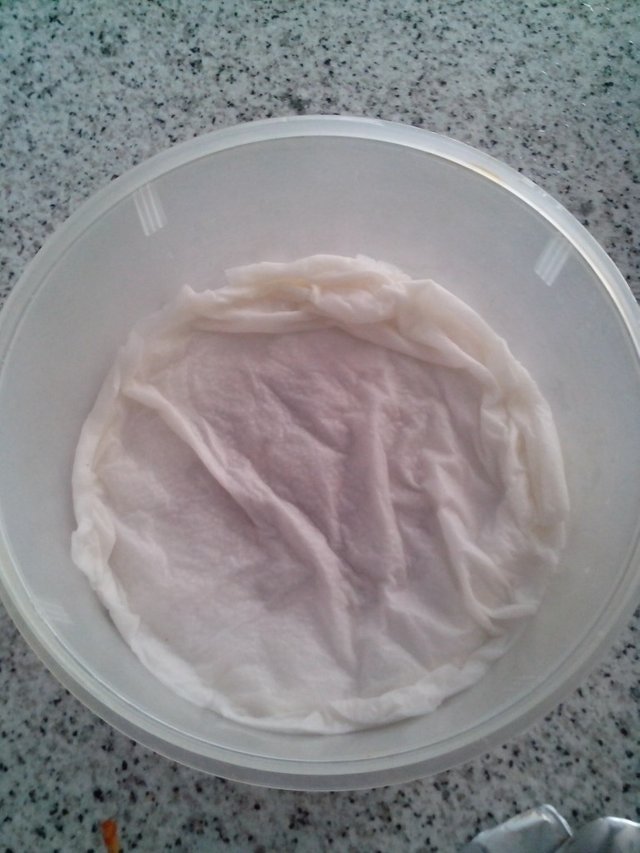
While the seeds are soaking, we prepare the Tupper, making it a bed down with wet kitchen paper, without it being puddled. I personally, I make 3 coats, I wet it and let it drain without wrinkling it the way a shirt is worn, and it spits the excess water quite well. We do not have to worry about it drying out, so if it's completely damp enough.
Step 4: Separation
Once they have been one hour in the liquid X-Seed of BAC, with the help of a spoon, we remove the seeds carefully from the liquid and place them on the bottom of the Tupper, distributing them well, so that the roots of the other.
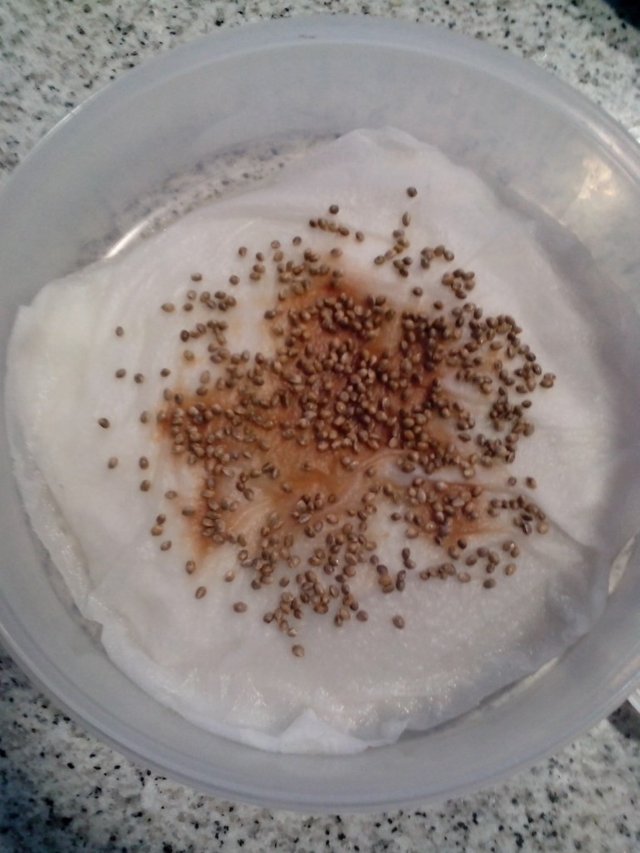
Step 5: Cover the seeds
Once placed all the seeds of Cannabis in the bottom of the Tupper, we cover it with another layer of paper, like the one before for the bottom, but we place it covering the seeds completely, making them between the two wet papers, all the seeds.
Step 6: Care
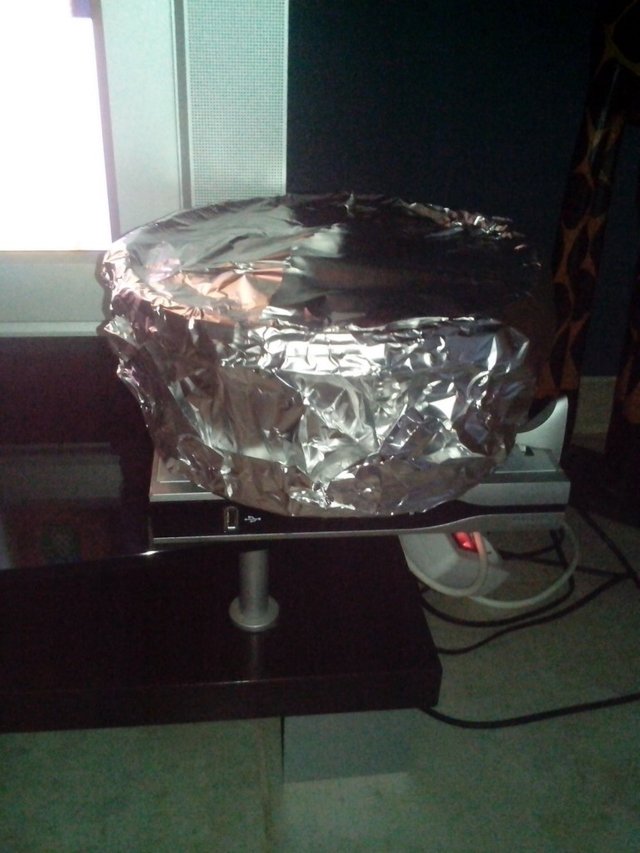
Once this is finished, you have to close the Tupper, which will never dry your kitchen papers, which is the fault that many growers usually have, when drying the paper and adding more water, and throwing in more so that it takes longer. in drying ... All that bothers our process, to put them in the closed Tupper we forget this. If our Tupper is transparent, as is our case, then we cover it completely so that light does not enter in any way. In our case we have used aluminum foil.

Step 7: Adjusting the temperature
Once closed and isolated from the light our Tupper, we should leave it in a place with a pleasant temperature. In winter, with the cold it is more difficult to find a nice place for them, so we must find a source of heat that is not excessive, we can use the computer modem, a tdt ... The play is too hot and will be cooked, neither should we go through ... We chose the home DTT to place our Tupper.
Step 8: More Care
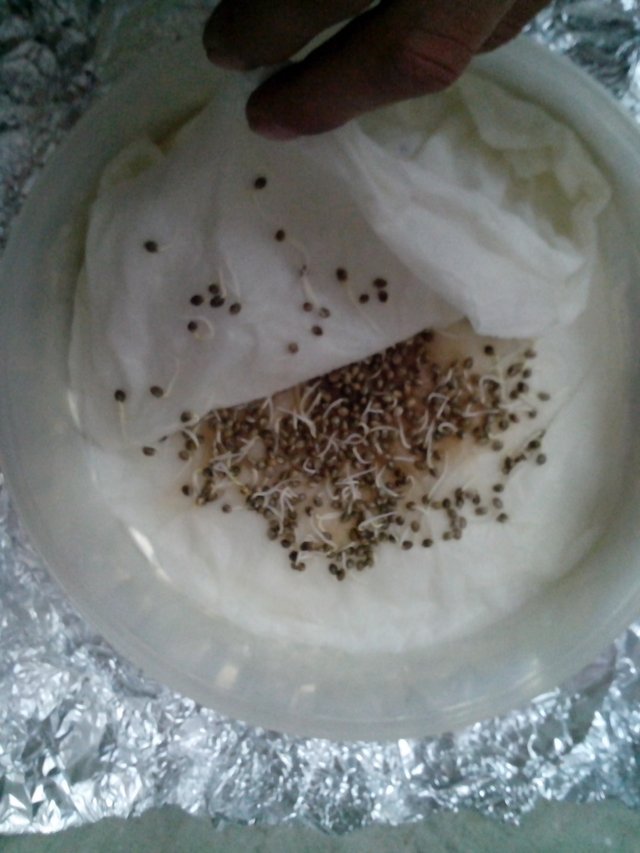
After 1 Day more or less, our seeds will be opened, letting their first root emerge, with which we must be very careful when manipulating our seeds. You do not have to leave them for a long time, once they are open they can be transplanted to the ground.
Step 9: To the land
Now that we have germinated them, we have to pass them to the definitive medium, they are usually passed on to land, but you can put them in a rock wool block to make their growth in hydro, in a jiffy to grow in coconut ... We will dedicate ourselves to explain on land, which is the most common.
Fill a small pot of earth, maximum half a liter. We water it well before depositing our seed inside the pot. Once the soil is wet (but not waterlogged), you should notice that the pot is already weighing, we make a hole with the fingertip, more or less than a half to 1 cm. and we place our seed, with the root pointing down. We cover it with a little soil, it must be half or one cm from the surface, and we will have our seed ready to come to life, we just have to put it in the sun, or the lamps, or where we are going to grow it, that in a couple of days, our new outbreak will appear that will not stop growing until the end.
Once the seed leaves, it becomes long by itself, it is not that they glean or anything like that, it is because they seek the light, or it has simply been formed like that. And then we advise the small pot to germinate, for 10 days or so since it leaves that it stops stretching, pass it to a bigger pot, about 3.5L to bury the excess trunk, since there the root also comes out and the plant will come out much stronger, apart from the fact that you can bury it and save the first branches in the space of the pot.
I hope you liked it good day.
Hi, @argenisapaz!
You just got a 0.25% upvote from SteemPlus!
To get higher upvotes, earn more SteemPlus Points (SPP). On your Steemit wallet, check your SPP balance and click on "How to earn SPP?" to find out all the ways to earn.
If you're not using SteemPlus yet, please check our last posts in here to see the many ways in which SteemPlus can improve your Steem experience on Steemit and Busy.
Congratulations you've been chosen by our curators at Canna-Curate for great cannabis content! If you'd like to join our curation trail

12.5SP - 25SP - 50SP - 100SP - 250SP - 500SP - 1000SP