Road Trip Van Conversion - Insulation begins
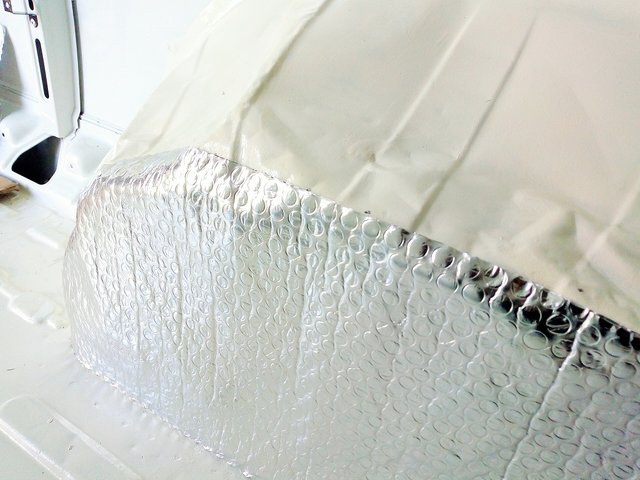
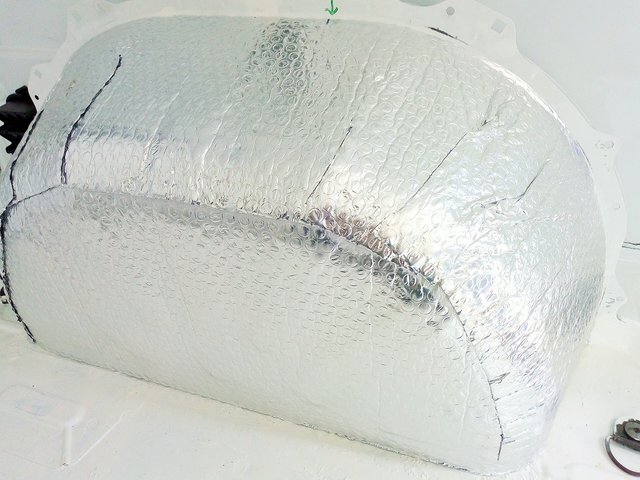
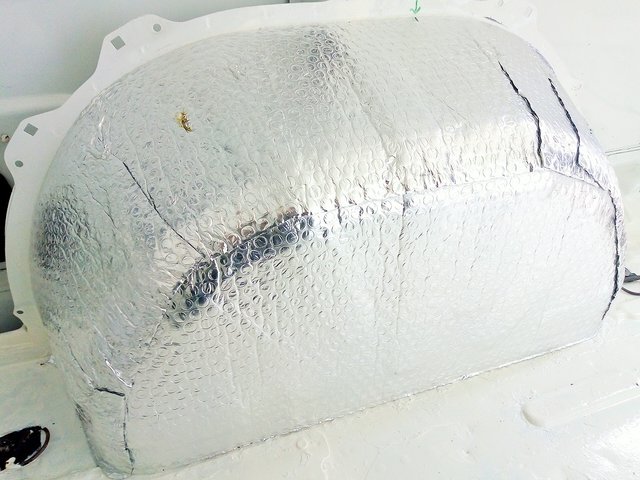
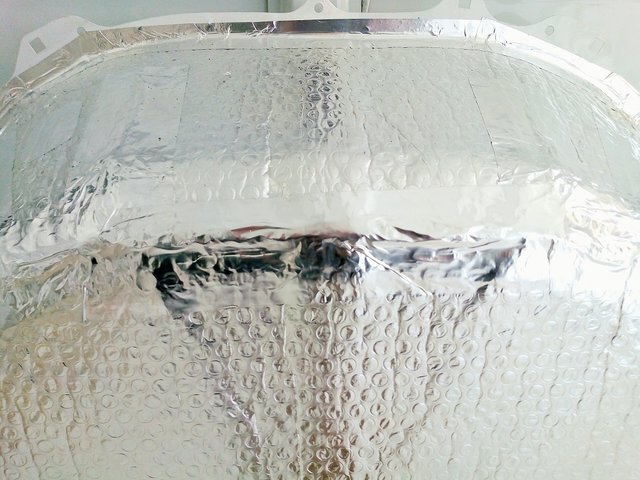
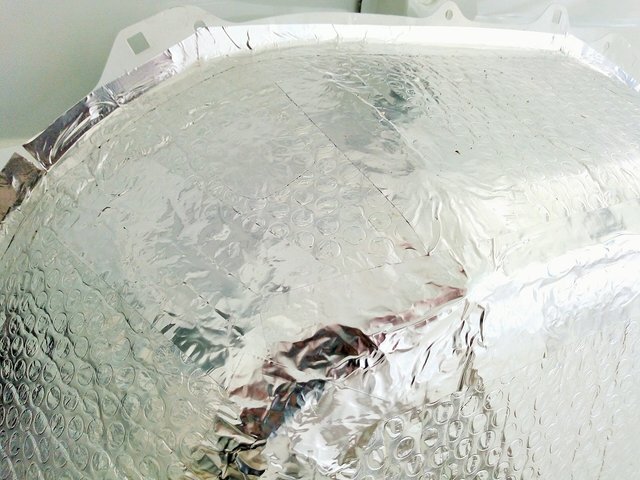
My Road Trip Campervan conversion / Bug Out Vehicle (BOV) continues.... Although the primary use will be pleasure, as a prepper, I will soon have a self contained BOV. After all the cleaning, sweeping and floor preparation I took a well earned break. The next step was to get the floor insulated. However, before that could be done, the wheel arches needed to be insulated. For this I used double sided foil bubble wrap, which is flexible enough to be moulded around the dents and curvature of each arch.

Getting High On Spray Glue - Was novel but disturbing at the same time!
Another small, essential slice to the project...
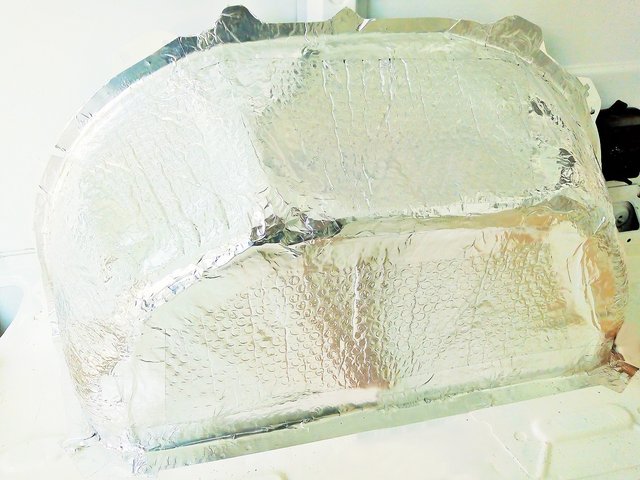
The project is moving along, slowly but surely (for now anyway). Things should appear to speed up a little I suspect, visually anyway. Time taken for this step was around 2 hours.
The Complete Project so far:
My Latest Brainwave & Project
Assessing The Task
The Strip Out
Floor Preparation & Rust Treatment
Hole Plugging & Lock mending
Finalising The Floor Foundations
awesome, would love to help you put that camper together. I have done this process a few times now. Almost missed this post. I will catch up with the rest. Keep up the good work.
Thanks..... My next dilema is = Walls or ceiling next?
I'm thinking walls, that way i can run all the wiring and ventilation after the walls are done.
Your welcome, I have done three builds, so you can say that I have learned what not to do. So far I see that you are totaly on track. For wiring, low voltage for LED and run it through pvc 16mm or 32mm. For your heavier gauge outlet wiring use metal conduit 14-2 or 12-2 depending on the amperage. Are you going to run solar? Makes me want to put up some of my build videos. For your van I highly recommend two roof vents with 12 volt fans and rain shrouds so the down pour does not come in. My last build I used 5mm thick knotty pine tongue and groove boards and marine finished both sides before installing. Then did two more coats of finish on the inside. Well I could go on for a couple of days talking about this very subject. Remember, make sure to add up all your amp usage first before investing in a solar unit. I was pretty good with 225 watt panel and a 30 amp controller connected to two golf cart batteries that produced 225 amps of storage. With that said I could not run a air conditioner off of that because of the initial drain to start up. I will keep an eye on your build. If you have question, just ask.
howdy sir preppervetuk! so why is the insulation of the wheel wells needed? to keep temperature more moderate? man you must be a perfectionist because that looks perfect.
I agree, you did an amazing job on that.
Well, lol - I'm mostly happy things turn out the way they do... Far from a perfectionist, more of a McGyversist....
howdy this fine Saturday sir preppervetuk! a McGyversist! lol. that skill is going to come in handy on the road!
Congratulations! This post has been upvoted from the communal account, @minnowsupport, by Prepper Veteran from the Minnow Support Project. It's a witness project run by aggroed, ausbitbank, teamsteem, someguy123, neoxian, followbtcnews, and netuoso. The goal is to help Steemit grow by supporting Minnows. Please find us at the Peace, Abundance, and Liberty Network (PALnet) Discord Channel. It's a completely public and open space to all members of the Steemit community who voluntarily choose to be there.
If you would like to delegate to the Minnow Support Project you can do so by clicking on the following links: 50SP, 100SP, 250SP, 500SP, 1000SP, 5000SP.
Be sure to leave at least 50SP undelegated on your account.
Your sense of humour as a prepper is priceless! Are you excited or does it feel like the conversion is a huge project @preppervetuk?
Well, i'm kind of used to projects like this now, so a bit of both i suppose - Excited to finish it and go on the road trip, but i know what is coming so i'll have to wait. Mistakes will make the expense grow too lol.
More haste less speed, as the saying goes. My husband and I would love to do a road trip like this. But he is not at all the handy man type so we'd have to buy. Now if I got my Dad and father-in-law involved we'd probably have an amazing camper van
I'm not exactly brilliant at DIY either. I rely on taking my time measure twice, cut once and swear a lot.
Sorry but that is really funny. I'm sure you are learning a lot though
Hello,
we like what you are doing. We custom build our expedition truck also.
I will post some "get to know truck" posts in future, for now it is more like travel blog, but pictures are there, have a look, you will like it :-)
Many thanks, i will.