Break me off a piece of that Kitkat branch
For today's bonsai, I have selected the tree that seems to need the most work on it today. Looking back at past posts, I talk a lot about what I'm going to do, but I don't really show very many of the stages, and there aren't enough pictures to break up the text. This time there are a lot more photos presented, so you can follow along in my journey as I work on my tree. Compare it from start to finish and let me know if you like the results.
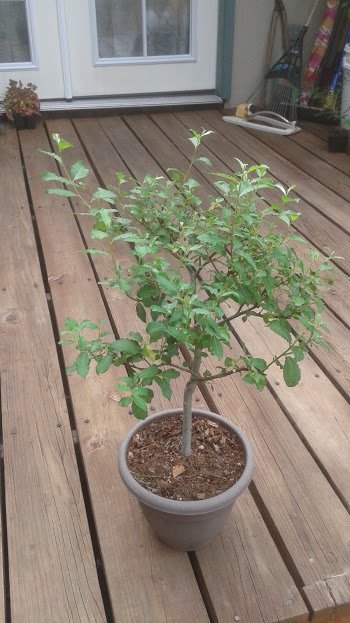
ID: 0007
Nickname: KitKat
Type: Pussywillow
Age: 3 years
Grown: cutting (from florist)
Last repotting: 2015?
Wired: never
About this tree: Pussywillow is a very forgiving tree. I purchased some pussywillow stems at a florist specifically so I could try to root them. All of mine rooted best by placing them in a vase filled with water. I left the stems mostly in tact, only cut off at the bottom about 12 inches from the top. It really helps them plump up if they dried out a bit at the store. The thick spiky roots are the ones you want to watch for, because that means it is ready to be planted in some potting soil. You can also bury the stem in wet sand, and it will spout up multiple stems in a row out of the soil. I usually prefer one stem per plant though, so I grow it upright.
Pussywillows are a wonderful tree for building a native wildlife landscape. Nearly every animal in the forest will benefit from having them around. Insects love to lay eggs underneath the soft textured leaves. Small birds perch on the branches and dine on the insects and spiders they find. Critters might nibble on the new leaves or soft wood and sweet sap if they are really hungry. The trees have many nutritional properties too. A little damage here or there hardly bothers the tree, as it is bountiful and enduring. Best of all, this tree produces catkins in late winter, which are soft and fuzzy like the fur of a kitten. I like to prune these enchanting catkin bearing stems in the winter. They are extremely decorative to display in a glass vase.
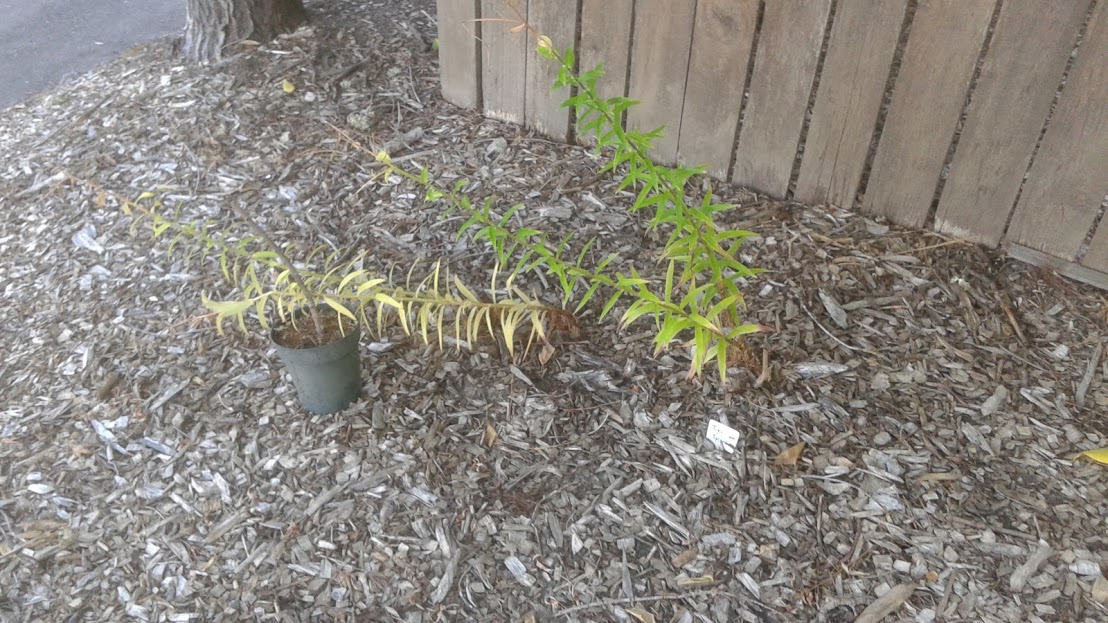
Remnant stem of a last year's failed bonsai. Now I use to hold up tipping lily stems.
The only time I had one fail on me is when I made a brutal heading cut in the winter after the first year's growth, and shortened it back to 14 inches. It is possible that I also repotted into bad soil or damaged some roots, and caused the tree to go into heavy shock. They don't seem to like having their initial growth restricted the first few years. Keep the central leader strong by not pruning it, as the tree may not have enough time to develop resistance to diseases introduced from the air that might also dry out the tree wound.
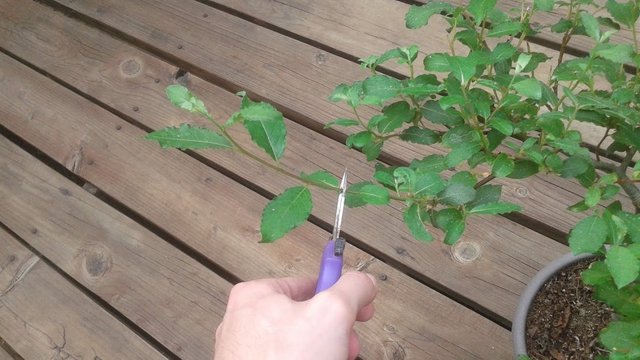
Today we're going to actually prune this tree and show you my progress on it. Remember, I am not an expert, and sometimes I am in a hurry to do things. I also like to take some risks and make mistakes to learn what you can and cannot do with different plants in nature. Today I didn't bother looking for the right tool, I just grabbed my nearest flower pruners because they looked the right size for most of the new growth I wanted to trim. Didn't even bother to sterilize it.
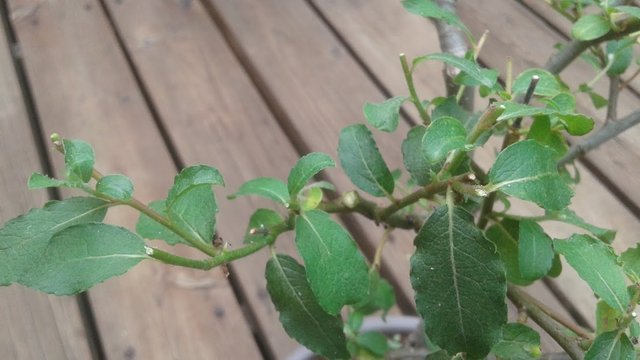
My initial plan is to trim off any branches sticking out beyond the boundaries of what I think the silhouette of the tree should look like. Anywhere I see a rounded tuft of branches and leaves, I will cut off any new branches that look like they are spiking out of that shape. Cut approximately a centimeter past the leaf node, so it can continue to grow there.
Next, I do a lot more heavy trimming. All of the big leaves get get plucked off. Big leaves are not ideal in bonsai. My theory is that they tend to absorb most of the energy from the tree, which makes them continue to expand larger and larger. They also shield out sunlight to the rest of the tree, which makes it hard for other new leaves to develop underneath. The sun also makes the leaf want to grow larger and healthier.

This tree is almost done. You can see by this pile, I trimmed quite a bit off. I also went ahead and trimmed any smaller branches that were extending two, three, and four inches long. Any really weak or dying branches were also removed. My strategy is to cut all of those small branches down to just two or three leaf nodes long. That will prevent the new branches from becoming super long with a bunch of leaves growing along it, and instead signal the tree that it should try to form new buds. Buds will make smaller branches form on branches that have been freshly pruned, and also sometimes forms buds further below on the older wood. If it doesn't put out any more leaves or branches this season, that is okay. I think this tree still has enough energy from its leaves to prepare for winter coming up.

At this stage, I looked at the tree, and still felt like it still needed a few more cuts to encourage a better tree shape to develop. There are some strong upward branches that are starting to dominate. By letting them remain they will continue to bud, they will get thicker stems, and the branches will not develop as well. Rather than wait for spring, I decided to make a few choice cuts. For these, I would use a root cutter tool.
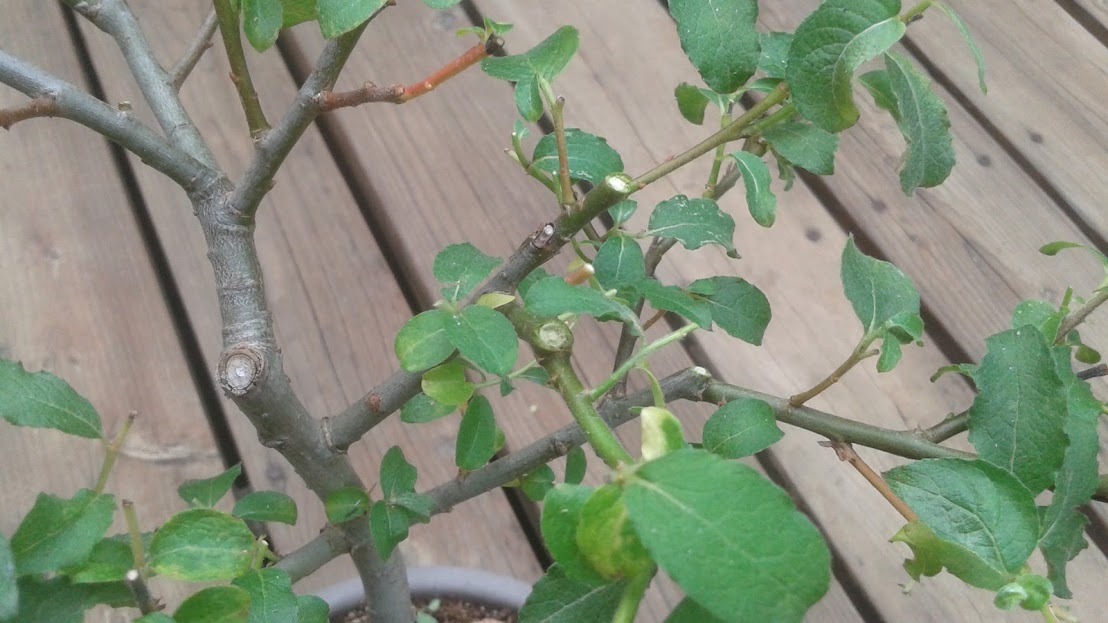
Here you can see some of the deeper cuts that were made. The root cutter lets you cut flush to the branch which is great, because it means it won't leave a stump protruding out of the wound. Instead the tree will work on healing over the flat cut mark. You can see that the cuts are on top, because those branches were heading straight up and out. Sudden changes of movement like that on the outer branches is not ideal, so they would have had to go eventually. Better to get them while they are young and green than after they become thick and old. If the branch was very old and thick, I would normally make big heading cuts in the winter when the tree is dormant and less likely to bleed sap.
Another factor I am taking into consideration with these cuts, is that I want branches that taper from thick to narrow, from base to tip. That is why I am usually choosing to cut these branches in a location in places where it divides into a little branch and big branch. By cutting off the big branch that was heading upward, I can leave the little branch to extend from the base branch. It also helps the branch to angle into a new direction, whereas the big branch that was cut tended to carry on somewhat straight in the same direction as the base branch. I could probably achieve some of the same goals with wiring, but with a few choice cuts I can accomplish almost the same thing, and large branches are not very flexible even when wired well. Wiring is also entirely ineffective at constraining the thickness of branches, whereas selective pruning makes this easy by choosing to cut off the thicker ones wherever a main branch divides.
A general rule of thumb, is to not make too many big heading cuts like this. As mentioned above, you can see what might happen. I think I learned somewhere that you should never remove more than 30% of the tree over the entire year, and only only a small amount of that 30% should be heading cuts like these. If you want to cut more than that, then you should just wait for next year. It is like telling a person that they can only eat and breath 70% of what they normally require for the rest of the year. They would become weak, malnourished, and starve!
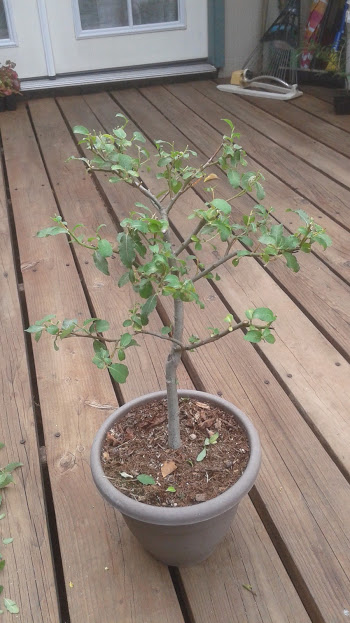
This is the end result.
It looks a bit skeletal at this point, but that is pretty normal after a full trim. The branches are much more prominent now, and there is growth in the areas I am looking to promote further development. Hopefully the lower right branch will flesh out a bit. It is the lowest branch, so I would like it to become more heavy and dominant in time. Having a good long branch at the bottom will be a good foundation for the pyramid of the crown branches to develop over it. That bottom branch really looks straggly, but if you compare it to the original photo, it looks like I only pruned the end off. Oops! Maybe I should have kept that upward end on, and just wired it down. Live and learn.
This tree might not produce many catkins in the winter, because they only tend to form on long thick upright branch tips. Fortunately I am growing a few other pussywillow cuttings just for this purpose alone. Hopefully I will have some decorative stems to harvest in early February to share.
Finally, I have a special photo to share from a few weeks ago. This photo will be my honorable mention of the day.
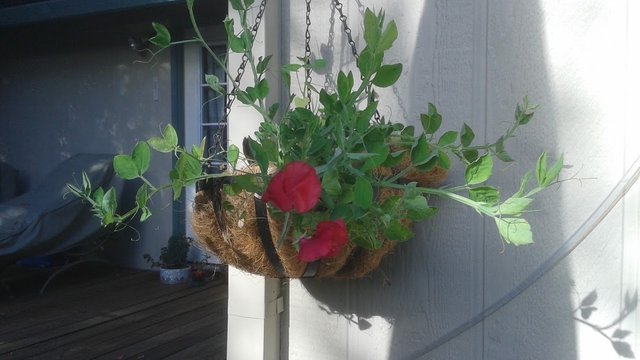
Sweet peas! They make a great display in a hanging basket. I wish you could smell them. They remind me of sour apple Runtz candy.
This post recieved an upvote from minnowpond. If you would like to recieve upvotes from minnowpond on all your posts, simply FOLLOW @minnowpond