DIY: HOW TO CUT A SIMPLE A LINE GOWN
Hello everyone,
Today we will learn how to cut a beautiful gown. In this tutorial you will learn how to fix and cut pocket, beginners will need this. Always practice, practice makes perfect.
Measurement required;
Length
Bust
Waist
Hip
Shoulder/ back
Feel free to resteem for more visibility, and also for others to learn.
Feel free to ask questions.

easy/simple source: facebook
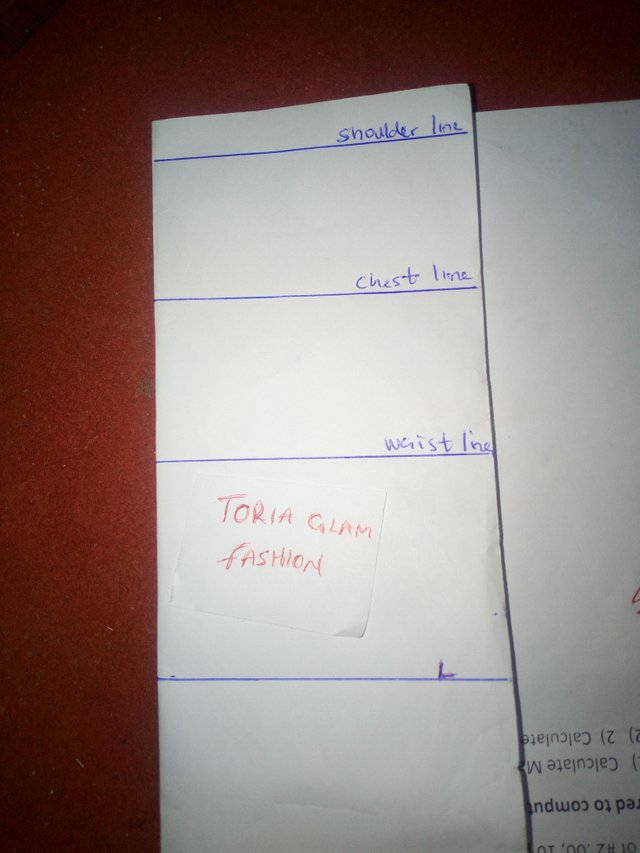
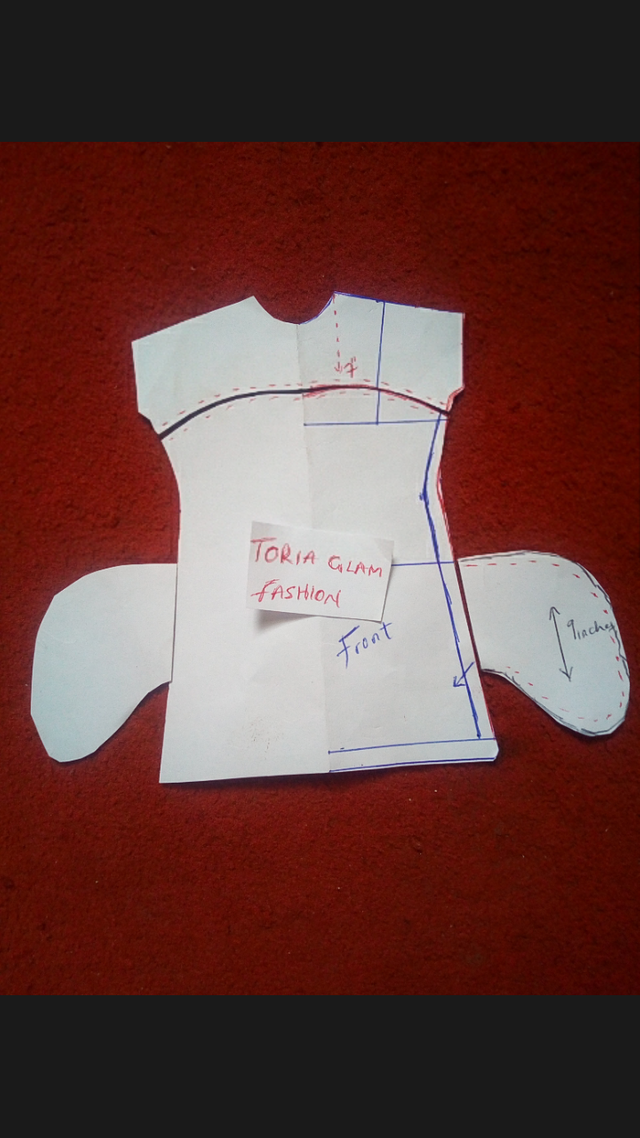
Step one; add your horizontal measurement as seen in the above illustration.
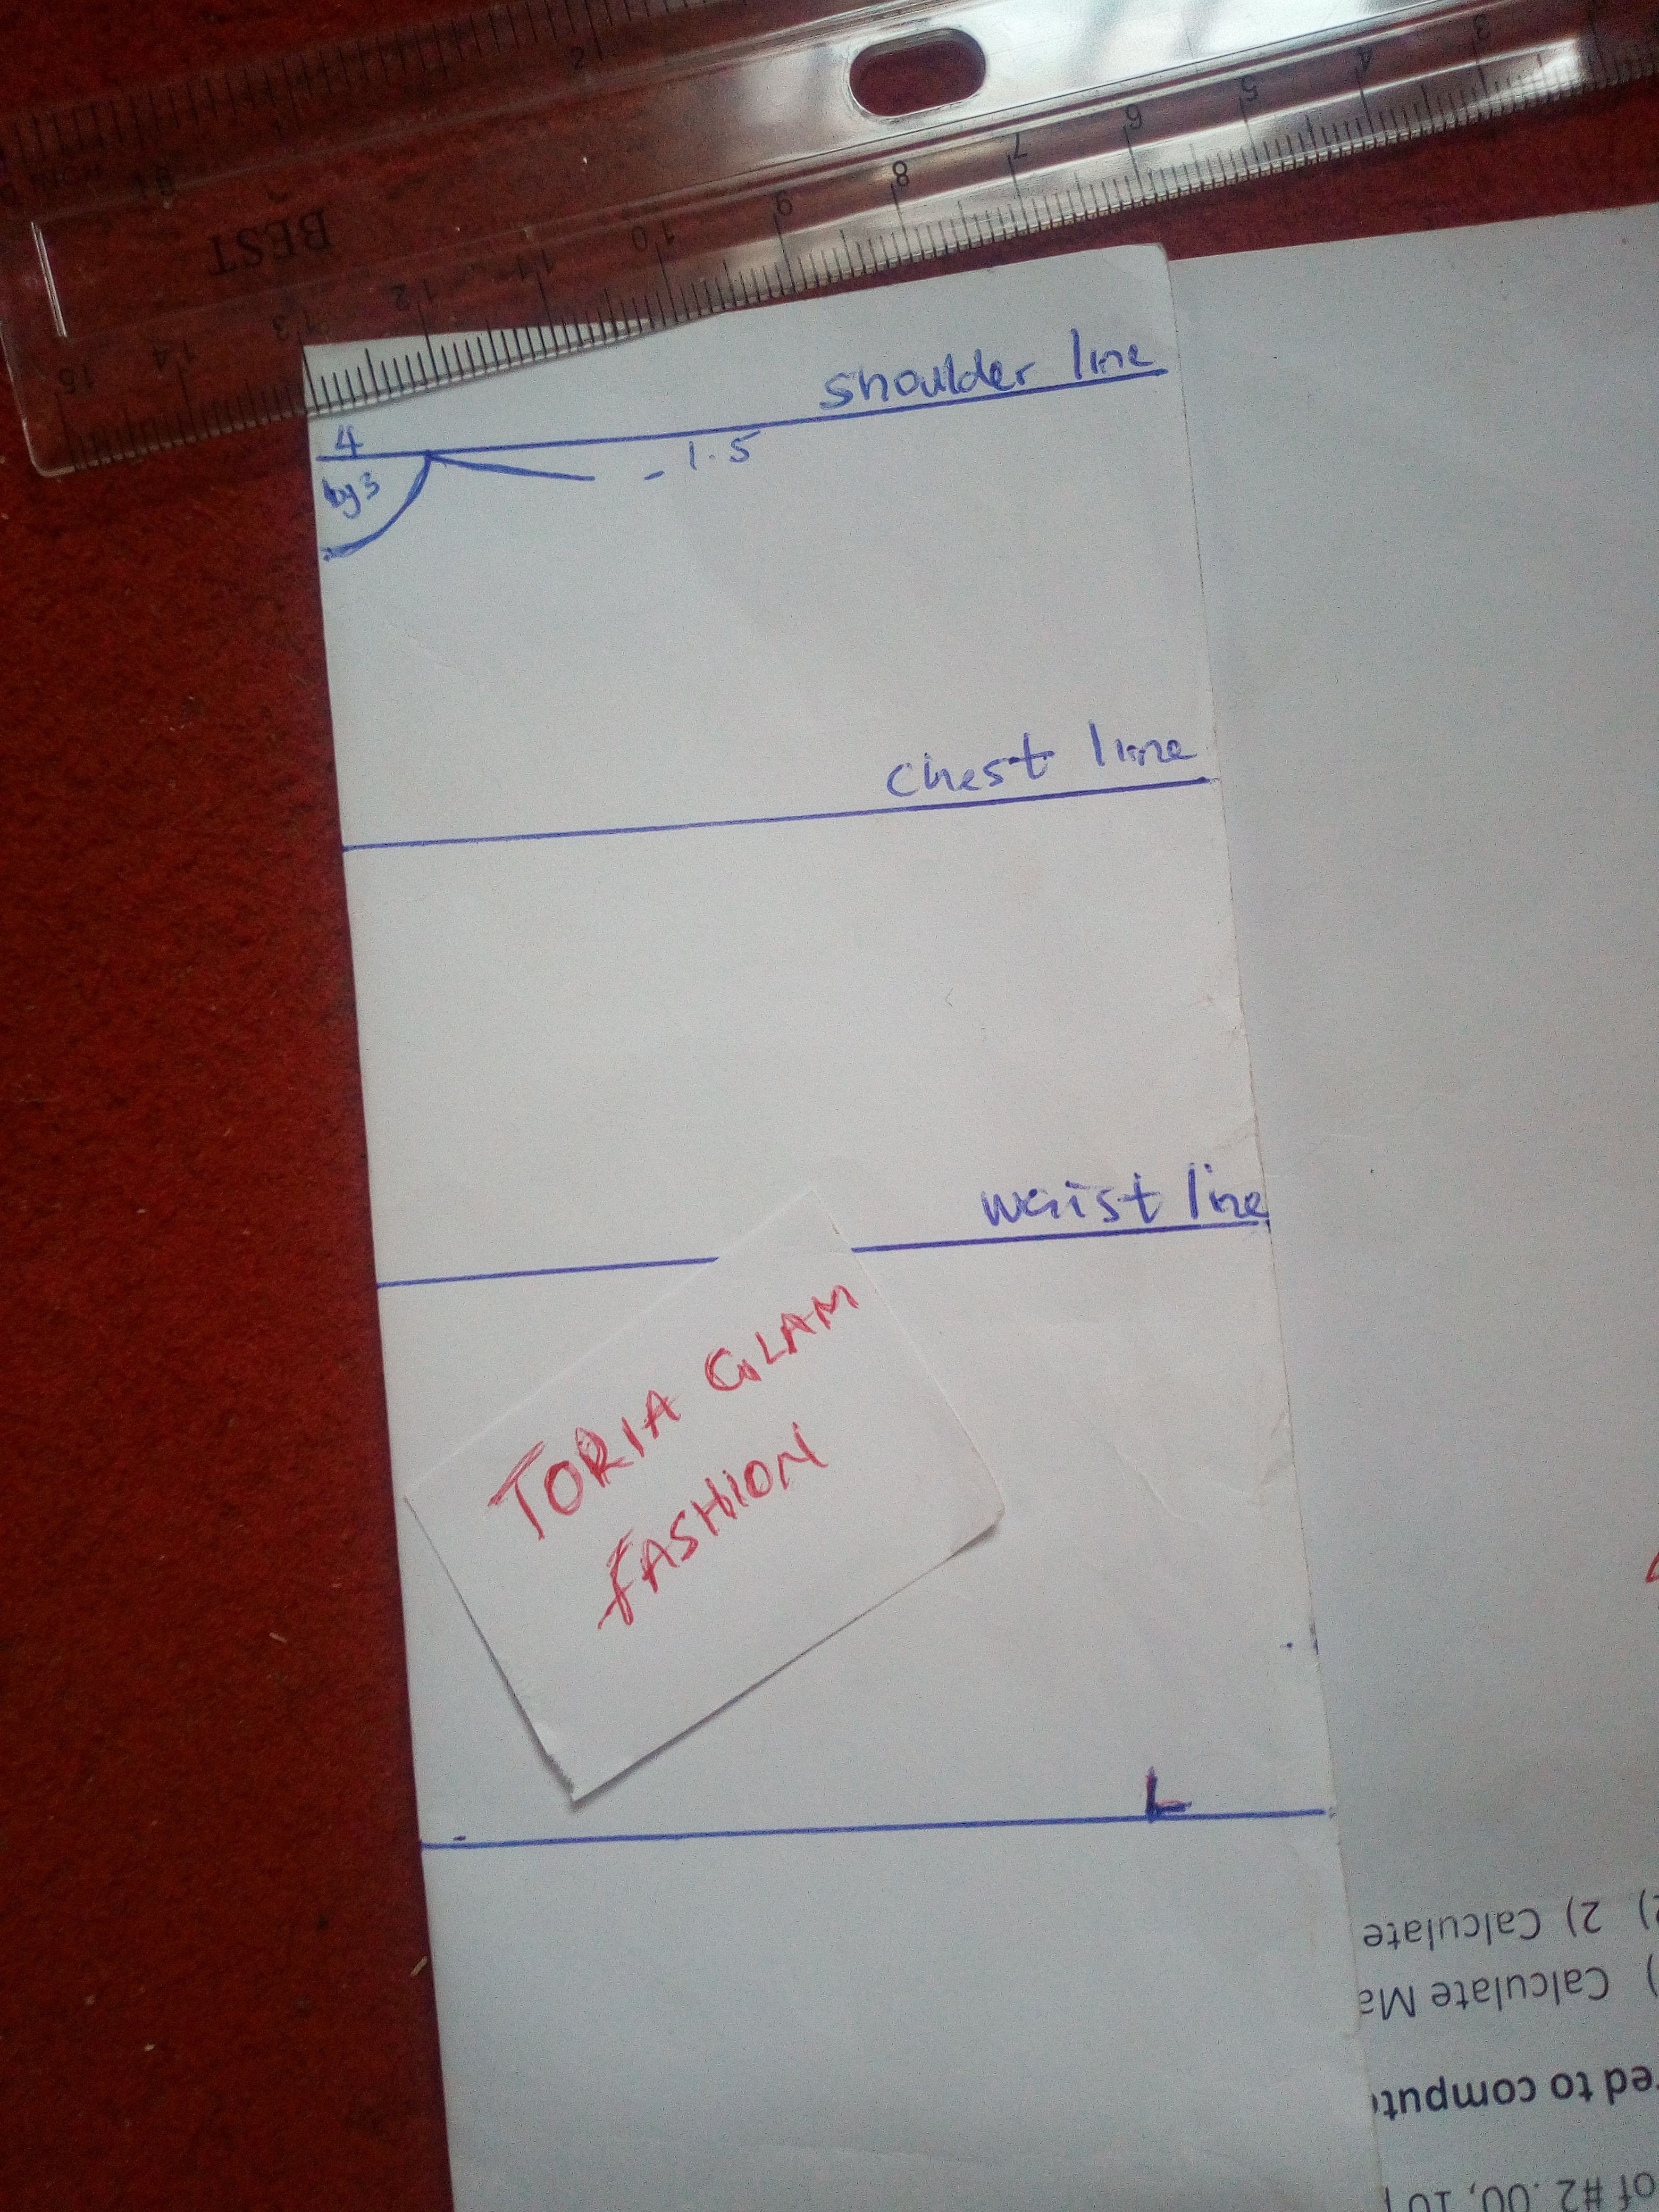
Step two; you can add your desire neckline, but here I used 4 by 3.
Step three; Come down by 1.5inches from the shoulder slope
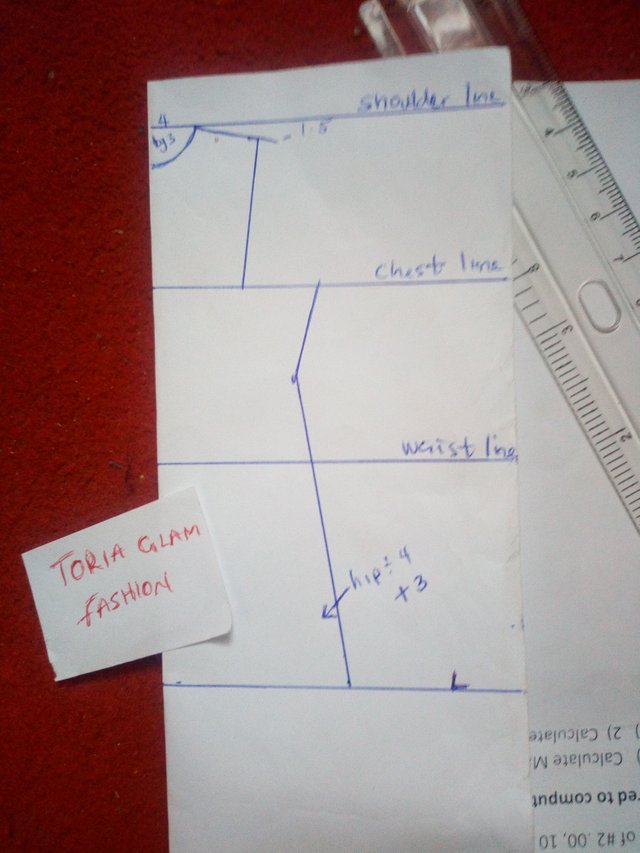
Step four; from the shoulder slope draw a straight line using shoulder measurement as guild.
Step five; To get the fullness of the gown divide your hip by 4 and add 3inches to it.
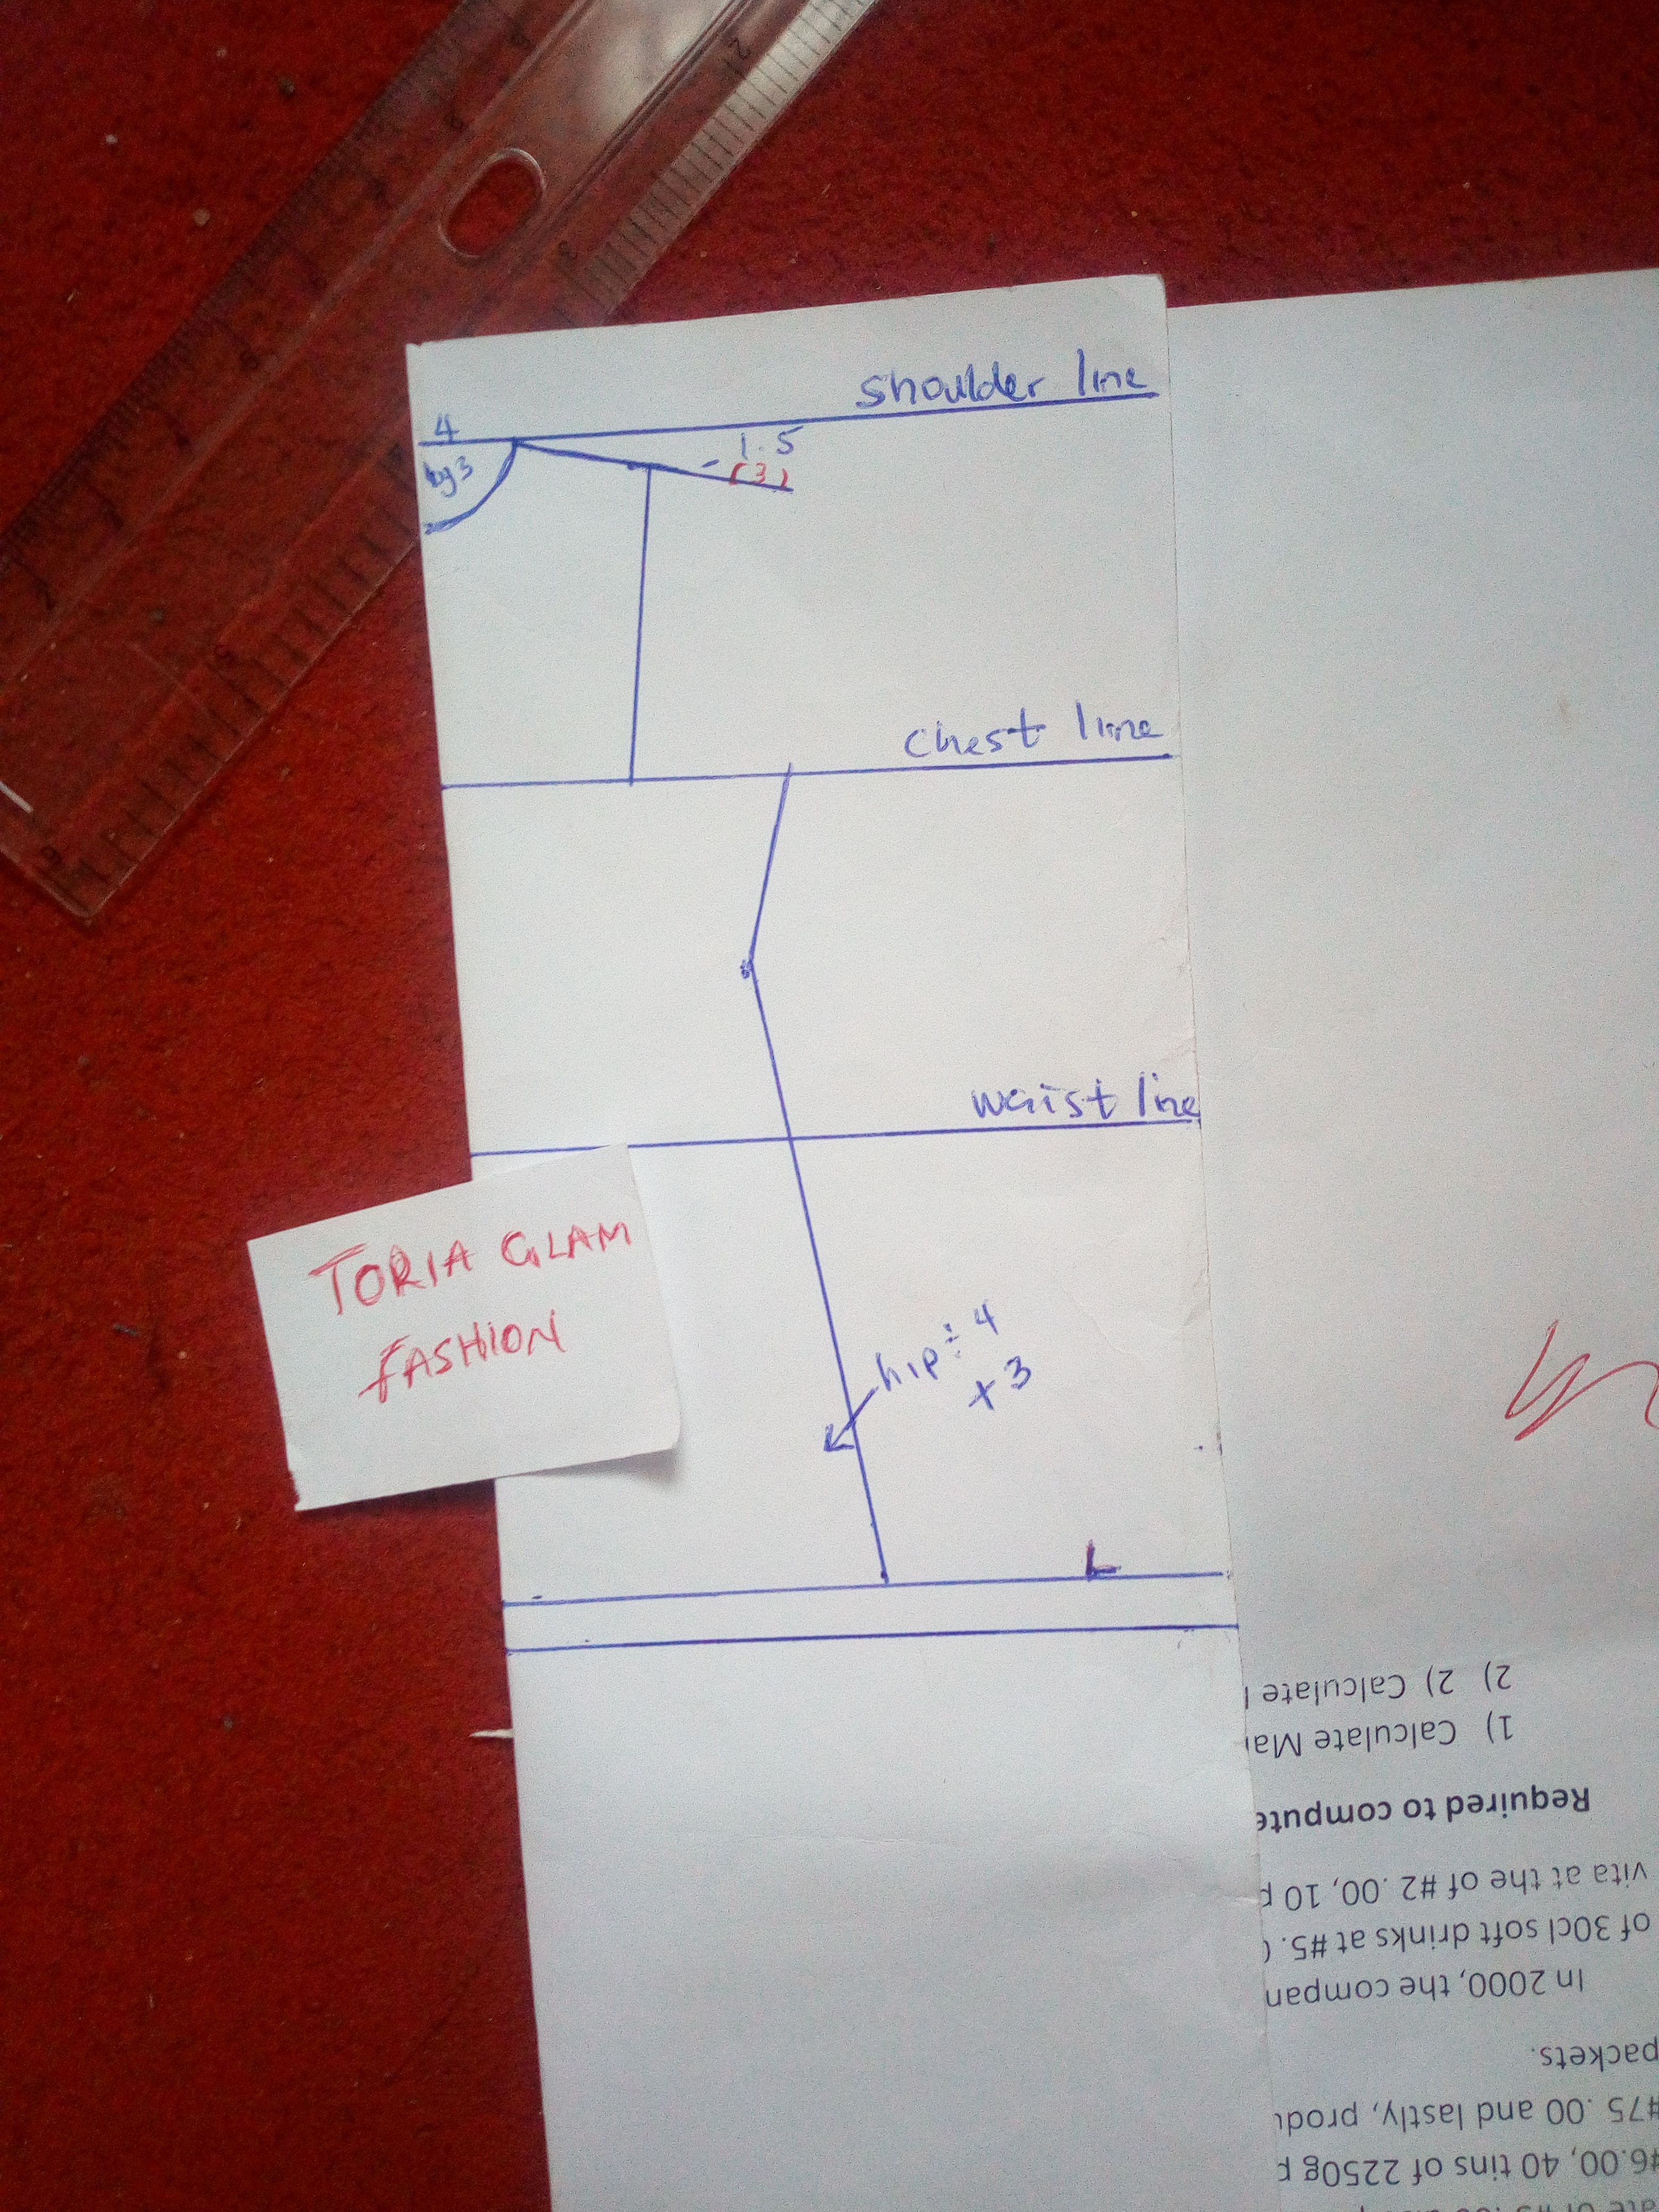
Step six; extend the shoulder measurement by 3 inches.
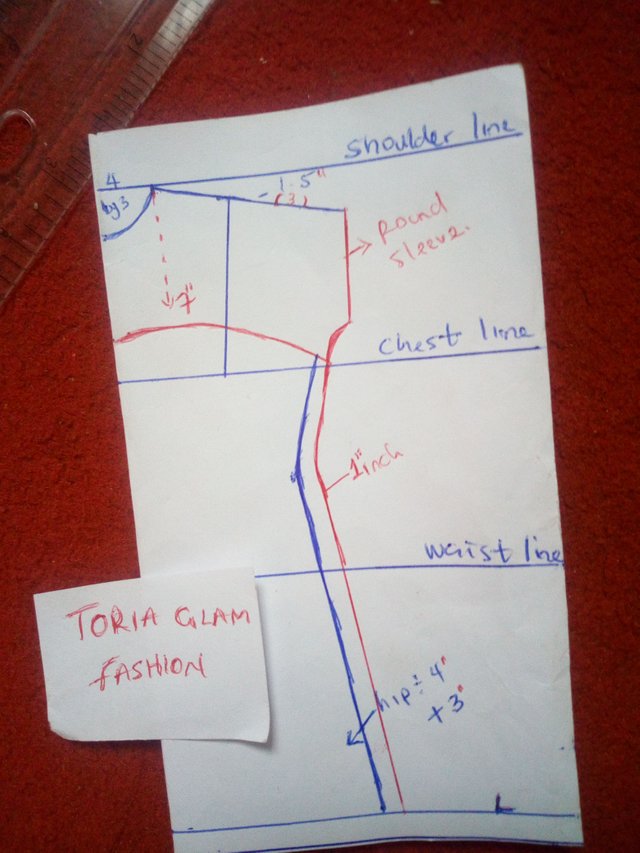
this extension will be the sleeve.
from the shoulder line come down by 7 inches and draw a curved line from the center front to 3inches under the chest line.
From the shoulder slope extension use your round sleeve measurement and connect it to the hem adding 1inch seam allowance.
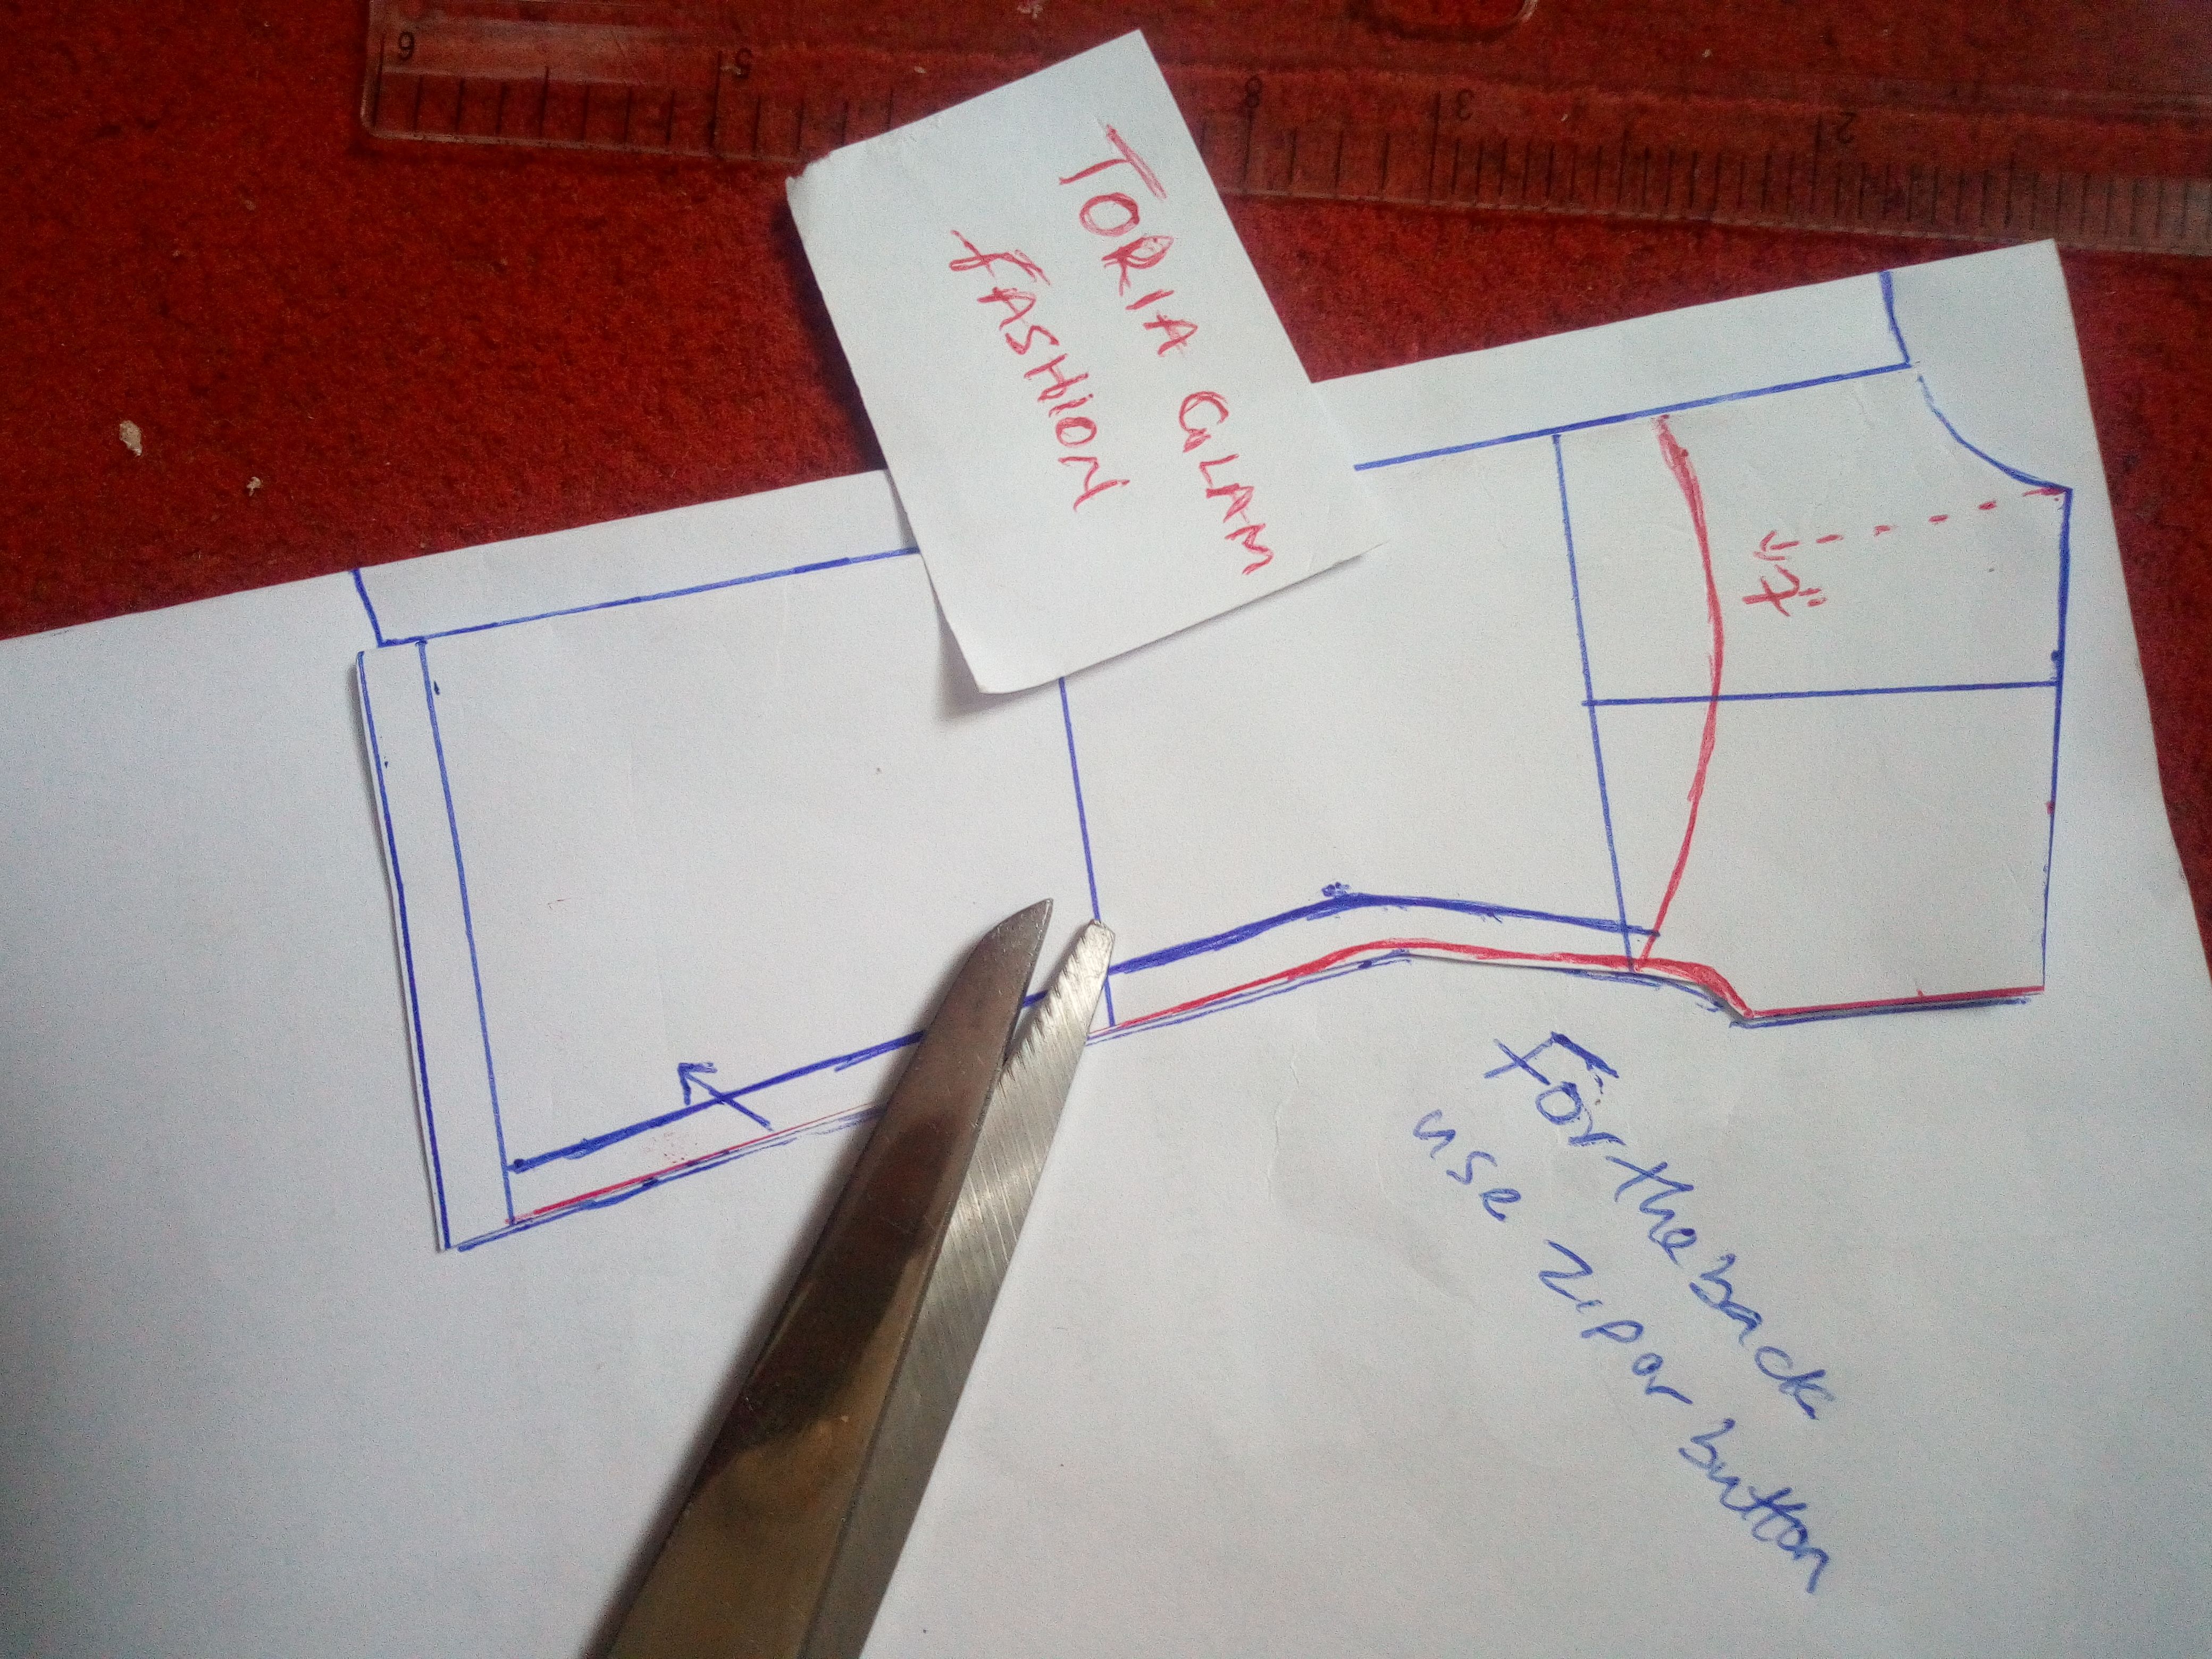
Cut front pattern and place it on another folded fabric, leaving a zipper allowance of 1inch.
Note: you can use button or zip as desire.
You can make your front and back neckline equal or the back 1inch higher than the front neckline.

Cut front and back pattern out, you can separate the top (upper part).
Place the front fabric on the back and cut the curve line.
Note: I will advice you do this on a paper so you could add seam allowance to the top.

Cut out front and back pattern, allow your creativity to lead you.
Note: You can play around with different prints of Ankara fabrics.

For the pocket, fold your fabric, from center go horizontally by 7inches, from the 7inches come down by 5inches and stop. Make the pocket length 9inches
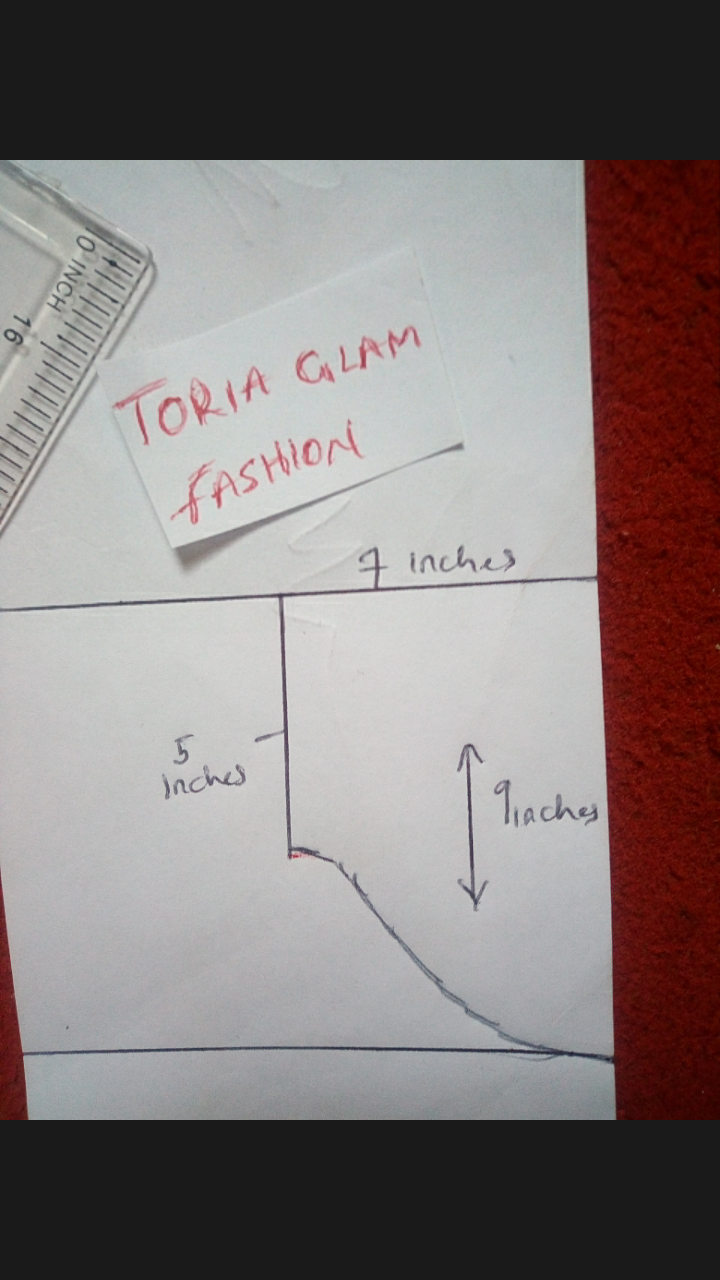
From the 5inches mark, go in by 1inch and curve the line as seen in the above illustrations.
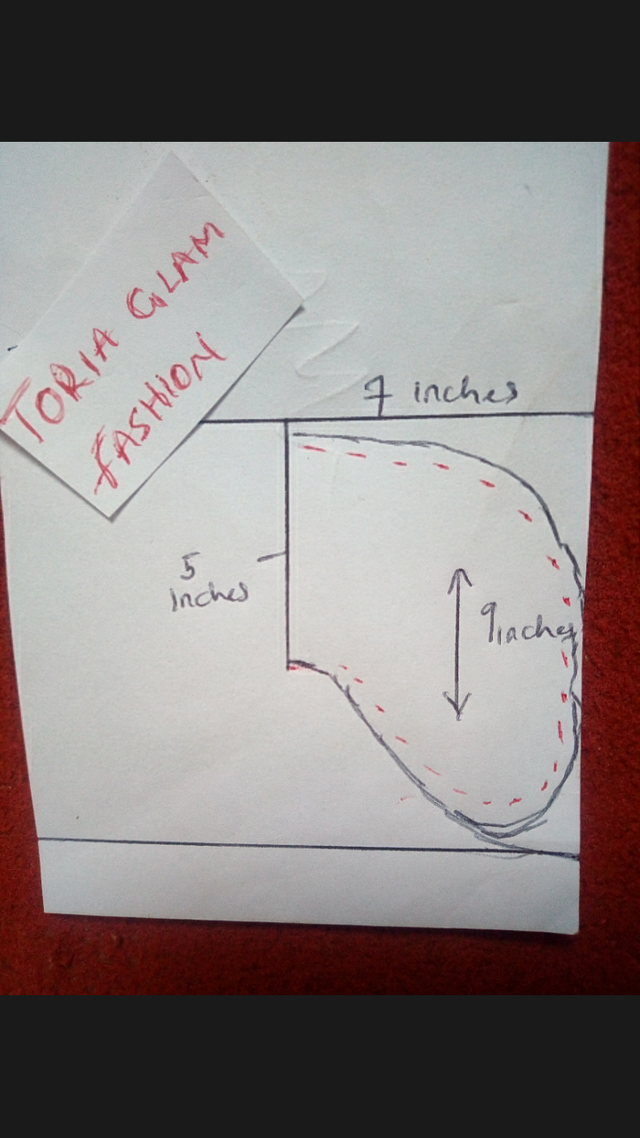
On the red dotted line is where you will run your stitches.
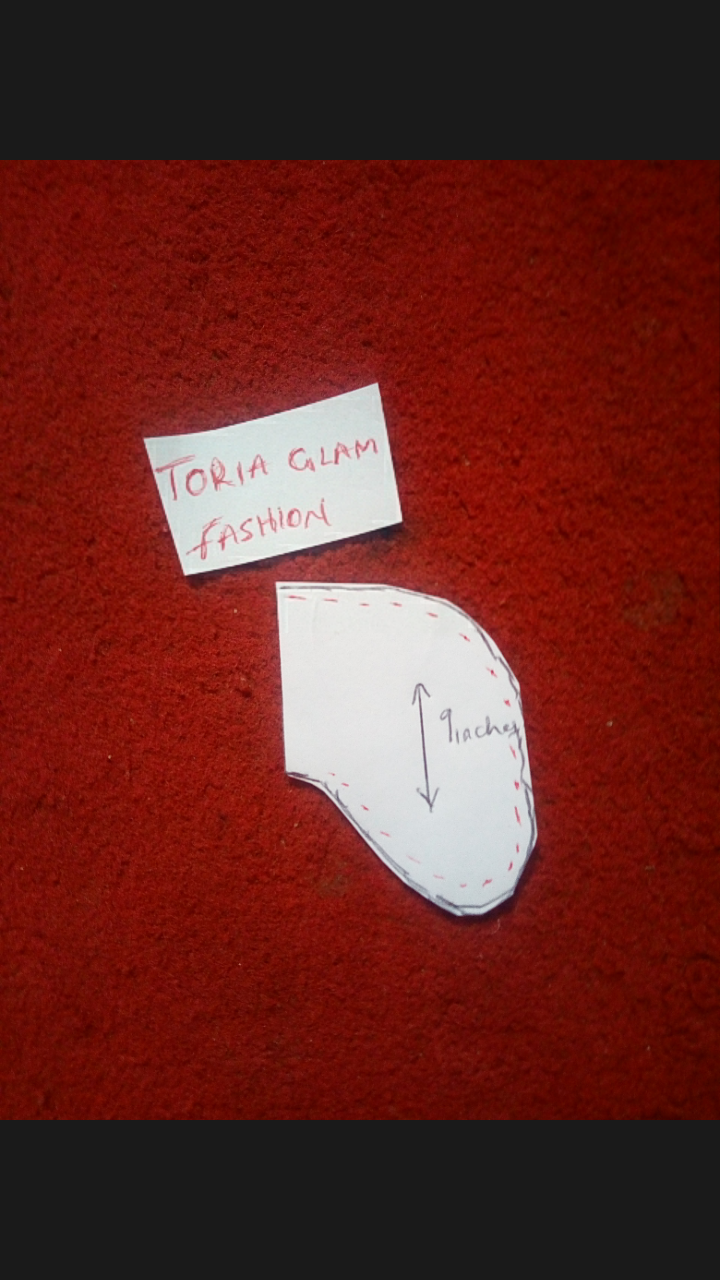
Your pocket is like this when you cut it out.
Come down by 10inches under your armhole to fix your pocket.
Thank you i hope my English is simple enough. Don't forget to upvote, comment and resteem. I appreciate your visit to my blog.
All other picture: my phone(techno L9 plus)
I remain @arogboolabisi stay bless.
Hello! I find your post valuable for the art community! Thanks for the great post! ARTzone is now following you! ALWAYs follow @artzone and the artzone tag, and support our artists!
I like your tutorial and your effort.
The image of a model is from the web, in these cases you must cite the source. You can edit and make the adjustment.
Its my pleasure to make the tutorial @teardrops thanks for the comment i have done the adjustment as been mentioned.
This is really amazing...am already feeling like a fashionista, with the laid down step by step procedures...this is wonderful, kudos dearie
Awww thanks, very soon you will be. Just run along thanks dearie.