The Supreme Naga- New Work (13 Photo Creative Process and Bonus Content)


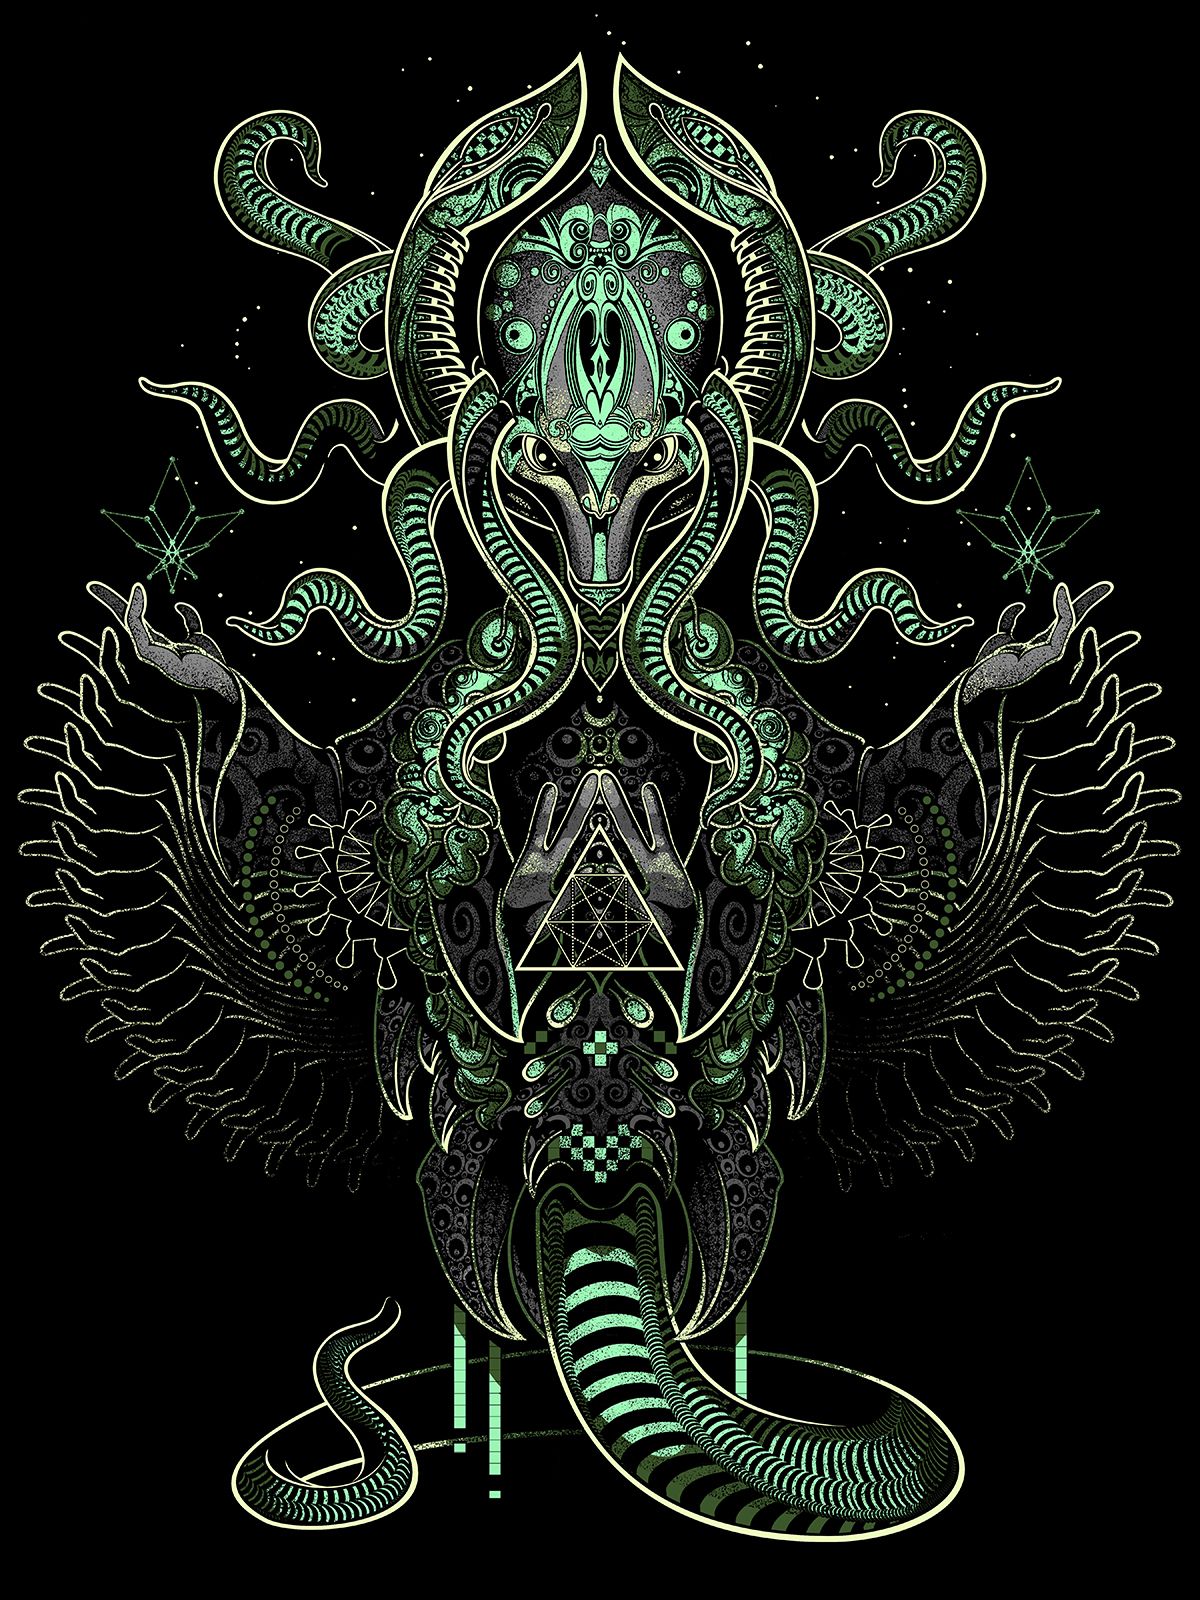
The Supreme Naga
My client, friend and the creator of https://www.po10cdesignstudio.com, Ricky Munwani, recently approached me with a design idea for my 6th Po10c Screen Print. As you will see below, the design evolved quite significantly throughout the creative process and instead of an Alien Fruit we ended up with an upright humanoid creature, The Supreme Naga.
You may know that screen printing is a laborious art form both at the design stage and production level. Great care is taken to limit my color and value usage as to not overload the printing process with numerous screens, and to keep costs relatively manageable overall. As if this weren't limiting enough, every pixel must have 100% Opacity. This means that there are no airbrush-y fades nor smooth, digital gradations. This constraint has proven to be a significant catalyst for innovation. I have developed some techniques and brushes that simulate gradation and I employ an arsenal of patterns to break up thick blocks of color in order to achieve a semi-psychedelic feel. Having the digital tools and the technical know-how allows me to do my part to streamline the process for everyone beyond me in the chain of development.

Sketched Assets
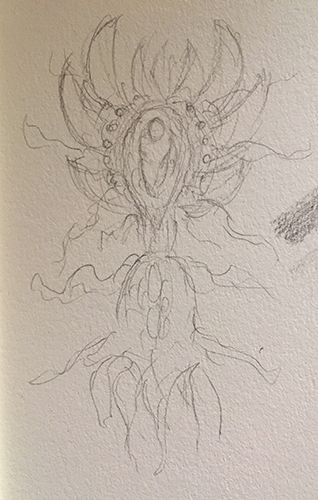
The Original Thumbnail
This was a minute short, 3 inch sketch of the original vision. Nothing to it, just a way to codify the imaginary aspect into form.
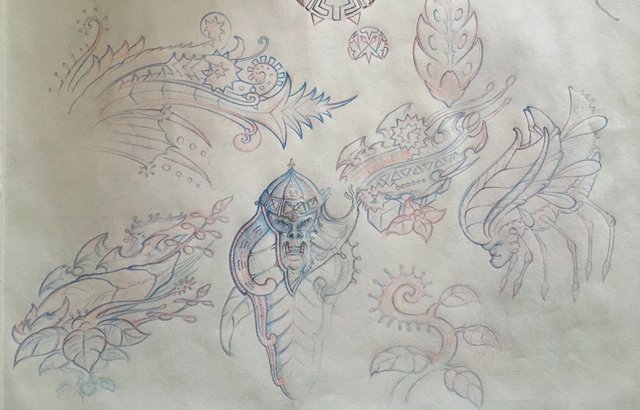
Various Psychedelic Forms
I compiled several pages of sketches created after DMT trips and dreams and mental meanderings. These were to serve as a launch pad as I intended to mash up these elements into some type of synthetic organism.
Into the Matrix
I begin by chopping up little portions of my sketches that I think will fit the idea that I have in mind and organize them in Photoshop. At this stage I know little of where I am going and use the time to explore interesting connections between forms.
I invert the values to receive an "x-ray" with my contour lines now appearing lighter. With white loaded in a full opacity round brush- on a fresh layer- I quickly line the image.
The Pen Tool is of key importance for this next phase. It is critical in order to create smooth Bezier curves, sharp points and clean lines. Please refer to my massive breakdown of my image "Heyoka" to understand more of how and why I use the Pen Tool.
https://steemit.com/art/@elohprojects/huge-full-power-creation-of-uv-reactive-screen-printing-design-step-by-step-time-lapse-video-process
After I am satisfied with my linework I start to add tesselating textures using the Pattern Pen in Corel Painter. Again you may refer to my Heyoka post for a deeper look at how that works.
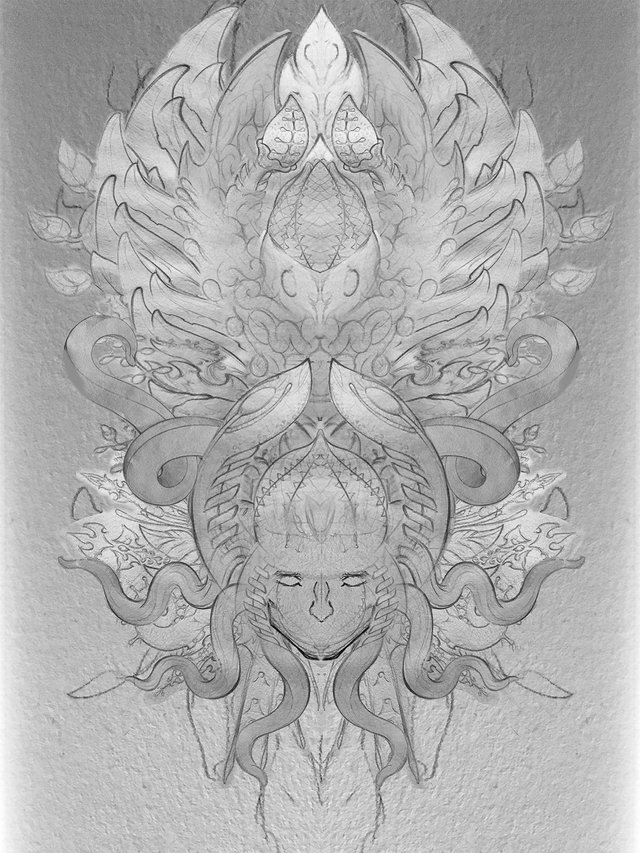
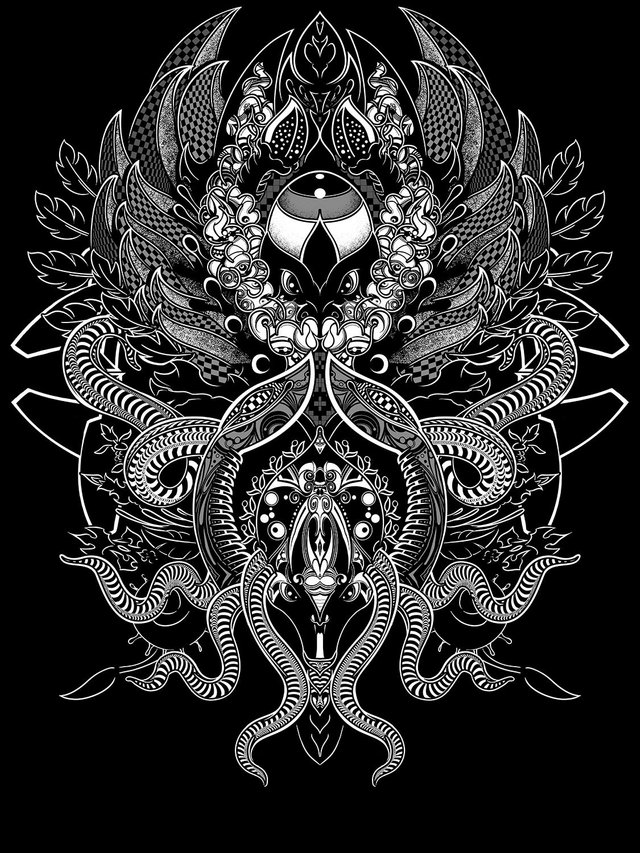
I continue to add textures that will serve as the basis of the rhythmic detail. This is the last iteration of my original idea.
I am unsatisfied with the bulky quality of the design and begin searching for more elegant solutions. As I begin to feel more uncomfortable with the overall product I notice that the bottom half of the image has a distinct character right in its center; something that looks like a gorgon (Medusa).
I decide that the strongest course forward is to abandon our initial idea and to seek equilibrium throughout the design by elevating the strongest elements to the top of the hierarchy and by extension, the top of the image.
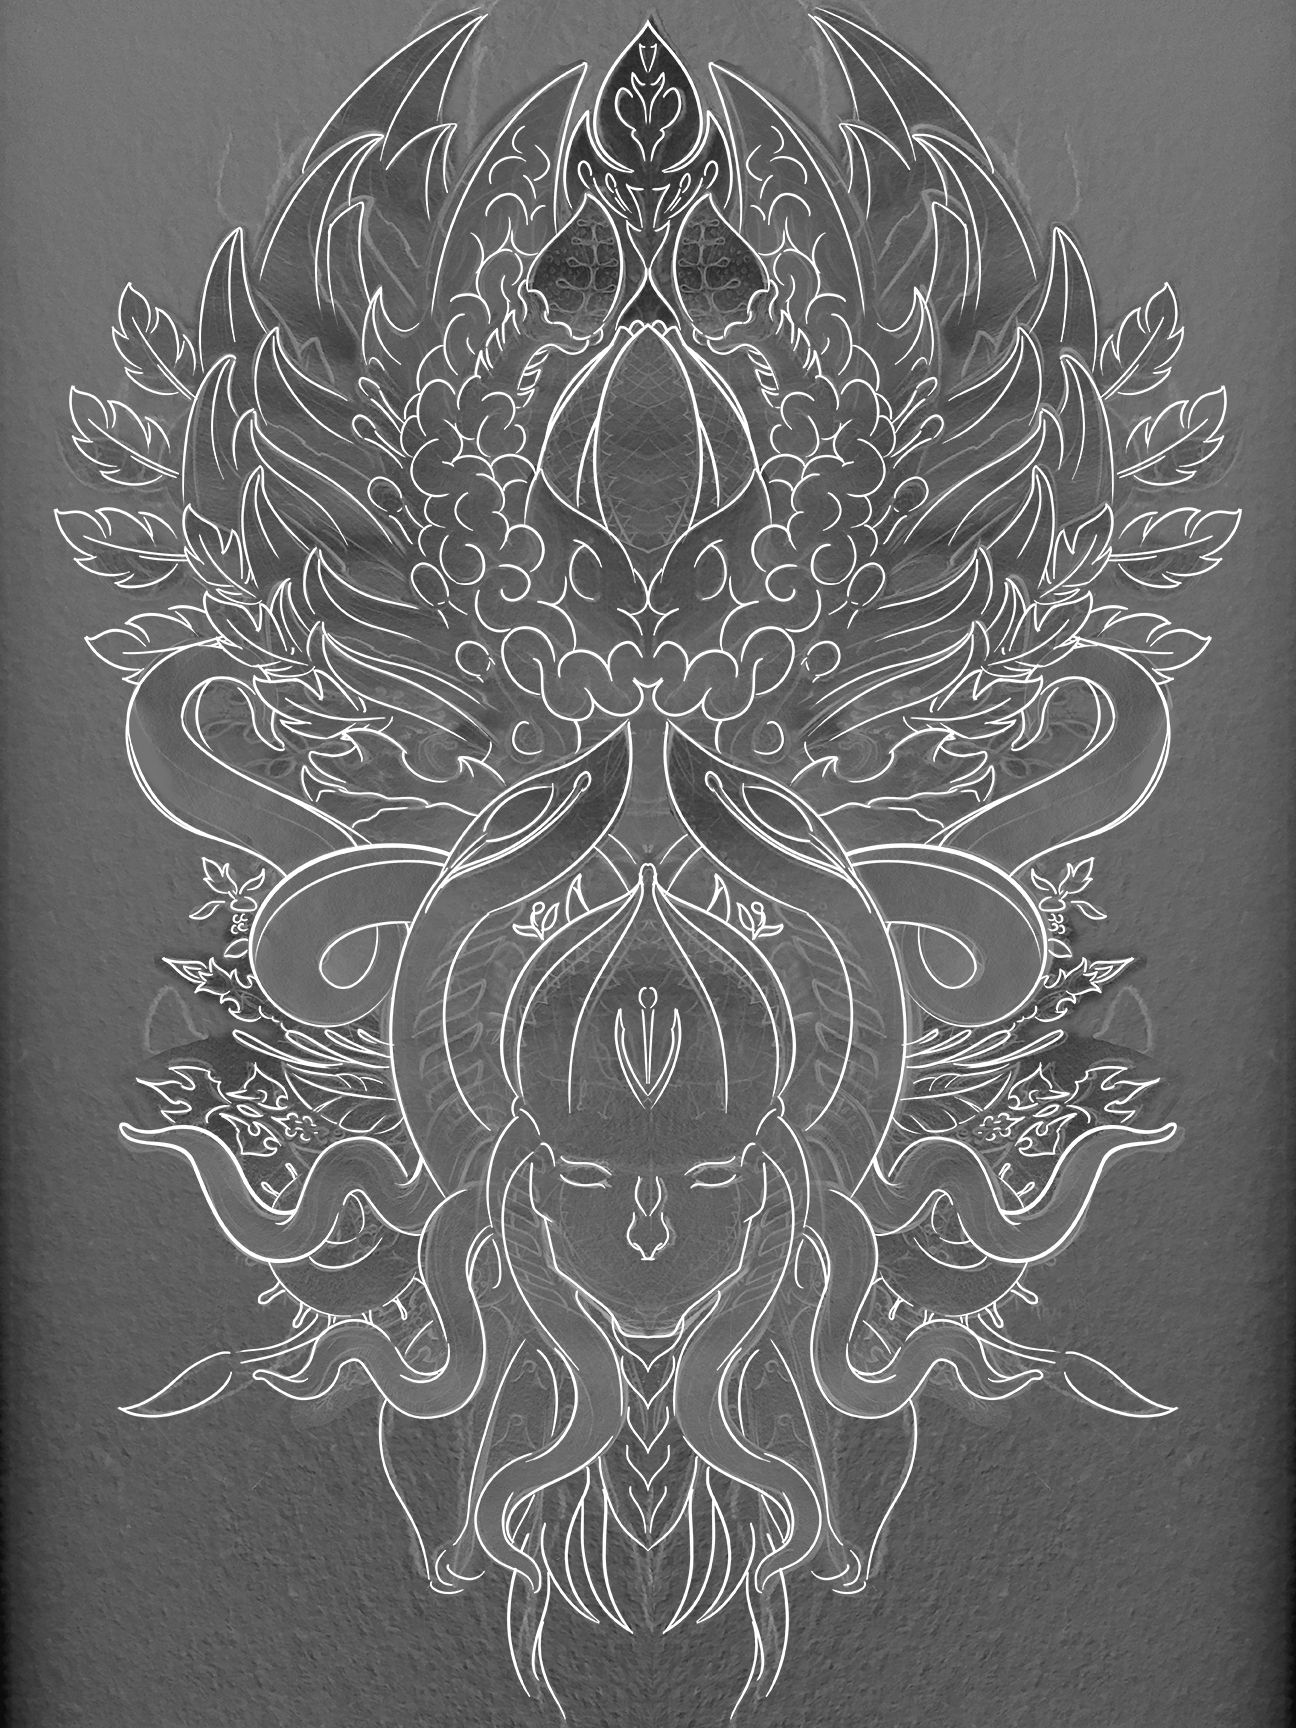
This is the result.
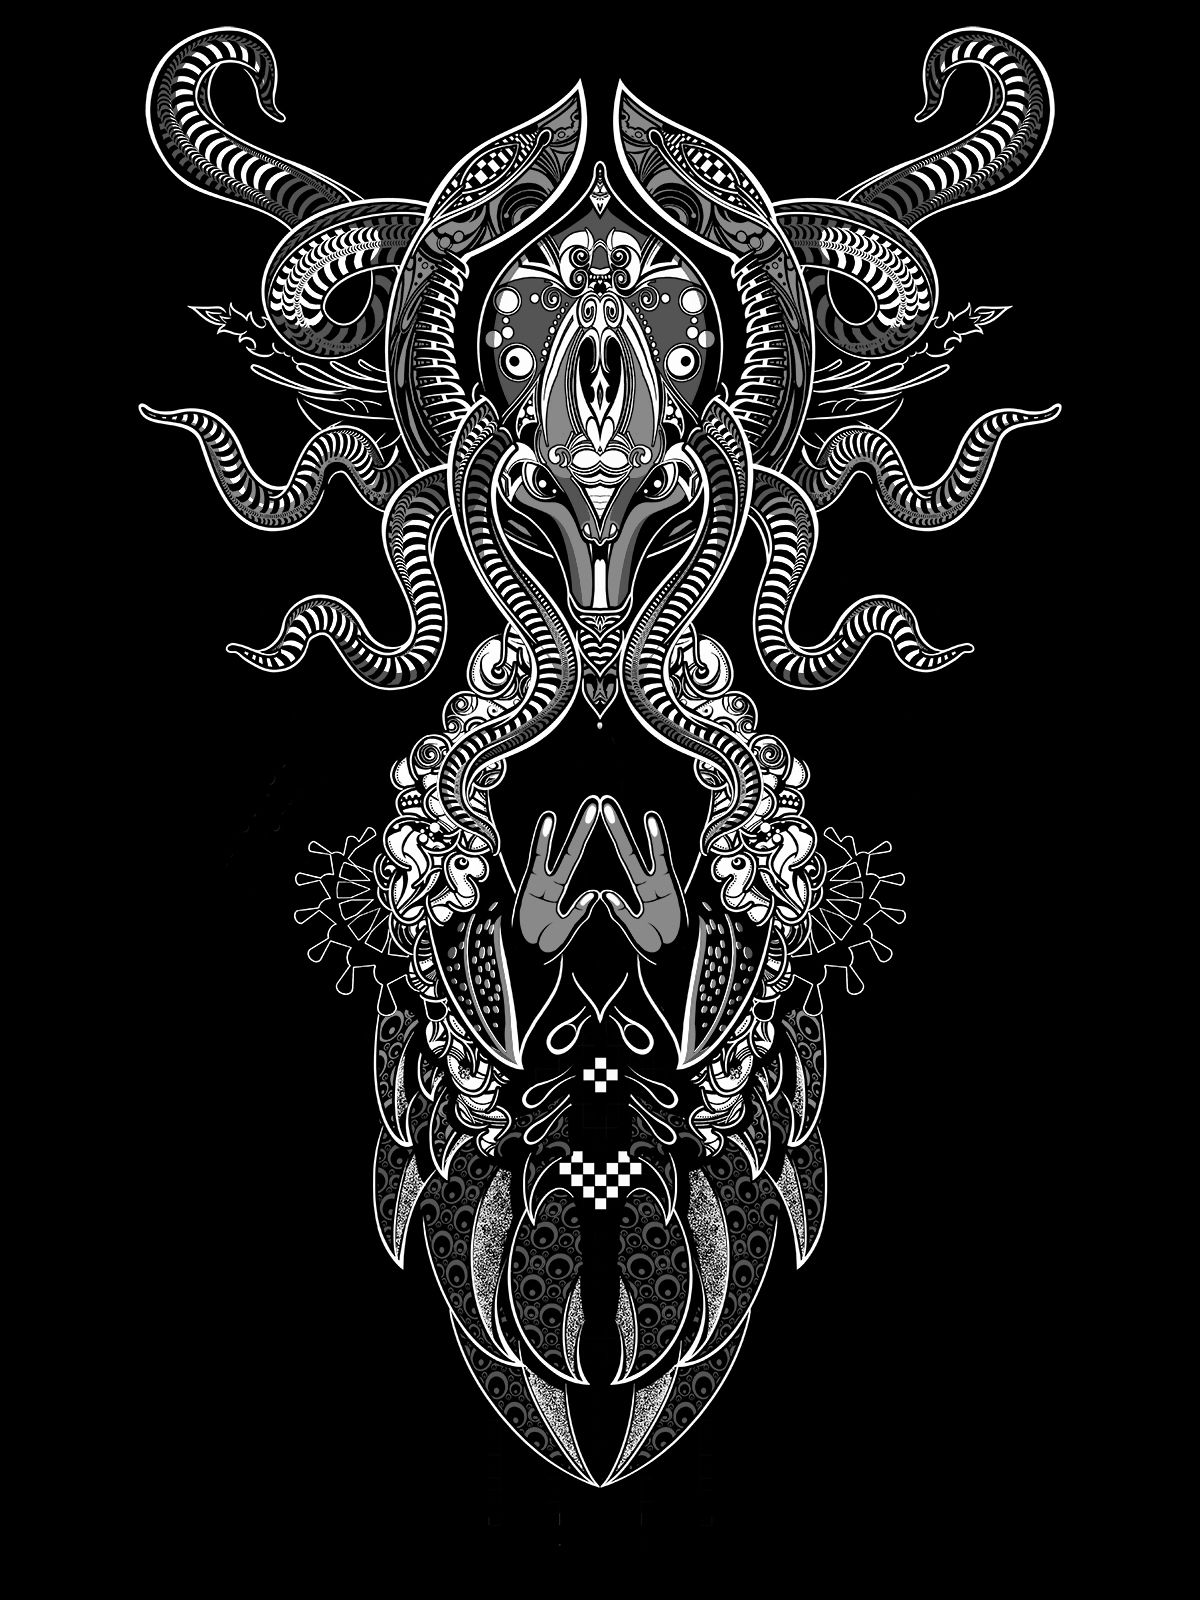
At this point I feel a solid level of relief and satisfaction. Clearly the gorgon needs a serpent's body and a couple more arms to drive home the Supreme Overlord status:) These added elements allow me to distribute textures in a way that provides context for each of my earlier choices.
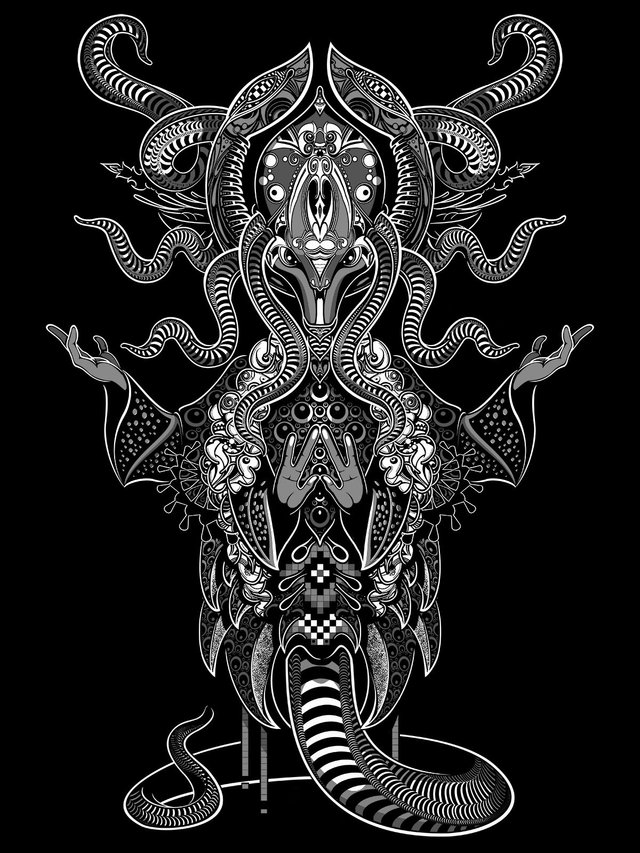
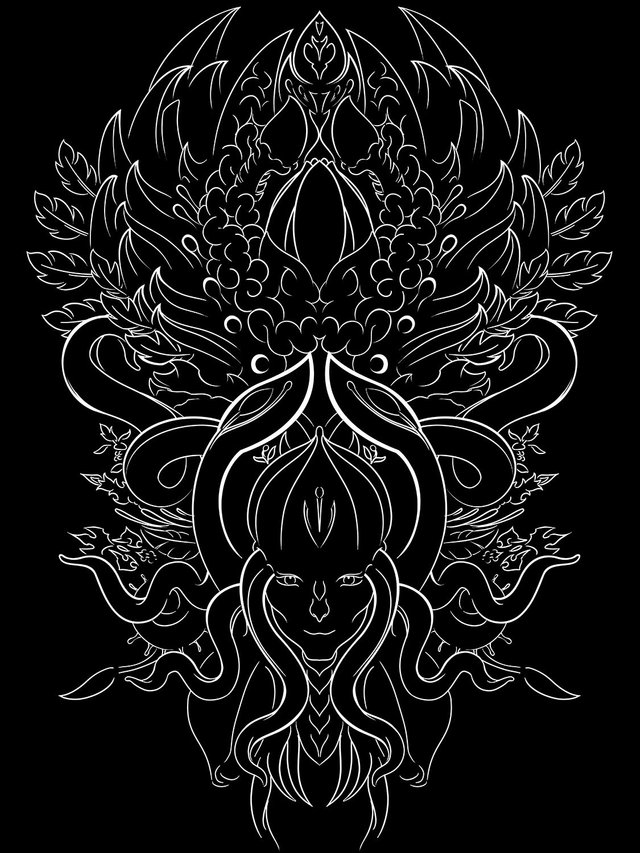
Confident in the overall design of my image I begin to paint in color and replace the large blocks of solid gray with my specially designed "Screen Shader Pointillist Brush". If you look at the dark gray on the cone of the Naga's (formely gorgon's) head you will notice that the solid block of gray has been replaced by a rough, gradiated, disintegrating texture.
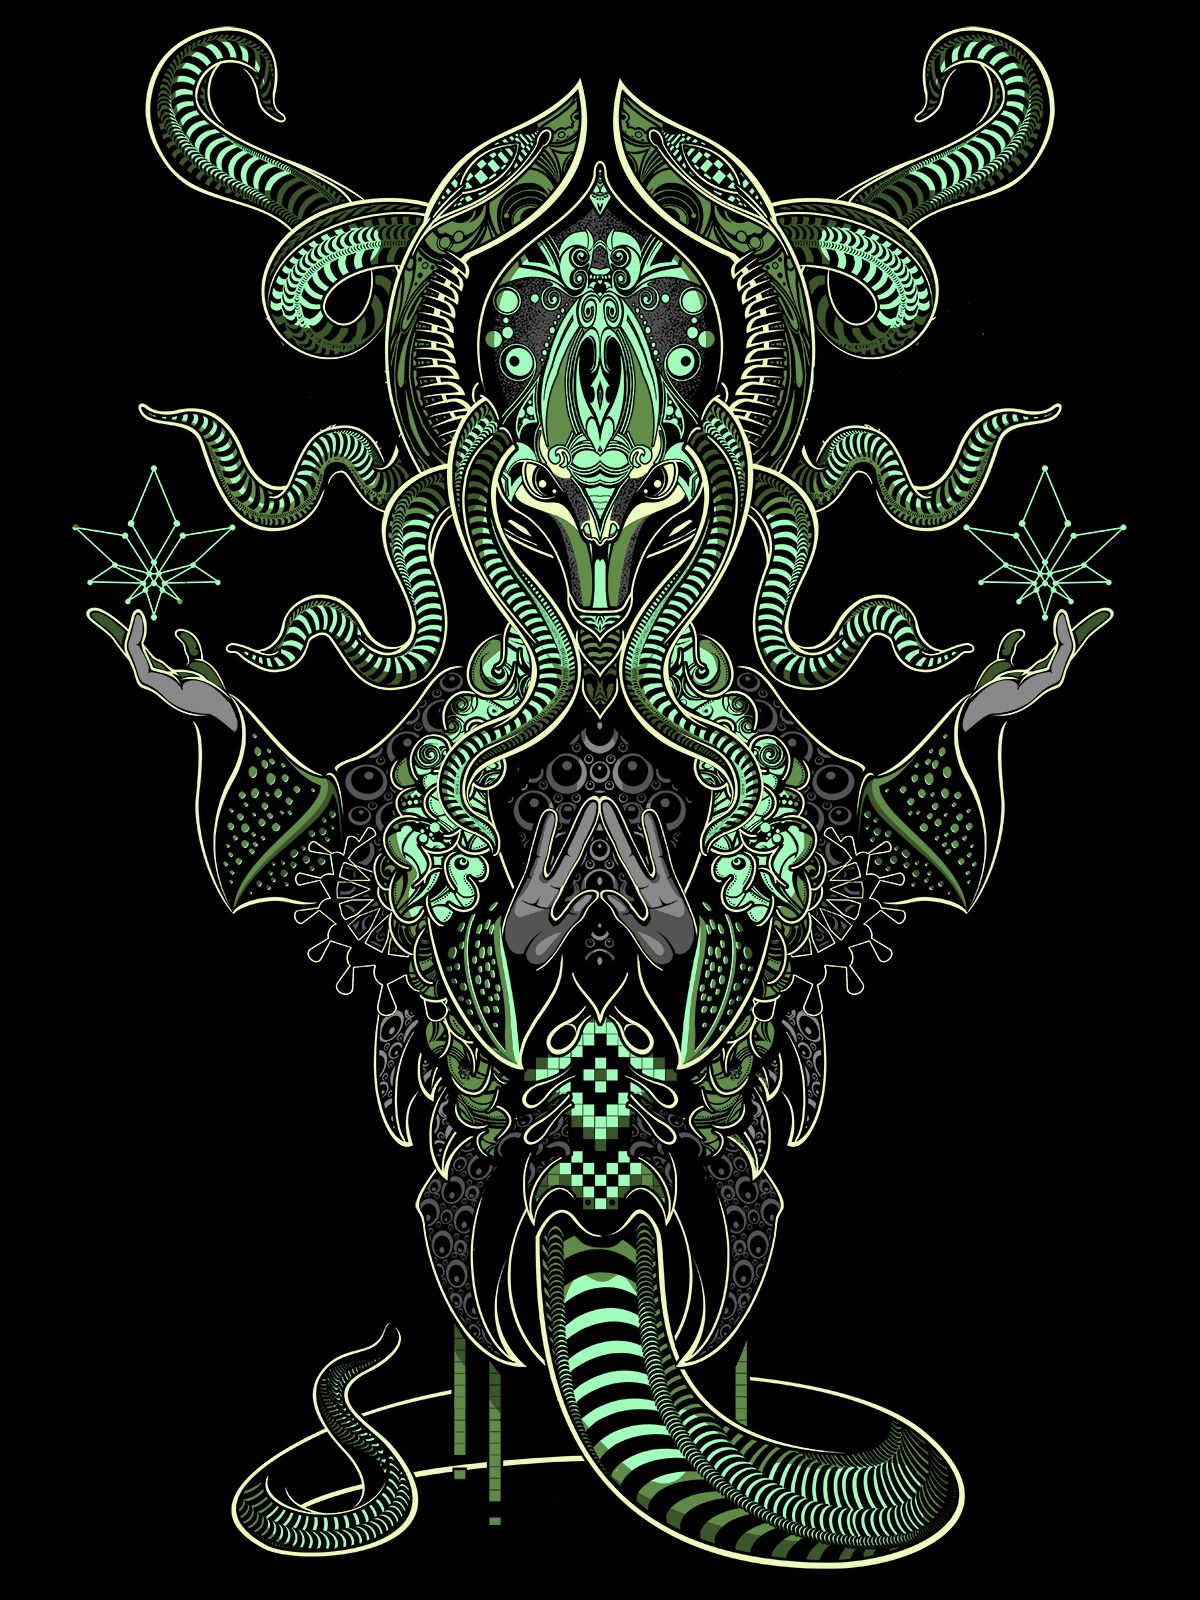
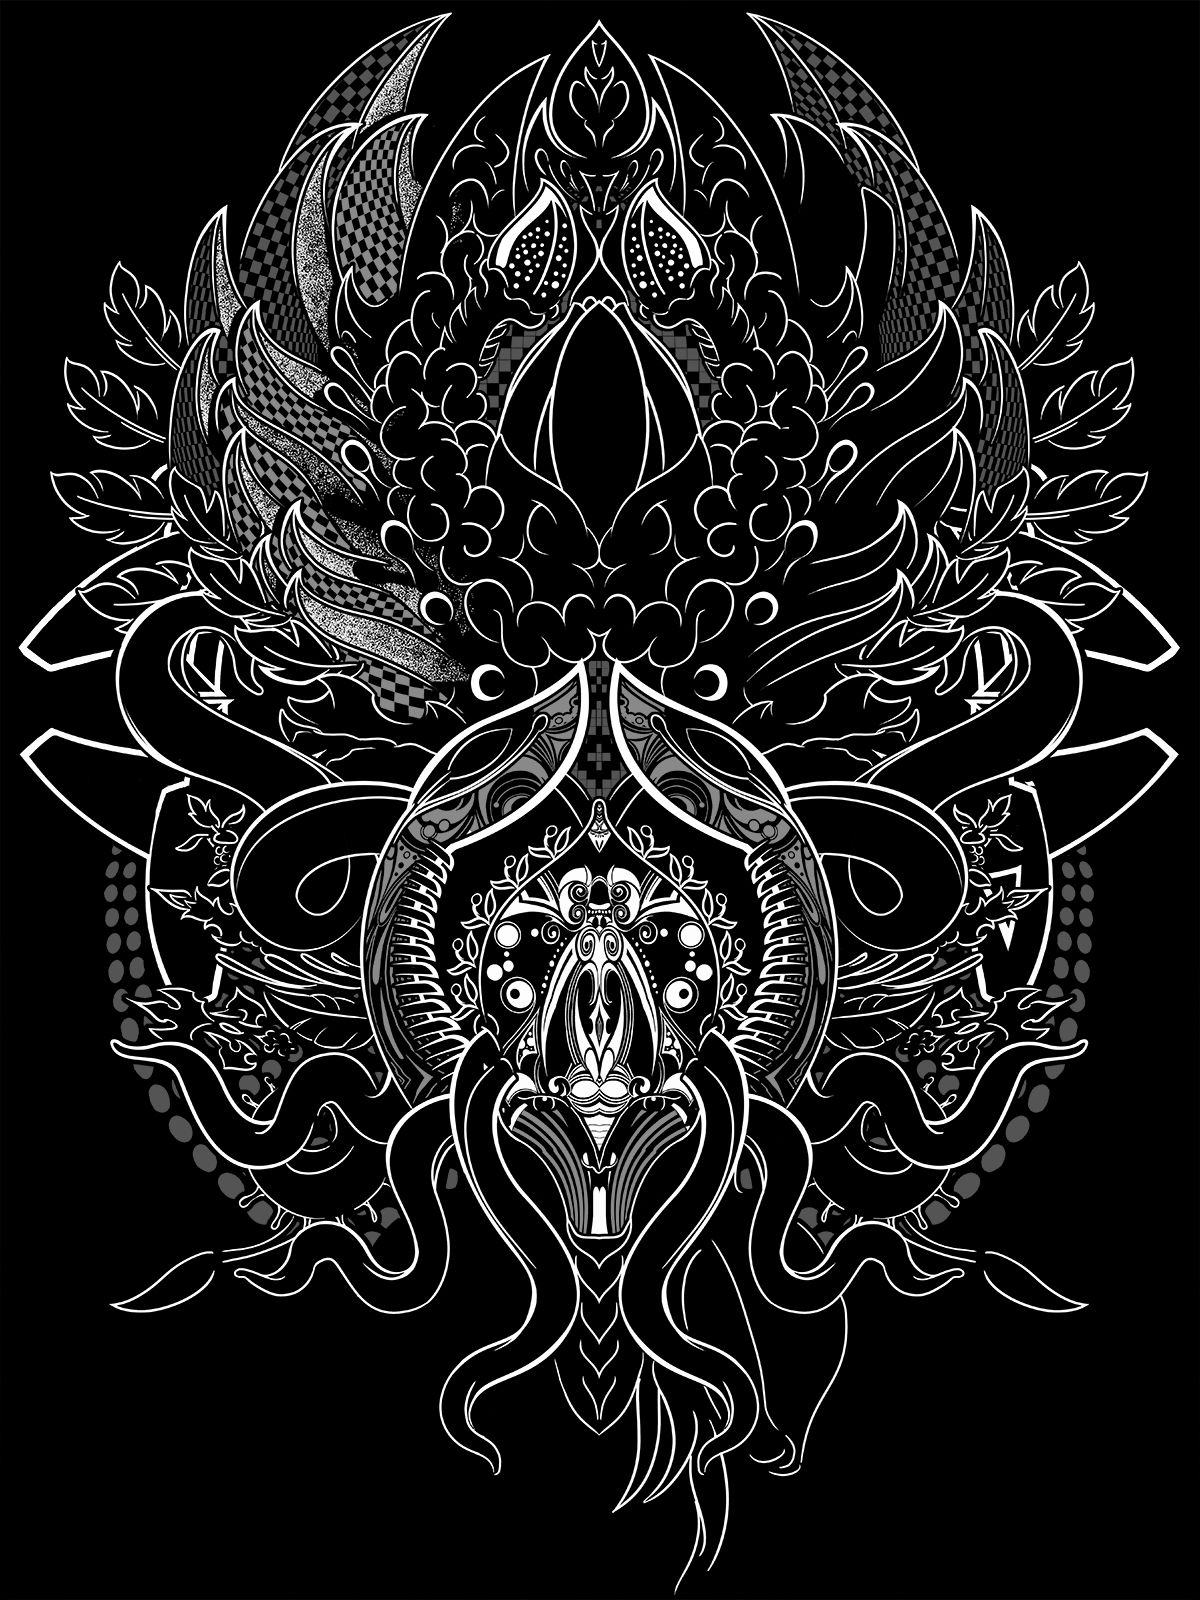
FINAL
Below you will see that nearly every block of color has been transformed into pointillist, shaded gradients. Textures have been replaced in areas in order to better compliment the integrity of the textural rhythm and all of my colors have been separated into their own layers. I add some stars and some simple FX to the background and finish off the "Illuminati Confirmed" hand gesture :) Lol
The Supreme Naga
That's All Folks
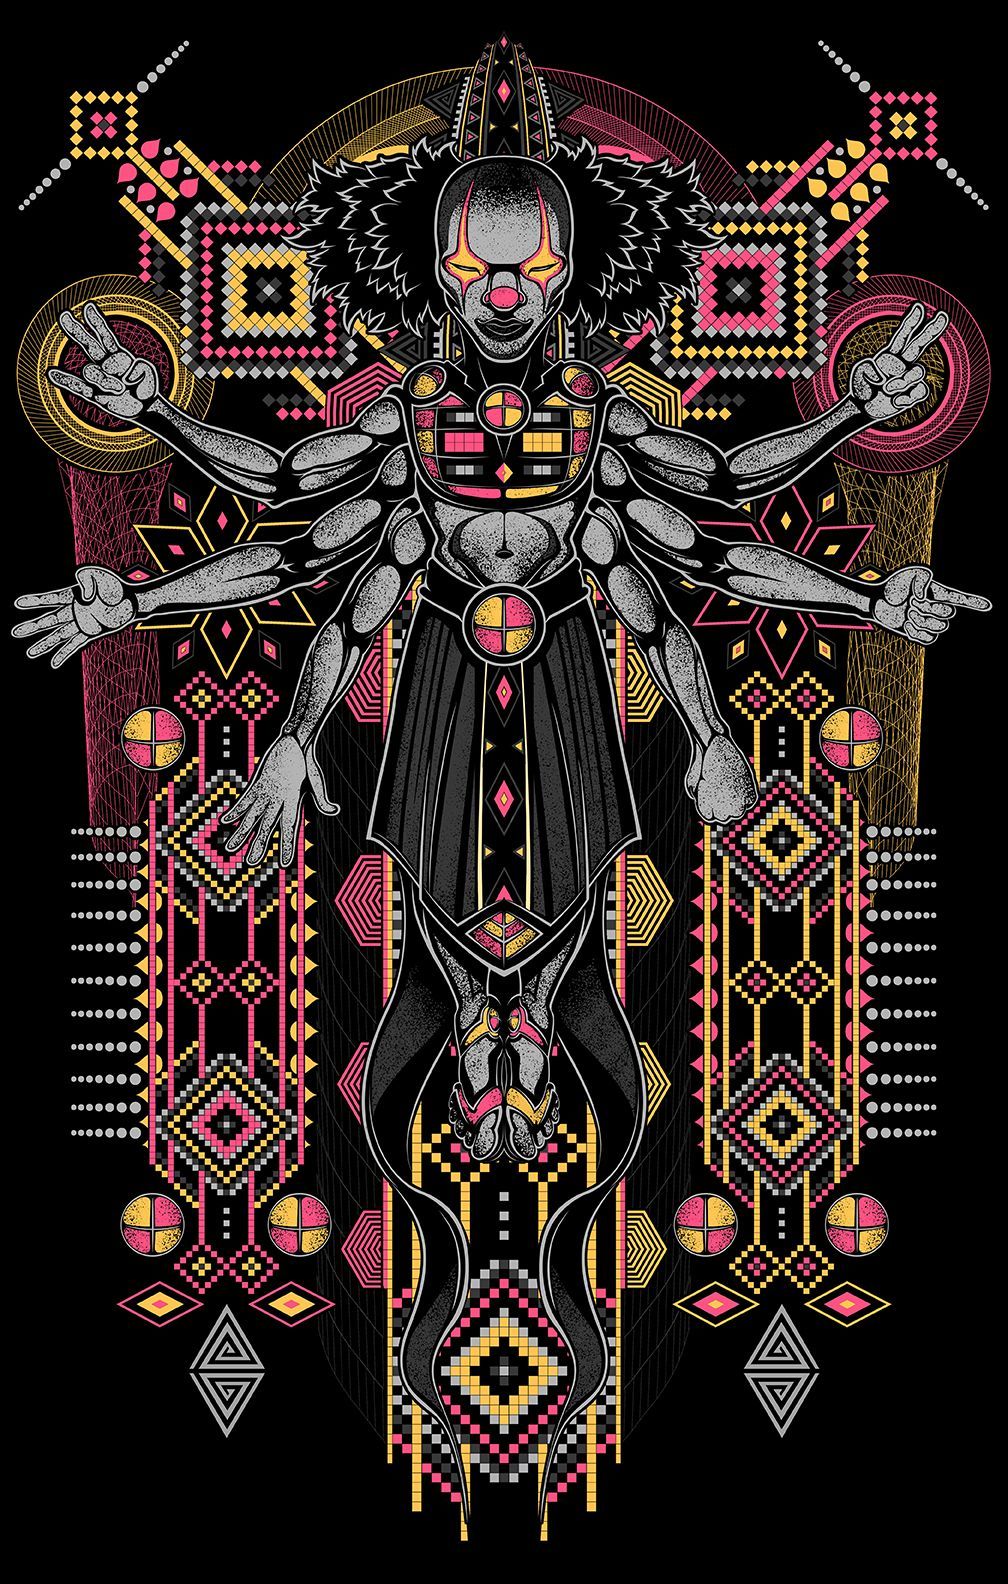
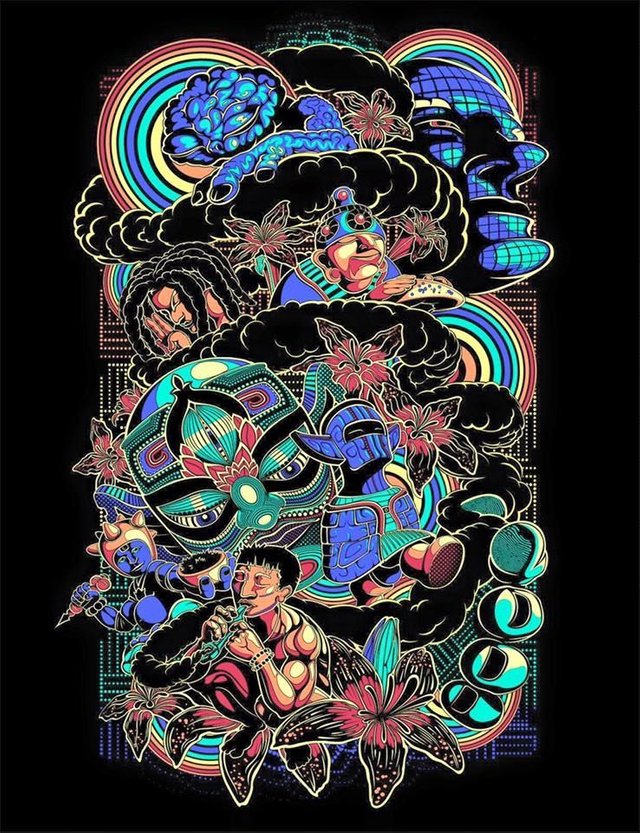
I hope you have enjoyed this walk through of "The Creation of The Supreme Naga". Perhaps you have gleaned a smidge of insight? Below you will find a couple other of my screen works designed for Po10c Design Studio.
Heyoka
Exhale
For deeper insight into my process please watch the attached "Heyoka Process "video.
And read my huge, behind the scenes Steemit post on Screen Print Design here
https://steemit.com/art/@elohprojects/huge-full-power-creation-of-uv-reactive-screen-printing-design-step-by-step-time-lapse-video-process
Thank you as always for your generous support and I do hope to interact with you in the comments.
I make my living as an artist so my family's livelihood depends upon my success. If you would ever like to discuss potential projects, provide feedback or just interact you may reach me at [email protected]
And on the off chance you feel the love and generosity and would like to make a donation to my career and my continued ability to contribute to the overall value of Steemit, I have provided my Bitcoin and Ethereum wallet addresses below. Please do not feel obligated as I have no expectations. But anything and everything is massively appreciated.
BTC

ETH

THANK YOU FOR YOUR TIME AND ENERGY
Kind Regards,
Sean


This design is awesome! I loved all the sketches you did while developing the idea. The process is very detailed. So much useful information here too. I've been wanting to do more screen-print style artwork. Great work! Following to see and learn more
thank you for sharing. loved to check the process! kudos
You've received an upvote from @slothicorn! Click Here to Learn More
(@playitforward)
Thank you @slothicorn and @playitforward.