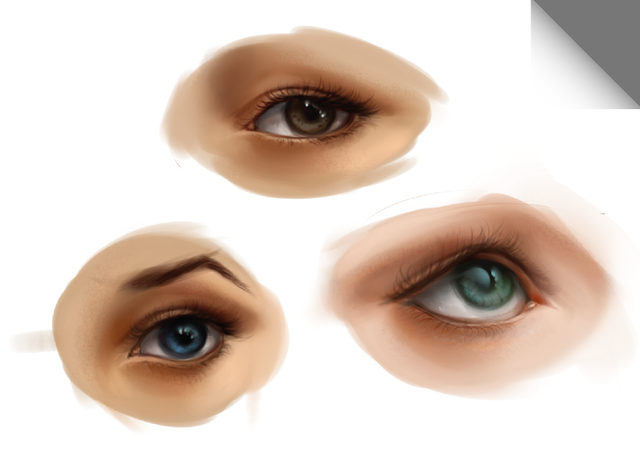
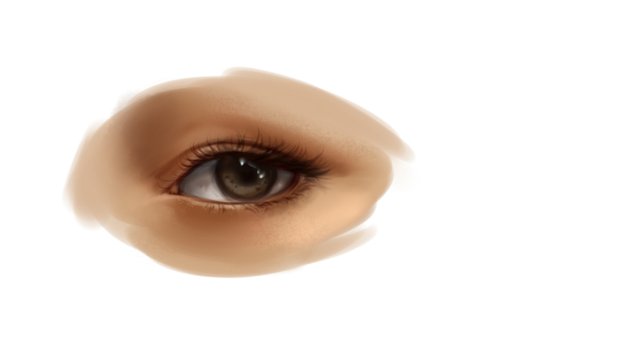
🍀🎨Artistic Process #3 - Learning the eyes values.
This will be the second part of a class or tutorial that has helped me improve more in the art world. Here I will present the side of the values and colors of the eyes, in order to understand them better... or get more confused 😂, warning: it is better if you have already a basic understanding of light and shadows.
If you would like a better understand of the structure and anatomy of the eyes, here is the first tutorial on the subject.
Just click the image, there won't be a jump scare 😉
Now, if you already know the basic structure and knowledge, we can go to the most complicated part of the tones and values, we will probably suffer all here ... 😉
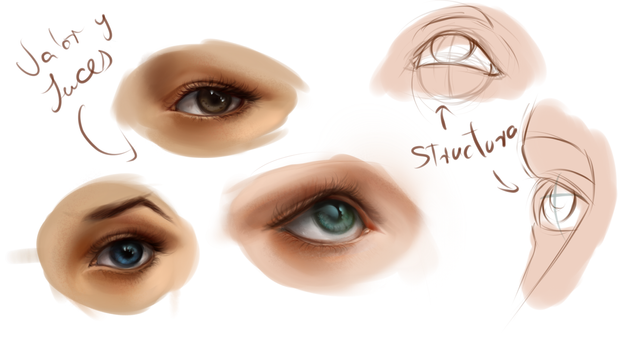
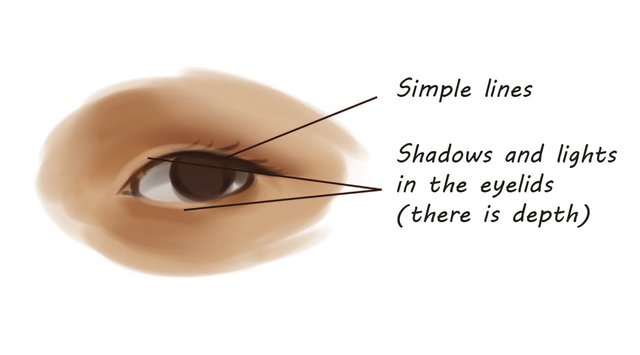
Before starting it is good to review the main areas of the eye and those that we should least forget.
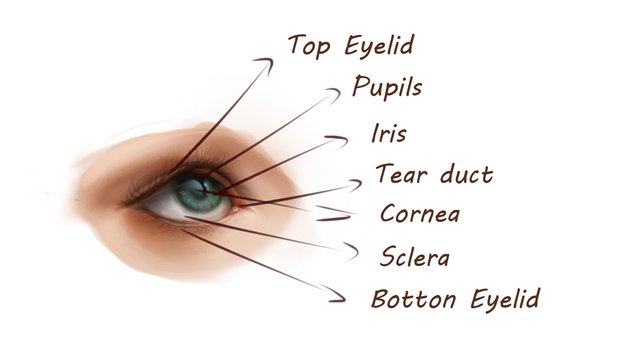
-Top eyelid.
-Pupil.
-Iris.
-Tear duct.
-Cornea.
-Sclera.
-Botton eyelid.

Valors
To paint well any part of the body we do not need a lot of knowledge of anatomy but a greater knowledge of forms, lights and shadows.
Although I will not go into depth with this issue as it deserves its own post, I will talk about the most basic and the ones we must take into account here:
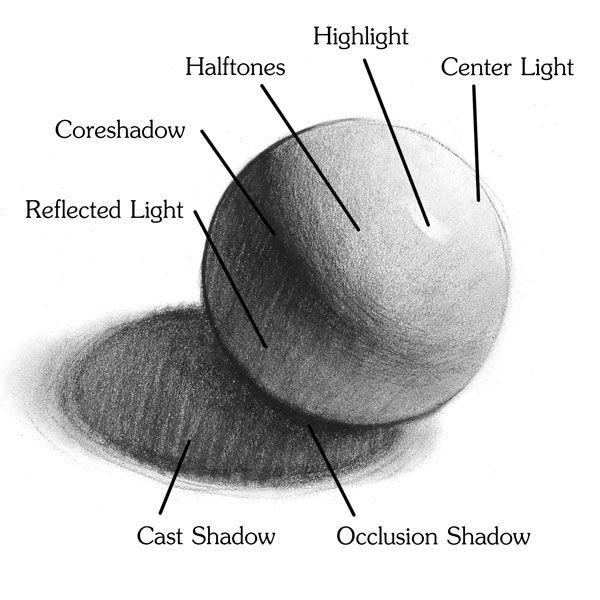
Center light: It is the area where the light will fall directly.
Core shadow: It is the second darkest area (after the occlusion) and tends to be found between direct light and reflected light.
The reflected light: When one object is close to another, the latter will tend to reflect a short light on the nearest side; an example is the lower area of the ball where there is a small brightness below. It is of great importance to remember it, without it you do not feel depth.
Halftone: This is the transaction between center light and core shadow. This is where we will usually see the textures.

Basic tones:
We start by making a basic or generic idea of everything, remember if it does not work in the basics it less will work with the details. Let's focus only on the half tones and the simple lines.
Tips
-We must remember that the eyelids wrap around the eyes, keep that idea.
-The shadows are not direct black; the shadows is where the secondary colors and lights are noticed; We have to add a tone that gradually goes to the ambient color.
-We must remember that we are working with an ocular sphere and therefore it has the nature of a sphere, it is good that we respect its curvature including in the shadows.
-I repeat: start with the basic idea, DO NOT GO TO THE DETAILS.
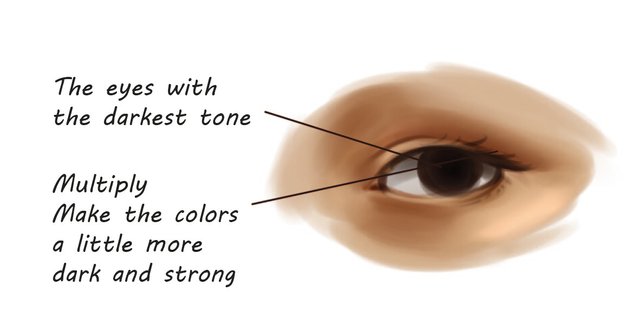
Make more contrasts:
Here we work with center light and shadows. We can do it with Multiply, Color Dodge and Overlay. (Or simply do it manually if we already have a better idea of what we want to do)
- Use the multiply for your core shadows.
- The Dodge Color for center lights.
- The overlay for halftones.
(Remember to use these with little or moderate opacity, depending on your tastes)
Tips:
-In order for the skin to have life there must be areas of warm and vivid tones. The skin is a combination of warm tones (reds, ochres and oranges) and cold tones (gray or blue gray)
-It is much easier to work from the darkest to the lightest, in the iris of the eye and in the hair is a very useful trick.
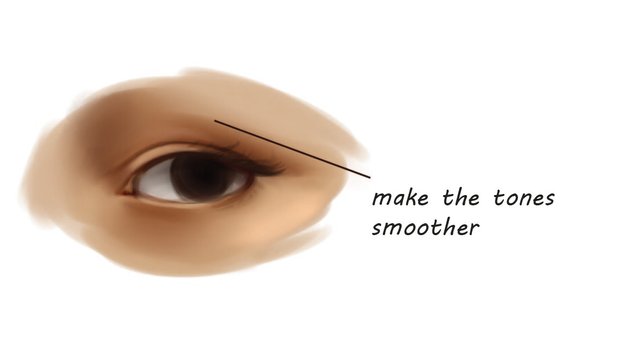
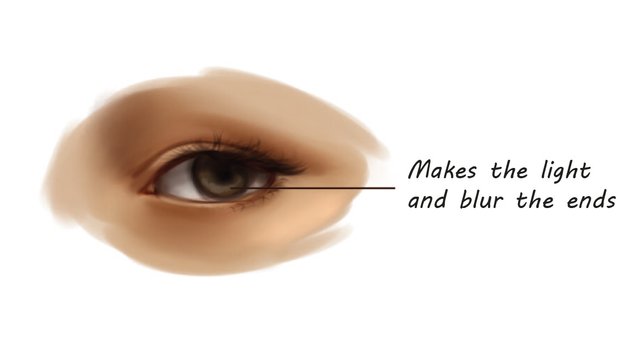
Blurs:
This is the most sweet step of all; we just merge all the previously layers and make a copy of it. With a soft brush we begin to blur the skin; when we are satisfied, just lower the opacity and let the new layer diffuse with the one below.
Tips:
-We try to maintain the difference of tones, do not exaggerate with the blur.
-Use a small medium-sized brush.
-With a soft brush we can also add a little more ambiental tones or warm tones to add more life.
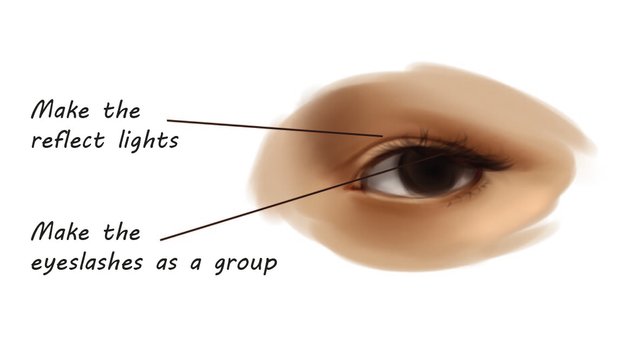
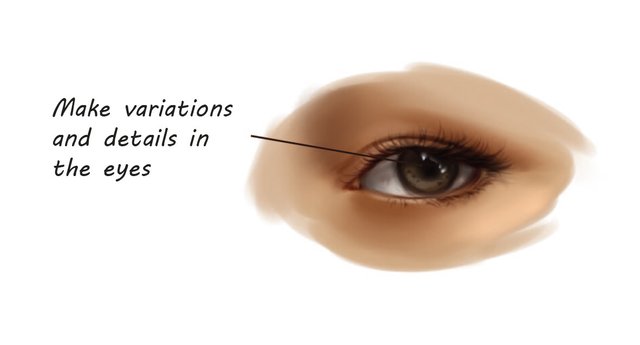
Iris and Eyelashes:
Now it is time to start with the details : D, since we have the basic tones and idea, we can make on this the details we need.
Tips:
-Don't forget to respect the reflected lights. The eye shows a little reflected light where the depth of the eye socket is.
-It is a common mistake to make the eyelashes with separate strokes; to make the eyelashes and the hair we must start with a dark block and then we break the edges with freer lines.
-It is better to start from the darkest to the clearest, not only in the eyes but also in general, here we will use it specifically in the iris.
Textures:
Now we will do what people usually to do from the beginning: D .... Please tell me that you were patients ...; this stage we can do with the color picker, a small or with textured brush.
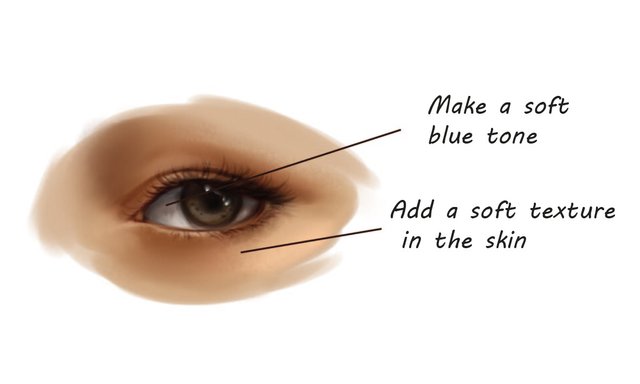
Tips:
-With Color Dodge, we add a little highlight to the upper side (the effect of the cornea) and we can blur one of the edges for a better effect.
-The edges of the pupil and iris are blurred or make a gradual change.
-Any texture is more noticeable is in halftones (in the center light and core shadow there is almost no texture or none at all)
I know it's a very complex topic, and most likely for those who already know the basics. If you need more basic information, you can always check the estructure of the eyes post 😉
gif and Process:
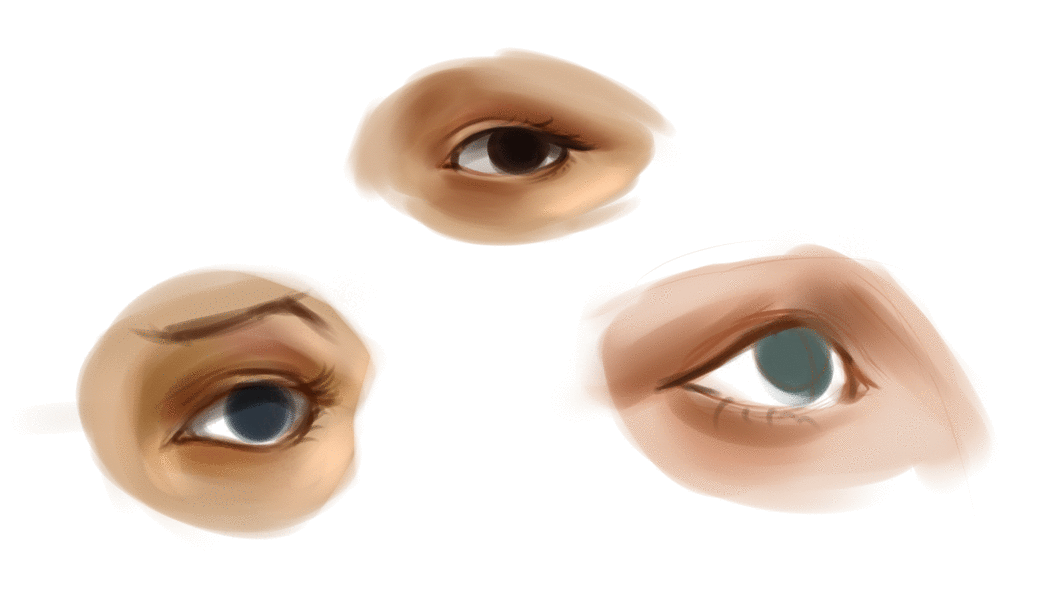
Copyright @edanya - All Rights Reserved
And I must say it is one of the best tutorials about the drawings I came across in recent times. Though drawing is an art, I really like the way how more creative you can become using simple techniques.
yes, it is true :)
it is good to understand the basic and fundamentals since they are the tools, one may use to make an artwork more interesting. They are not exactly rules, since we can use them in different ways but we can learn from them how the real world works and with that to make our draws more familiar while keeping a sense of originality :)
Dear Artzonian, thanks for using the #ArtzOne hashtag. Your work is valuable to the @ArtzOne community. Quote of the week: Art, freedom and creativity will change society faster than politics. -Victor Pinchuk
This post was shared in the Curation Collective Discord community for curators, and upvoted and resteemed by the @c-squared community account after manual review.
I find this post very didactic as a good tutorial should be! You were so extremely detailed during the process that even a non-illustrator like me can understand, though it is a complex topic as you said, you make it understandable! Great post! (:
** This post will proposed to be curated by the CELF project **
Thank you so much :'D
though, as just said i tried to make it as simple as possible, i thought it was still too complex for people ^^
i'm glad it was easy to understand
This is another comprehensive eye guide of yours, kothy. I really like how thorough and detailed you are when you described every part of creating the eyes. Good job, my dear :).
-upvoted-
Hi edanya,
Visit curiesteem.com or join the Curie Discord community to learn more.
thank you so much my friends :D
Hey! This is really helpful. Seeing the properties of the eye presented this way helps to demystify thing a bit.
Art can often look like magic when one doesn't understand what is happening.
Thank you so much :D
yeah, watching just the final result can make things look way more complicated, but once you see the progress, it makes things look more natural or reachable :)
Woaaaaaaa!! What a cool and detailed tutorial edanya!! Very nice and helpful aaAaaAAA ^~^
thank you so much ^^
i hope it doesn't have to much information though xD
These are really lovely, realistic eyes @edanya. Thank you for sharing with us the step by step process. I wish I could draw and paint eyes like yours.
I think I have that problem ☹. I need to read your earlier post for sure. Thank you again for bringing us this tutorial.
thank you :D
i think i should make a post about values and lights soon ^^'
since it would be the basic for many future tutorials ^^
and i'm glad it had been of help :3
Yay! Can't wait to read it. I am always confused where should I draw the shine or shadow if the light is shining from the middle or side.
Lovely tutorial, danya <3 The process is well detailed with nice text and the end results are very beautiful ! good gif animations too !!
Thank you so much :D
long time no see also, how are you doing, my friend? ^^