behind the scene of camzy's portraits (how to draw a portrait)
hello steemians and welcome to my blog today
Today am going to be doing some thing very interesting that everyone who knows me both on steemit and on facebook have been asking of..?
A tutorial on how to draw portraits
yea......! i know
most of you have been anticipating this from me in a long time, well here is it
lets take a tour of what happens behind the scene of camzy's portrait job
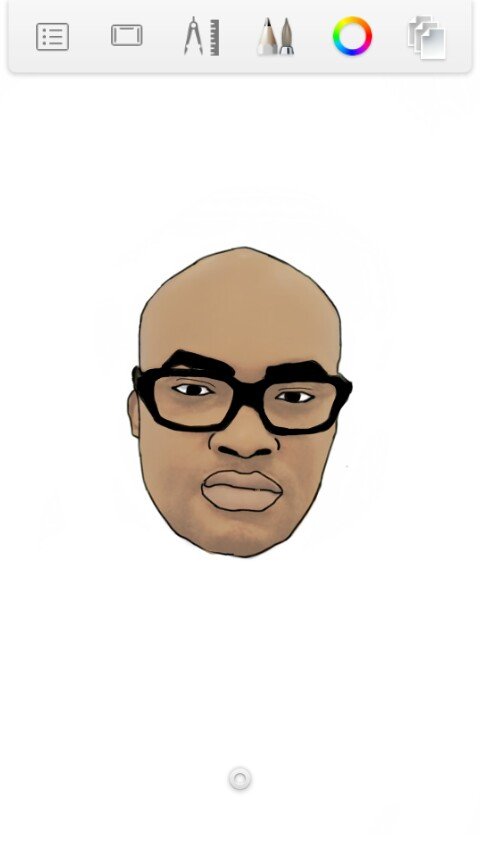
so i picked a random steemian to be my test subject and the funniest part is am yet to know his name (lols)
Now over to business
portrait drawing isnt something i woke up one day i drew and bull eye, it was a hit.. no!
it took me more than 6 months to get to where are am currently including the experiences, so dont expect it to work that fast is you are going to try it out immediatly.
lets begin
first of all, what app does camzy uses for his drawings ?
ans: camzy uses auto desk sketch book pro (mobile)
now you have known that lets begin
first thing i would advice you guys to do is to purchase the pro tools of auto desk sketch book, its just #930 (about $3) but you would be charged #1450 ($5+)
why am i advising pro tools?
ans: normal sketch books lack fill tool (for easy painting) and transform (to change seize and orietation) so you wouldnt like a rough work, get the pro.
after the purchase you open your auto desk sketch book
open and the background would look like this
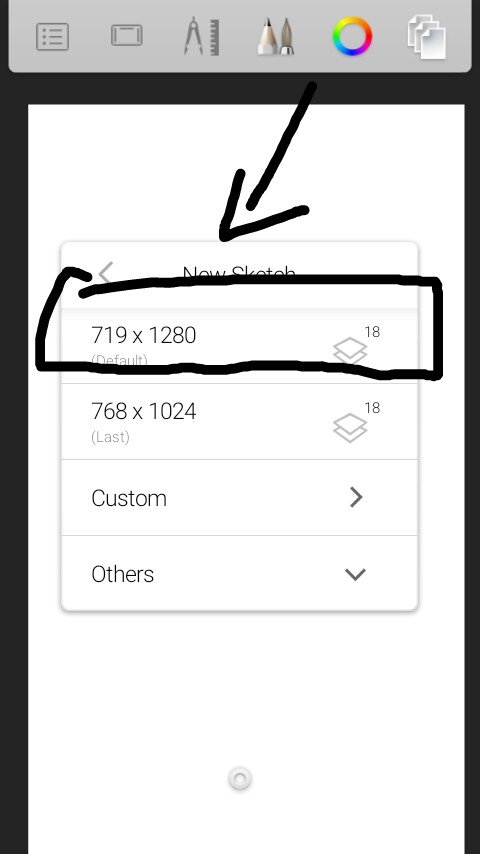
you click the menu button by the left and click new sketch

then you select the first option thats the default book/paper
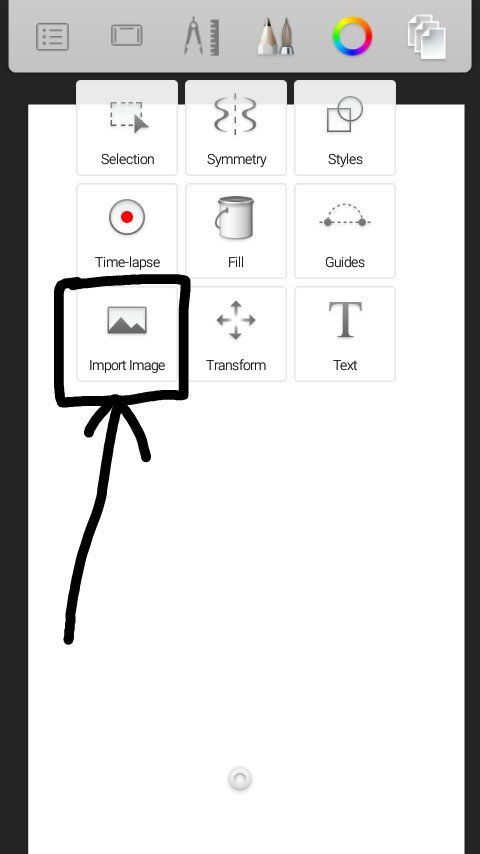
immediately it opens you click the compass like menu that has ruler besides it
there you will see import image, click it
then you locate the image you want to work on, on your phone memory then you import
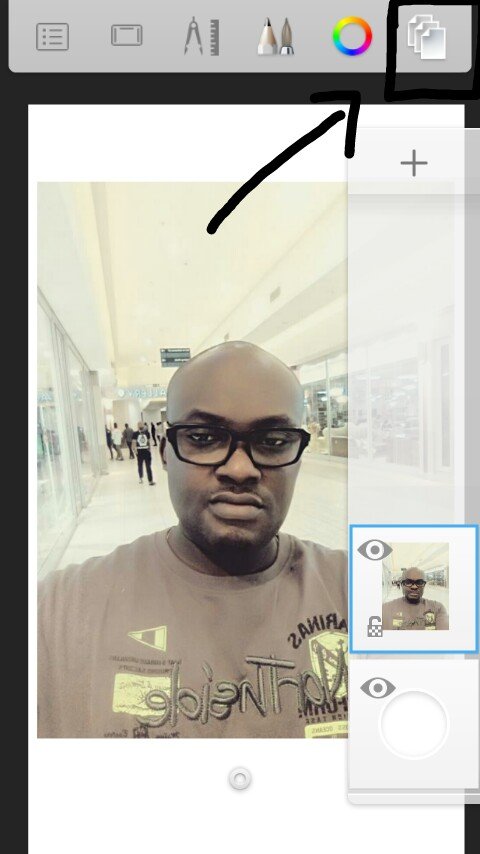
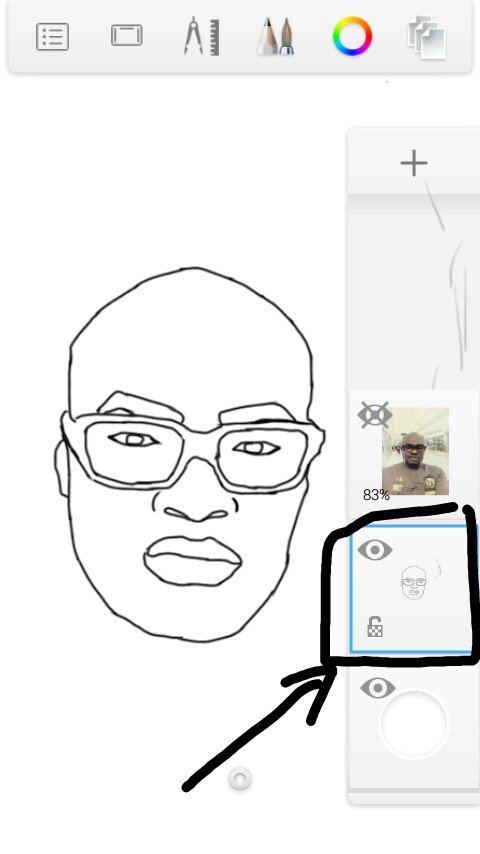
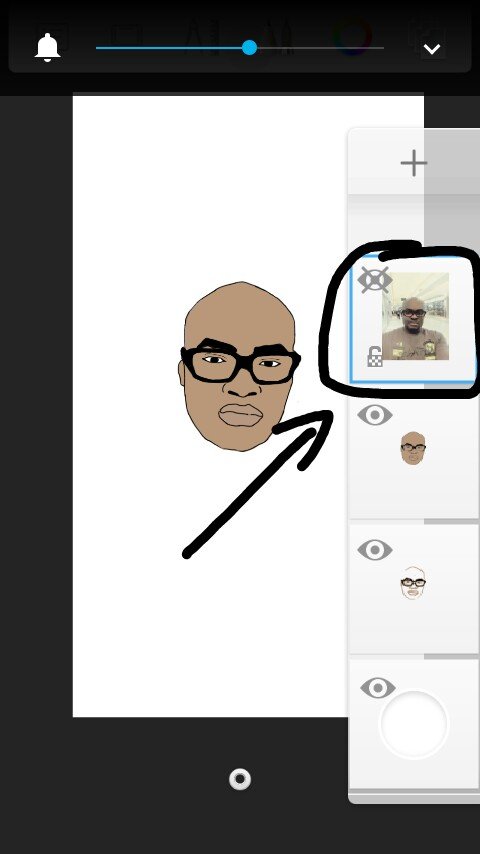
once it displays you click the menu at the extreme right that looks like books.
what is this?
they are called layers and thats why you draw on.
click on the plus sign just below the layers sign to add leayers
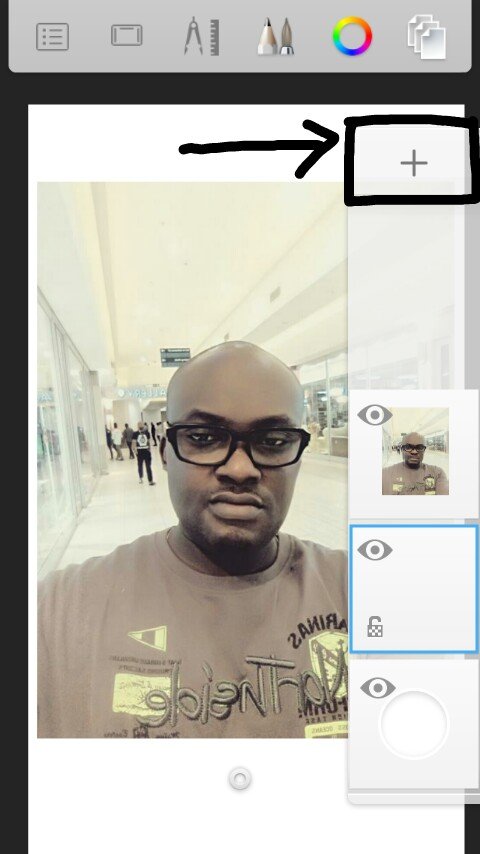
then you add a fresh blank layer.
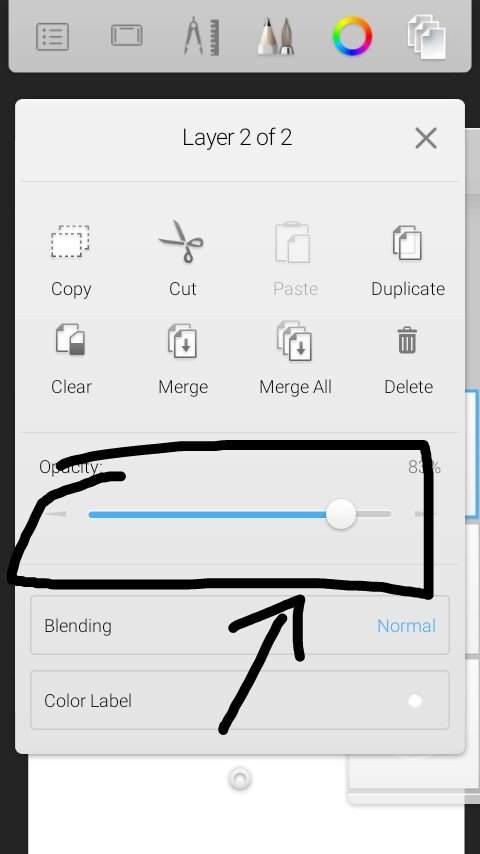
now you click on the first layer, the one with the imported picture on it, then you would see a slider called opacity meaning visibility, you reduce it to a minimum of 79% but me am using 83%
now you click the bottom layer that is empty and let the drawing begin
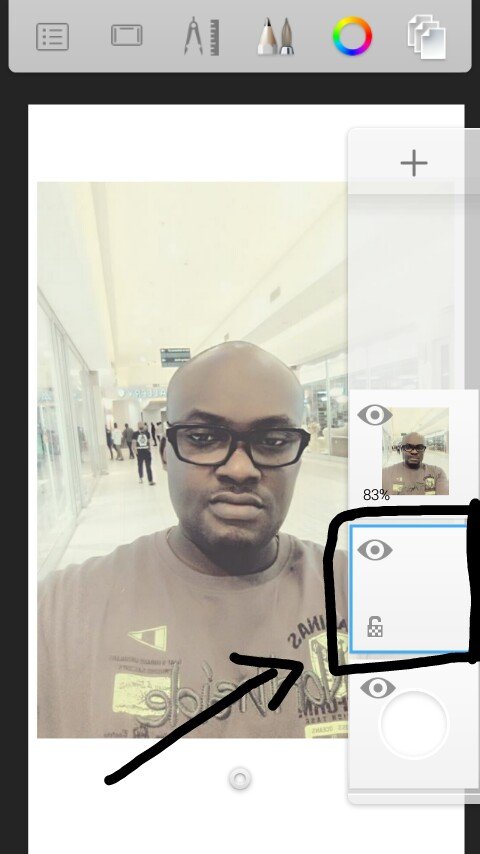
you trace all lines, bends and anything traceable from the image you imported
i guess am speaking somehow in parables but here is a quick video to explain more and for easy understanding
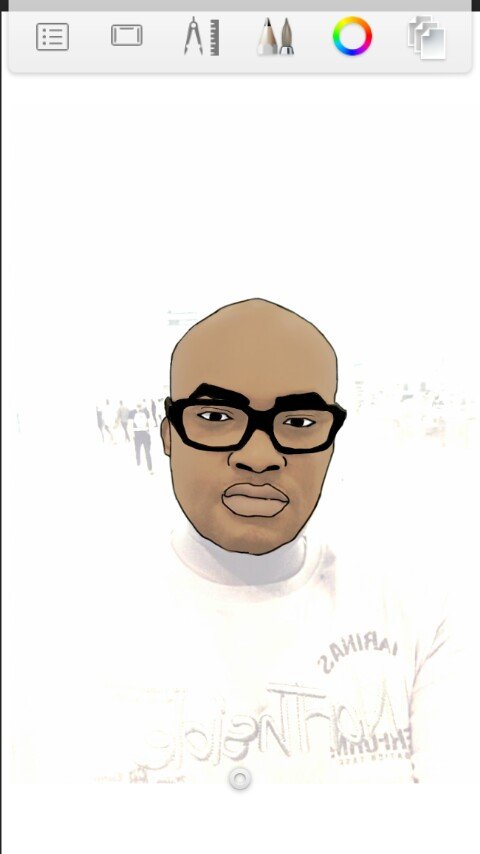
then after the tracing you click the eye like icon on top of the layer bearing the imported image and first phase of your work comes to life. :-)
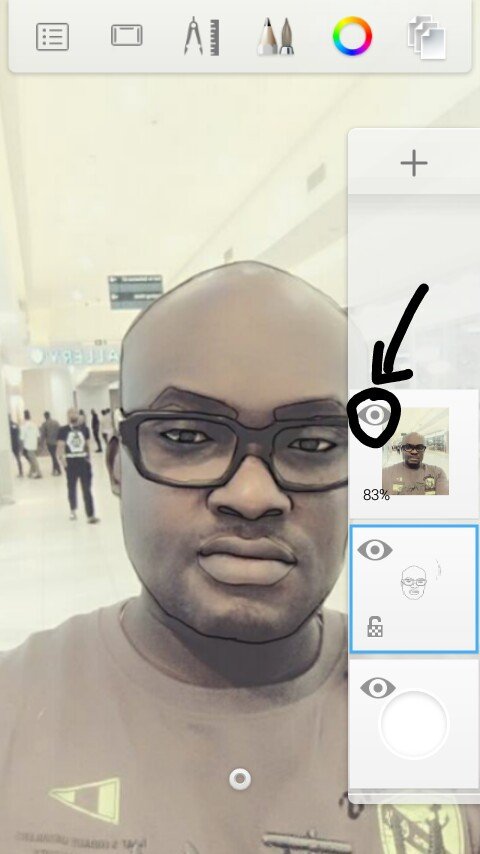
after making the other layer insivible you click on the down layer to start your painting.
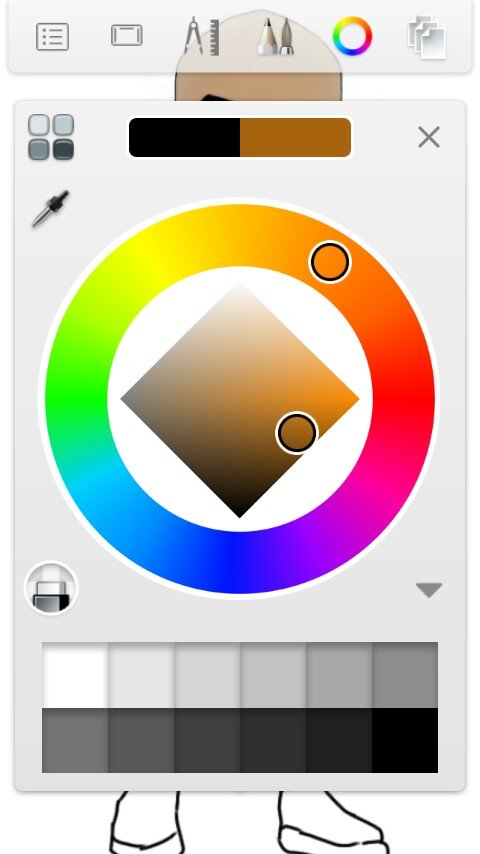
before you start painting you must first copy the exact skin colour that was brought to you (this is the reason why some artist arent getting enough patriots)
they fail the use the actual complexion
in other to know the actual skin colour, you simply click the paint icon above and you would see a kind of a dropper.
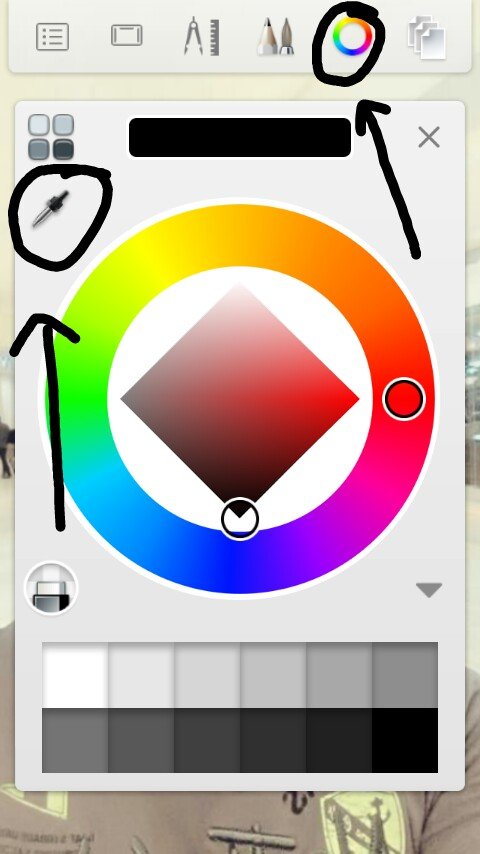
click it and use it to copy the skin on the lightest part of the skin for a bright sketch
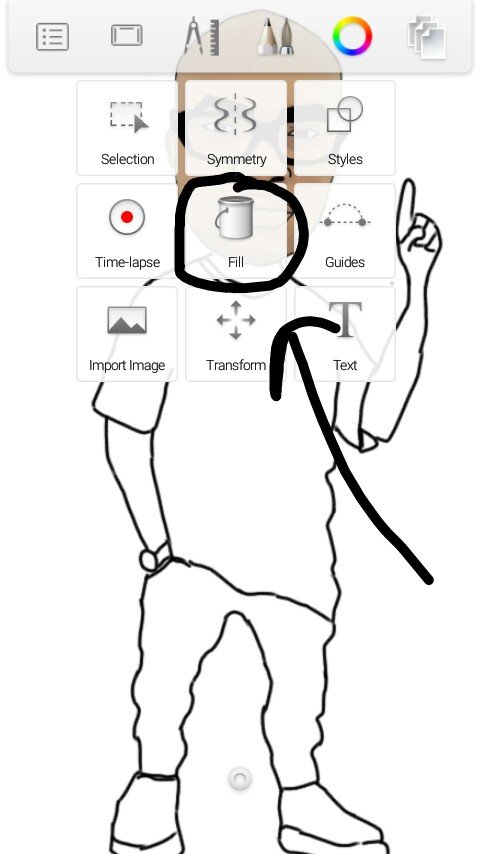
after that you click the compass like iicon again and you will see the fill tool
select it and move to your sketch
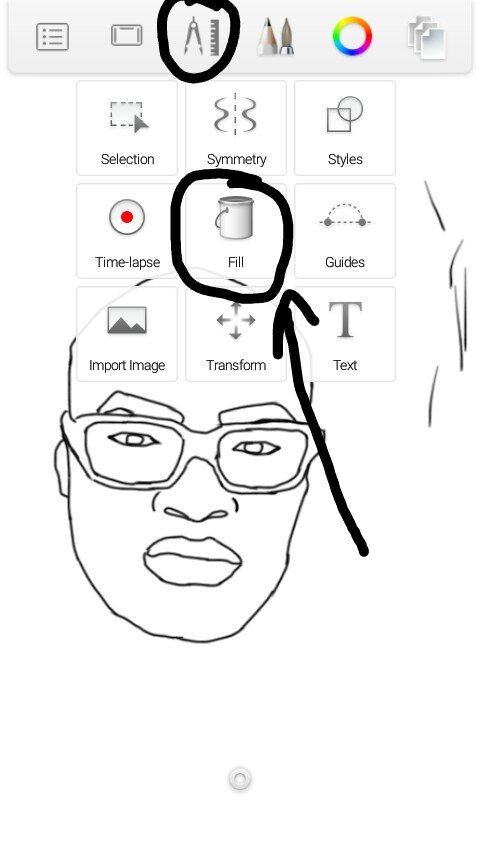
make sure the first option on the fill tool is the one selected then you immediately fill all parts.
skin with the copied colour, hair and eyebrows with black (so unfortunate my subject is a bald man)
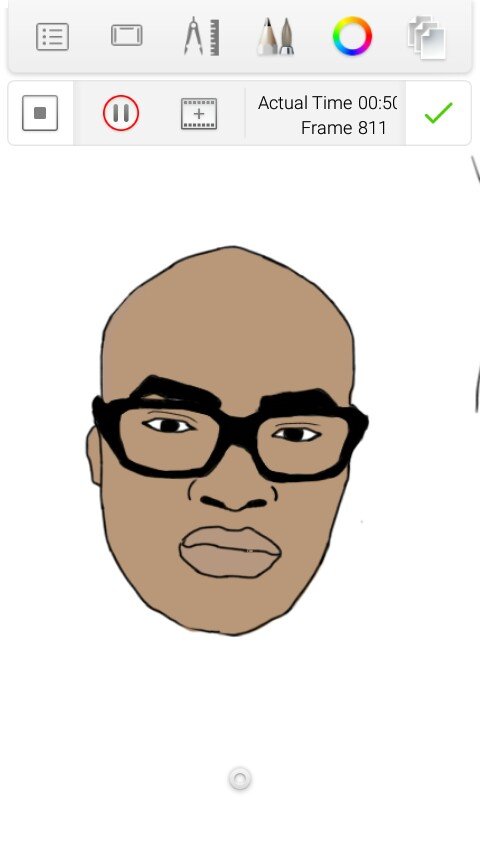
now the painting looks rough and has to be clean and brust, you simply use your brust and paint all the outlines
here is a video for that
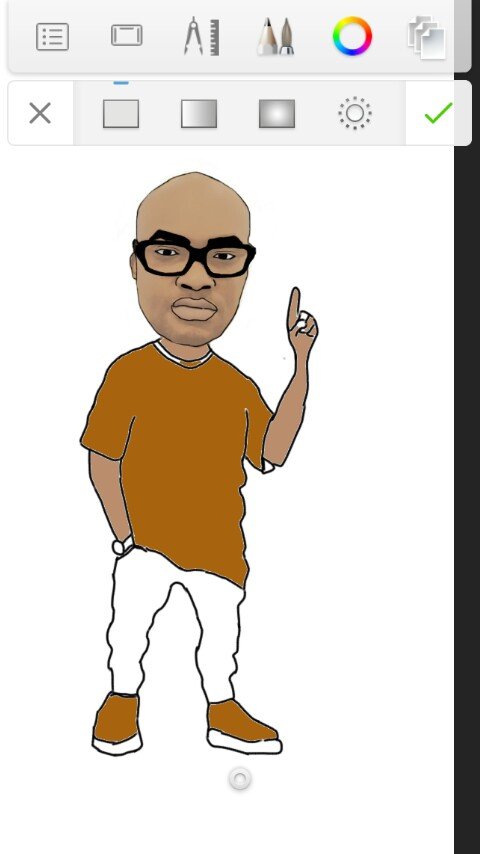
after that our sketch would be looking cool and its time for extra effect to brighten things up
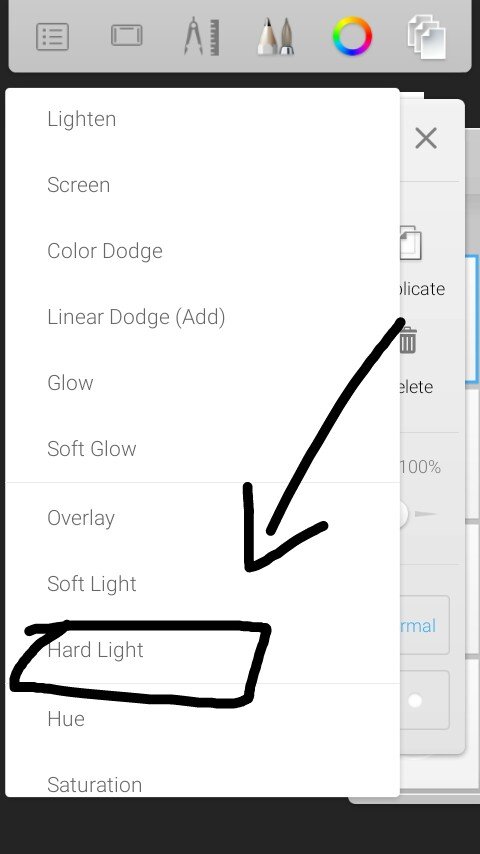
your click the layer icon again and click on the first layer
then you click on the normal written below

and change to hard light
now you reduce the opacity to 34%
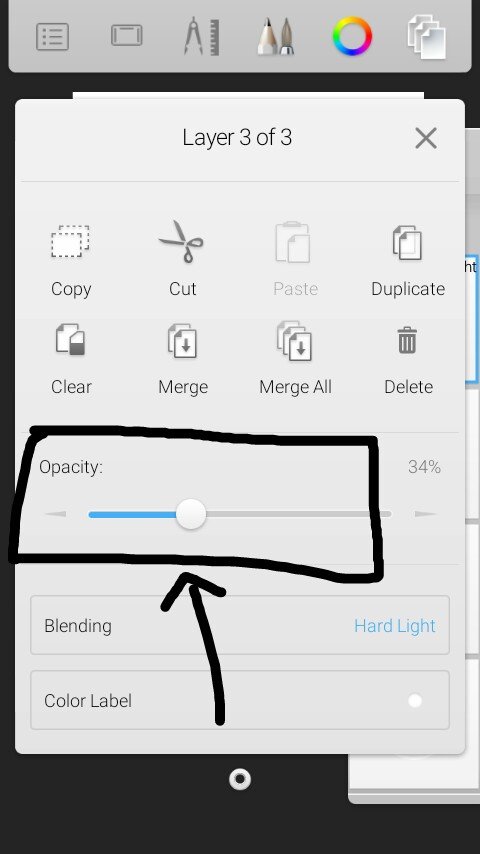
and viola thats the magic
(my secrete recipe tho)
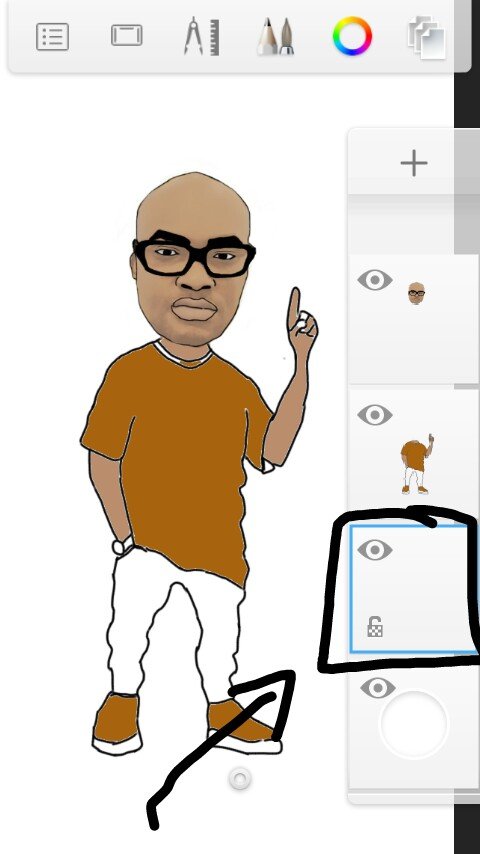
them you use the eraser tool to erase all parts with the body
to get only the head
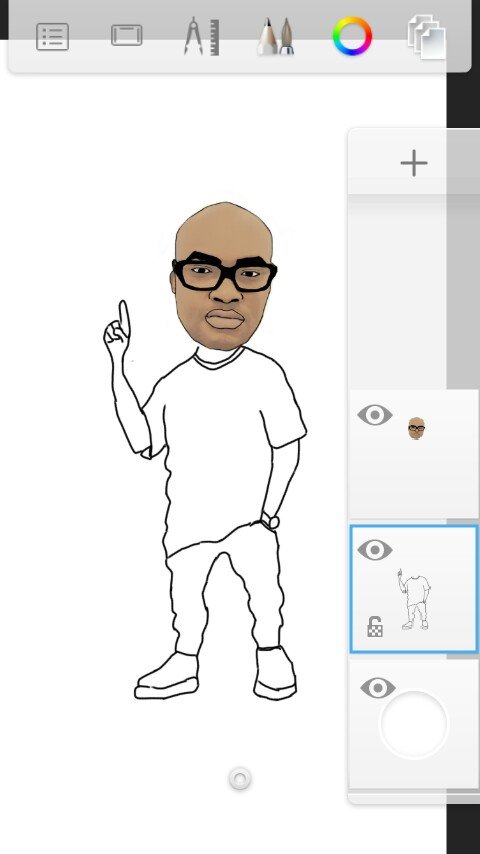
now after that you create a new layer and you create a new layer for the body then you draw any body of your choice.

drawing a body is very complicated so i just used a sample body i drew for @amec, maybe later i would do a fresh tutorial on only drawing bodies
but for now you can take my body designs and trace, you are free :-)
now you click the compass again and reduced to size of the head to match the body

after that you make sure the body matches the head well
cause mine looks like the body isnt so i have to change the orientation of the body.
by simply clicking the body layer
and back to transform again
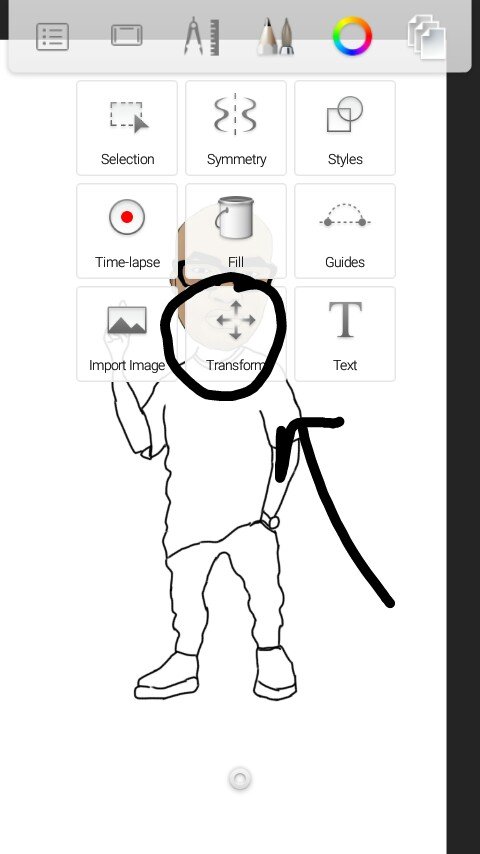
you would see a flip icon above
click it and change body direction
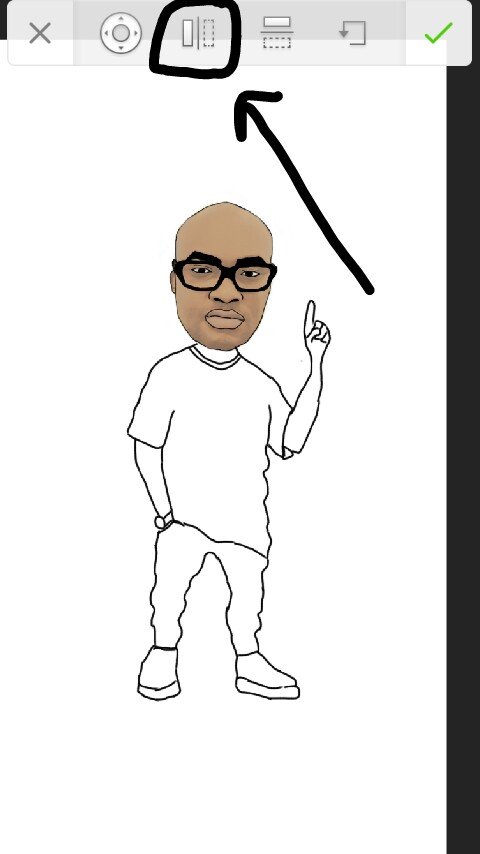
now its time for painting
choose colour
and over to the fill again
paint with colours of your choice and paint skin exactly
(you already know how to pick colour by now)
now the painting looks rough so you have to use the brush again for painting
which you would create a new layer and paint on it in order to to affect the drawn lines
use this particular brush for the painting
and here is a video on how to paint
hope am done........
ohhh! i forgot the shoe (winks)
and thats all and you have a beautiful and clean portrait. :-)
all images were screenshot token with my tecno W3 mobile
I am camzy, the visual artist


Congratulations @camzy, this post is the seventh most rewarded post (based on pending payouts) in the last 12 hours written by a User account holder (accounts that hold between 0.1 and 1.0 Mega Vests). The total number of posts by User account holders during this period was 2450 and the total pending payments to posts in this category was $3306.29. To see the full list of highest paid posts across all accounts categories, click here.
If you do not wish to receive these messages in future, please reply stop to this comment.
Damn!!!
:-)
I go bite your brain commote
hehehe
see zombie o
Wow!..long and worth it.
Lols
Really worth it bro
This is great!
Thanks friend
Congratulations @camzy! You have completed some achievement on Steemit and have been rewarded with new badge(s) :
Click on any badge to view your own Board of Honor on SteemitBoard.
For more information about SteemitBoard, click here
If you no longer want to receive notifications, reply to this comment with the word
STOPWOW! Easy and simple to follow. I wish I could try this but im not just artistic lol
Lol
Too bad
Great job well done bro. This was a nice one. Would definitely try it out sometime. Thanks for sharing.
Thanks brother
You still dey owe me my toon o😑
na you dey dull yourself na
you no wan send picture
wow i even thought you were using a powerful pc software but this is just a masterpice. good work g
lols
not at all
thanks for the comment
Hahaha. Downloading auto desk now . Damn you are good