10 sketching tips for beginners
Artists share their expert sketching tips to help y make your first marks.
The Beginner's Guide to Sketching is a book that offers lots of inspiration and advice for anyone looking to take their first creative steps or wanting to add a new piece to their design portfolio. The comprehensive guide covers everything from choosing the right drawing tools to understanding shading and value, adding colour, and creating a finished scene.
If you're a complete novice, you should have a look at our seven fundamental pencil drawing techniques and our 100 drawing and painting tips and tutorials. But if you're ready to go, here some of the artists that contributed to the Beginner's Guide to Sketching offer some expert advice to get you off to a flying start...
Use an extra piece of paper under your hand to avoid smudging your work
"When shading, use an extra piece of paper underneath your hand," advises artist Brun Croes. "This will minimise the amount your hand smudges your pencil lines. If you're right-handed, start shading from left to right; if you're left-handed, start at the right and move to the left.
"There's nothing more frustrating than trying to make a clean-looking drawing that loses its brilliance and value thanks to smudging. Instead, use smudging to your advantage every now and then to smooth out shading. You can do this with several tools. I use a simple piece of tissue paper to get the job done."
- Create curly hair with simple lines
Sketching tips for beginners: Curly hair
Drawing curly hair in four steps
Want to draw curly hair? Illustrator Eva Widermann suggests these sketching tips: "Draw two straight vertical lines; these will be your guidelines for the width and length of the curl. Now loosely draw a wavy line down between the two lines.
"Double this wavy line a little below the first. You can already see a curly ribbon forming before you. Now connect the open parts on the sides, remove the guidelines, and add some details."
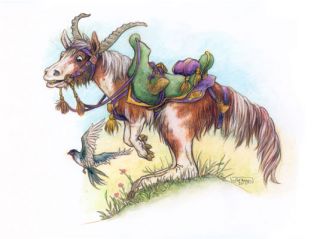
The final image of Patricia's Kangahorse
Designer Patricia Ann Lewis-MacDougall suggests keeping some texture. "Some artists might find using watercolour pencils a little on the grainy side; however I like the added life the grain gives to a sketch. You don't have to add water over the whole image. Leave some areas untouched to add a bit of texture to your sketch."
- Sketch a sky with smudges
Sketching tips for beginners: How to sketch sky
Create subtle shading by smudging large areas of soft charcoal
If you want to sketch a sky, artist Marisa Lewis has some advice: "Sometimes it's preferable for your shading to be less sketchy and more smooth and subtle. Pencil lines don't blend perfectly unless you're very careful. We don't want a sky full of scribbles, unless it's on purpose.
"Instead, use spare paper to doodle a big swatch of soft graphite or charcoal pencil, then use a large blending stick to pick up the soft dust to use for your image. Keep using the blending stick and adding more scribbles as you need more graphite. Using the same technique, start darkening some areas of the sky to define the tops of the clouds."
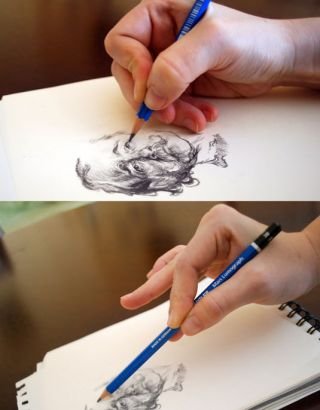
Tripod (top) and extended tripod (bottom) grips
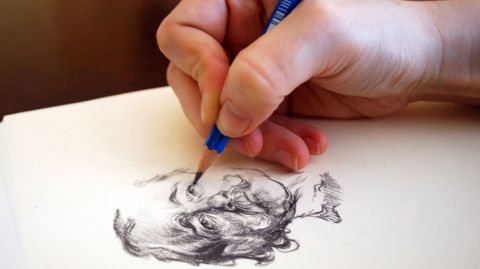
Take control of your pencil by holding it correctly, says illustrator Sylwia Bomba. "If you position your hand closer to the end of the pencil, you have more control and precision, but heavier strokes (darker markings). Gripping further up the pencil will give you less control and precision, but lighter strokes (lighter markings)."
- Use varied lines
Sketching tips for beginners: Use varied lines
Shifts in the width and darkness of your lines will create interest
Use varied lines, says illustrator Rovina Cai. "Not all lines are equal. Subtle shifts in the width and darkness of your lines will create a dynamic, visually interesting drawing. Controlling the kind of mark you put down can be tricky in the beginning, but with practice you will be able to create a variety of marks that work together to make a cohesive image. Experiment with different pencil grades (from 3H to 6B) and with holding the pencil at different angles."
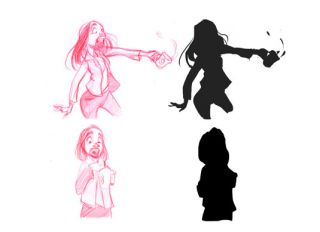
If you look at the examples here, it’s clear that the first girl is holding a mug, but what about the second one? It’s not as clear!
"Have you ever noticed that every important character in an animation movie is recognisable from their shadow alone?", says artist Leonardo Sala. "This magic has a name: the silhouette. The purpose of finding a strong and interesting silhouette is to create an easily recognisable character that will remain clear in the visual memory of the viewer.
"To test out whether your characters are readable as silhouettes, grab a piece of tracing paper and trace around your character, filling it in with a solid colour. A great way to test your silhouettes is to show them to your friends or colleagues and ask them what they see."
- Flip your image with tracing paper
Sketching tips for beginners: Mirror with tracing paper
Flipping the image can help highlight any problems
"A benefit of tracing paper is that you can flip it over to see how your drawing looks from the reverse angle," advises artist Justin Gerard. "This can help reveal errors in proportion. As you work, take advantage of this in order to arrive at a more successful drawing."
- Make it symmetrical (but not quite)
Sketching tips for beginners: Symmetrical but not quite
Keep a nice contrast going between a finished look and a more of a sketchy feel
"I like symmetrical drawings but they often look boring all too quickly," says Croes. "A good way to prevent this is to add some subtle changes and only keep the general lines symmetrical instead of mirroring every small part. Keeping some elements asymmetrical helps to avoid boring repetition."
- Mix things up with irregular lines
An example of an illustration using irregular lines
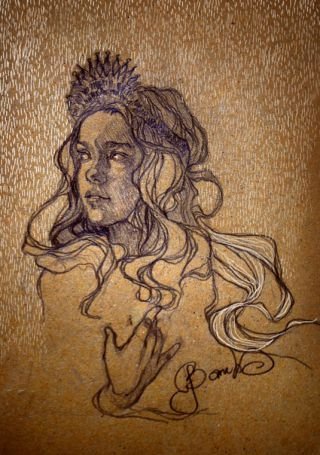
"The use of irregular lines when shading adds a lot of dynamism to your sketch," Bomba says. "If you want to create a fresh and unique sketch of a portrait, architecture, or concept art, you should definitely use this technique. I use it to sketch loosely, flat backgrounds (if there is no texture, this technique will add some), bushes, or grass."