MASTERING THE MICROSOFT WORD USAGE EPISODE #2
Recently, I started a series on “Mastering the Microsoft Word Usage”, with the Episode #1, explaining in details how to produce a professional Table of Contents.
The purpose of this series is to afford everyone a proper understanding of Word processing tools and how to use them, instead of improvising to produce shabby documents.

In This episode, using Ms Word 2010, I will be teaching how to insert Page Numbers. Before you say you know that already, I need you to first of all, complete this introduction. Most people, especially students, when typing their practical, seminar, industrial training and project reports, type their title page in one document, their prefactory section (Abstract, Acknowledgment, Table of Contents, etc.) in another document, then the main report (Chapters One to the End) in a different document. This they do because they do not know how to number a section appropriately, without affecting other sections in the same document.
According to general practice, the title page should not be numbered. However, the next page should carry the page number ‘ii’. This means prefactory section should be in roman numerals, starting from ii, iii, and so on. The main section starts with the Arabic numerals 1, 2, 3, etc. This tutorial will help you to do page numbering easily without breaking your work into different documents.
At the end of this tutorial, you will be able to:
- Apply Page Break
- Apply Section Break
- Apply Page Numbers
- Format Page Numbering
Page Break
A page break is applied at a point where you do not want any more text on that page. All texts after this point appear on the next page. For example, this is the last sentence I want to have on this page.

Fig. 1: A Page Break Illustration
The next sentence starts on the next page. The page break may be used at the end of a chapter, when the next chapter must start on a fresh page. Most times, people press the “Enter” button several times to achieve this purpose, but the disadvantage is that when that document is copied and opened on another computer, it is likely the document scatters if page layout is not the same on both computers. So every time you need to start typing on a fresh page, insert a Page Break.
To insert a Page Break:
- Put your cursor at the point where you want the page break
- Click on ”Insert” tab on the Microsoft Word Taskbar.
- On the top left corner, Click on Page Break
The keyboard shortcut for this operation is “Ctrl + Enter”
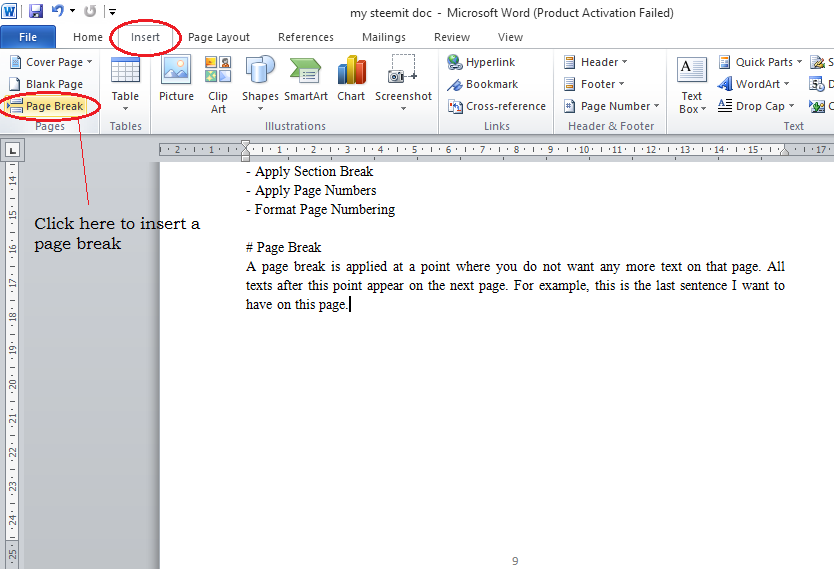
Fig. 2: How to Apply Page Break
At that point, your cursor jumps to the next page and the job is done. In case you mistakenly applied a page break and you later want to remove it, simply put your cursor at the beginning of the new page and press Backspace to remove the page break.
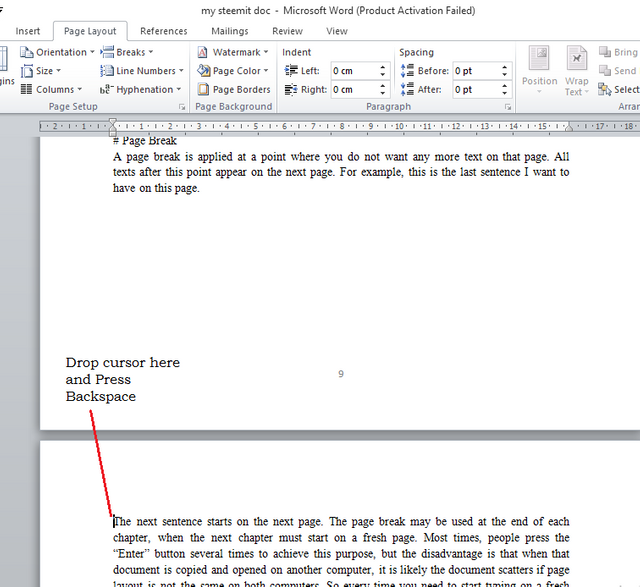
Fig. 3: How to delete a page break
Section Break
A Section Break is a break that partitions your document into different sections, for the purpose of formatting each section differently.
There are four different section break options, which are:
- Next Page: This inserts a section break and starts the new section on the next page.
- Continuous: This inserts a section break but the next section starts on the same page.
- Even Page: This inserts a section break and the new section starts on the next even-numbered page.
- Odd Page: This inserts a section break and the new section starts on the next odd-numbered page

Fig. 4: Illustration of A Next Page Section Break
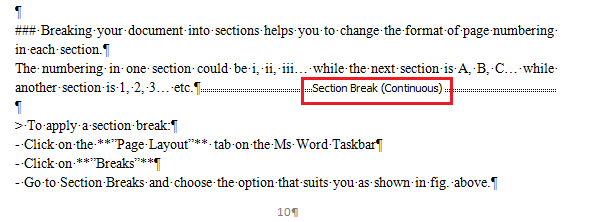
Fig. 5: Illustration of A Continuous Page Section Break
Breaking your document into sections helps you to change the format of page numbering in each section.
The numbering in one section could be i, ii, iii… while that of the next section is 1, 2, 3… and another section is A1, A2, A3… etc.
To apply a section break:
- Click on the ”Page Layout” tab on the Microsoft Word Taskbar
- Click on ”Breaks”
- Go to Section Breaks and click on the option that suits you as shown in fig. 6 below:
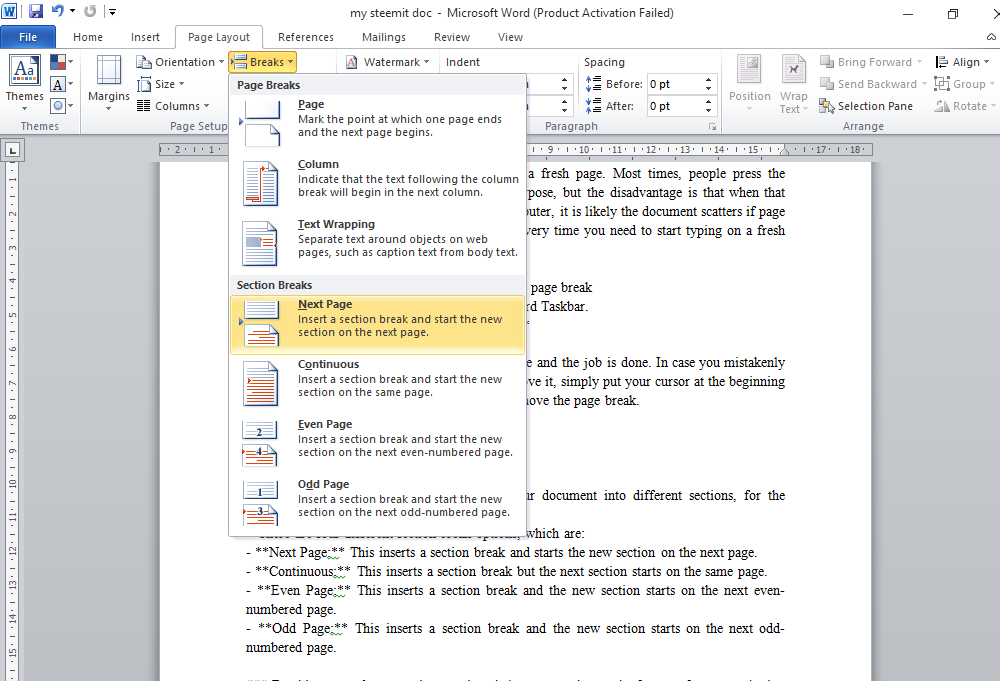
Fig. 6: How to Insert Section Break
Immediately, a section break is applied at that point.
The prefactory section of your report / thesis should be numbered i, ii, iii,… Therefore, at the end of the prefactory section, there should be a section break to differentiate the prefactory section from the main section of the report.
To delete a Section Break, click on the Show/Hide tab ( ¶ ). This displays every point where there is a Page Break and Section break. Simply put your cursor at the point before the break and press “Delete”.
This approach is also applicable to deleting a page break.
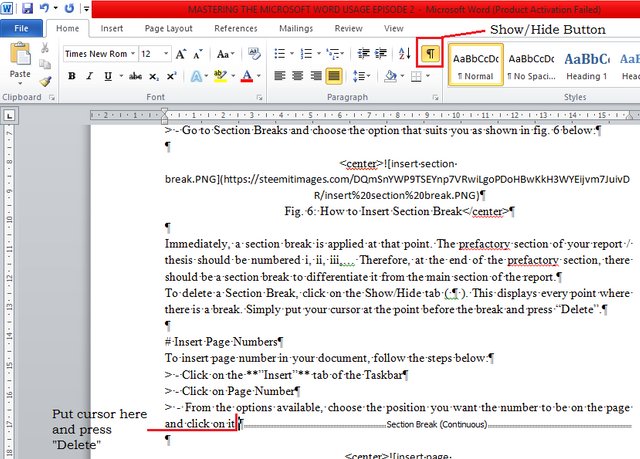
Fig. 7: How to delete a section Break.
Insert Page Numbers
To insert page number in your document, follow the steps below:
- Click on the ”Insert” tab of the Taskbar
- Click on Page Number
- From the options available, choose the position you want the number to be on the page and click on it. For example, Bottom – Center, Top – Right, etc.
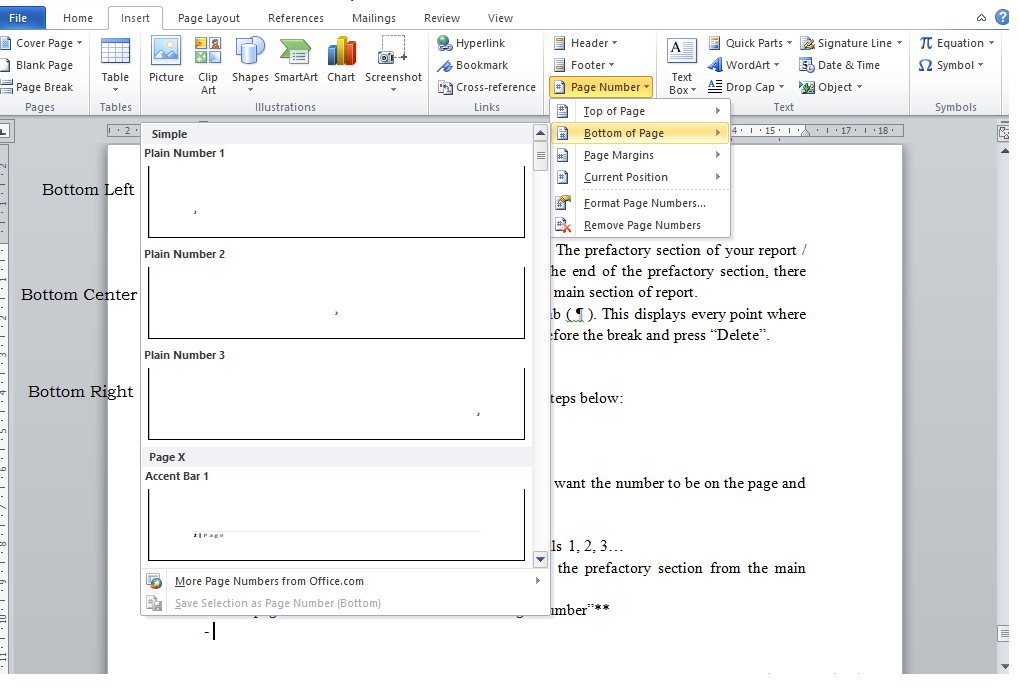
Fig. 8: How to Insert Page number
By default, this page numbers will be in Arabic numerals 1, 2, 3…
Having applied a section break to separate the prefactory section from the main document, you need to number the prefactory section.
- Go to Page Number and click on ”Format Page Number”
- Change Number Format to “i, ii, iii…”
- Start at [i]
- Click Ok
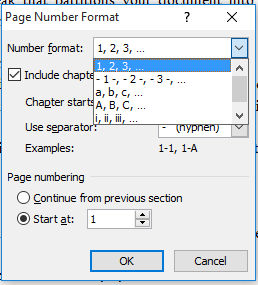
Fig. 9: To Format Page Number
To number the main report,
- Go to Page Number and click on ”Format Page Number”
- Set Number Format to “1, 2, 3…”
- Start at [1]
- Click Ok
To remove the number “i” on the title page, follow these steps:
- On the ”Insert” tab of the taskbar, click on Footer
- Click on ”Edit Footer”
- Mark / check the ”Different First Page” check box.
- Close Footer
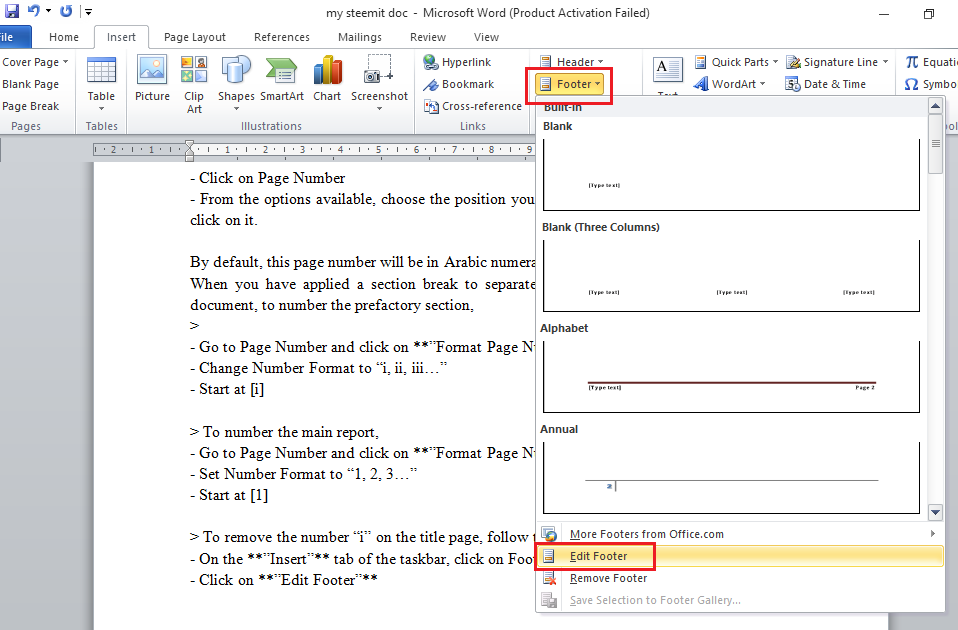
Fig. 10: To Edit Footer
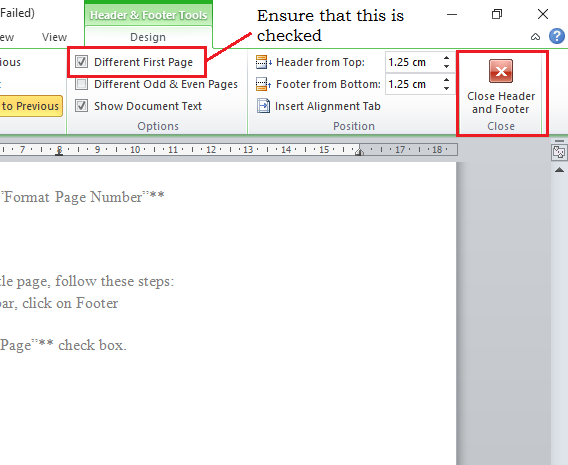
Fig. 11: Check Box and Close Footer
If you follow these steps properly, your page numbering should be perfect.
I love to get feedback from you.
Please, drop your comments, ask questions and let’s know what results you get when you take the steps as elucidated above.
Watch out for Episode #3…