Anglo Saxon Hearpe build pt 3 + video
(This is a repost from my older site, http://heatherthebard.wordpress.com, reposted for your interest and pleasure! Read the previous post here on Steemit: https://steemit.com/howto/@heatherthebard/anglo-saxon-hearpe-build-pt-2)
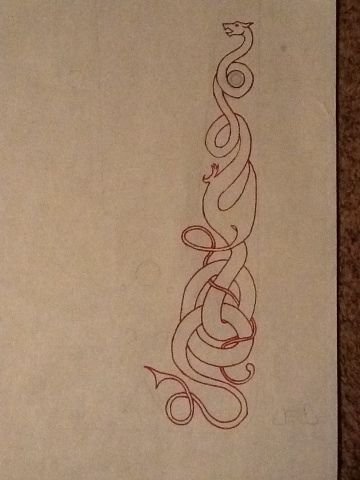
Day Three, and I spent time looking at Celtic knot designs for the soundboard. Though the project is Anglo Saxon, there are remarkable similarities between the art. Also, the Trossingen Lyre was found to have carved art -- strikingly similar to traditional Celtic knot designs -- covering its entire face.
I sketched a basic template on a piece of butcher paper, and decided on sound holes. In my research it is ambiguous whether either of the period lyres had them, but looking at sound technology today, almost all string instruments have them in some form. I elected to do two in the arm cavities and one rosette-style collection of holes in the main body.
At this point in my research, I learned both the historical lyres used brass nails or tacks to affix the soundboard to the back. While I fully intended to glue it together, I also knew glue could not be the only method of holding it together. Having a historical example of nails being used meant I had leeway (and I don't have to struggle to pin it with wood dowels).
Day Four
Assembly went a lot quicker than I thought.
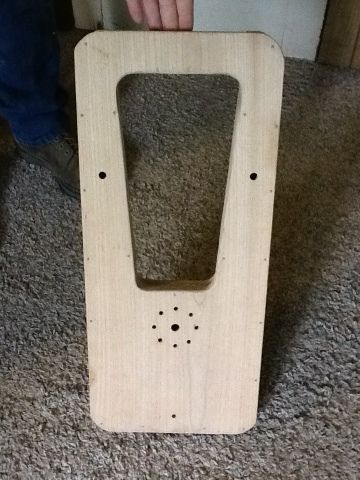
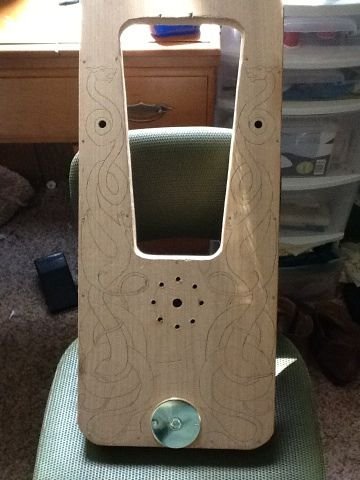
We oiled the inside surfaces of the sound cavities and drilled the sound holes in the morning. We also drilled tiny holes around the outer surfaces to prevent crackage when we installed the finishing nails. Gluing was a snap. The whole rest of my day was spent transferring the dragon design to the face... carving it in, and lots of sanding. Three hours’ worth. It took another thirty minutes to thoroughly coat all surfaces with the Tung Oil. Then we let it dry overnight.
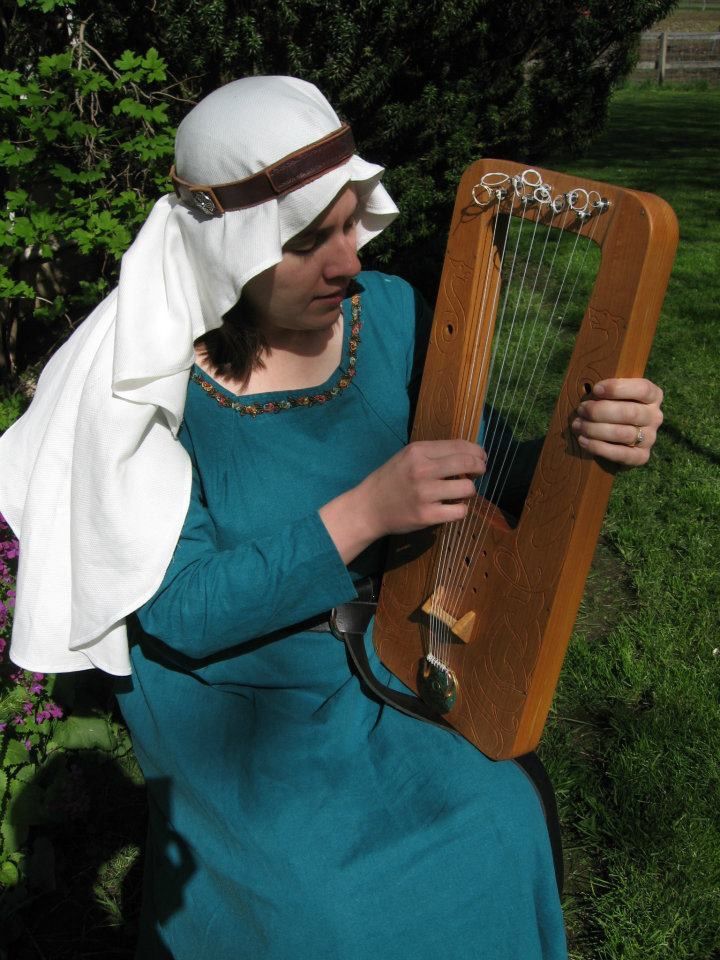
I also solved the tailpiece issue that plagued me: I simply lack the skill to craft my own tailpiece and I do not particularly want a dowel on the bottom to dig into my leg while playing (the commonly accepted playing position is seated, with the base resting on your leg). During our latest Home Depot trip, we came across a set of brass entry cover plates. Brass was a known metal at the time of the Anglo Saxons, and the Sutton Hoo lyre was known to have metal embellishments affixed to it. We drilled one hole entirely through the hearpe base, looped the tail rope around the top plate, and sandwiched them together.
Day Five
I ordered the tuning machines and strings. Nylgut (made by Aquila) is a synthetic substitute for authentic gut strings. They have been engineered to retain the resonance and sound qualities of gut, without the extreme sensitivity to humidity and temperature and without the short life span. As an ukulele player, I am familiar with them and prefer them to other options.
In the meantime, Husband carved the bridge from oak (a bona fide hardwood). We have also applied the mandatory second coat of Tung Oil finish to the instrument.
While waiting on tuning machines and strings, I began sanding on the 'headstock’ to spec for fitting the tuners, and re-applied the Tung oil.
Day Six
The tuners arrived and the headstock promptly needed more sanding (it wasn't thin enough). The good news was, our design allowed enough space on the headstock to put all eight tuning machines, so I will have more options for tuning it instead of just the pentatonic five strings plus octave design I originally planned on.
The strings were, unfortunately, back ordered, but I had a spare set of four uke strings to use for testing. Come to find my tail piece design needed more work. I couldn't tie a proper knot on the rope, and consequently, the strings pulled loose as soon as they were put under tension.
Day Seven
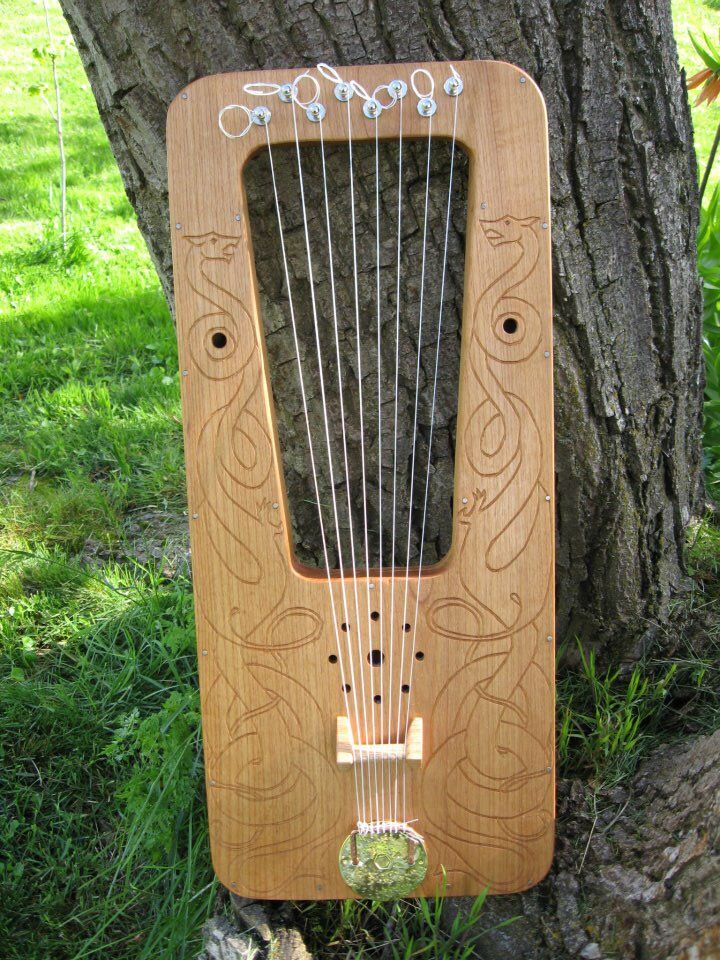
We redesigned the tailpiece to use a heavy piece of copper wire, threaded through the entry plate and squared off into a nice flat area for the strings to tie around. It seemed to work well. A ball pin hammer expertly applied gave the brass a nice "distressed," "hand-hammered" look.
The new strings arrived and I settled on tuning it to an Aeolian (natural minor) mode beginning on a D, given the prevalence of minor keys and harmonies in medieval music. The beauty is, it doesn't take much to re-tune the instrument. The strings are very sensitive to minor shifts in the friction pegs.
After noodling around a bit, I learned a song and made a short video where you can see it and hear it being played:
Hi this is a fascinating post, I really like the Celtic carving.
We have started a woodworking community here on steemit and would welcome you. We have some other instrument makers as well.
Feel free to use the woodworking tag.
We have a discord channel, link here: Woodworking on Steem Discord Channel And a weekly woodworking post competition ,
you can read the post here
Thanks
Thank you! I will definitely check you out! :)