6 portrait lighting patterns every photographer should know part II
- Loop Lighting
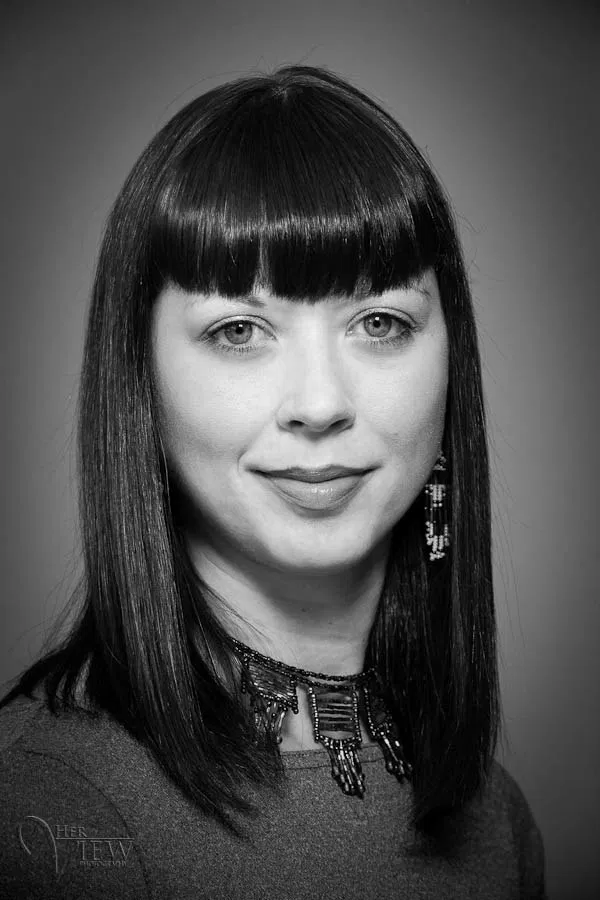
oop lighting is made by creating a small shadow of the subjects noses on their cheeks. To create loop lighting, the light source must be slightly higher than eye level and about 30-45 degrees from the camera
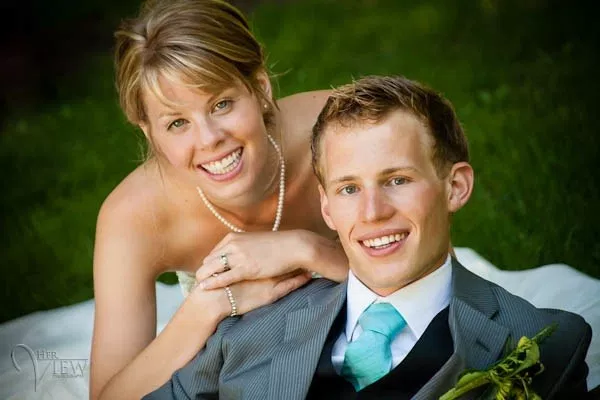
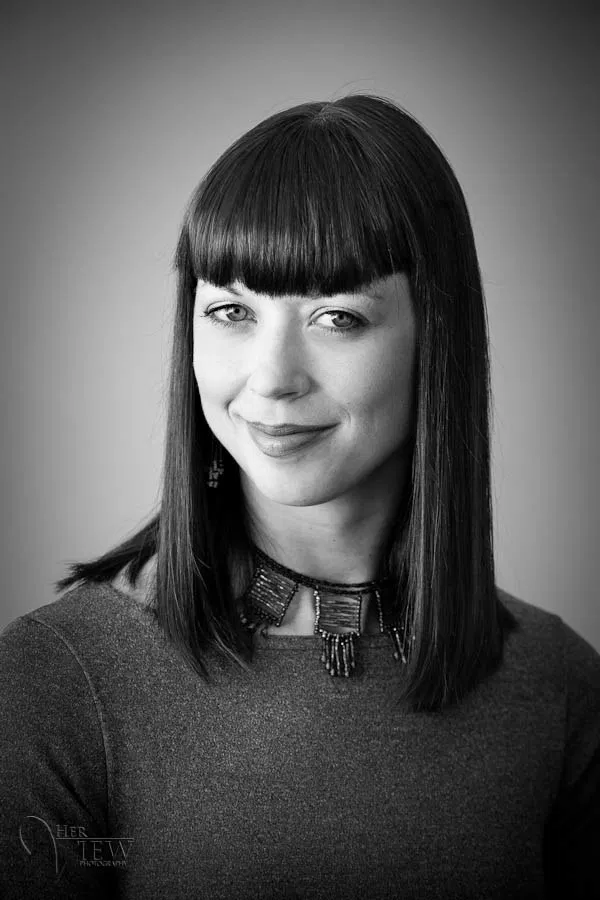
Look at this image to see where the shadows fall, and on their left sides you can see a small shadow of their noses. In loop lighting the shadow of the nose and that of the cheek do NOT touch. Keep the shadow small and slightly downward pointing, but be aware of having your light source too high which will create odd shadows and cause loss of the catchlights. Loop light is probably the most common or popular lighting pattern as it is easy to create and flatters most people.
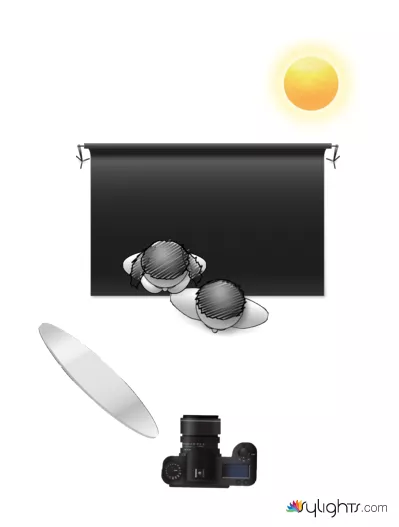
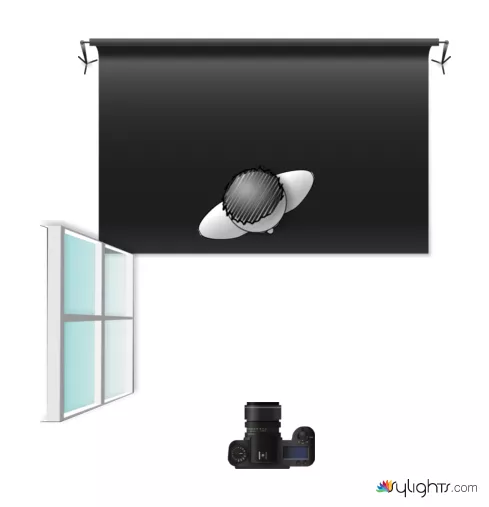
n this diagram the black backdrop represents the bank of trees behind them. The sun is coming over the trees but they are completely in the shade. A white reflector is used at camera left to bounce light back into the subjects’ faces. The reflector may or may not be in the sun but you can still pick up light even if it’s not. Just play with the angles, by changing the placement of the reflector you can change the lighting pattern. For Loop lighting it will need to be somewhere around 30-45 degrees from the camera. It also needs to be slightly above their eye level so the shadow or loop of their nose angles down towards the corner of the mouth. That is one mistake I often see beginners make with reflectors is to place them down low and angle it up. That lights up the bottom of your subject’s nose and does not create a flattering pattern.
- Rembrandt Lighting
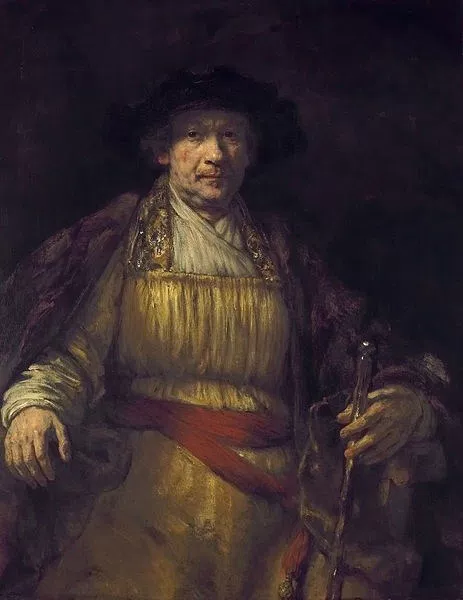
Rembrandt lighting is so named because the Rembrandt the painter often used this pattern of light in his paintings, as you can see in his self portrait here. Rembrandt lighting is identified by the triangle of light on the cheek. Unlike loop lighting where the shadow of the nose and cheek do not touch, in Rembrandt lighting they do meet which, creates that trapped little triangle of light in the middle. To create proper Rembrandt lighting make sure the eye on the shadow side of the face has light in it and has a catch light, otherwise the eye will be “dead” and not have a nice sparkle. Rembrandt lighting is more dramatic, so like split lighting it creates more mood and a darker feel to your image. Use it appropriately.
To create Rembrandt lighting the subject must turn slightly away from the light. The light must be above the top of their head so that the shadow from their nose falls down towards the cheek. Not every person’s face is ideal for creating Rembrandt lighting. If they have high or prominent cheek bones it will probably work. If they have a small nose or flat bridge of the nose, it may be difficult to achieve. Again, keep in mind you don’t have to make exactly this pattern or another, just so long as the person is flattered, and the mood you want is created – then the lighting is working. If you are using window light and the window goes down to the floor, you may have to block off the bottom portion with a gobo or card, to achieve this type of lighting.
- Butterfly Lighting
Butterfly lighting is aptly named for the butterfly shaped shadow that is created under the nose by placing the main light source above and directly behind the camera. The photographer is basically shooting underneath the light source for this pattern. It is most often used for glamour style shots and to create shadows under the cheeks and chin. It is also flattering for older subjects as it emphasizes wrinkles less than side lighting.
Butterfly lighting is created by having the light source directly behind the camera and slightly above eye or head level of the subject (depends on the person). It is sometimes supplemented by placing a reflector directly under their chin, with the subject themselves even holding it! This pattern flatters subjects with defined or prominent cheek bones and a slim face. Someone with a round, wide face would look better with loop or even split to slim their face. This pattern is tougher to create using windowlight or a reflector alone. Often a harder light source like the sun or a flash is needed to produce the more defined shadow under the nose.
- Broad Lighting
Broad lighting is not so much a particular pattern, but a style of lighting. Any of the following patterns of light can be either broad or short: loop, Rembrandt, split.
Broad lighting is when the subject’s face is slightly turned away from centre, and the side of the face which is toward the camera (is broader) is in the light. This produces a larger area of light on the face, and a shadow side which appears smaller. Broad lighting is sometimes used for “high key” portraits. This type of lighting makes a person’s face look broader or wider (hence the name) and can be used on someone with a very slim face to widen it. Most people however want to look slimmer, not wider so this type of lighting would not be appropriate for someone who is heavier or round faced.
To create broad lighting the face is turned away from the light source. Notice how the side of the face that is towards the camera has the most light on it and the shadows are falling on the far side of the face, furthest from the camera. Simply put broad lighting illuminates the largest part of the face showing.
- Short Lighting
In short lighting, the face is turned towards the light source this time. Notice how the part of the face that is turned away from the camera has the most light on it and the shadows are falling on the near side of the face, closet to the camera. Simply put short lighting has shadows on the largest part of the face showing.
Putting it all together
Once you learn how to recognize and create each of the different lighting patterns you can then start to learn how and when to apply them. By studying your subject’s face you will learn which lighting pattern will be best for them, and for the type of portrait and mood desired. Someone with a very round face that wants to appear slimmer in a grad portrait, will be lit very differently than someone that wants a promo shot for their band that makes them appear mean or angry. Once you know all the patterns, how to recognize and master quality of light, direction of light and ratio (we’ll discuss that in a future article) then you will be well equipped to handle the challenge.
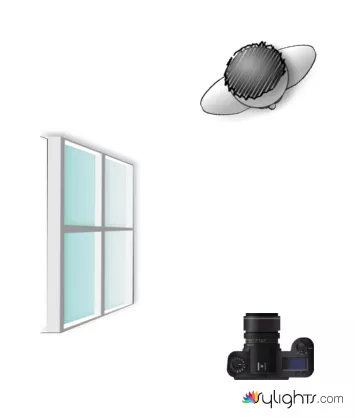
Of course it is much easier to change the lighting pattern if you can move the light source. However if the main light source is the sun, or a window – it’s a bit tougher to do that. So what you will need to do instead of moving the light, is to have the subject rotate in respect to the light to change the direction it falls on them. Or change your camera position. Or change their position. So basically move the things you can move in relation to the light, if you cannot move the light source itself.
source : https://digital-photography-school.com/6-portrait-lighting-patterns-every-photographer-should-know/
Linda photografy ;)
welcome
This post is upvoted by Polsza for 51 %.
If you want help us growing upvote this comment.
Thanks !
img credz: pixabay.com
Nice, you got a 58.0% @kodieamos upgoat, thanks to @digiphotography
Want a boost? Minnowbooster's got your back!
The @OriginalWorks BETA V2 bot has upvoted(0.5%) and checked this post!
Some similarity seems to be present here:
https://digital-photography-school.com/6-portrait-lighting-patterns-every-photographer-should-know/
This is an early BETA version. If you cited this source, then ignore this message! Reply if you feel this is an error.