The Metal Rose
The Metal Rose
Today I will be showing you how to create your own metal rose. Now I know most people wont have the tools to create a metal rose but its still pretty interesting to see how one is made!


Before you tackle on this project I suggest you have the following materials to complete the project!
- Scrap or non-scrap metal
- Metal Rod
I will also suggest that you tick off the tools that are required to complete the rose.
- Angle Grinder equipped with cutting and grinding wheels
- Pliers
- Bench vise
- Mig welder
- Propane Torch with Propane
- A marking tool (chalk or a sharpie)
- Optional but will speed up the process: Plasma Cutter
This is probably the most important part to this guide, Safety Gear:
- Eye protection
- Welding gloves
- Respirator
- Steel toe boots
- Jeans or a welding apron
- Long sleeve shirt or welding jacket
*Anyone who is injured in the process of making this project is responsible for their own injury. I am in n o way responsible for any injury that may occur while creating this project. Proceed at your own risk.*
STEP 1: Cutting The Circles
First you will need to mark the circles on the scrap metal using a stencil such as a paint can, roll of tape, a cup or anything that is round and easily traceable. Once the circles are traced out you will then begin to cut out the circles with a Angle grinder or Plasma torch. You will end up with three metal disks that should look relativity the same.
STEP 2: Cutting The Petals
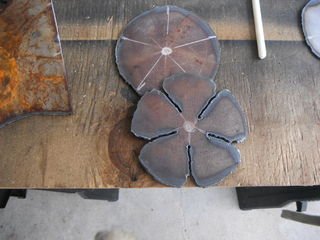
You will pick five points on the perimeter of the disk that are evenly spaced. One tip to pick the 5 points is to draw a star with the points touching the edge of the disk. Once the five points are chosen you will draw them to meet in the middle of the circle. Now its time to cut the pedals on the line you just drew make sure to not cut all the way down the line make sure there is enough room to drill a hole.
STEP 3: Welding
You will now take your Plasma torch or Drill Press and create a hole just big enough to fit the metal rod through the pedals. Place the metal rode in a bench vise before drilling/cutting the holes. After all three holes are drilled, take out your welder. You will weld them from the top of the petals so the next set of petals will sit on the previous weld. This is all the spacing that you will need for it to look good. Be sure to weld the petals so the cuts don't line up or else it wont look like a rose when its finished. Make sure to rotate the next disk so the cuts are 1/3 of the way past the previous cut.
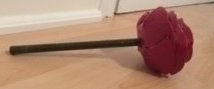
STEP 4: Heating and Shaping
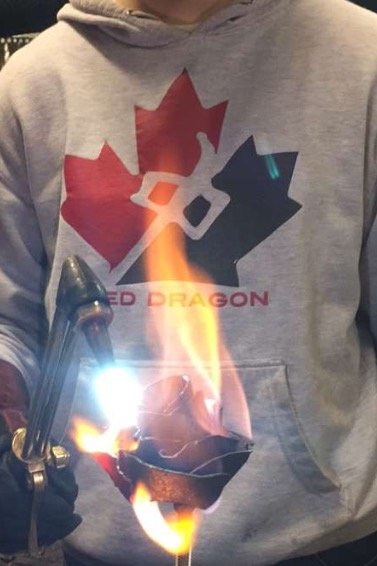
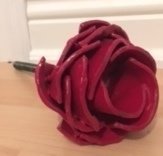
The final and the fun step. Heat a pedal till its red hot and you are able to bend the pedal with your pliers in a up right position. Remember to bend the pedals so that one side lays on the inside of another while half of the pedal is covering the next one. Keep the top pedals nice and tight. It will take 7 or more heating's to bend all the pedals. Once you are done folding all the pedals upward its time to get a little creative and bend the petals in different directions. Don't worry about making is symmetrical. It's not suppose to be! It's organic!
I hope you enjoyed the learning process of creating a metal rose! Let me know what else you would like to create in the comment section below!