How to Put an Image Inside of Text in Photoshop CS5
In this tutorial I will show you and we'll learn how to put an image inside a text with Photoshop in the simplest way. This version of the tutorial is for Photoshop CS5 or earlier.
How to Put an Image Inside of Text
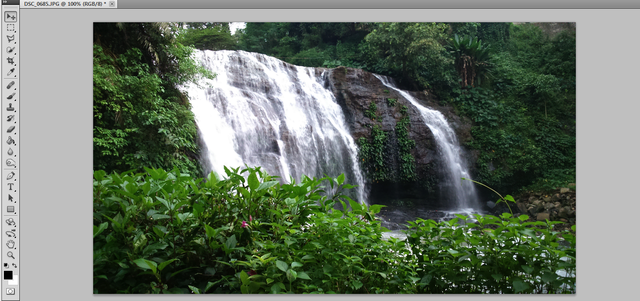
Step 1: Open or Choose A Photo To Put Inside Your Text
First, you need the image that we're going to put inside of your text. I'll use my personal panoramic photo of a Falls:
Step 2: Duplicate The Background Layer
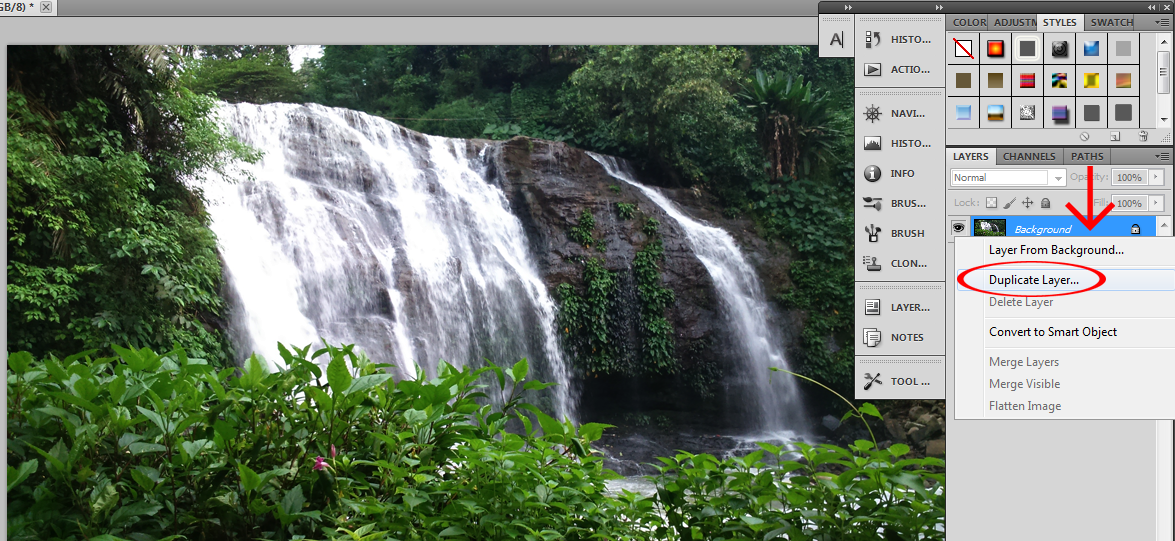
You need to make a copy of this layer. Go to Background Layer and hover your mouse on it then right click on your mouse and choose Duplicate Layer or, you can select the same command from the keyboard by pressing Ctrl+J (shortcut/hotkey).
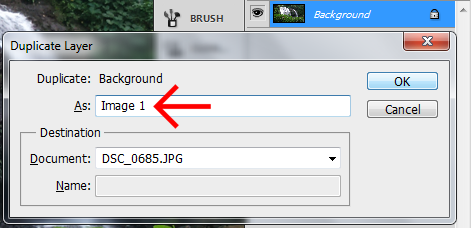
Photoshop creates a copy of this layer, names it "Image 1", and places it directly above the Background layer:
Step 3: Add A White Solid Color Fill Layer
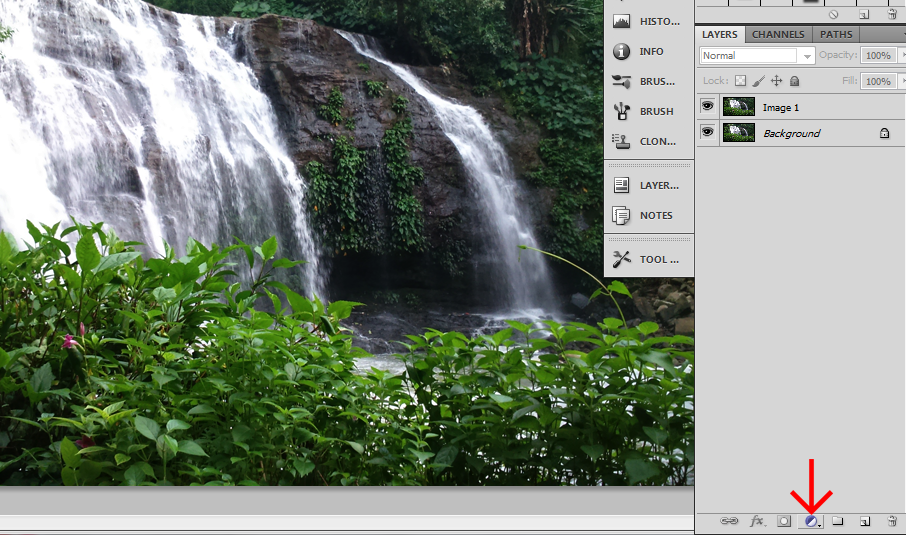
Next, Create a New Fill or Adjustment Layer to use as the background for our effect. Click on the New Fill or Adjustment Layer icon at the bottom of the Layers panel:
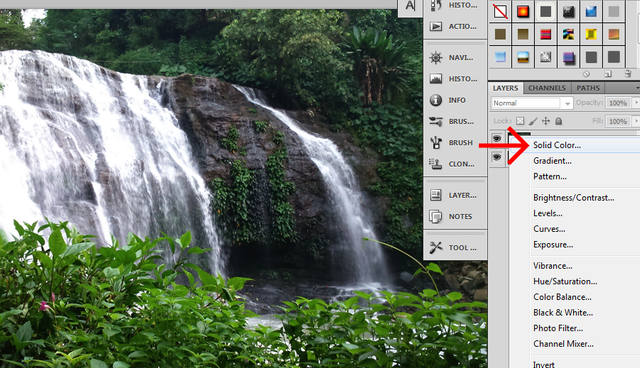
Choose Solid Color from the top of the list that appears:
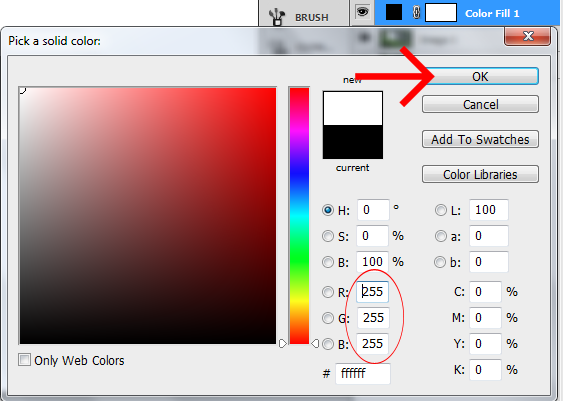
The RGB Boxes Color will Pop Up you can choose the color fo fill the Layer. I chose the color White.
After you've chosen a Color Click OK.
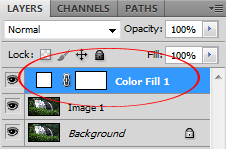
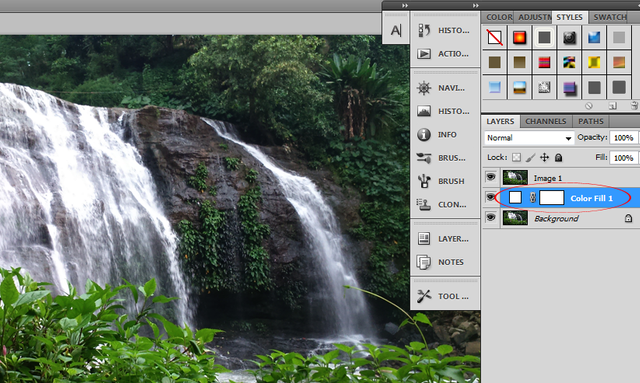
You can see the white Solid Color Fill layer (named "Color Fill 1") sitting above the two image layers:
Step 4: Drag The Solid Color Fill Layer Below to Image 1
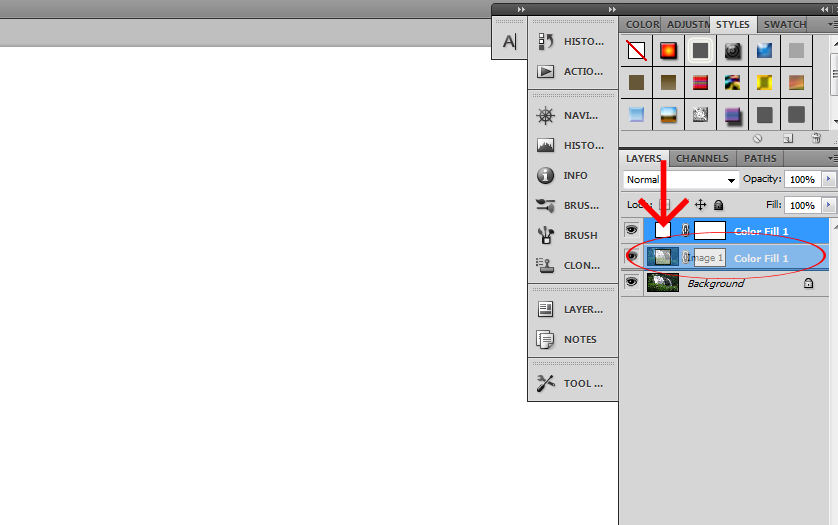
You need to move the Solid Color Fill layer below Image 1. Click on the Solid Color Fill layer (make sure you click on its little color swatch icon on the left, not the layer mask icon on the right), and with your mouse button still held down, drag the layer downward until you see a highlight bar appear between the Background layer and Image 1:
Release your mouse button when the highlight bar appears to drop the Fill layer into place between the two image layers. Your image will reappear in the document window.
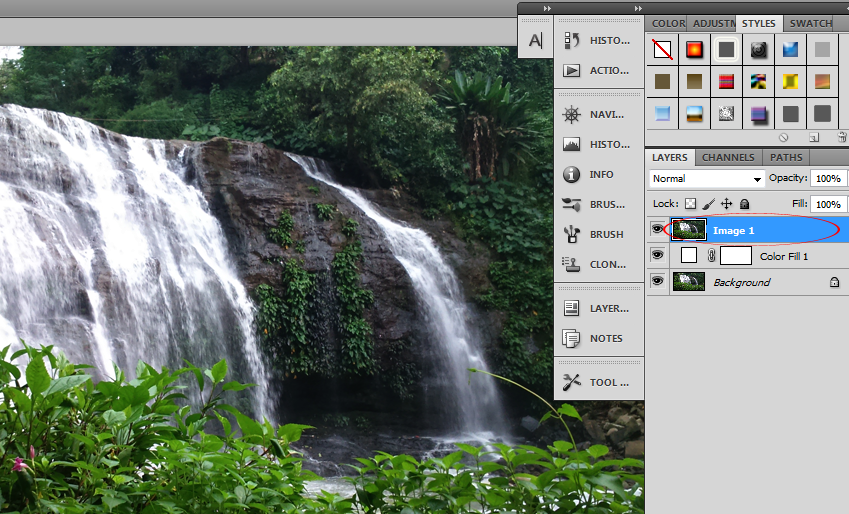
Step 5: Select Image 1
Click on top layer (Image 1) in the Layers panel to select it:
Step 6: Select The Type Tool (Text Tool)
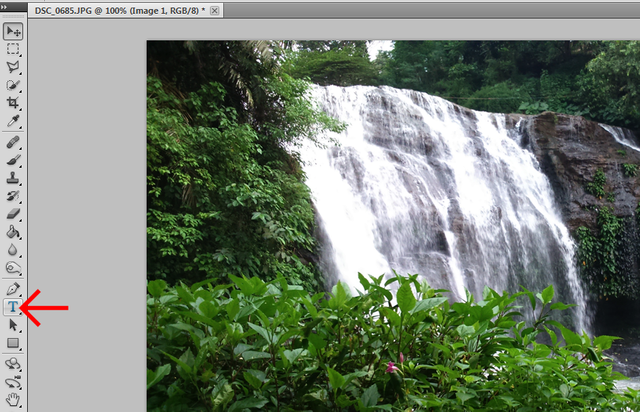
To Add the Text Click the Photoshop Select Type Tool, you can see this tool in the left side of the Panel Tools.
You can also select the Type Tool simply by pressing the letter T on your keyboard:
Step 7: Choose Your Font Style
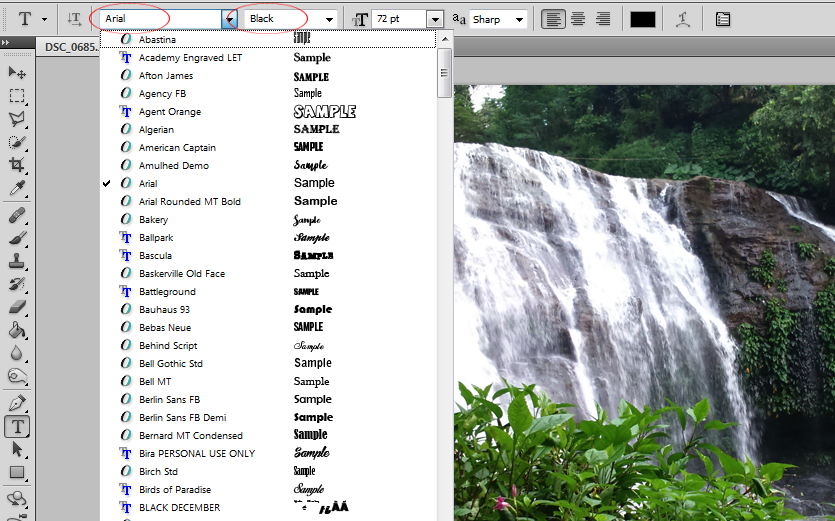
To select a Font Style with Type Tool, go to the Options Bar along the top of the screen and choose your font. Generally fonts with thick letters work best. I'm going to choose Arial Black, but of course you can choose any font you like. Don't worry about the font size for now. We'll resize the type later, manually:
Step 8: Set Your Type Text Color To White
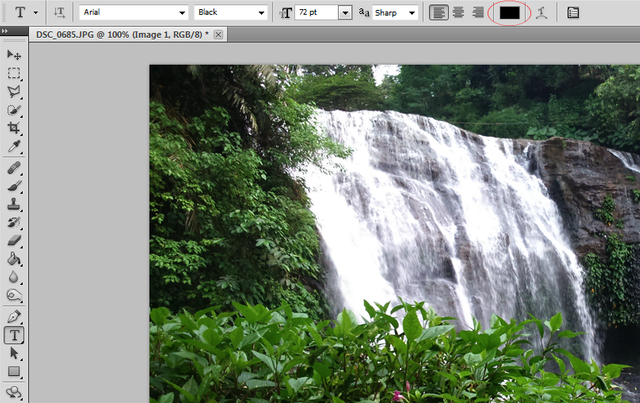
Let's set our type text color to white. If your type color is already set to white (or some other color you can easily see in front of your image), you can skip this step. To change the type color, click on the color swatch in the Options Bar:
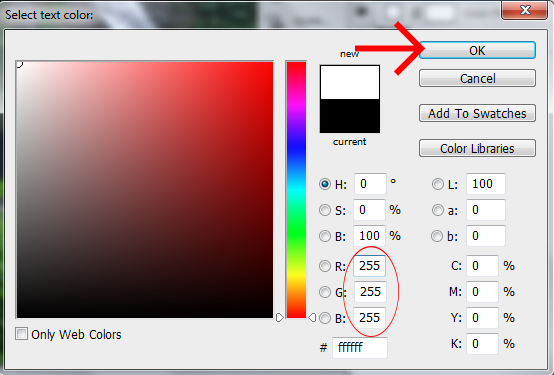
The RGB Boxes Color will Pop Up, you can choose the color for fill the Layer. I chose the color White.
After you've chosen a Color Click OK.
Step 9: Add or Write Your Text
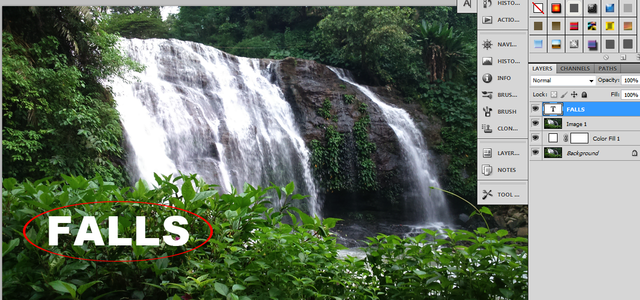
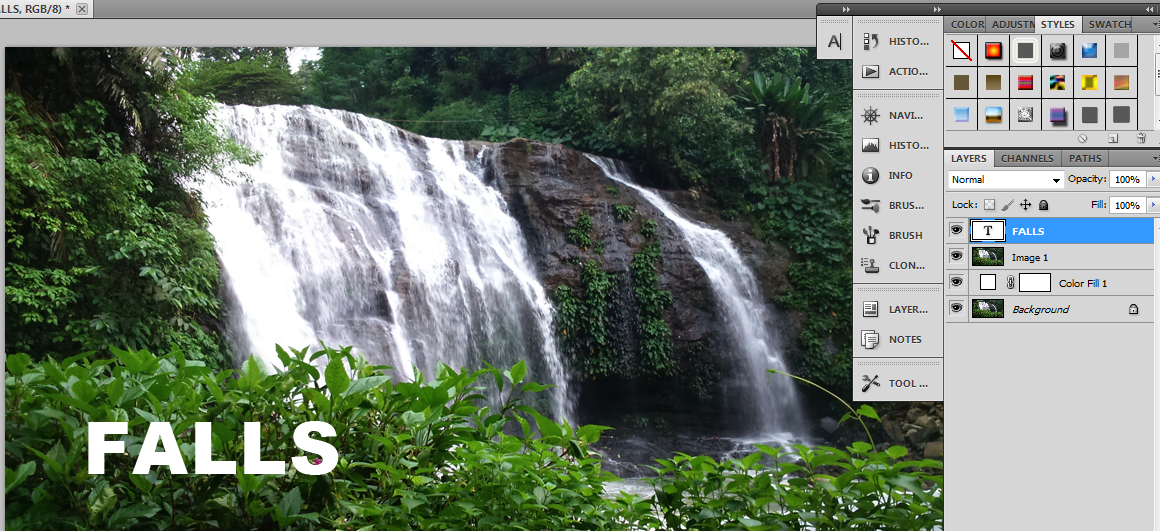
Using the Type Text Tool, your font chosen and your type color set to white, click inside your document and add your text. I'll type the word "FALLS":
Step 10: Drag The Text Layer Below Image 1
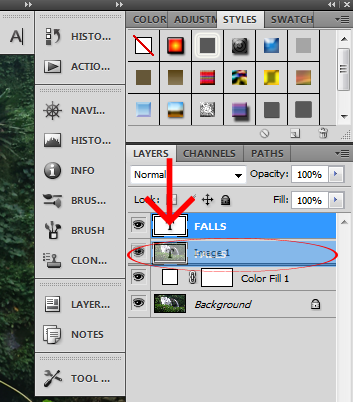
If you look in the Layer Panel you can see or add you Text Layer Top of the Image 1
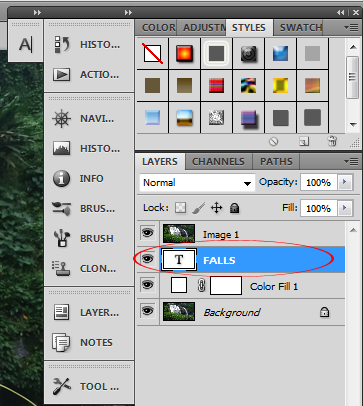
You need to move it below the Text Layer. Click on the Text layer and, with your mouse button still held down, drag it downward until you see a highlight bar appear between Image 1 and the Solid Color Fill layer:
Release your mouse button when the highlight bar appears to drop the Text layer into place:
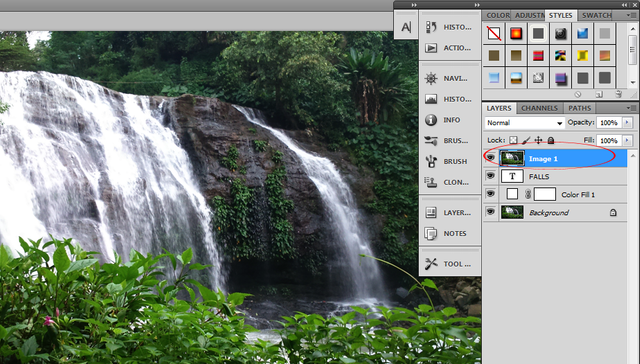
Step 11: Back to Image 1 and Select Again
Click once again on Image 1 to select it and make it active:
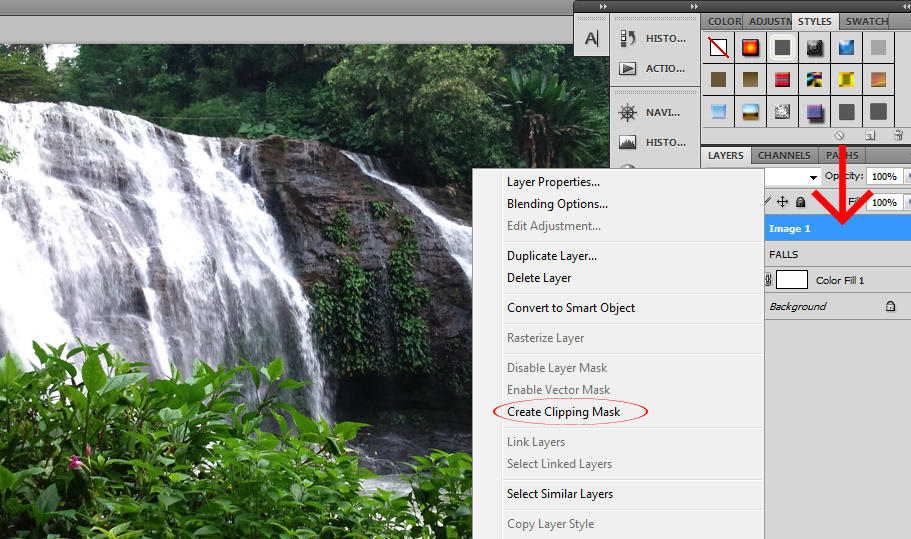
Step 12: Create A Clipping Mask
When Image 1 Selected and the mouse is over click right click mouse and choose Create Clipping Mask.
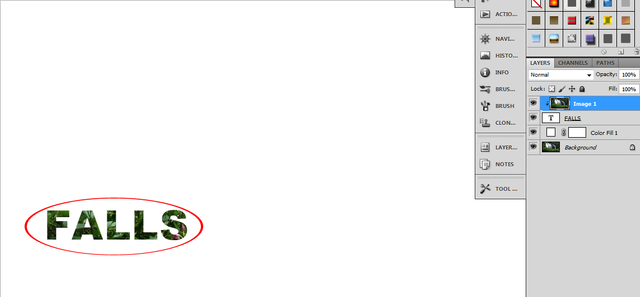
If you can see the Image 1 Layer is already inside of the text, It means the Clipping Mask is already used but this is
not the finish products you can resize the Text Layer.
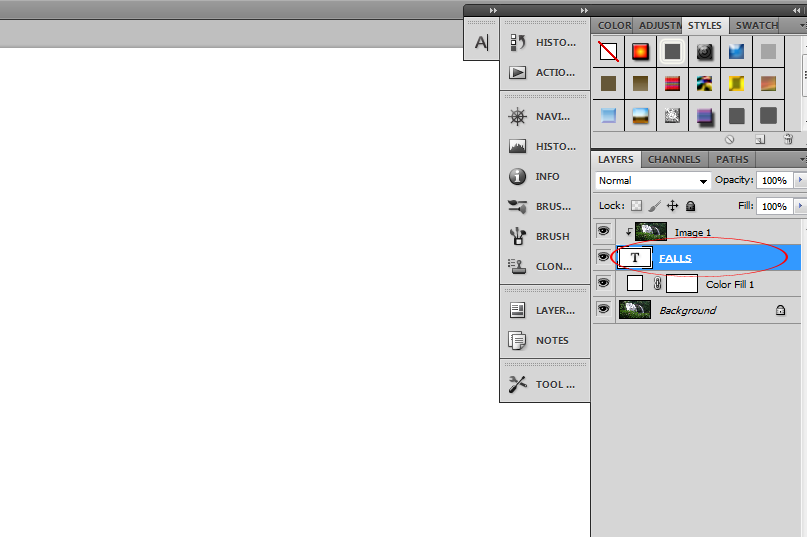
Step 13: Select The Text Layer
Click on the Text layer to select it and make it active:
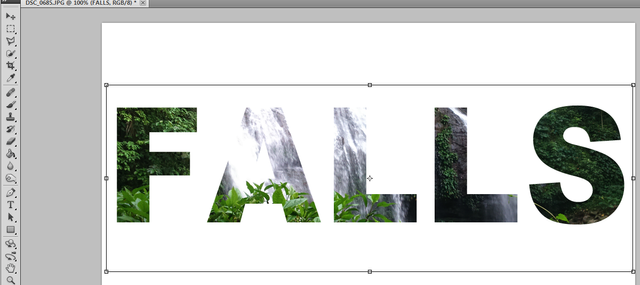
Step 14: Resize And Reposition The Text Layer
Now you can Resize or Reposition the Text by pressing Ctrl+T. This places the Free Transform box and handles (the little squares) around the text. To resize it, simply click and drag any of the handles. When you're done, press Enter
Step 15: Add An Effects Like Bevel Emboss or Shadow (Optional)
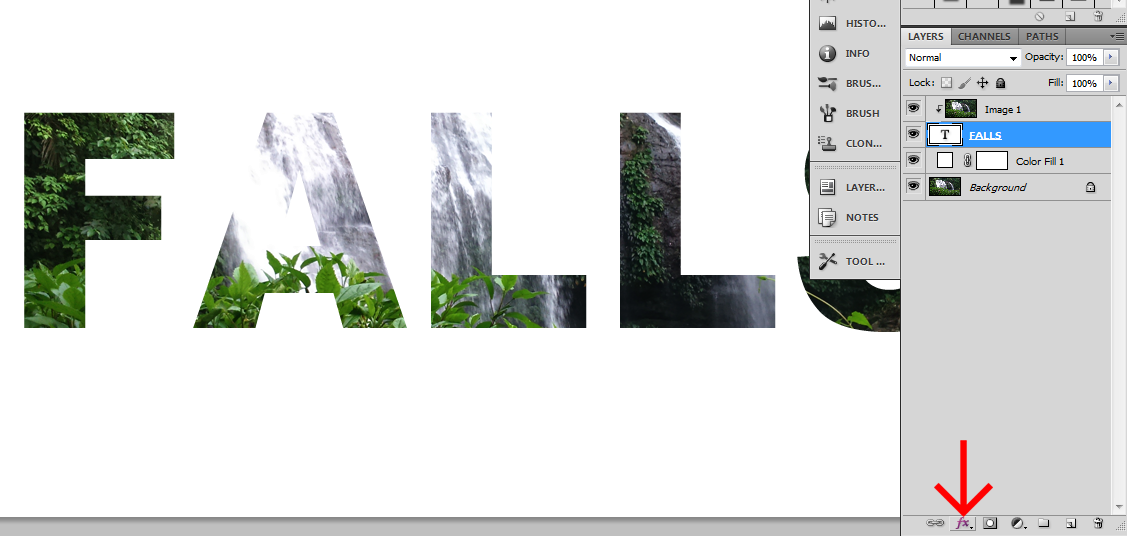
This Final Step is Optional Only if you want add and Effects of your Text you can use Add Layer Style you can see this layer "fx icon" in the bottom of Layer Panel.
Click the fx icon and choose the Bevel Emboss and Click it.
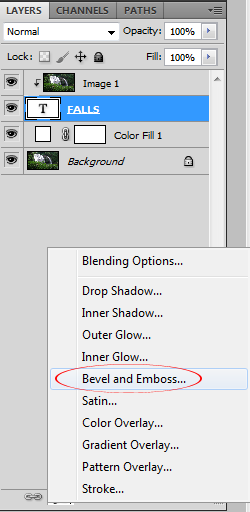
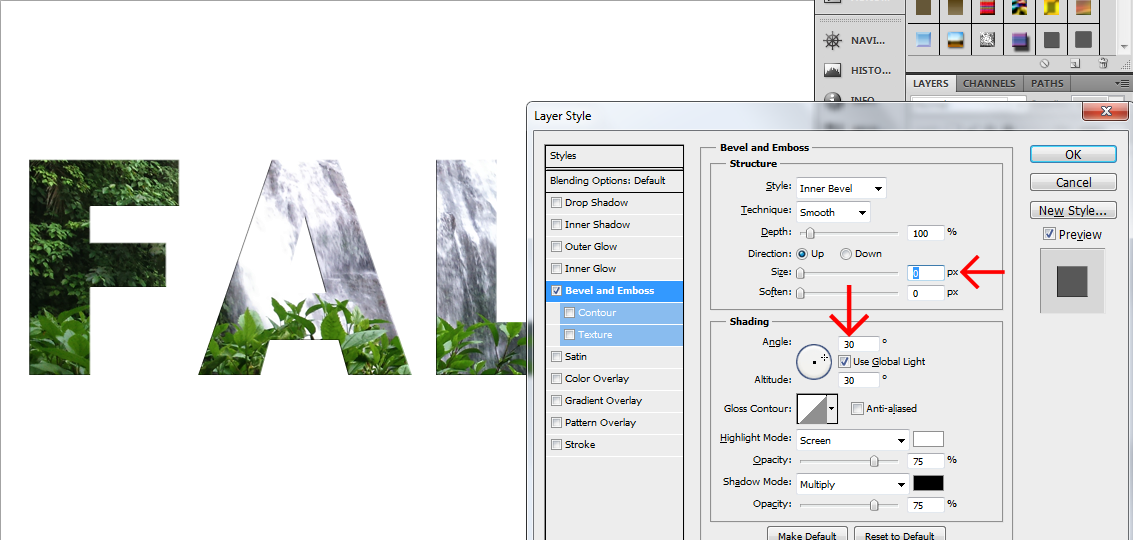
To Bevel Emboss:
This opens the Layer Style dialog box set to the Bevel Emboss then I’ll set the Angle of the shadow to 126°. I'll decrease my Distance value to 0px and the Size to 0px, but these two values depend a lot on the size of your image so you may need to play around with them on your own to find the settings that work best:
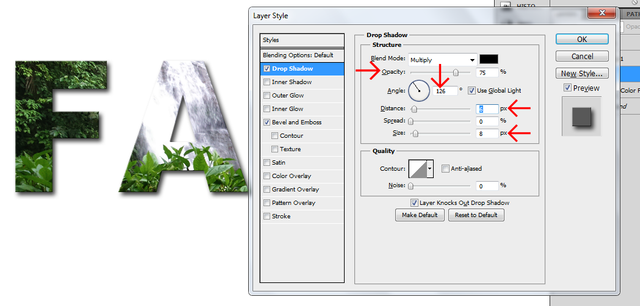
To Drop Shadow:
I’ll lower the Opacity of the drop shadow from its default value of 75% down to 50% to reduce its intensity, then I’ll set the Angle of the shadow to 126°. I'll decrease my Distance value to 6px and the Size to 8px and , but these two values depend a lot on the size of your image so you may need to play around with them on your own to find the settings that work best:
This is my finished work:

Original Photo taken to Sony Xperia M2 :)
And there we have it! That's how to easily place an image inside a text thanks to the power of clipping masks in Photoshop.


Very nice tutorial its very clear and easy to follow thanks for tut sir i would like to see more of your post :)
@cleverbot
Thank you @ruah..
She said be careful with that one love he will do what it takes to survive.
This comment has received a 1.56 % upvote from @drotto thanks to: @banjo.
Cool - this really helps people wanting to learn photoshop. Some people could use help with the banners they create here - this would be of assistance to them. Great work @toffer! Keep it up!
Thanks for the wonderful feedback @flamered..
Super helpful! This looks really good sir. I like how the steps are really detailed and you were able to explain everything so clearly that even beginners and non-users are able to follow everything you've instructed. Bravo!
Thank you for the support sir @deveerei..
You're welcome!
Congratulations! This post has been upvoted from the communal account, @minnowsupport, by toffer from the Minnow Support Project. It's a witness project run by aggroed, ausbitbank, teamsteem, theprophet0, someguy123, neoxian, followbtcnews/crimsonclad, and netuoso. The goal is to help Steemit grow by supporting Minnows and creating a social network. Please find us in the Peace, Abundance, and Liberty Network (PALnet) Discord Channel. It's a completely public and open space to all members of the Steemit community who voluntarily choose to be there.
Thanks for the support @minnowsupport
Really nice post, very detailed.
@zararina thanks for the wonderful feedback..
Very cognitive, I didn't know about that tool in PH, I hope you will tell us more about PH, as occasionally I make photos and like to edit pics) tnx for sharing, I follow you)
Thank you for your feedback @diana-stepasiuk.. Of course i will post of Photoshop tutorial .. Just follow @toffer, upvote and resteem.
thank you for such info.
This helps a lot!
Your welcome @dante01
Useful. Cute to pag roses nasa loob.