HOW TO DRAW A DETAILED REALISTIC PORTRAIT WITH GRAPHITE.
Hello friends and my fellow artist/creative minds in @worldofxpilar how is the weather over there? How are you celebrating/enjoying your Christmas holiday? I'm doing great down here myself.
I'm here again to share a graphite pencil portrait I did, but this time I want to teach or leave clues for beginners.
HOW TO DRAW A DETAILED REALISTIC PORTRAIT WITH GRAPHITE
Having been an artist for 7 years now, I have learnt so many things which has brought me this far. I started drawing with crude materials until I gathered money enough for me to buy the necessary materials that can aid me to draw like a professional. So I went ahead and bought some of the materials I saw online, which were used bye other professionals in the field. Since I started with graphite pencil and powder. I bought all the basic materials necessary to create a realistic graphite drawings or portrait. This materials include graphite pencil 12b, mechanical pencil. Otherwise known as clutch pencils I also bought tombo mono zero eraser. An eraser used for creating highlights, lights, hair strand that are grey or flash from lights reflection. I also bought vinyl eraser which is used for correction and creating realistic drawings. I also got myself tools for blending which were brush, Q-Tip, blending stomp or Tortillion. Mechanical pencils are really good for detailing hair strands and other stuffs like skin pores and skin movement lines. For you to become a professional or be known for being a good artist with graphite as a medium for drawing, you must have the necessary tools so as to be able to create drawings that look like pictures and stand out from amateur or a beginner or somebody who is just learning and has not gotten anywhere yet.
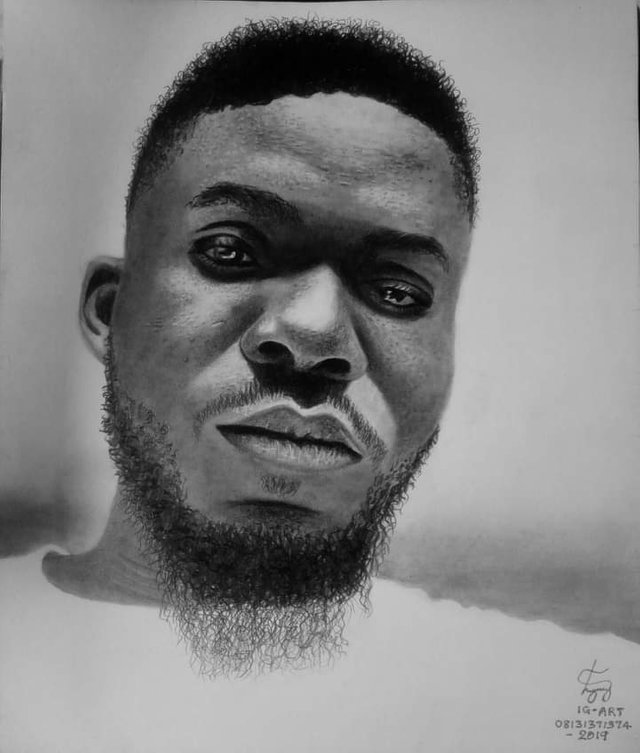
Here is a realistic graphite pencil portrait I made to guide you. You can see the details of the skin on his face and the details of his hair and facial hair.
You're free to ask questions or follow me on Instagram with this link: https://www.instagram.com/tempestinyang/
Materials
| Paper | Pelican |
|---|---|
| Size | 15 X 12 inches |
| Pencils | Graphite pencil, mechanical pencil and graphite powder |
| Eraser | Tombo mono zero and watermelon vinyl eraser |
| Camera | Infinix mobile phone |
| Duration | Approximately 23hrs |
| Location | Home |
Here are the steps on how I did the portrait. I drew my grid lines and made my sketch then started shading it gradually. Starting from the hair
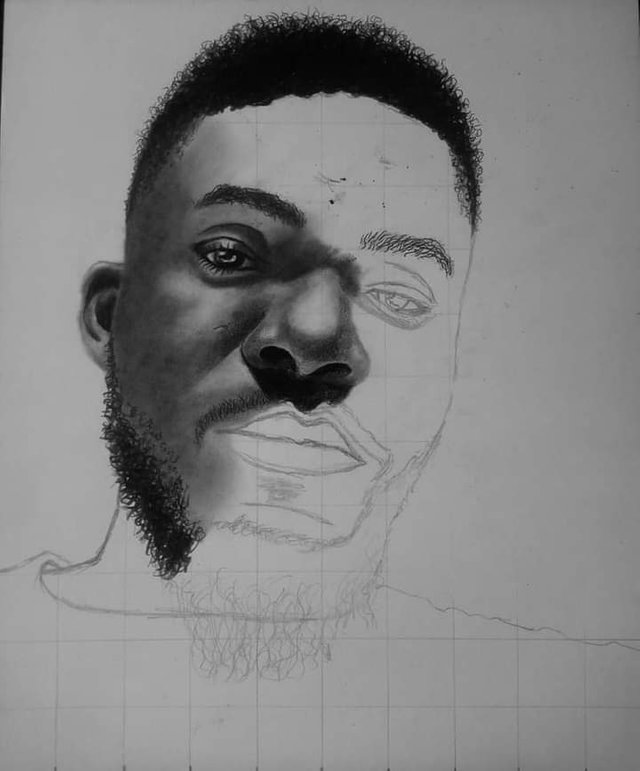
Progress shot 1
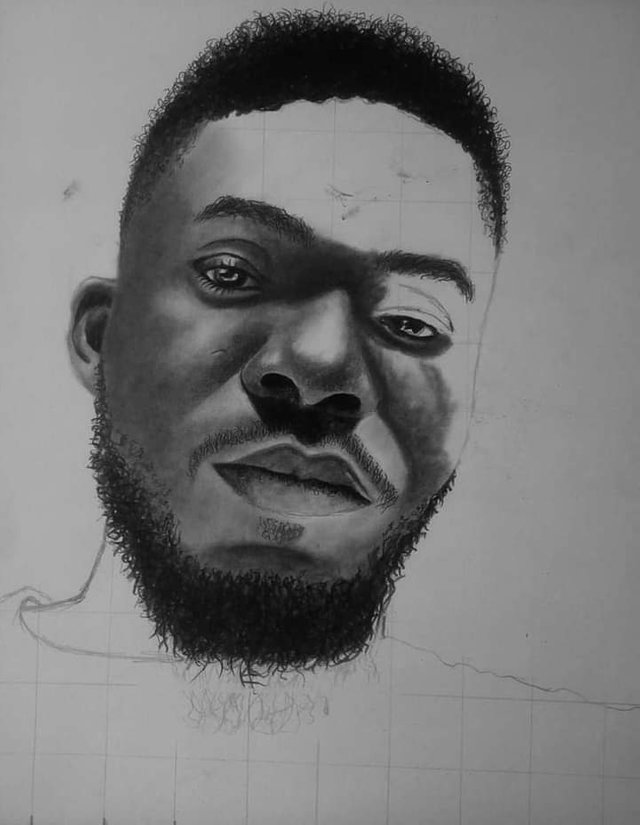
Progress shot 2
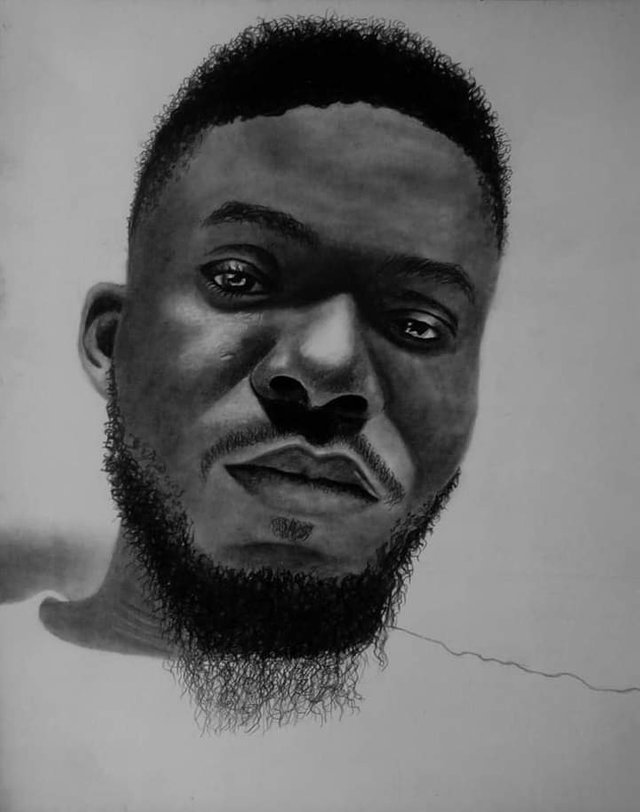
Progress shot 3
Finishing
Merry Christmas to you. I appreciate you for checking my blog and artwork as well. I wish you a blissful festive season at hand. Stay blessed. Stay safe. Stay tuned. More works coming. Next year will be great
keep steeming✍️