What Freezes First Experiment
This fun learning activity can be done on a rainy day inside or as a way to cool down a little during a heatwave. It’s easy to do at home or it can be done as a group activity during a lesson at school and accompany some theory. The suggested age group for this experiment: ages 4-13, although some older kids might still get a kick out of it too.
This activity is a great way to learn about the properties of solids and liquids and how they change at different temperatures (hot and cold). If you are working with older kids, they might learn more if they have an opportunity to list the liquids/solutions they are going to use in their experiment so that they can make a note of what state they are in at varying temperature, for example: room temperature (in its natural state), in a hot environment (out in the sun or placed in a heated oven) and then at freezing point. They can also make predictions of which substance they think will melt first. These notes can be used for further analyses and discussions.
What Freezes First?
Here’s what you will need:
- Access to a freezer
- An ice tray or sectioned container
- A timer
- And a variety of the following liquids/substances:
- Water
- Dish soap
- Honey
- Salt water solution
- Vinegar
- Milk
- Cooking Oil/Hand Sanitiser
Instructions:
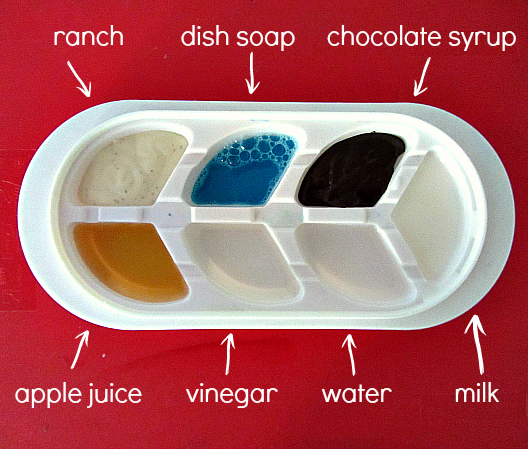
- Before you fill your trays, mark each "cube" with a symbol so that you know what substance is in each cube, water and vinegar can look the same for example.
- Fill each of the ice cubes with one of the above listed substances, making sure that they are all set at room temperature before you start.
- Once the tray has been filled, place it flat into the freezer.
- Get the kids to list each of the substances in a notebook, or to start compiling a graph (up to you how you want them to capture the data) while they wait.
- Set a timer to go of every 15 minutes to observe the tray to see which substances have started freezing first and which ones are not freezing at all.
To help pass the time, you could take the same substances and heat them, to see what happens to the properties in a hot environment, this way they can compare the data.
The Results:
Before discussing the findings, you might want to teach the kids the meaning behind the words "viscous", since the viscosity of each liquid/solution comes into play here.
Viscous means sticky, gluey and syrupy. So, if something is viscous, you usually don't want to stick your fingers in it — that goes for boogers and maple syrup alike. -https://www.vocabulary.com/dictionary/viscous
The findings will show that the liquids with a lower viscosity froze faster while those that where thicker took the longest to freeze, or didn't freeze at all!
Milk freezes the fastest, this is because there are already solids suspended in milk, making it nearer to a solid state than water and vinegar for instance (both of which froze soon after the milk). The liquids that had a higher viscosity, like the dish soap, honey, hand sanitiser and oil, did not freeze at all - this is because there is more dissolved solids in the water than there is water.
What fun right! This experiment can be adapted according to the lesson you have planned as well as for the age group of the children at hand. To be honest with you, even many adults will learn something new here and be surprised with the results!
Yes the activity is really a great way of learning about the properties of solids and liquids,and how they change as a result of temperature.We did such an experiment back then in school.Nice article,keep it up
Fun :) I'm sure my nieces will love this!