Painting a Seascape - Part 2 - Building up the Detail, Refining the Image and Final Details
Hello Steemers
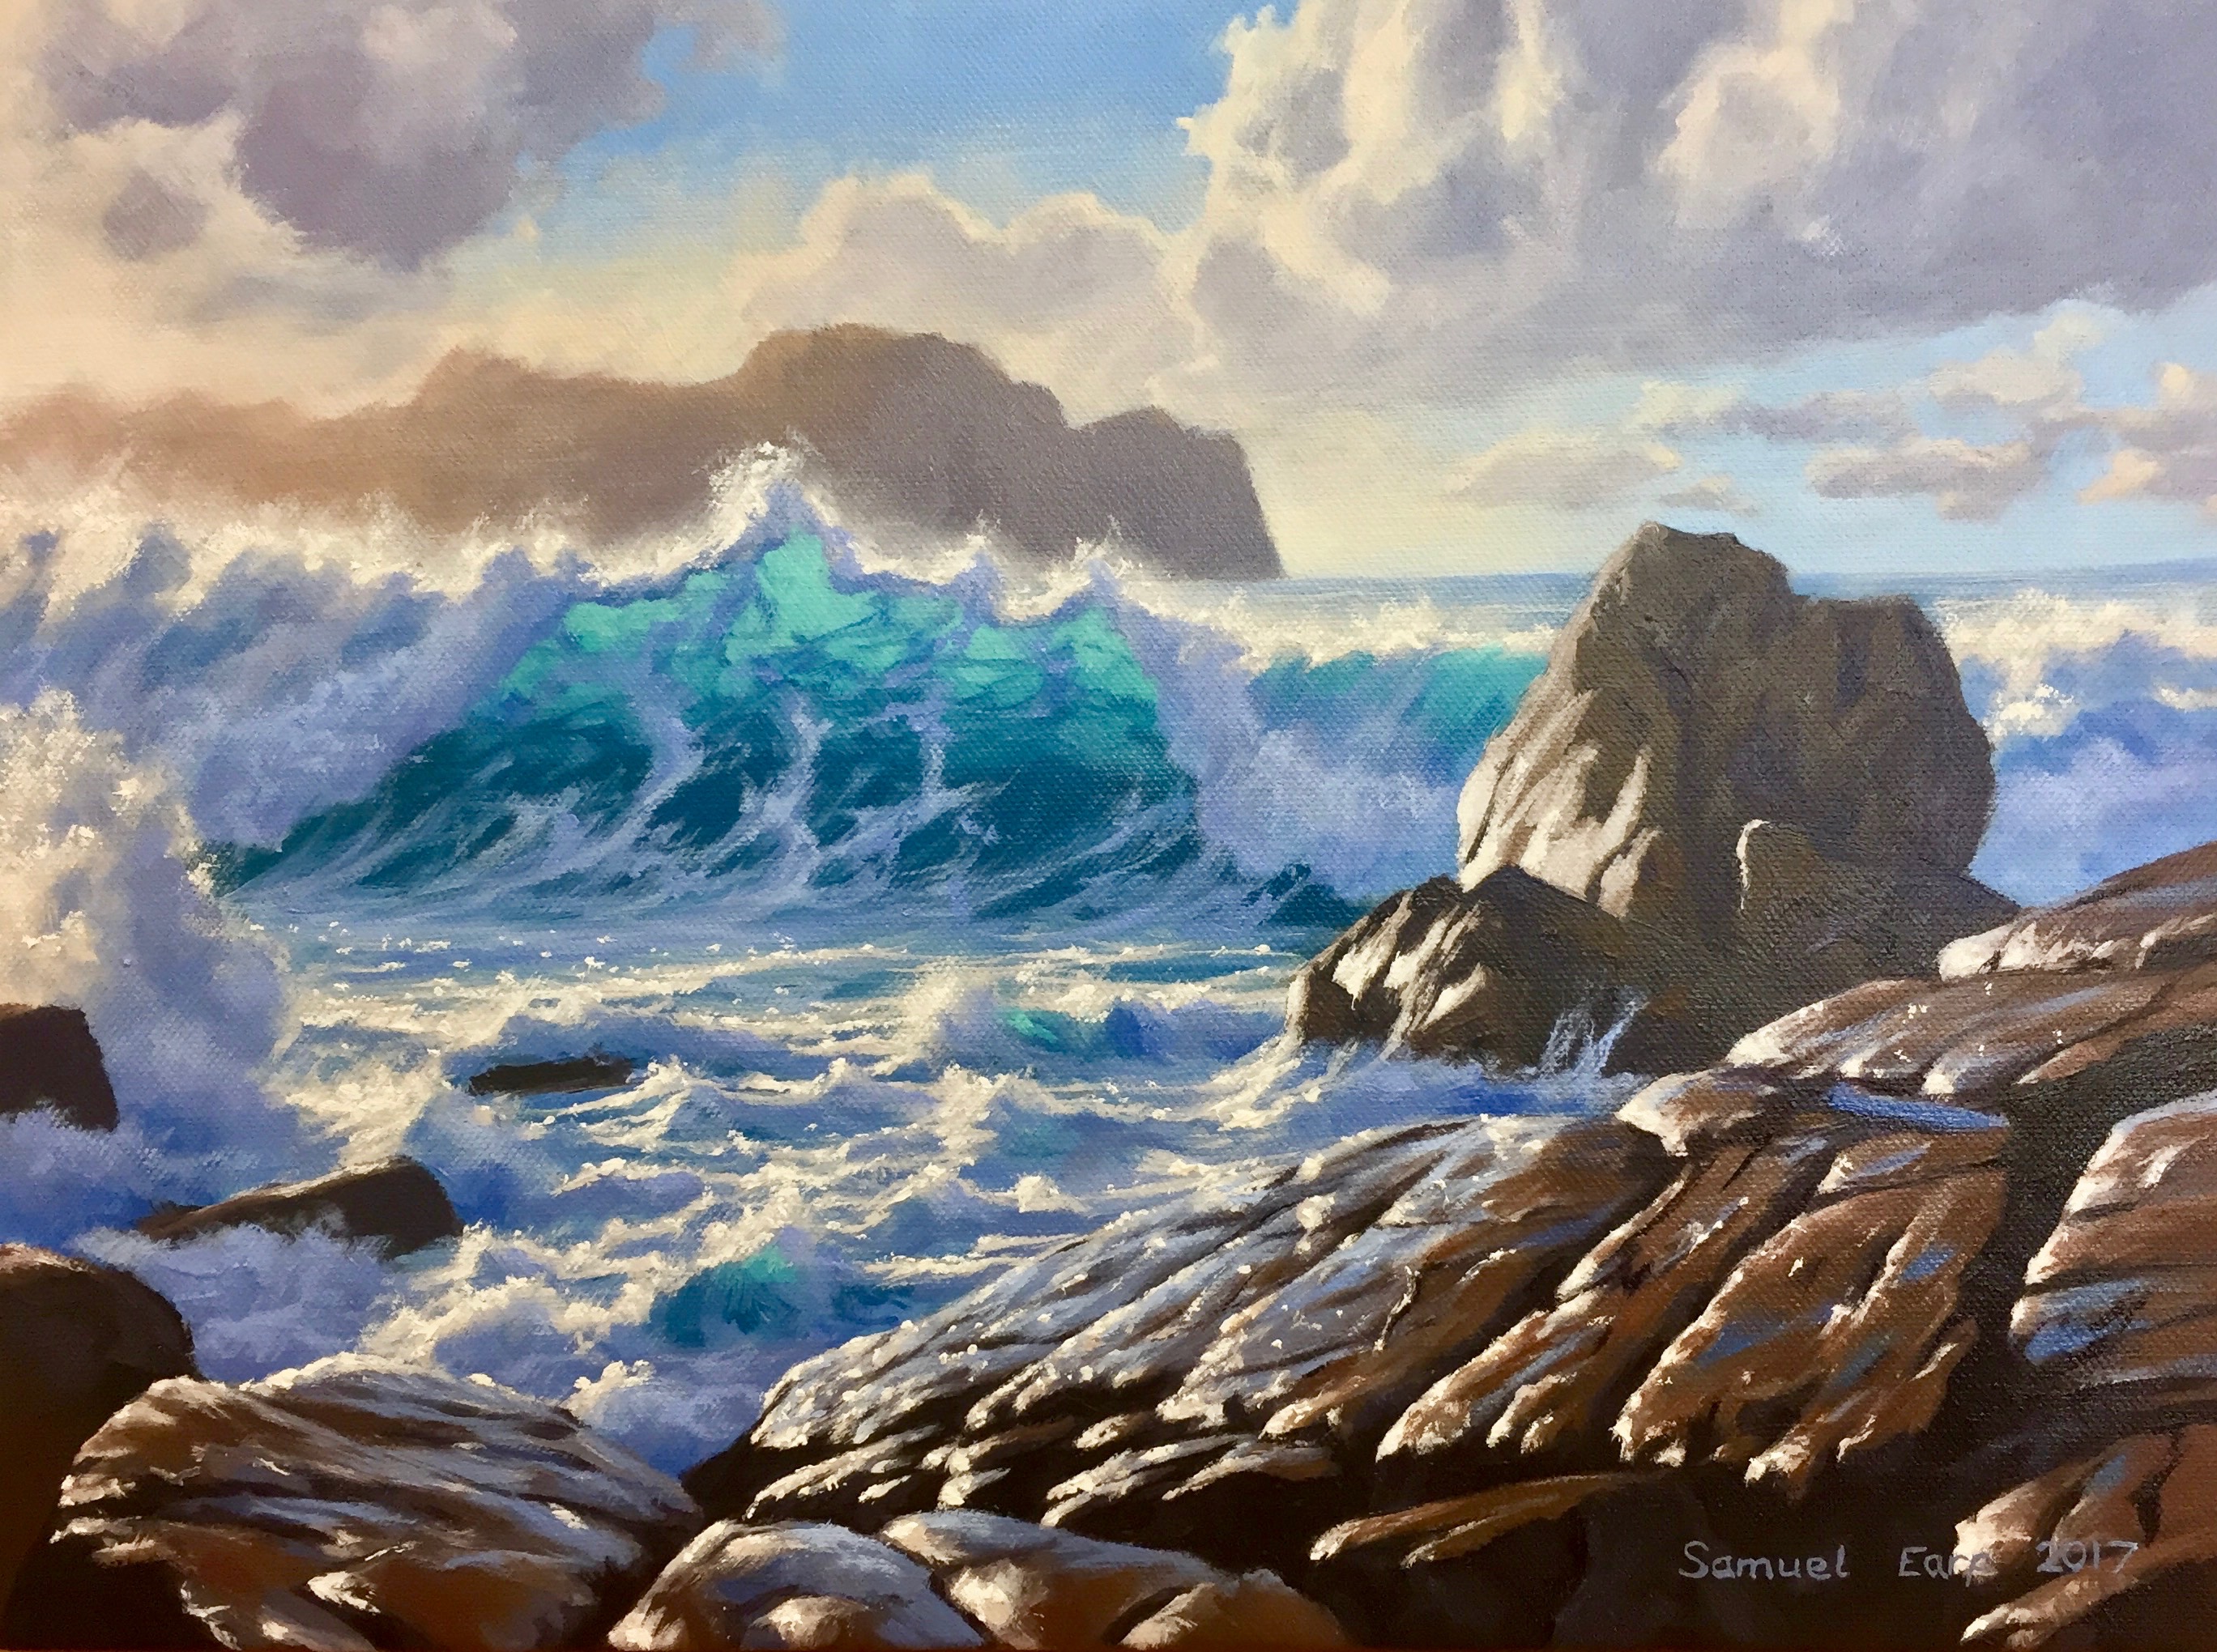
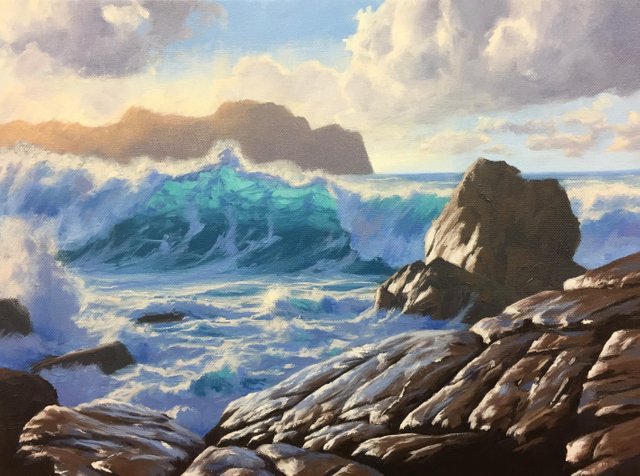
This is Part 2 of 'Painting a Seascape', where I show you how I painted this oil painting of Port Soif on the island of Guernsey.
In this blog post I show you how I built up the detail and refined and completed the painting following on from the blocking-in stage.
Check out the previous blog post where I explain how I designed the composition of the painting with pencil sketches and the initial blocking-in phase where I start painting the final art work.
https://steemit.com/art/@samuel-earp-art/painting-a-seascape-part-1-sketching-and-blocking-in
Building up the Detail and Refining the Image
So now that I have allowed the painting to dry I start working on the detail. I start back with the sky and begin defining the clouds. I use ultramarine blue, burnt umber to reduce the saturation, quinacridone magenta to give the clouds a violet tint and titanium white to increase the tone.
I use a flat bristle brush and a dagger brush to define the shapes of the clouds.The highlights of the clouds are white, but not a pure brilliant white, instead I have dropped the tone by mixing the white with a small quantity of ultramarine blue, burnt umber and quinacridone magenta.
I start adding in the detail of the white water and the crest of the breaking waves. I want to preserve my lightest tones until the very end of the painting, so although it looks white in the photo it's actually not quite white. I drop the tones of the white by mixing in a little burnt umber, ultramarine blue and quinacridone magenta.
Once I have added more highlights to the white water and the crest of the breaking wave I start building up the detail of the shadow areas. I mix these hues with a combination of ultramarine blue, cobalt blue and titanium white. I also in some areas add a little quinacridone magenta and if the colour is too saturated I can knock it back with a little burnt umber.
I paint more highlights in the rock in the mid-ground with burnt umber mixed with titanium white.
Next I start working in the detail of the rocks in the foreground and I use a combination of burnt sienna, burnt umber, quinacridone magenta, ultramarine blue and titanium white. Given the rocks are closest to the view I can use a full tonal range where my shadows will be at their darkest and my highlights, lightest.
I introduce lighter tones on the sunward facing edges of the cracks in the rocks, I also want to give the illusion that the rocks are wet so I paint some of these areas with cobalt blue mixed with titanium white. I keep in mind that the wet rock surface is reflecting the sky.

Continuing to work on the rocks in the foreground I add highlights on the rock, crack edges where the sun is directly reflecting the light. I don't use pure white as I am saving that until the end so I still add a little burnt umber into the mix.
I reinforce the cracks in the rock by mixing burnt umber and ultramarine blue to create a near black. I use a dagger brush in order to paint the cracks and achieve varied marks.
At this stage of the painting I am getting near completion and I am now refining the image. With the distant rocks I wanted to create the illusion of the bright evening sun illuminating the back of the rocks and the sea. I dry brush a glaze of yellow oxide mixed with a little quinacridone magenta and titanium white.
I add some more detail to the clouds adding lighter tones and refining the overall shapes.
Final Details
To complete the painting I add final details in the reflected light in the white water and breaking wave itself and I mix these colours using a combination of ultramarine blue, cobalt blue and titanium white adding quinacridone magenta in other areas.
Finally I add my lightest tones in the splashes of the white water and breaking wave where I have been using pure titanium white. I paint white dots in the sea to create the illusion of sparkles in the water.
I add highlights of pure titanium white in the rocks to give the illusion of glistening rocks where the edges are reflecting the sunlight.
I hope you enjoyed this blog post, stay tuned for the next part where I explain how I build up the detail of the painting and refine the image.
If you found this blog post interesting and helpful and you like what I do, any tips to help support my art career would be greatly appreciated.
Bitcoin: 1Px9bSmVfw69F2uEUso8Zz46BV2DmGLZJg
Litecoin: LQYz47A7pZfMLRjqpR29YbxnY36aoLrFAT
Dash: XmHqFwzmyhax3zm2Q3hVhqAYfMZ2AqaZ3f
Check out my website for more painting demos and my art: samuelearp.com
Subscribe to my mailing list for news, new paintings and art tips and receive a FREE digital art print download of one of my seascape paintings suitable for printing an image of any size: https://www.samuelearp.com/subscribe/
I love the slow addition of details to this one. Good job mate.
Thanks @crazyseanymph :)
Incredible as always!
And incredible highlights in this one!
Thanks @walperion :)
Amazing :) I love your paintings!
Thanks @goldenroom :)
Its wonderful art
Thanks @itzikuna :)
Fantastic Art..
Thanks @nomishiekh :)
great like always! You are very professional and talented painter! upvote!
Thanks @prostosun :)
Very cool... soon I come back and look more your post :)
Thanks mate :)
you are welcome :)
Very beautiful …. @samuel-earp-art I love this painting :-) Resteemed
Thanks for the resteem @stef1 :)
I am an art enthusiast. Your description of your work was particularly engaging and gave the appraisal of the work a rare synergy. Great post, I look forward to reading more of your content.