Tutorial : How to create Word Art with reflect effect using Inkscape software
Good morning everyone! and happy new year 2018, hopefully you are always in good health and can do activities and daily routine as usual, and hopefully the career in this new year is better than in previous years.
On this occasion I will share a tutorial how to make WORD ART WITH REFLECT EFFECTS using inkscape software. but, before we get into the turorial session, do we know what Inkscape is? to make it easier for us to use this great software.
Inkscape

Image Source
Inkscape is an open source software that is almost equivalent to corel draw, although not as famous as the corel draw itself. But this software already meets the standard XML, SVG and inkscape CSS can also run on windows operating system, so this graphic device is really friendly with you who have talent graphic designer. The main goal of inkscape is presented is to be one of the current cutting-edge graphics tools.
Okay, that's a glimpse of information about this inkscape, now we go into tutorial session.
That's a glimpse of information about inkscape, hope you guys novice designers like me can understand and are interested to follow this tutorial from me.
Tutorial
Tutorial how to create Word Art with reflect effect using Inkscape software
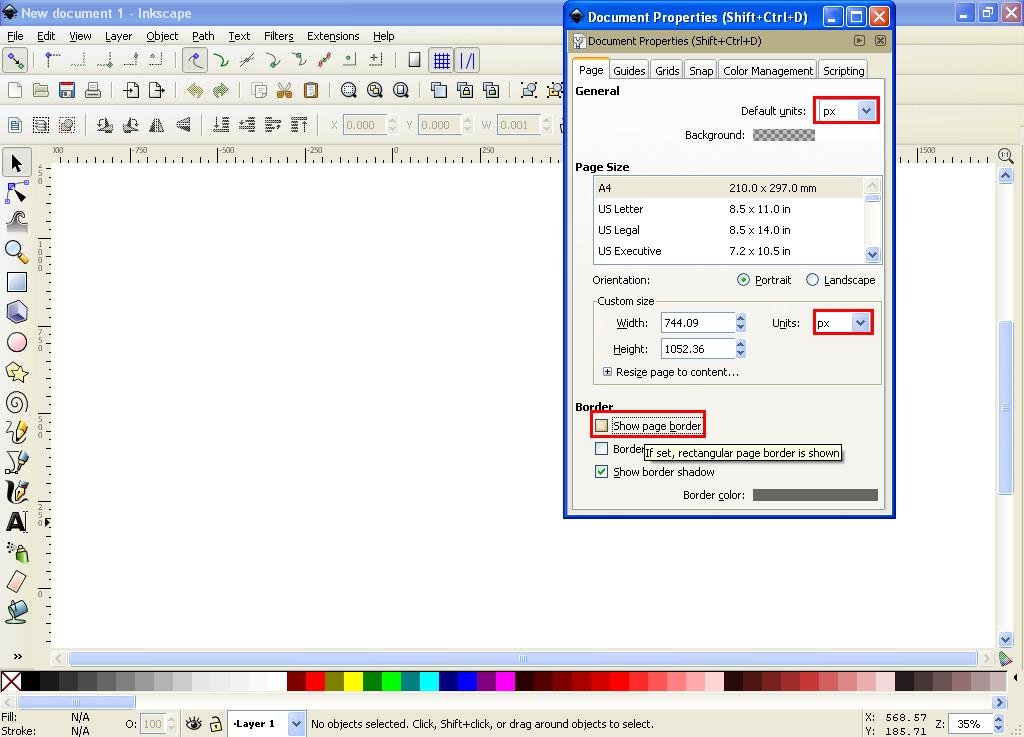
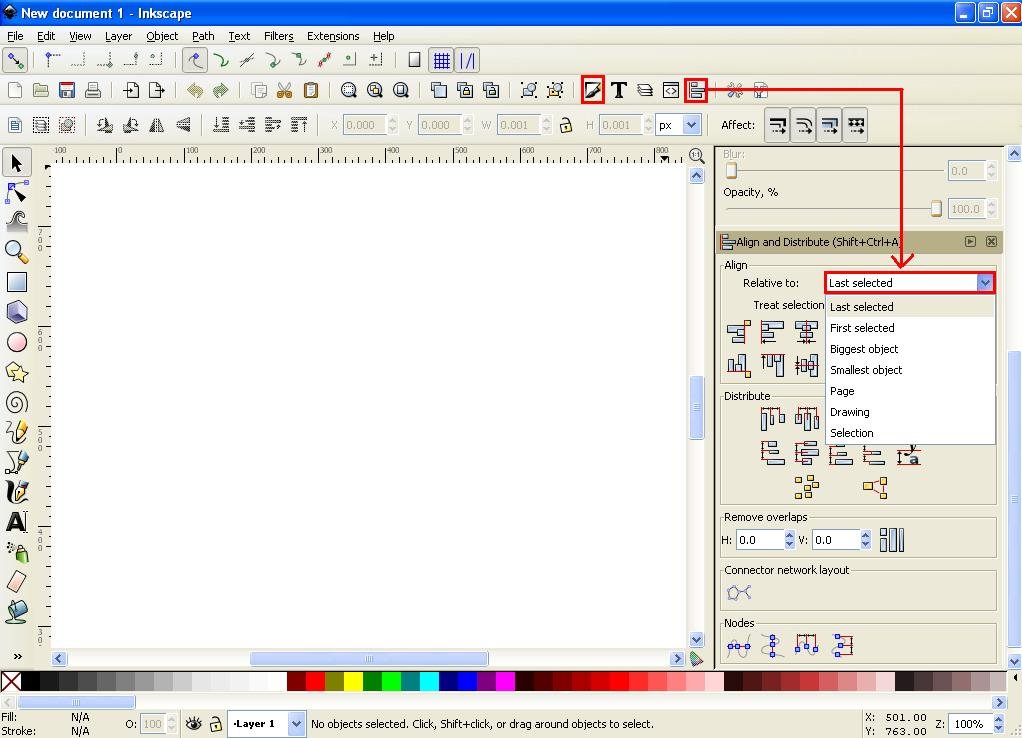
For the first step, we set the workspace in inkscape, click the file on the menu bar select document properties, then uncheck show page border and make sure all units are in pixel unit on document properties command screen, then click view select custom, click view again select zoom and zoom 1: 1. Finally click the button or icon align and distribute object and select last selected on the command screen and click also fill and stroke icon on the menu bar.


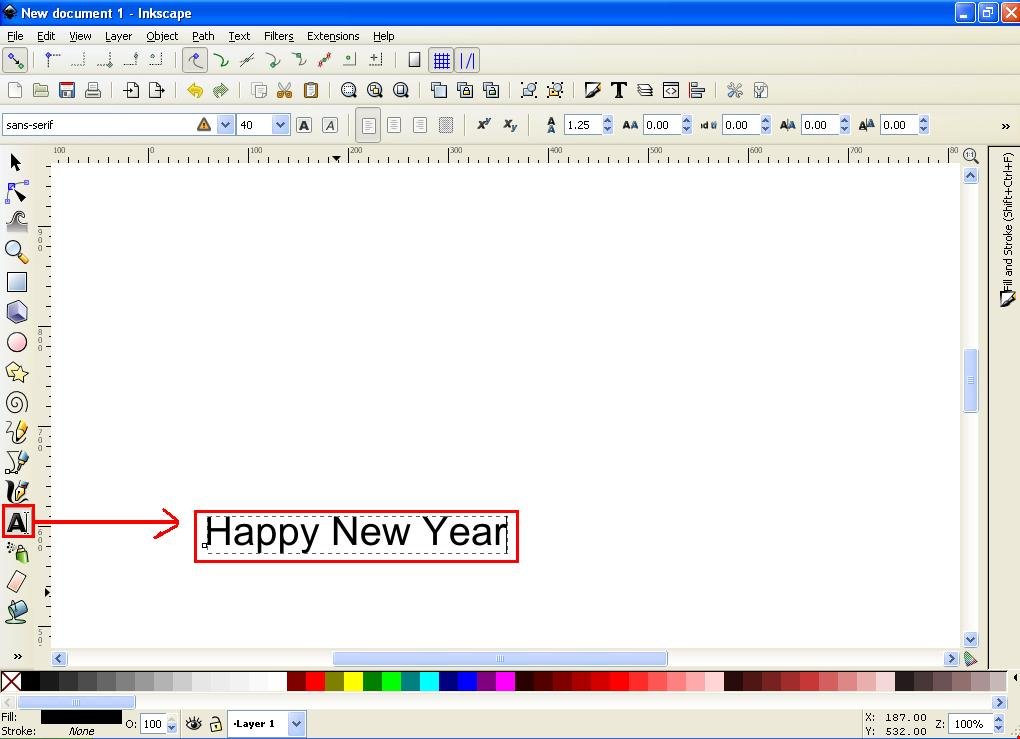
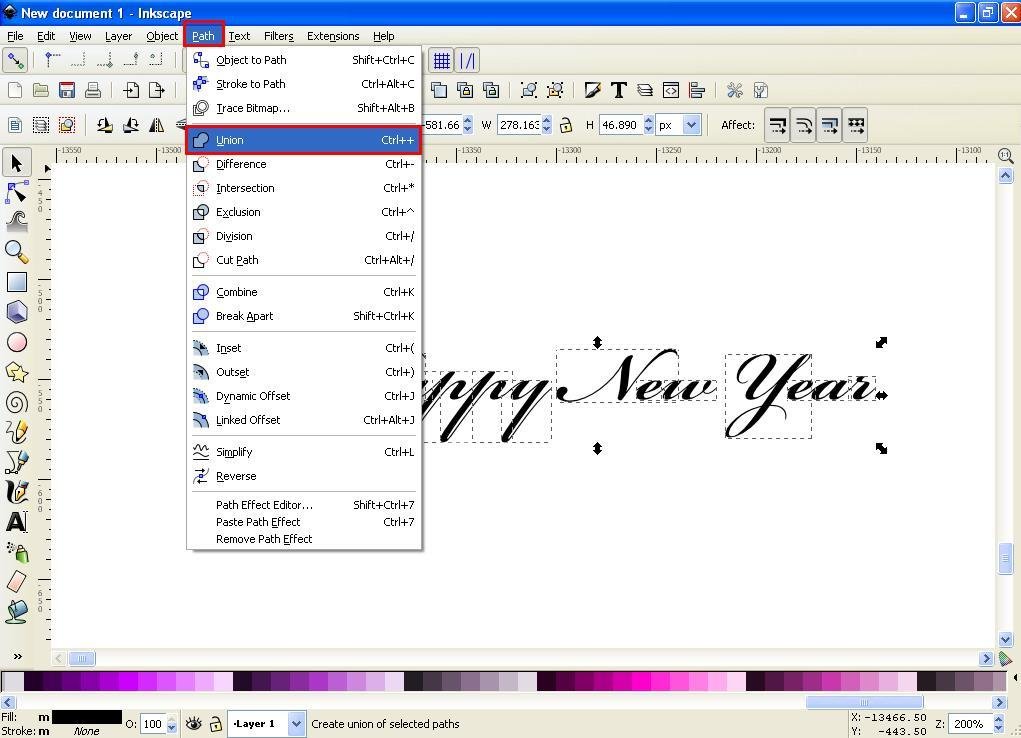
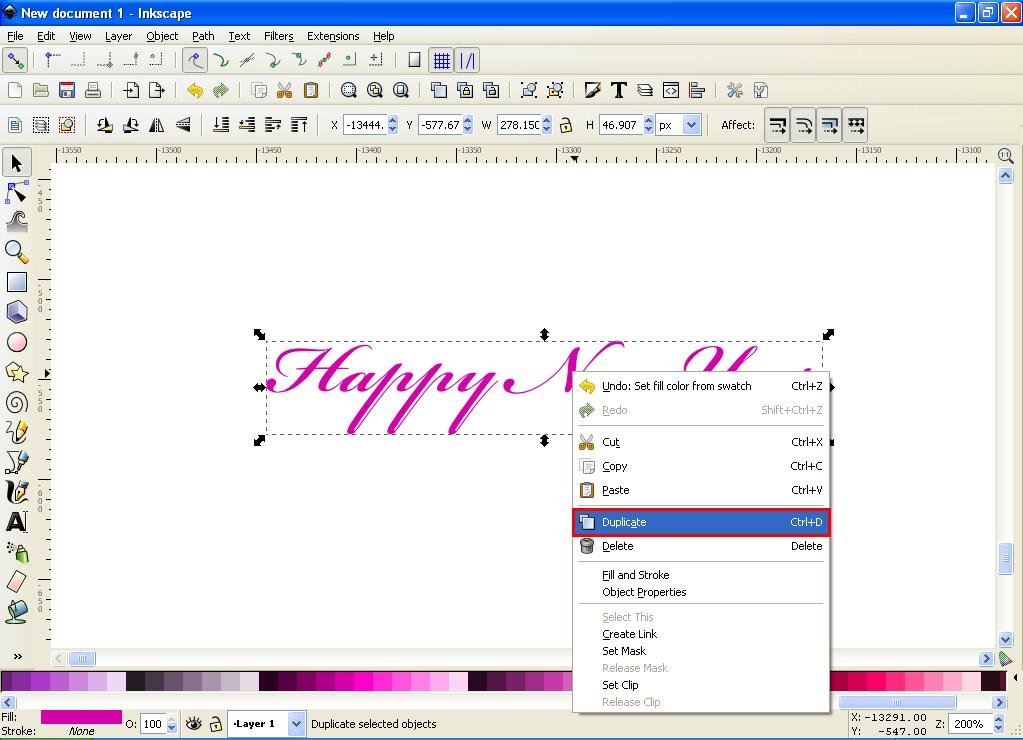
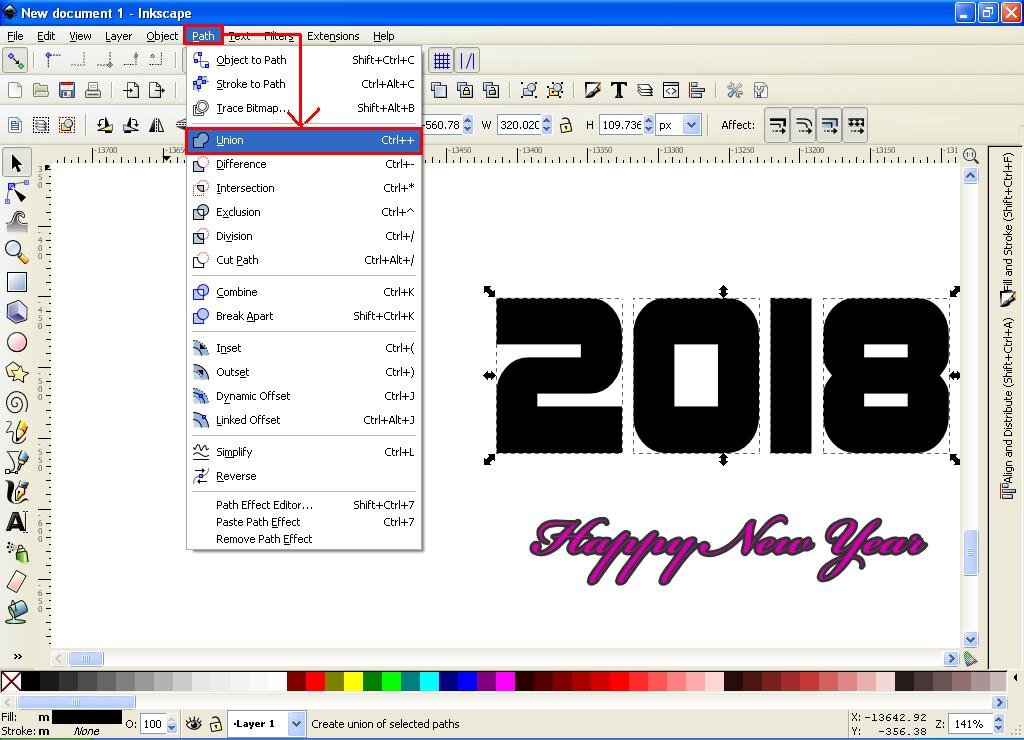
The second step, click menu create and edit text object on the side bar and write a word or sentence as the first object, then click icon (T) on the menu bar to choose the type of font you like, no need to set the size, because the font size on inkscape can be the way we click on the arrow then we drag and press using the mouse. Next click the path on the menu bar select object to path, then click the un-group icon on the menu bar. Finally click the path again on the menu bar, and select union.


Step three exchange the text color with one of the available colors in the task bar, then right click on the text, select duplicate, change the color for the duplicate text and click the lower selection to bottom icon or button on the menu bar. Next click the path on the menu bar, select Outset, then text duplicate will enlarge by itself and look like a shadow effect. Up to this stage we are finished for the first object


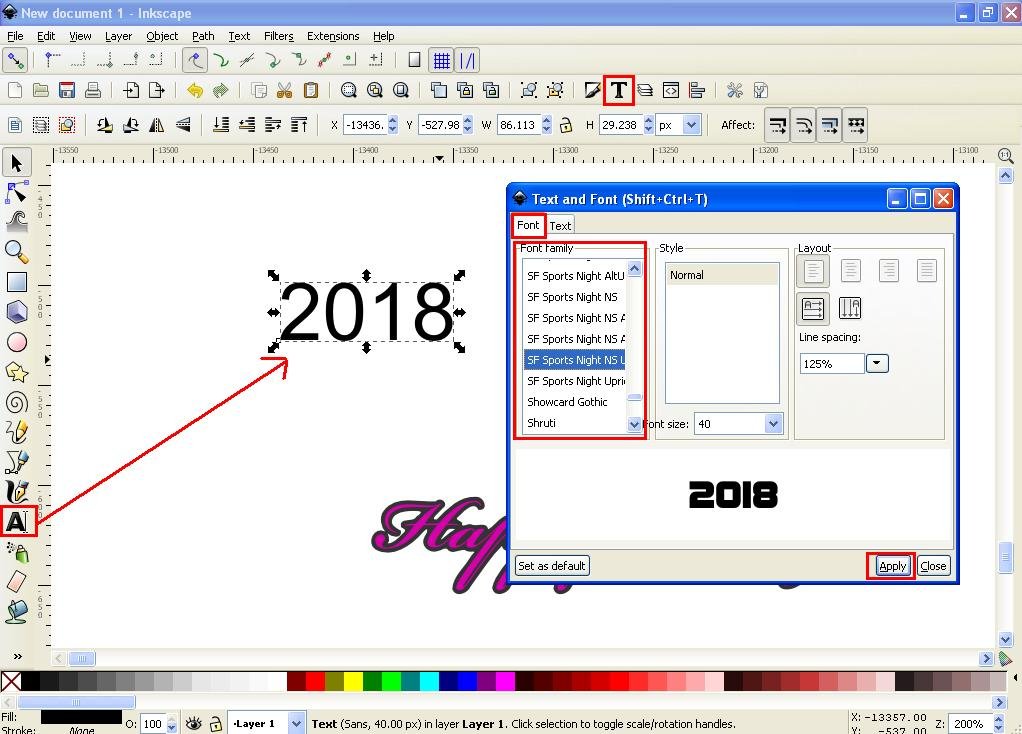
The fourth step, click menu create and edit text object and make text or second sentence as object number two, set font like before. Next click the path on the menu bar, select the object to path, and click the un group icon. last click the path again on the menu bar and select union.

The fifth step, click fill column on fill and stroke command screen, and click linear gradient column then press G on keyboard it will exit gradient editor line, click the end point and set the opacity to 100%. Then double click on the line to add a point, keep in mind that the number of points is influential for the number of colors we will set on the object. then set the line position to vertical and click the edit button, it will exit the gradient editor command screen.


The sixth step, set the color and lighting of the object, click the down arrow on the gradient editor screen, and select one by one ad stop and set the color according to each wish until finished. Next right click on the text object and select duplicate, move the duplicate sideways because we do not use now.


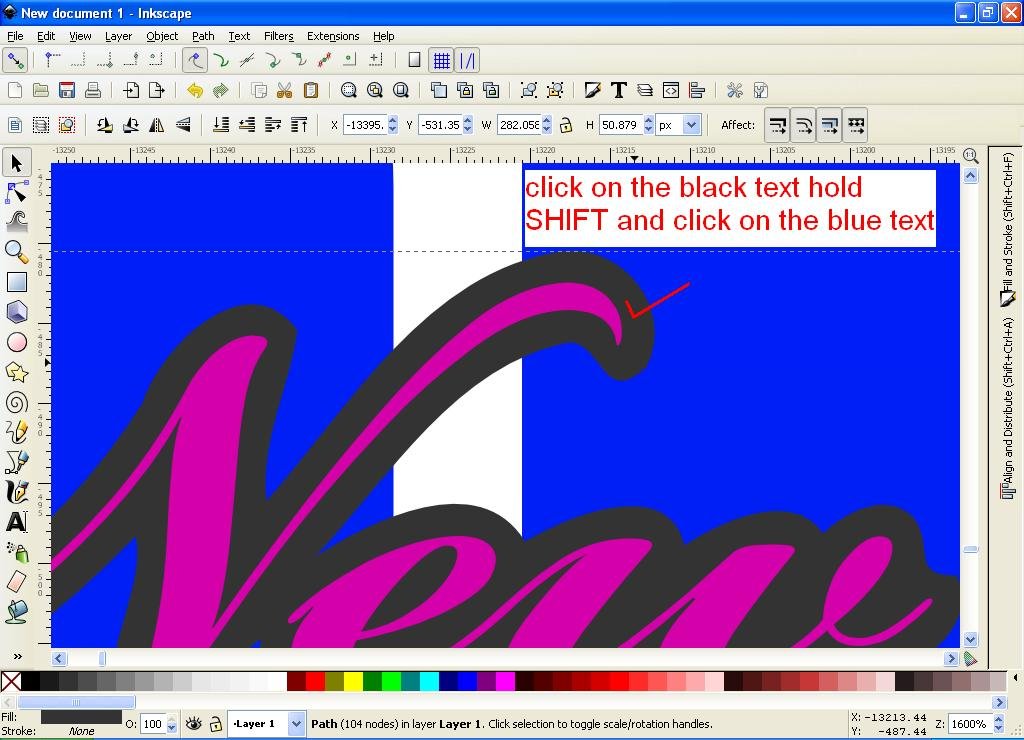
The seventh step, click the select and transform object and select the object we created in the first step, hold SHIFT on the keyboard click on the second text object then click the center button on vertical and horizontal axis on the align and distribute object screen on the right. Next, click on the first duplicate text object we have set out the set, hold SHIFT again and click on the second text object. Lastly click the path on the menu bar and select the difference.


For the eighth step, select both objects thoroughly and click the group icon on the menu bar. Next grab the text duplicate object number two earlier and place it under the object we already group or the first object and click the center button on vertical axis only on the command screen align and distribute object. Then, click on the bottom object or duplicate it, and click the flip button objects vertically, then the object will be reversed automatically, and set the position of the two to be close.


In the ninth step, click the rectangles icon on the side bar and create two rectangular objects of view of different sizes and give the contrasting colors to the objects we have completed in the previous stages. Take a large rectangular object place it behind the text object, and grab a small rectangular object place it above the text that we have reversed, or the bottom text. Next, click on a small rectangular object and set the blur capacity to 7%, 8% or 9%, adjusting to the state of the object.


For the tenth step, click the rectangle icon again and create a smaller rectangular object that can be customized with the first text and put white or set the contrast, place it in the first text and click on the lower selection. Step icon then set its blur capacity on the fill command screen and stroke.


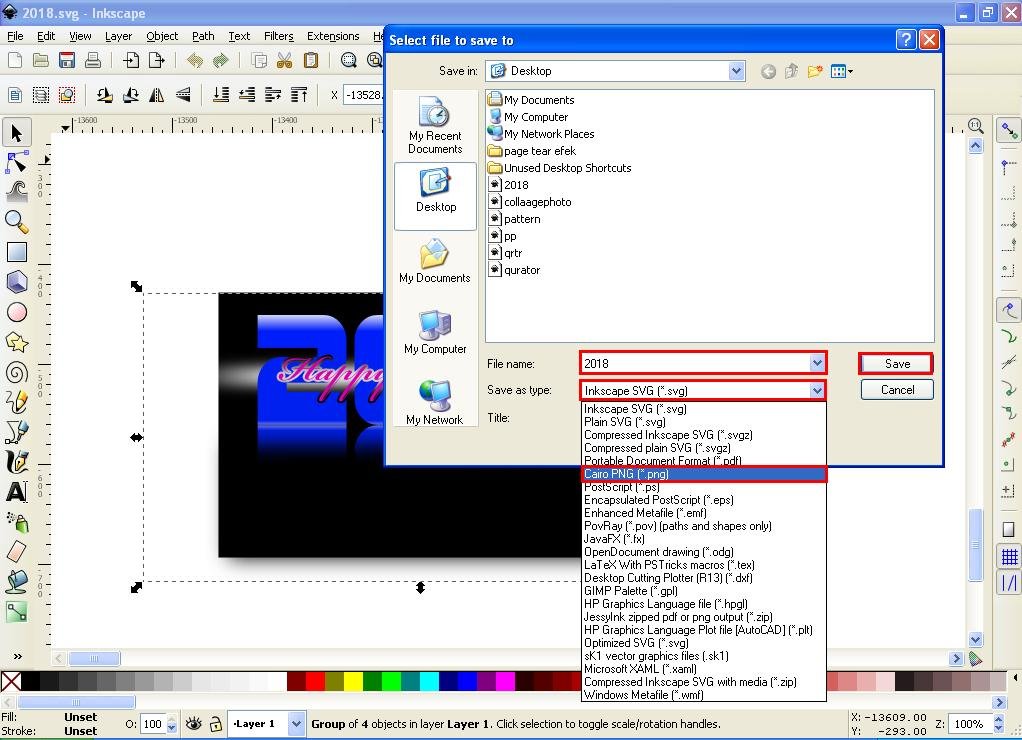
For the eleventh step, or the last step, we save all the objects into one file, There are two ways to save files in Inkscape.
The first way
Click the file on the menu bar, select Export bitmap, then click browse button then fill in the file name and click Save and click export.


The second way
Click on the file in the menu bar select Save As, then fill in the file name and select the file format, here there are various file formats to choose from, I suggest to save the file in two formats, the first save in SVG format, its function to facilitate we re-edit the file if necessary, and the second save in PNG format allows us to upload files to various media.

That's the steps to design a Word Art with reflect effect on inkscape software. That's all I can share on this occasion, hopefully useful to all of us!
Thank you for reading and following my tutorial, see you next tutorial and Happy New Year for everyone!
The image below is the result I made in this tutorial.

Best Regards @saini88
Posted on Utopian.io - Rewarding Open Source Contributors
Your contribution cannot be approved yet because it is not as informative as other contributions. See the Utopian Rules. Please edit your contribution and add try to improve the length and detail of your contribution (or add more images/mockups/screenshots), to reapply for approval.
You may edit your post here, as shown below:
You can contact us on Discord.
[utopian-moderator]
Thank you @shreyasgune, I have edit it, Please check it once more
Thank you for the contribution. It has been approved.
You can contact us on Discord.
[utopian-moderator]
Thank you very much @shreyasgune #utopian-moderator
Hey @saini88 I am @utopian-io. I have just upvoted you!
Achievements
Suggestions
Get Noticed!
Community-Driven Witness!
I am the first and only Steem Community-Driven Witness. Participate on Discord. Lets GROW TOGETHER!
Up-vote this comment to grow my power and help Open Source contributions like this one. Want to chat? Join me on Discord https://discord.gg/Pc8HG9x