Tutorial : How to create a photo with pattern effects using inkscape software
Goodnight everyone! Hopefully you are always in a healthy condition and can do daily activities and routines as usual, and hopefully today is better than yesterday.
On this occasion, I will share a tutorial using inkscape software to create photos with pattern effects. Steps or process to create a photo with pattern effects using Inkscape softwae is very easy and simple. I'm sure the designer of the mover can do that.
As usual before we enter the tutorial session, we first know what is Inkscape? to make it easier to use the software. For that here I try to explain a bit about this inkscape software. For more knowledge you can read on various websites on the internet.
Inkscape
Image Source
Inkscape is an open source software that is almost equivalent to corel draw, although not as famous as the corel draw itself. But this software already meets the standard XML, SVG and inkscape CSS can also run on windows operating system, so this graphic device is really friendly with you who have talent graphic designer. The main goal of inkscape is presented is to be one of the current cutting-edge graphics tools.
Okay, that's a glimpse of information about this inkscape, now we go into tutorial session.
That's a glimpse of information about inkscape, hope you guys novice designers like me can understand and are interested to follow this tutorial from me.
Tutorial
How to create a photo with pattern effects using inkscape software
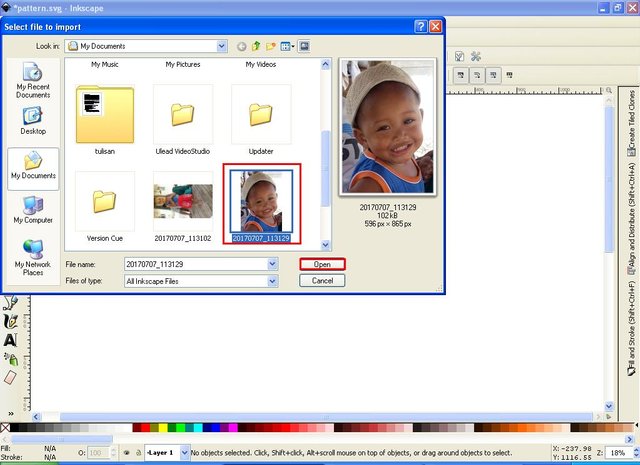
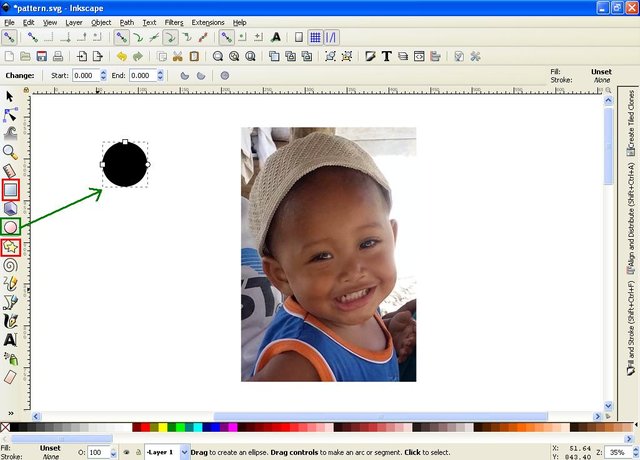
For the first step, provide a photo file, here I am using my nephew photo.

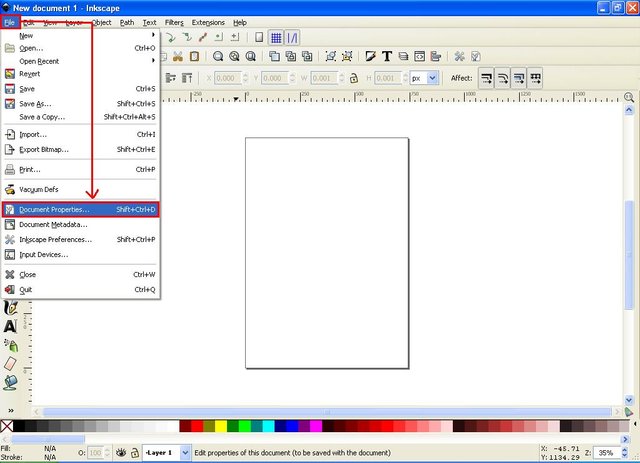
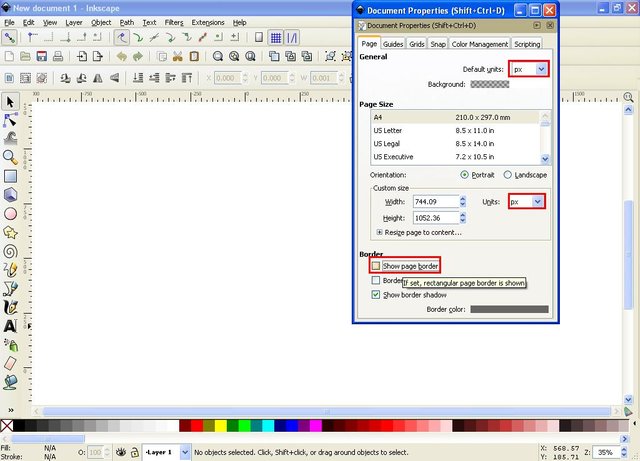
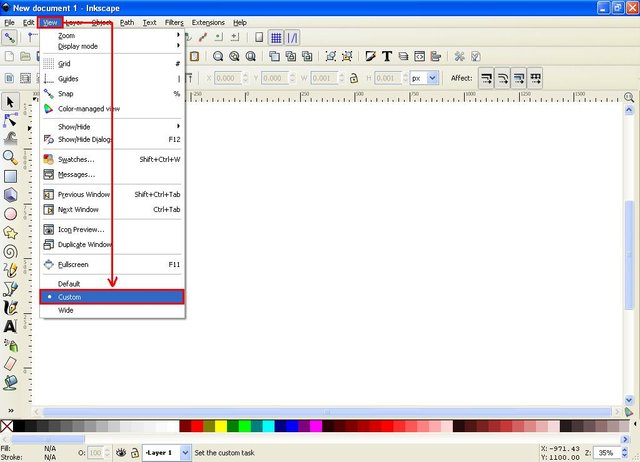
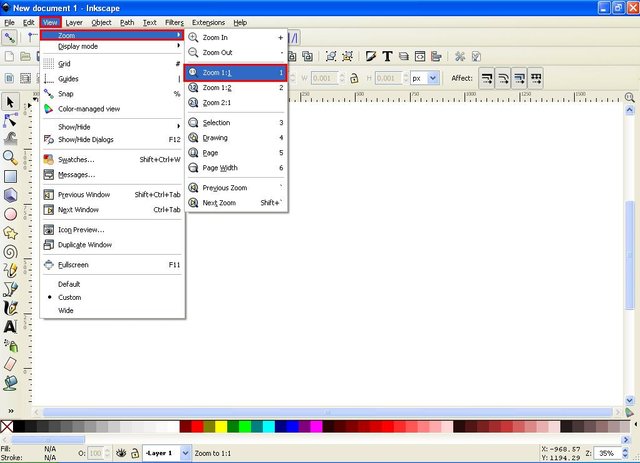
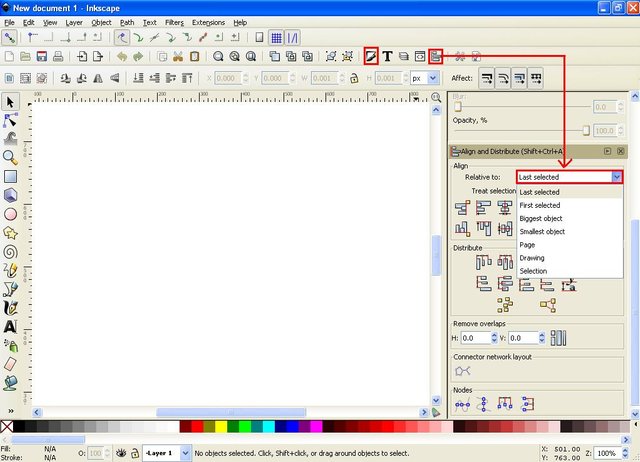
Then we set the working page on the inkscape screen. Click the file on the menu bar, select document proeperties and then uncheck show page border on the document properties command screen. Then click view select zoom and zoom 1: 1. Finally click the align and distribute object button and fill and stroke button on the menu bar to open the command screen object settings that we will do.
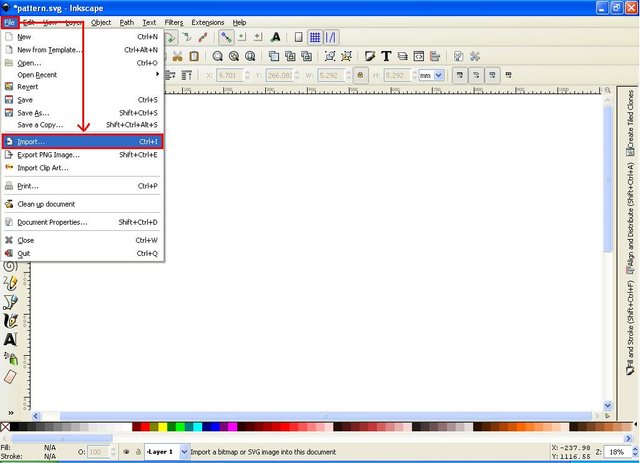
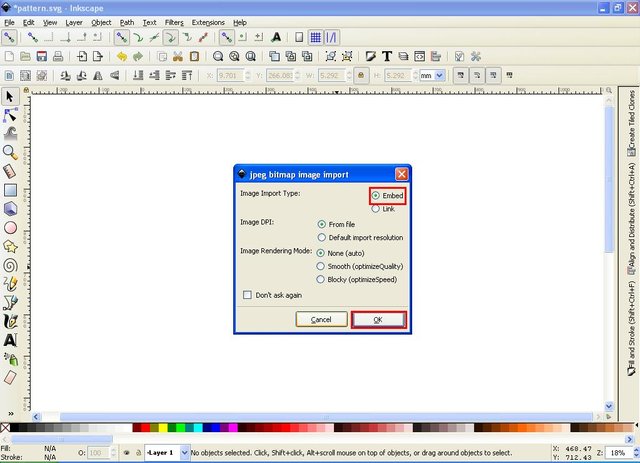
The second step, click the file select import, then select the image file that will be used as pattern effect, click open and select embed.
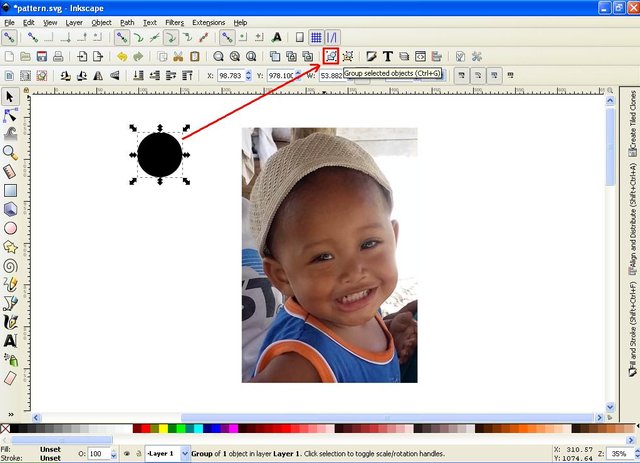
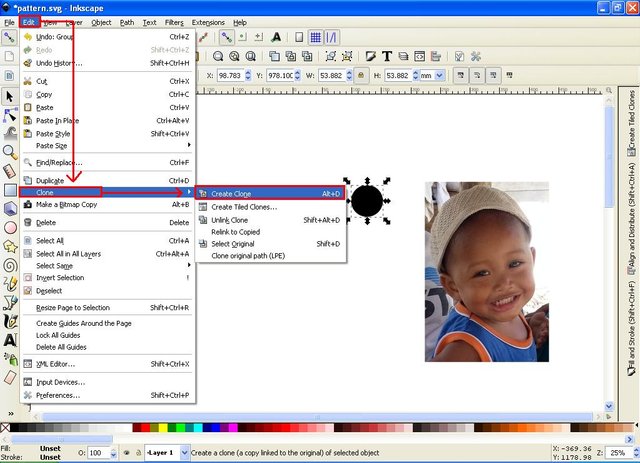
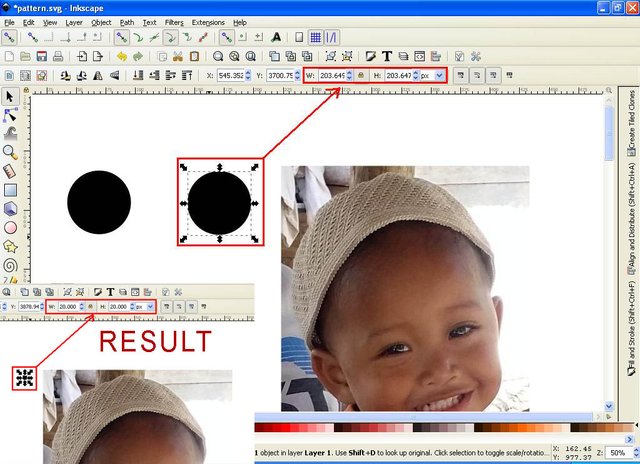
In the third step, click the create circle button, or rectangles button or polygon button on the tool bar, in this tutorial I choose to use create circle. Next hold SHIFT and CTRL on the keyboard and create an object using the mouse of course, then click the group button on the menu bar. Finally click edit on the menu bar select clone and choose create clone.
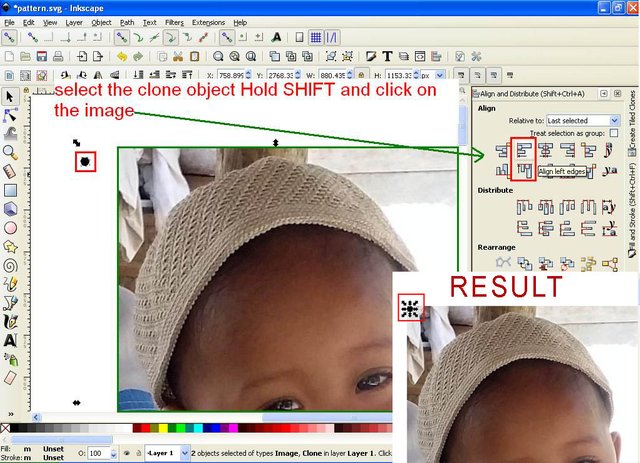
The fourth step, move the cloned object earlier and change the size of the pixel becomes smaller, here I use 20 pixels. Then click the object hold SHIFT on the keyboard and then click on the object image or image that we imported earlier, then click the align left edges and align top edges on the command screen align and distribute object.
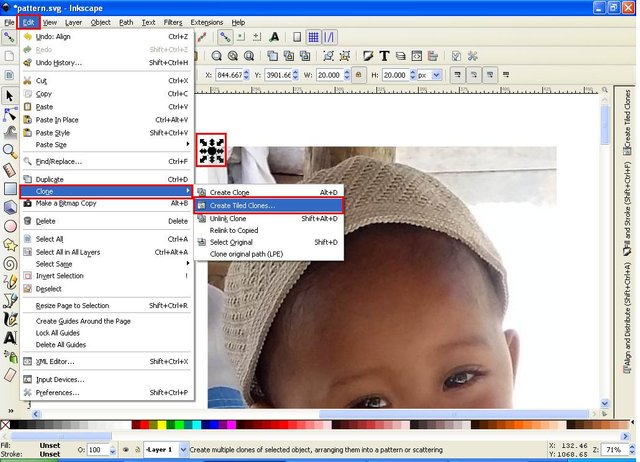
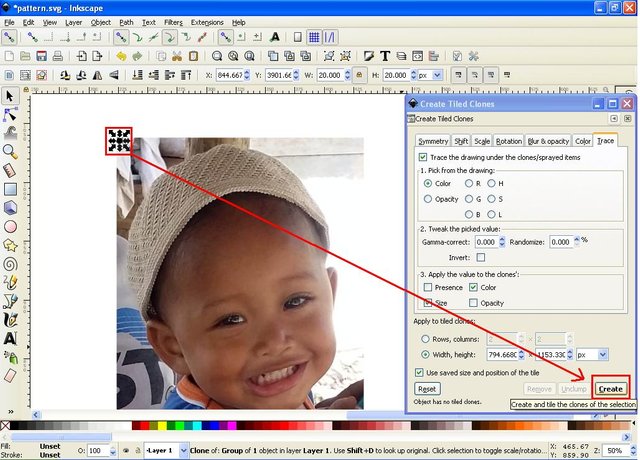
For the fifth step, click on the small object, then go to edit in the menu bar, select clone and select cerate tiled clones, it will exit the create tiled clones command screen. After the screen is out, then click on the image or photo and then on the create tiled clones command screen, click on the trace column and then click the trace the drawing under the clones, on the command Pick from the drawing select color, then the Tweak the picked value column is not necessary do whatever, then in the Apply the value of the clone column select size and color. Next on the Apply to tiled clones command select the width and Height columns, fill or copy and paste the image size into the width and heigth columns on the command. Finally click on the object that we cloned earlier and click the create button on the command screen create tiled clones. Then the image will soon become the pattern of the object we have clone earlier.

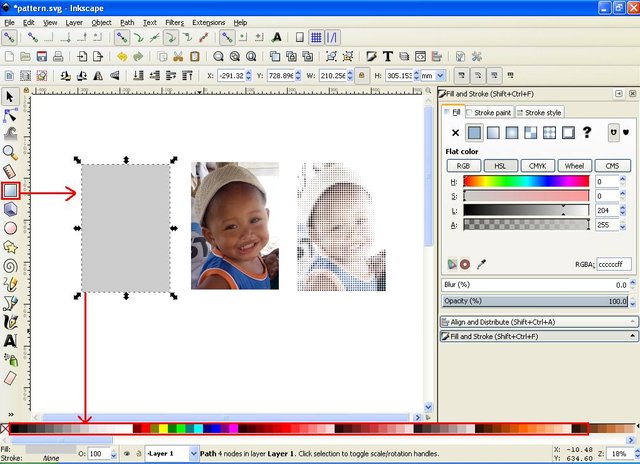
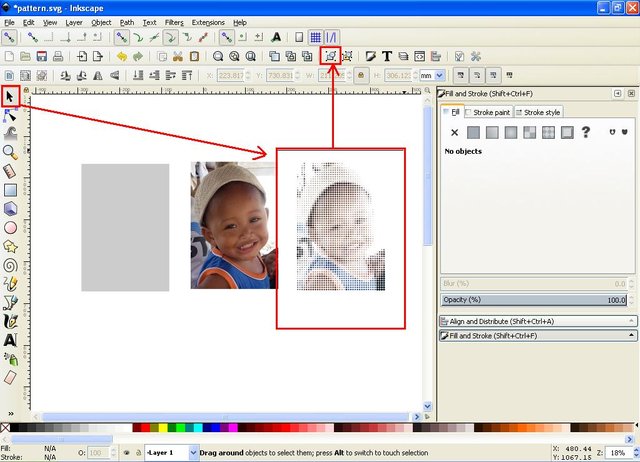
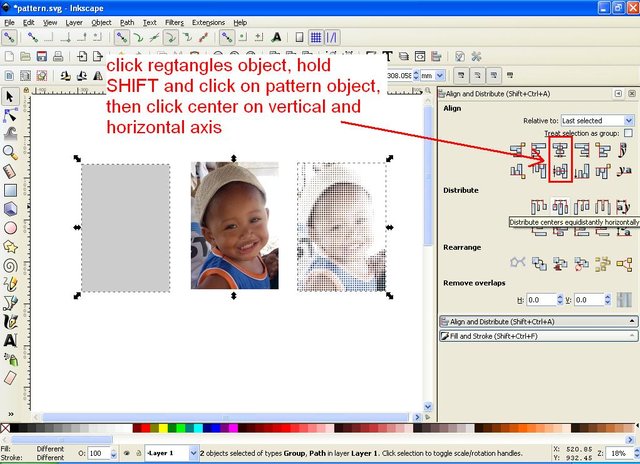
In the sixth step, this stage can be done and may not, because at this stage I just want to add the background only. But if you want to make it okay. Click the rectangles button on the tool bar then create a rectangular object according to the size of the photo we patterned earlier, and make the color with the photo we have. Then click the button select and transform object on the tool bar and select the object image that we have given the pattern effect then click the group button on the menu bar. Finally click the rectangles object hold SHIFT on the keyboard and click on the photo we have given effect pattern then click center button on vertical and horizontal axis.
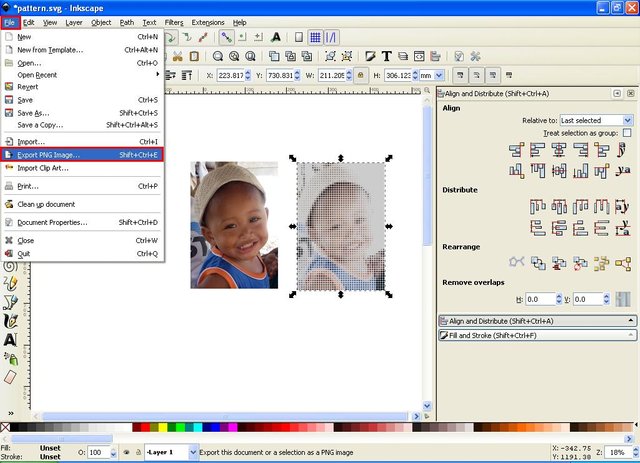
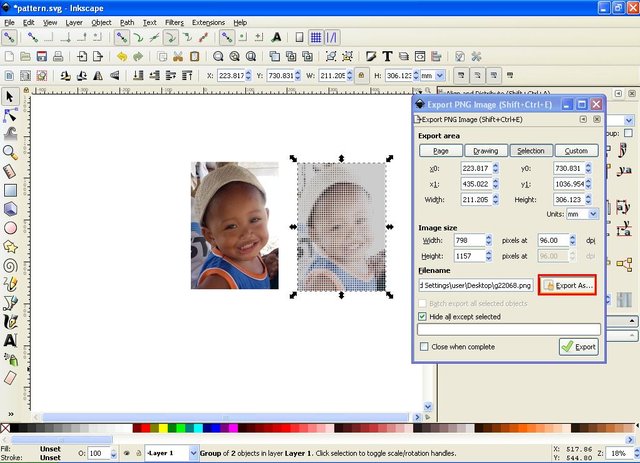
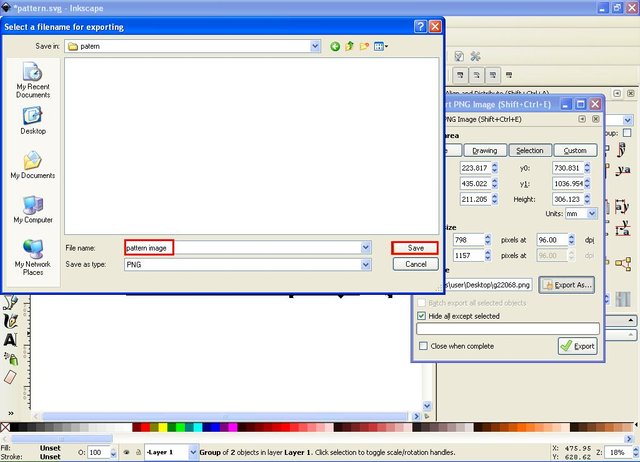
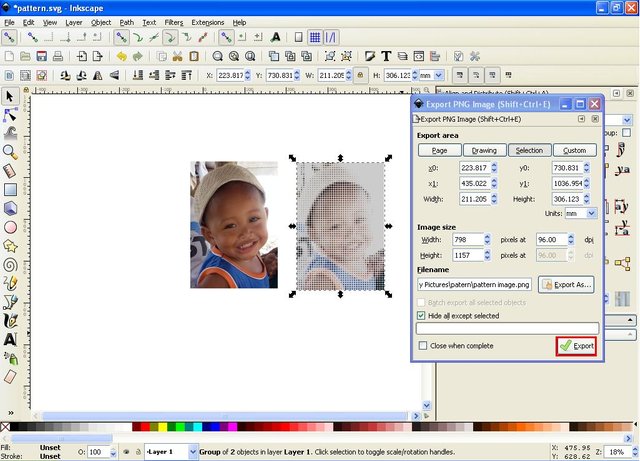
The last step is to save the object into a file. there are two ways to save the object into a file on this software. First, click the file on the menu bar select Export, then select browse or export As then give the file name click save and click export.
The second way is, click the file on the menu bar select Save As, then give the file name, select the desired file format, if you already exported then no need to save in PNG format. I suggest to be saved in SVG format for easy editing if needed later.
That's a series of steps to design a photo with pattern effects on inkscape software. this is all I can say on the occasion of this tutorial, hopefully useful for all, see you in the next tutorial.
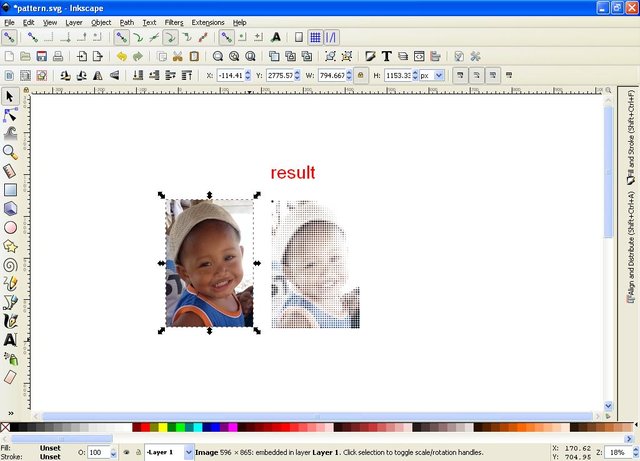
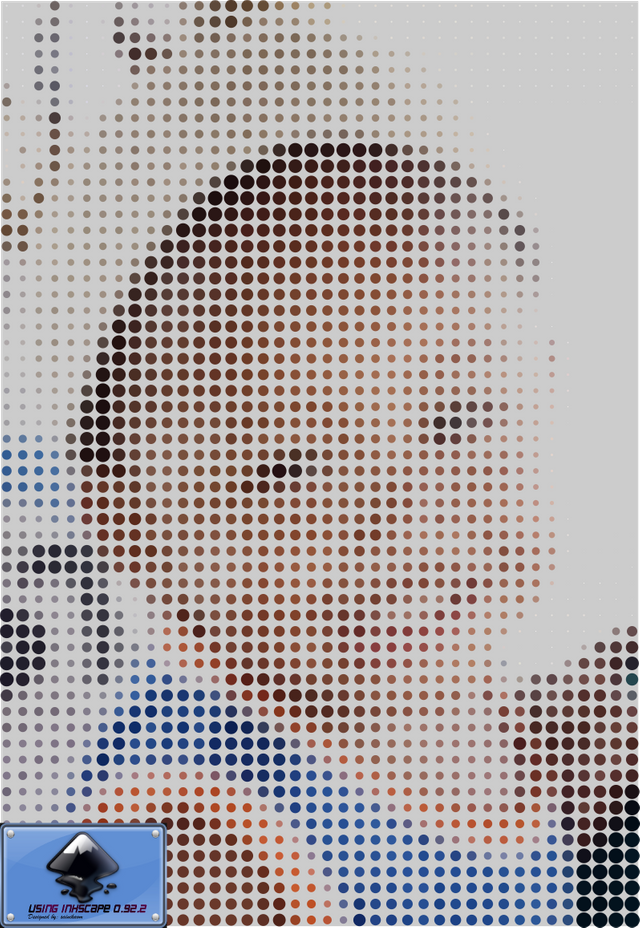
And this is the result of the photo with pattern effects that I made in this tutorial. Best regards
Posted on Utopian.io - Rewarding Open Source Contributors
I was unaware such application existed, for my posts i usually just use gimp, but sometime i feel is complicated to use, i will try this one and see its compares to gimp, maybe i am just not using the right tool.
Hi @m3mt!
I think Gimp is also a great software for design. I also use Gimp for some of my designs. But I do not make tutorials using GIMP because there are so many that make it. By the way, if you want to try it is also very interesting to combine the Gimp design results into Inkscape or vice versa.
Greetings!
Hey @saini88 I am @utopian-io. I have just upvoted you!
Achievements
Suggestions
Get Noticed!
Community-Driven Witness!
I am the first and only Steem Community-Driven Witness. Participate on Discord. Lets GROW TOGETHER!
Up-vote this comment to grow my power and help Open Source contributions like this one. Want to chat? Join me on Discord https://discord.gg/Pc8HG9x
mantap banget bang @saini88...
semakin keren aja...
goodluck bang saini..
nyan sinyak roneuh nyoh bang...??
Thanks bang @my451r, hehehe keponakan saya itu
Thank you for the contribution. It has been approved.
You can contact us on Discord.
[utopian-moderator]
Thank you for the contribution. It has been approved.
You can contact us on Discord.
[utopian-moderator]
Thank you very much @manishmike10 #utopian-moderator
That's a very nice howto, thank you for sharing! :)
I think I might try giving utopian.io a try myself one day. Looks very interesting.
Thanks too much @gamer00