Tutorial : Design of Bitmap Emphasis Technique
Good morning everyone! Hopefully you are always in good health and can do daily activities and routines as usual, and hopefully today will be better than the previous days.
On this occasion I will share a tutorial on design, and would like to invite novice designers to learn the same graphic design using inkscape software. In this tutorial this time I want to invite you beginner designers to design a picture in the form of Emphasis Technique.
As always, before we get into the tutorial session, I want to introduce first what it is Inkscape. but here the only general explanation, for more details you can search and read in various other media.
Inkscape
Inkscape is an open source software that is almost equivalent to corel draw, although not as famous as the corel draw itself. But this software already meets the standard XML, SVG and inkscape CSS can also run on windows operating system, so this graphic device is really friendly with you who have talent graphic designer.
The main goal of inkscape is presented is to be one of the current cutting-edge graphics tools. Okay friends, that's a glimpse of information about this inkscape, now we go into tutorial session.
That's a glimpse of information about inkscape, hope you guys novice designers like me can understand and are interested to follow this tutorial from me.
Tutorial
Design of Bitmap Emphasis Technique
To make an image in Bitmap Emphasis Technique very easy, and this is the easiest tutorial to follow from all the tutorials I've previously shared. Well, just go to the process.
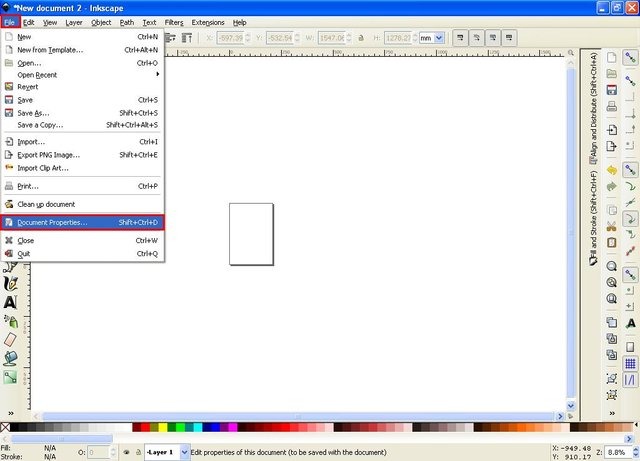
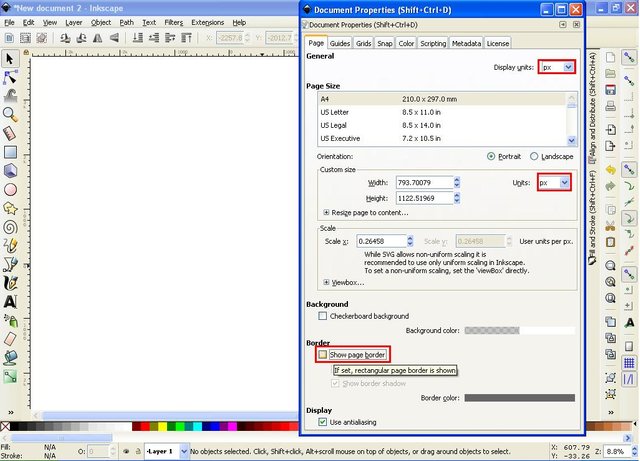
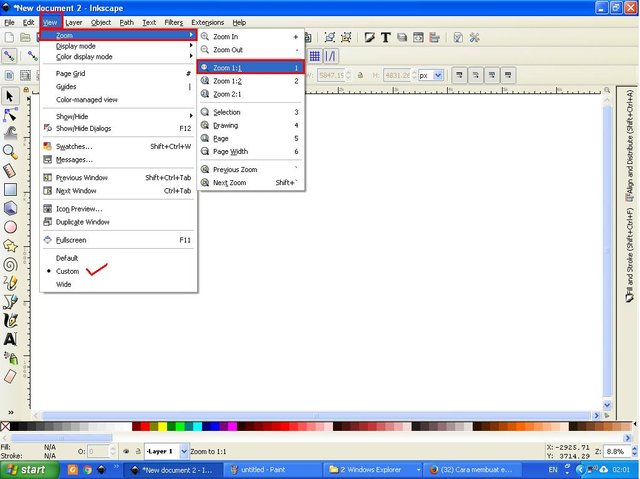
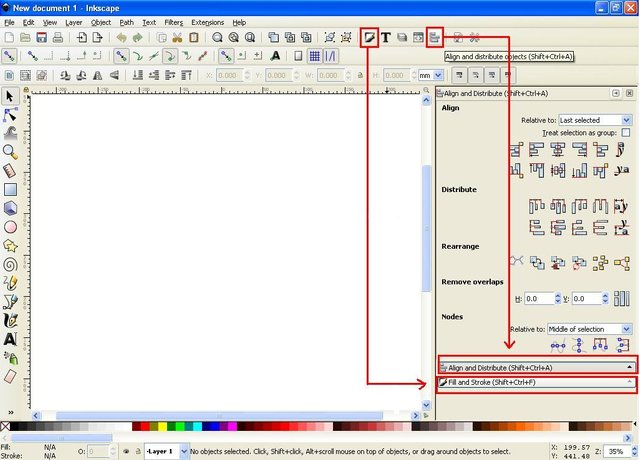
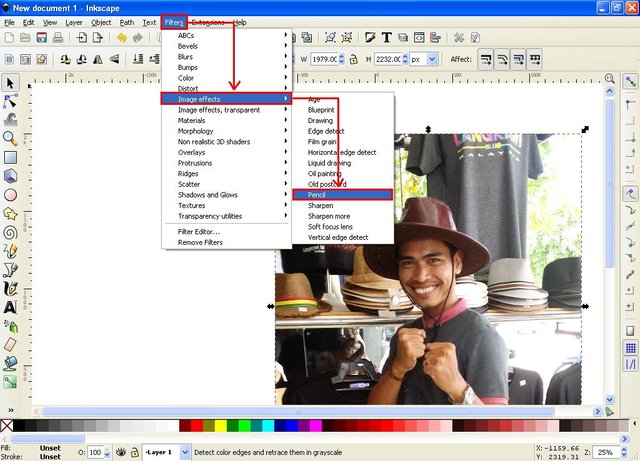
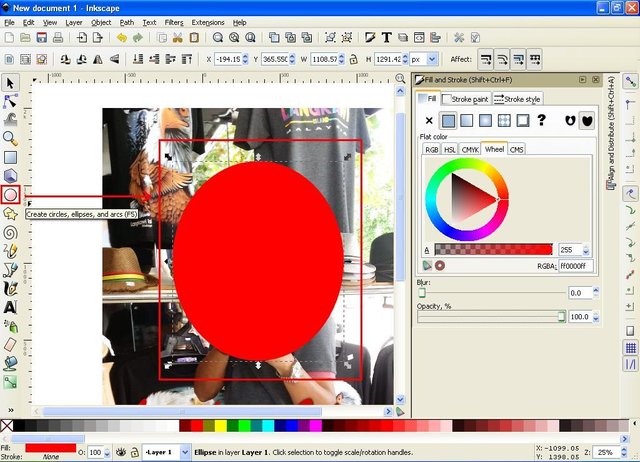
The first step provides an image file, here I use a photo of my friend, then open the software inkscape, then click the file on the menu bar select document properties, then uncheck show page border on the command screen document properties, then click view select custom, then select zoom and select zoom1: 1. Next activate fill and stroke by click fill fill icon on menu bar.
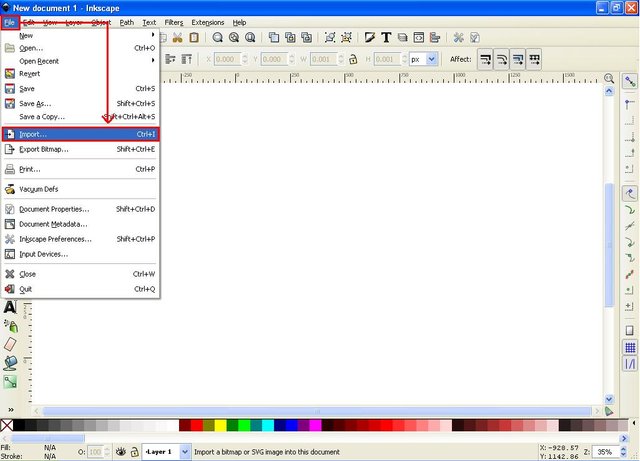
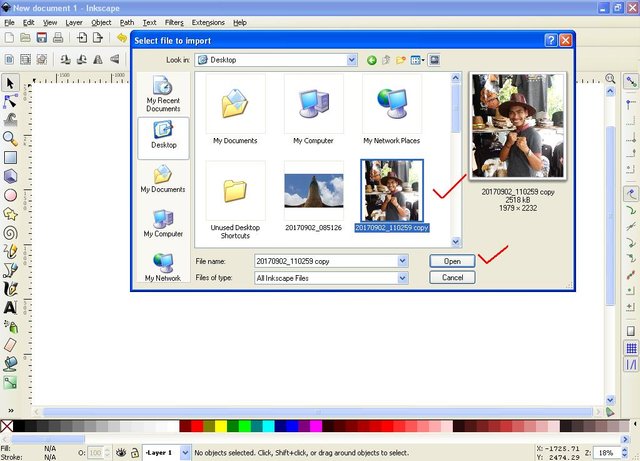
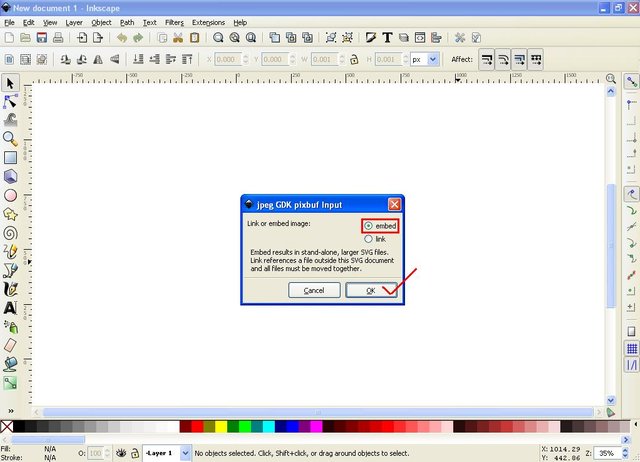
The second step, click the file in the menu bar, select import, then select the file or photo that will be used for Bitmap Emphasis Technique, then click open then select embed on the command screen.
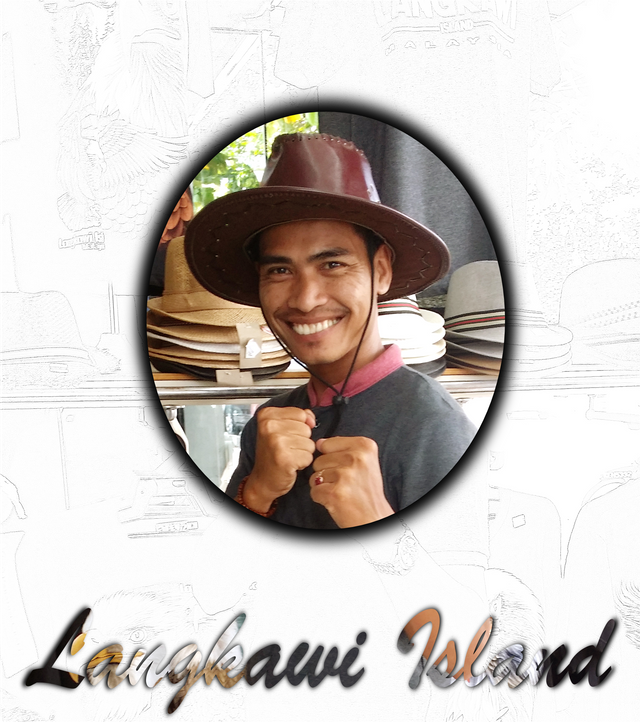
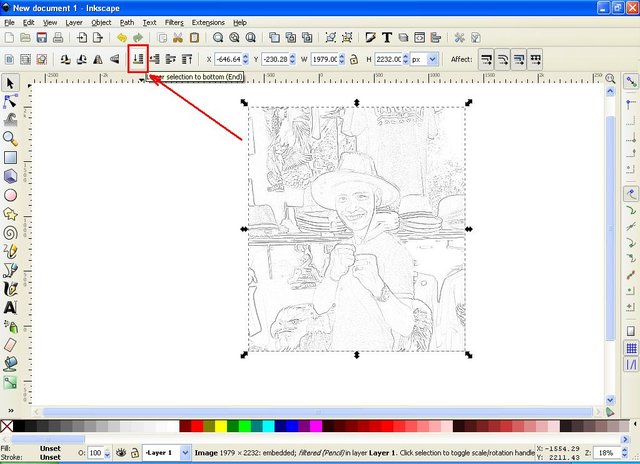
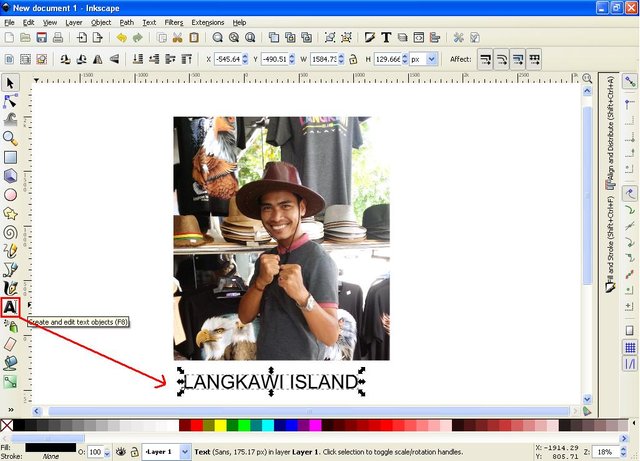
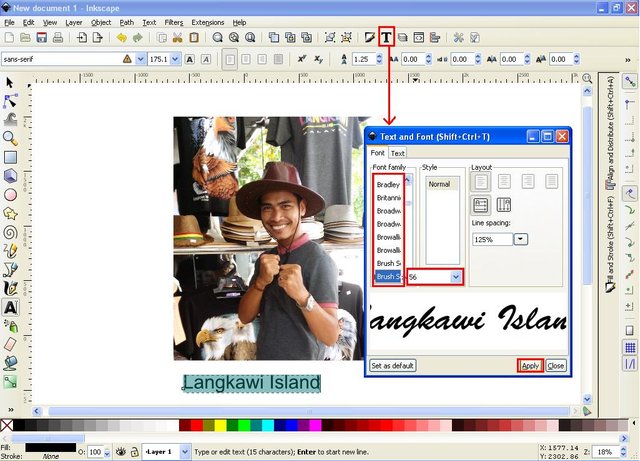
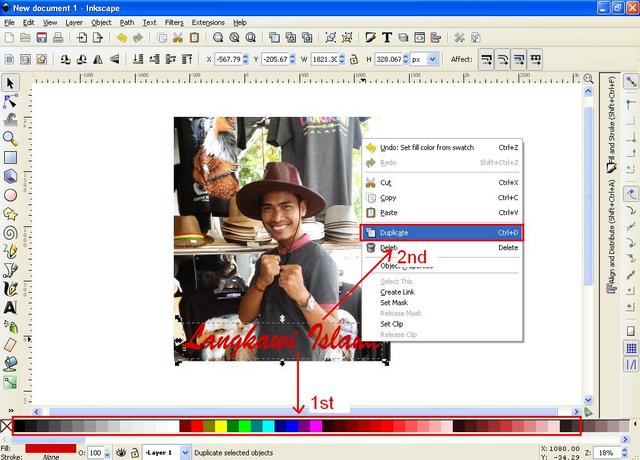
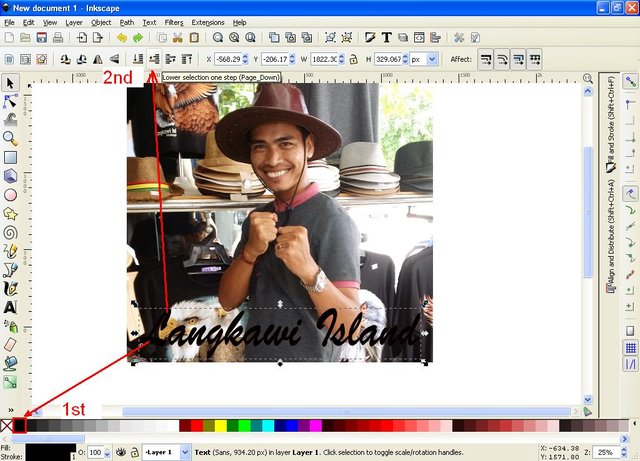
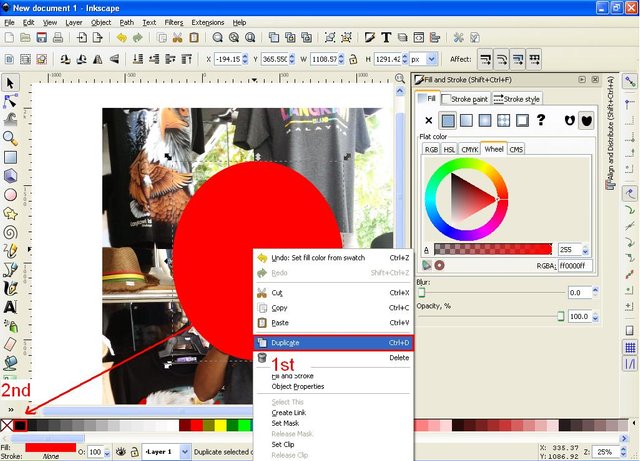
The third step right click on the file or photo, select duplicate, then click object on menu bar select image effect and select pencil. then click the lower selection icon on the menu bar or press End key on the keyboard, then the original image will appear fore and leave it alone. Next click the icon Create and edit the text object on the side bar and write a word or sentence, here I write the name where the photo was taken "Langkawi Island". then to set the shape and size of the text, click the icon "T" on the menu bar and select the type of font you like, then click apply and click close, then select the color you like on the task bar, right click on the text, and select duplicate .
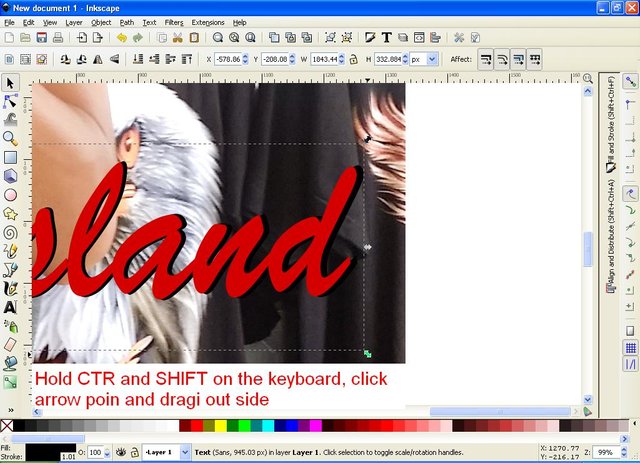
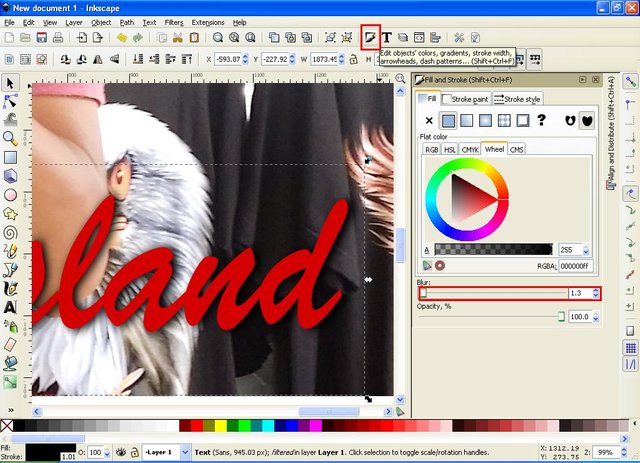
The fourth step to change the text duplicate color to black, then click the lower selection one step icon, hold down the CTRL and SHIFT keys on the keyboard click the arrow at the corner of the text and drag it out so that it becomes a shadow. then adjust the blur capacity on the fill and stroke command screen, for setting the size of the blur depends on the size of the text.
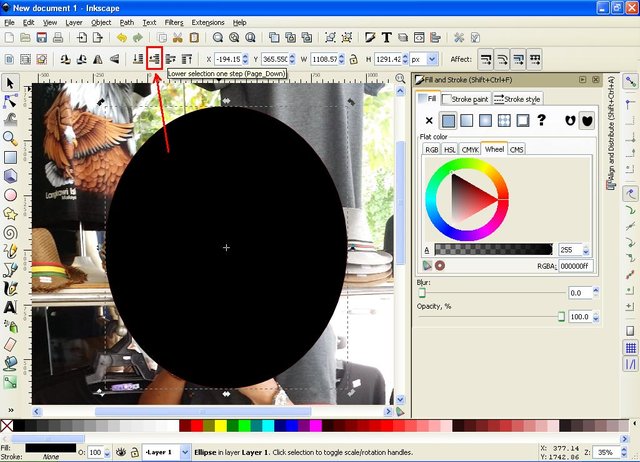
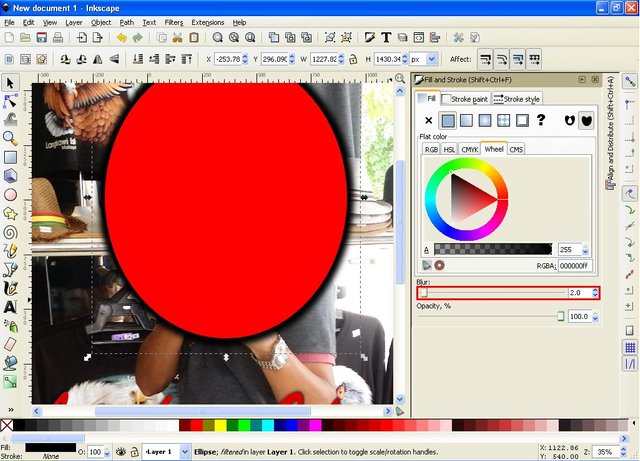
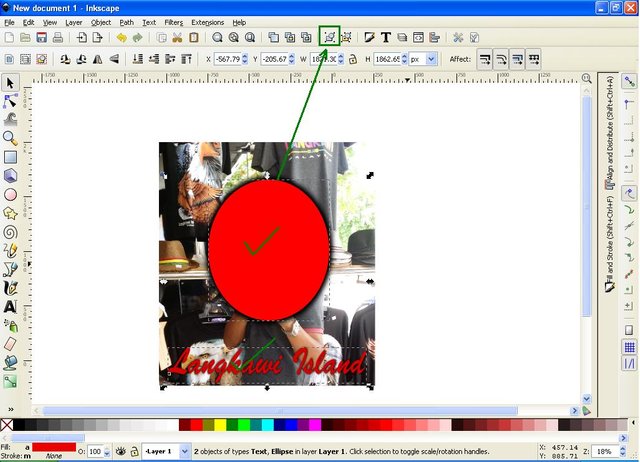
The fifth step, click the create circles icon, ellipses and arcs on the side bar, then create an object, may be rounded, or oval, or adjust to your desires and creativity. Right click on the object select duplicate, then change the color to black and click the lower selection one step icon, then hold down CTRL and SHIFT key on the keyboard then click the arrow on the object angle and drag it out to form the shadow, then set the blur capacity on the command screen fill and stroke.

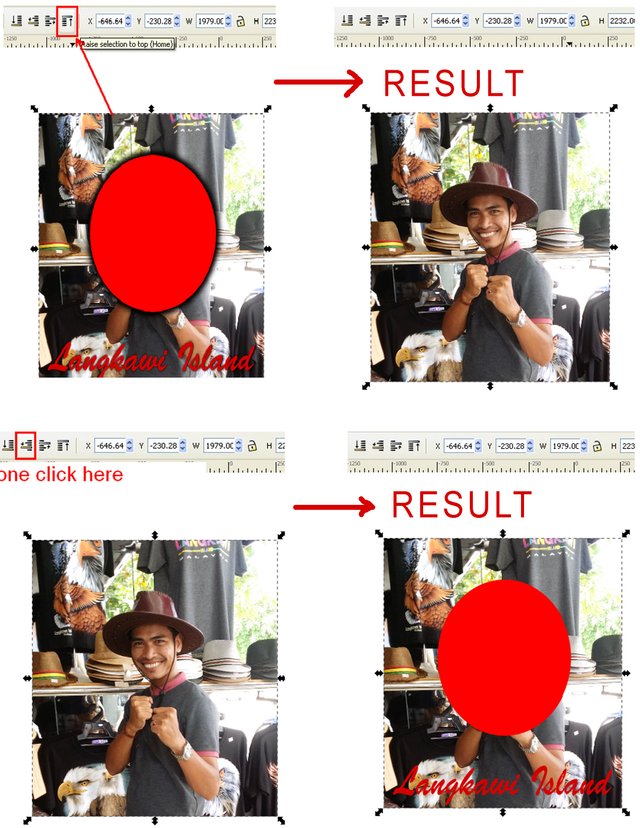
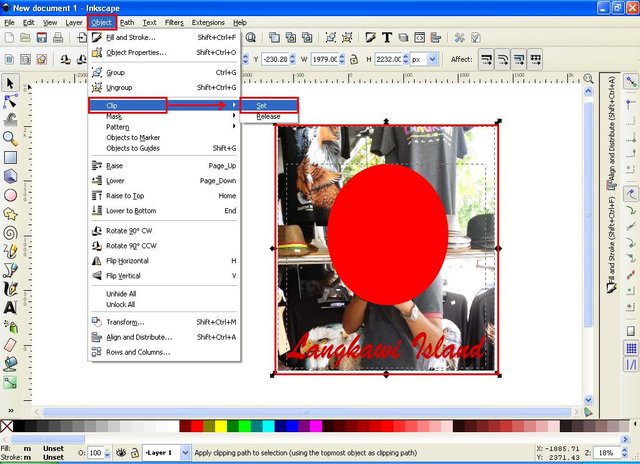
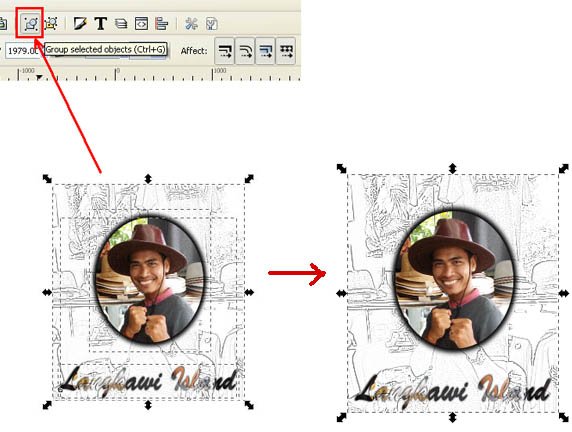
The sixth step, click the SHIFT circle object hold on the keyboard then click the text and click the group icon on the menu bar. Then click on image file or photo then click Raise selection icon to top on menu bar, then click icon lower selection one step. Next click on image or photo file and hold SHIFT key on keyboard then click on circle and text object before, then click object on menu bar select clip and select set. then block the object thoroughly and click the icon group on the menu bar.
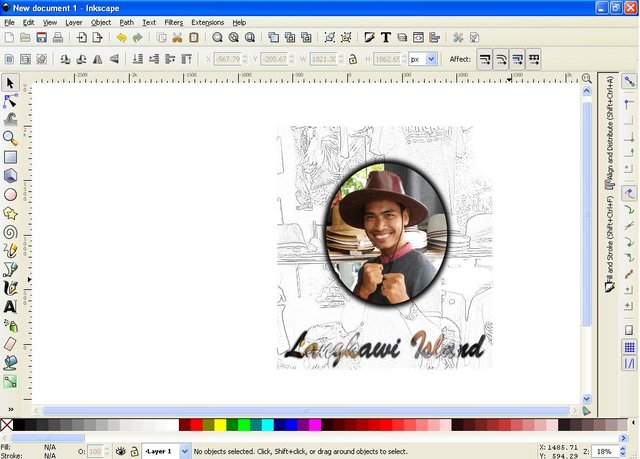
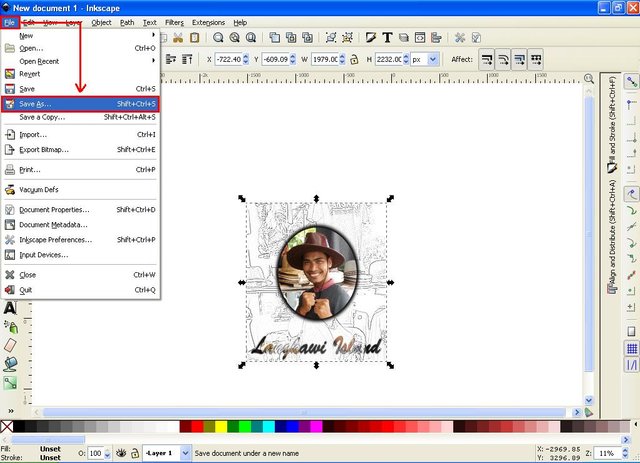
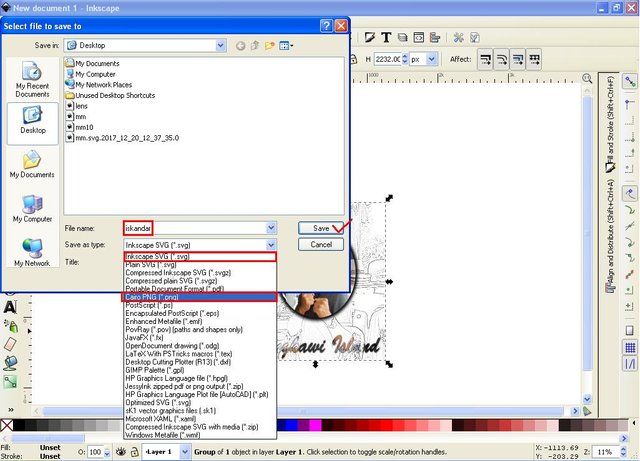
The seventh step, or the last step, save the file, click the file in the menu bar and select Save As then write the file name and select PNG or SVG format, I suggest to save in two format, because SVG format will make it easier for us to edit again files if necessary, and the PNG format makes it easy for us to upload files to various media.
Okay! that's what I can share in this tutorial, hopefully useful for all of us. thank you for reading and following the tutorial from me. good luck!
Posted on Utopian.io - Rewarding Open Source Contributors
Quite a good suggestion
Thanks bro!
Hello, you received a boost courtesy of @steemdunk! Steem Dunk is an automated curation platform that is easy and free for use by everyone. Need a boost? Click me
Upvote this comment to support the bot and increase your future rewards!
Thank you for the contribution. It has been approved.
You can contact us on Discord.
[utopian-moderator]
Thank you very much @zikra #utopian-moderator
Hey @saini88 I am @utopian-io. I have just upvoted you!
Achievements
Suggestions
Get Noticed!
Community-Driven Witness!
I am the first and only Steem Community-Driven Witness. Participate on Discord. Lets GROW TOGETHER!
Up-vote this comment to grow my power and help Open Source contributions like this one. Want to chat? Join me on Discord https://discord.gg/Pc8HG9x