Tutorial : Creating 3D Cover Using Inkscape
Goodnight everyone! Hopefully you are always in good health and can do daily activities and routines as usual, and hope you have a happy weekend. On this occasion I want to share again a tutorial using inkscape software, if in the previous tutorial we have learned how to make 3D writing then in this tutorial we will learn to create 3D cover with our own creativity.
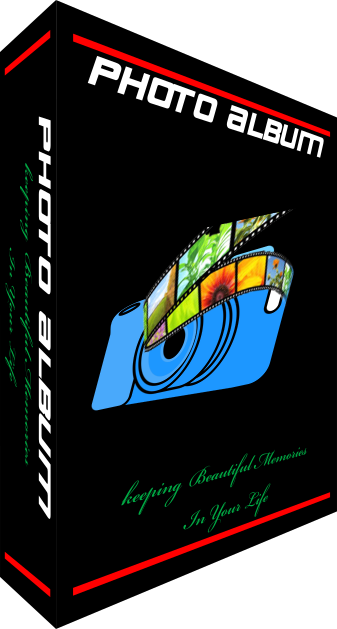
In this tutorial I created a Photo Album cover in 3D. later you can make another drawing or something more interesting than the results of my work on this tutorial, it all depends on the value of art, imagination and creativity respectively.
But as always, before we learn the tutorial further, we better know first what is Inkscape, for that I will introduce to you guys novice designers about this great inkscape.
Inkscape
Inkscape is an open source software that is almost equivalent to corel draw, although not as famous as the corel draw itself. But this software already meets the standard XML, SVG and inkscape CSS can also run on windows operating system, so this graphic device is really friendly with you who have talent graphic designer.
The main goal of inkscape is presented is to be one of the current cutting-edge graphics tools. Okay friends, that's a glimpse of information about this inkscape, now we go into tutorial session.
That's a glimpse of information about inkscape, hope you guys novice designers like me can understand and are interested to follow this tutorial from me.
Tutorial
Creating 3D Photo Album Cover Using Inkscape
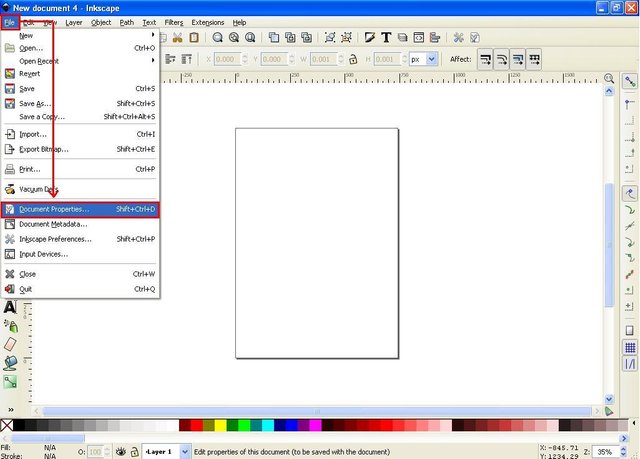
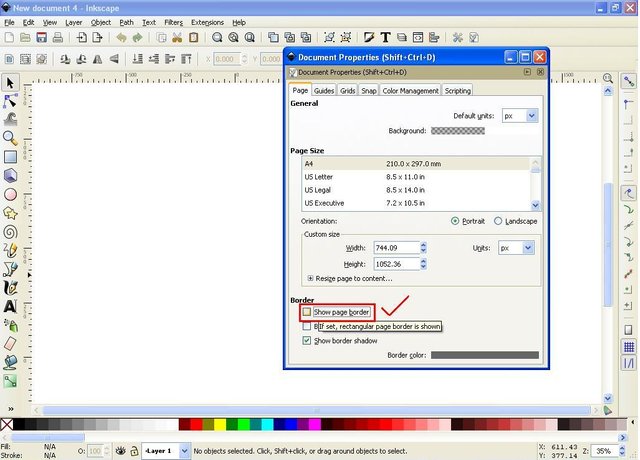
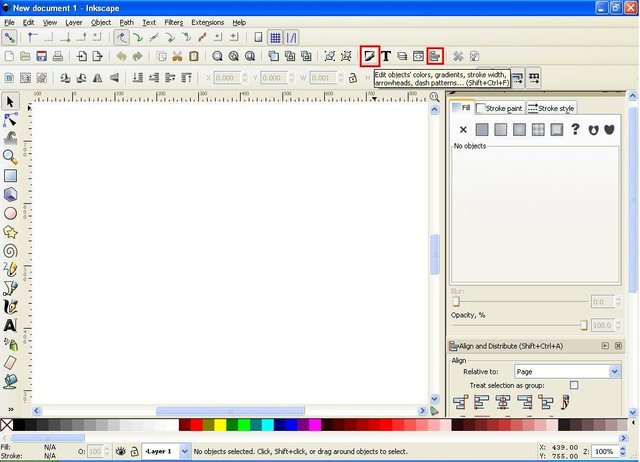
In the first step, open inkscape then click the file on the menu bar and then select the document properties then un-check the show page border on the document properties command screen.
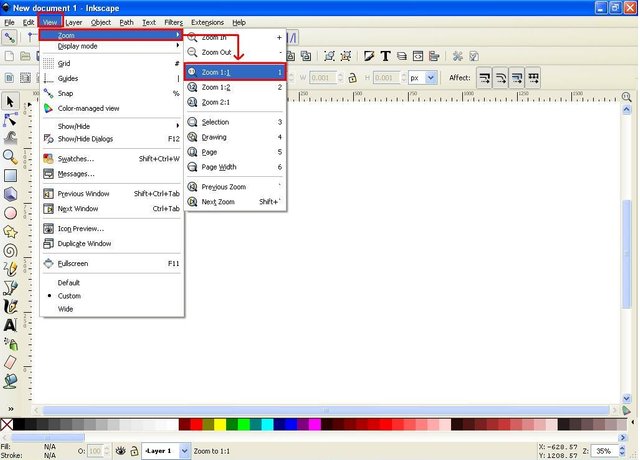
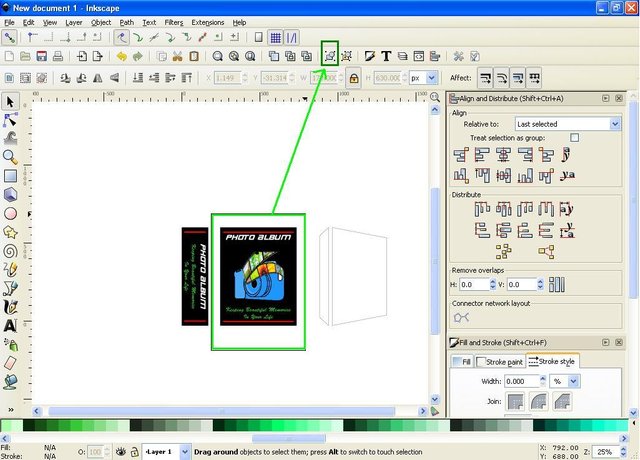
The second step is click view on menu bar then select zoom and select zoom 1: 1. Next activate fill and stoke and align and distribute abject by clicking on the icon on the menu bar.
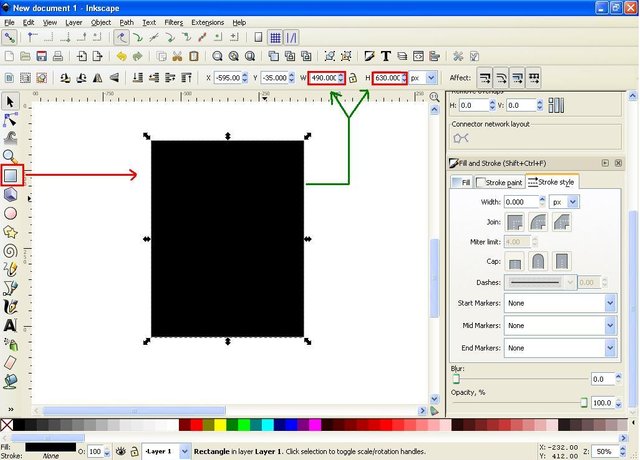
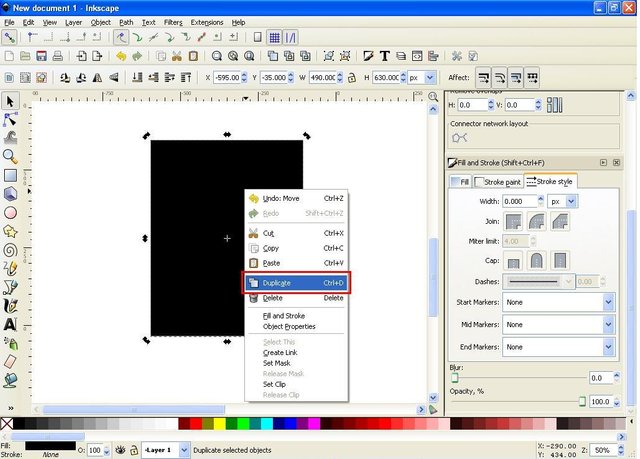
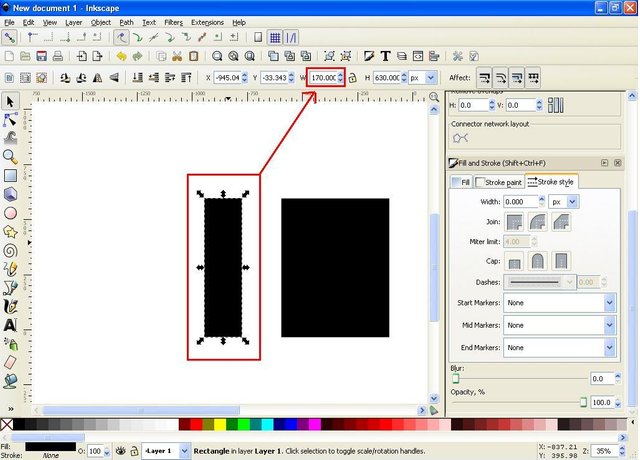
For the third step we start to create the first object by clicking rectangles on the side bar, then create a square object then set the width 490.000 and height 360.000px in the menu bar and this will be the first object in making this 3D image, then make duplicate the object will become the second object, and change the width size to 170.000px while the size of the height remains 360.000px.
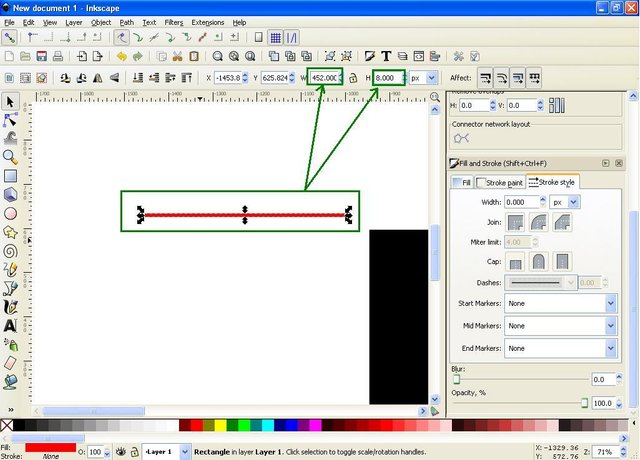
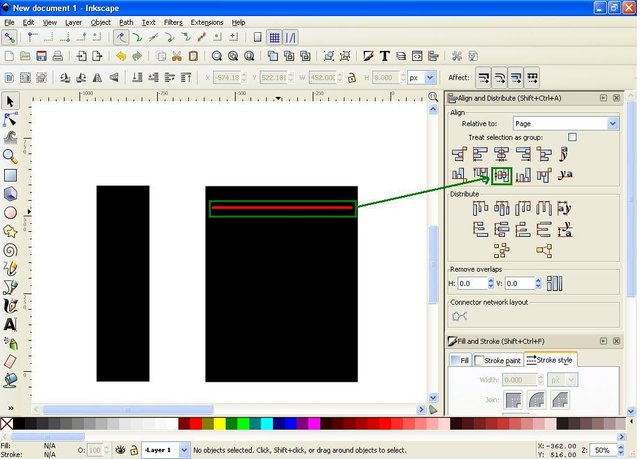
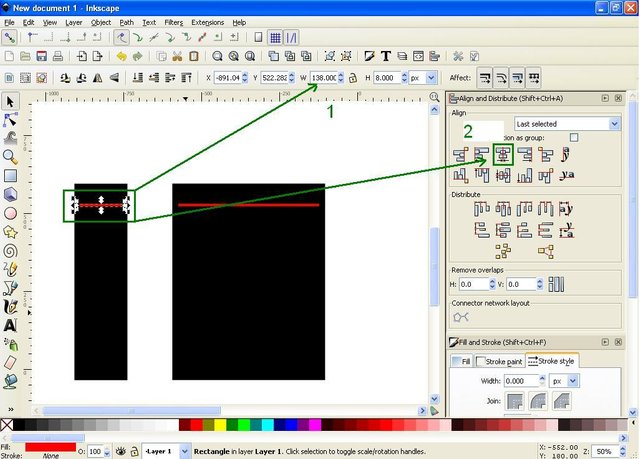
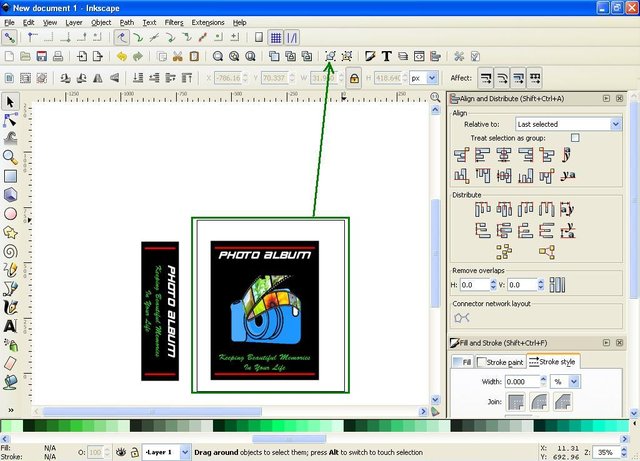
Step four, click again on the rectangles icon and create a rectangular object and give the width size 452.000px and height 8.000px on the menu bar and give a different color, here I use red, then duplicate the object into four pieces two pieces with the size of the last and two more pieces change the size to 138,000px width and height fixed with the size of 8.000px on the menu bar. Next place a long object over the first object and place a short object over the second object, then set its position by blocking those objects and then clicking the center icon on vertical axis on the align and distribute command screen of your right object.
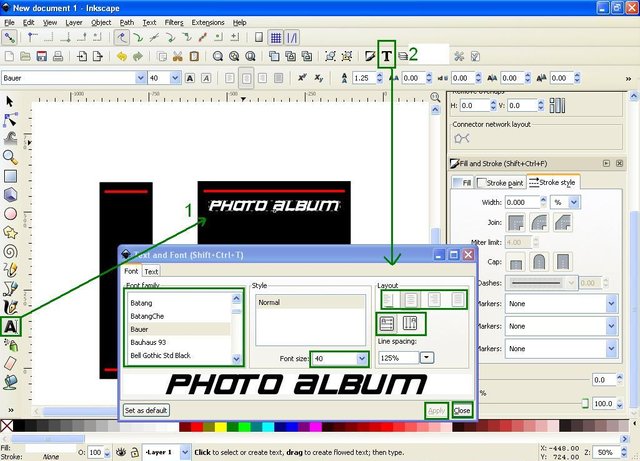
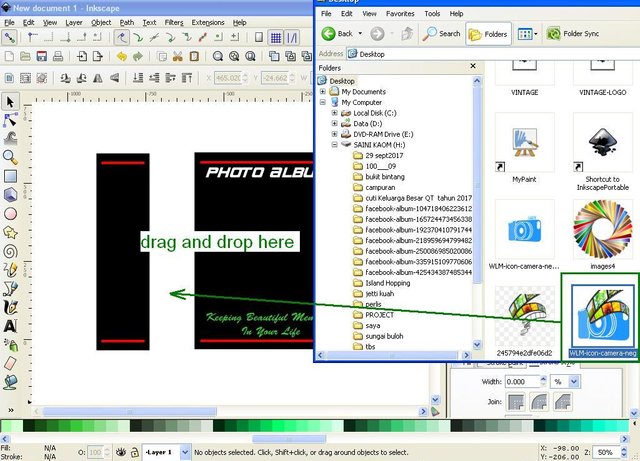
In the fifth step add the writing, because in this tutorial I made the cover of the photo album then the writing of the Photo Album and I add a little little slogan below it as a cover sweetener object, if you make a cover or another picture, then of course the writing will be different. Okay, we go, then select the font shape and font size on the command screen text and font. Then set its position by using one of the icons on the command screen align and distribute the object, so that more rapidly an orderly, and to beautify the cover you can also add other objects or photos you have, by opening the image file storage and drag and drop the file to work screen and set the position in accordance with the wishes and your creativity.
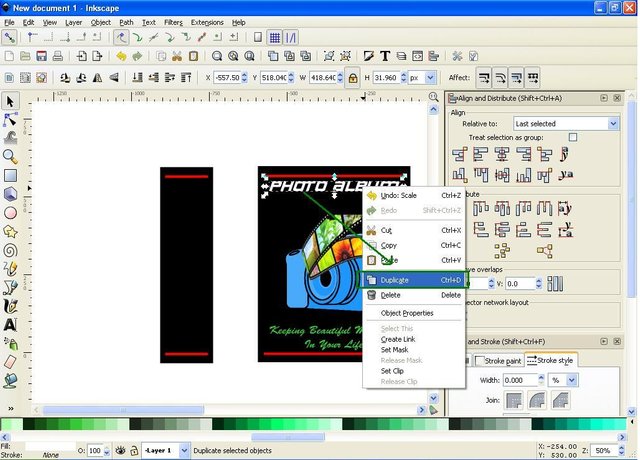
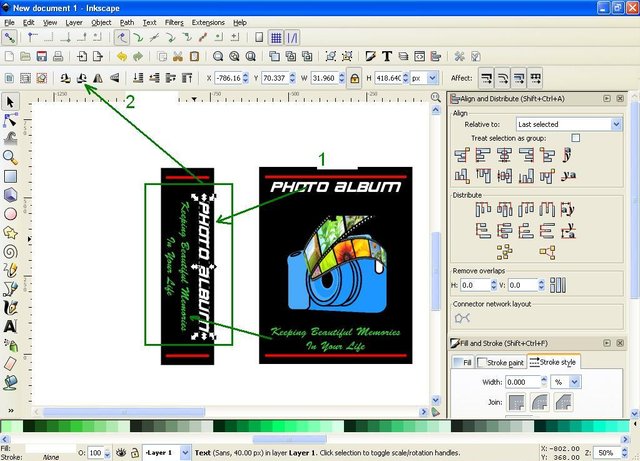
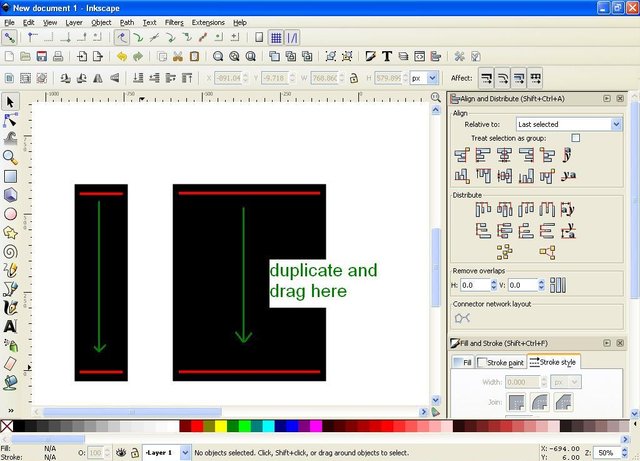
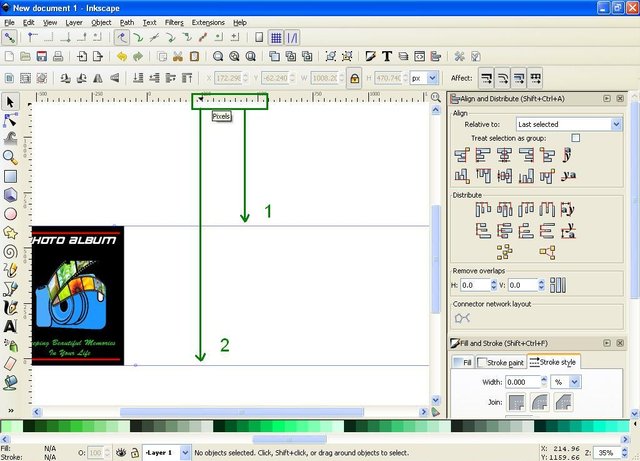
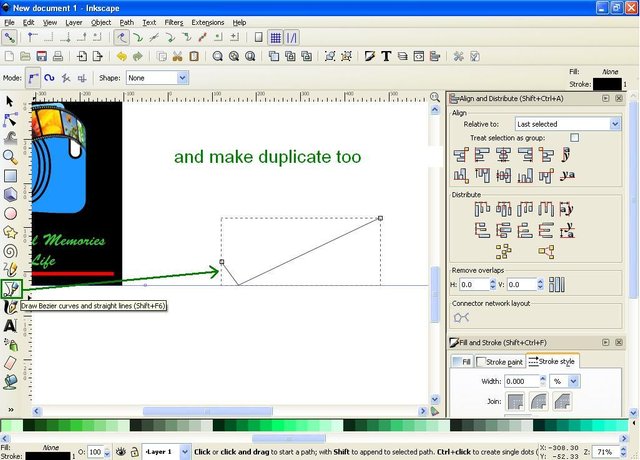
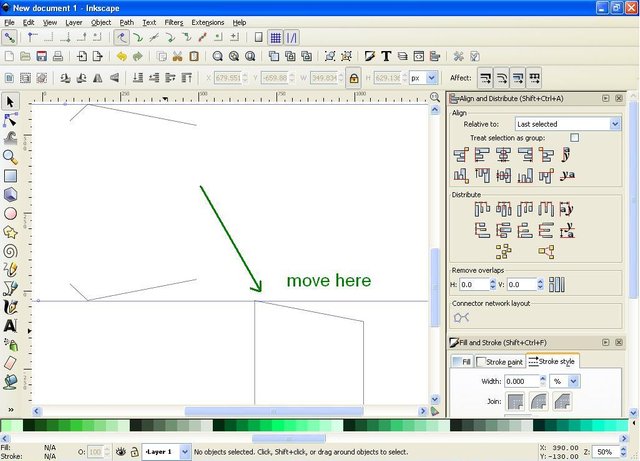
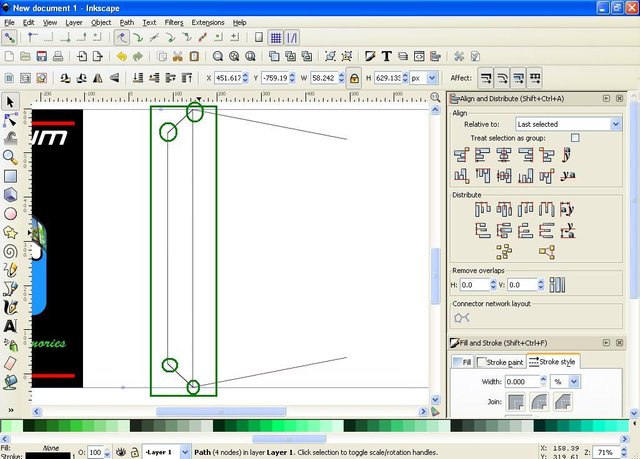
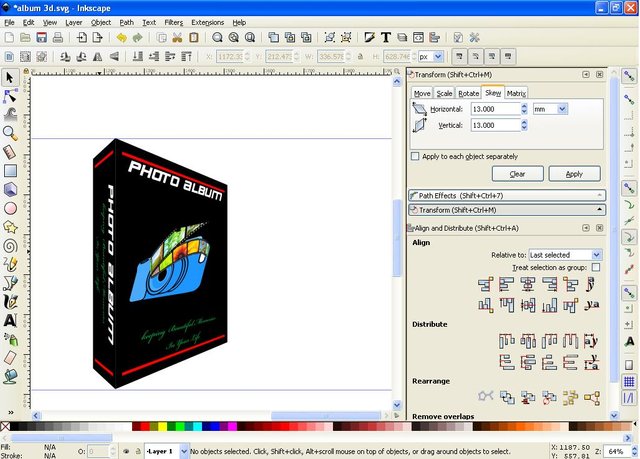
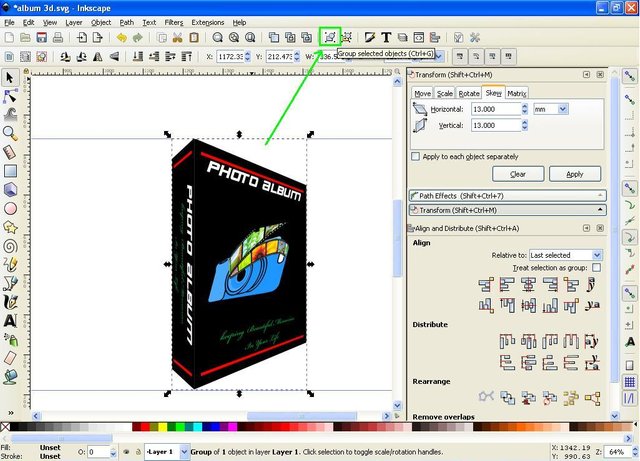
The sixth step after the cover is finished, block all the objects and covers thoroughly then click the group icon, then grab the coordinate line on the rule and place it on the top and bottom of the object as the guide line for 3D vector preparation. and now we start to create the vector, click the draw icon Bezier curve on the side bar, then make a short vector line with italic position and a long and oblique line, then click the select and transform object pad side bar, then make duplicate for the vector and reverse its position by clicking on the flip icon selected object vertically and rising up to touch the top coordinate line, then click the Bezier draw icon again and draw a line like drawing a wall, note the midpoint of the lines, if it is difficult to understand, then follow the details in the pictures I attached below. If the front wall is ready click and move it to the side or down, then make the side wall in the same way, and move it to the side of the front wall.
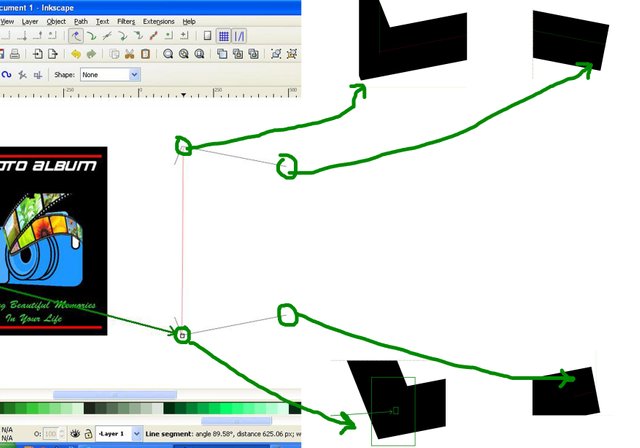
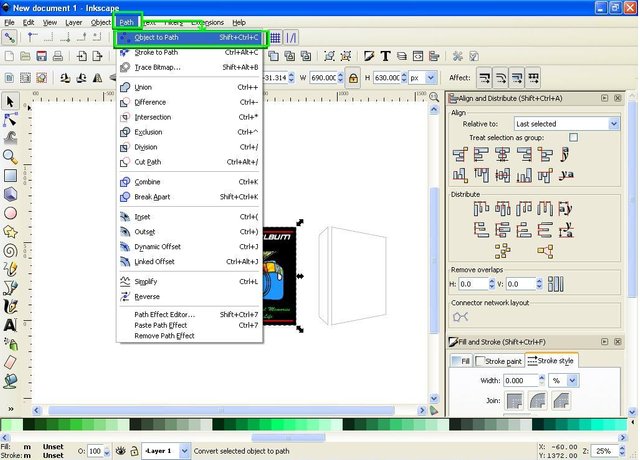
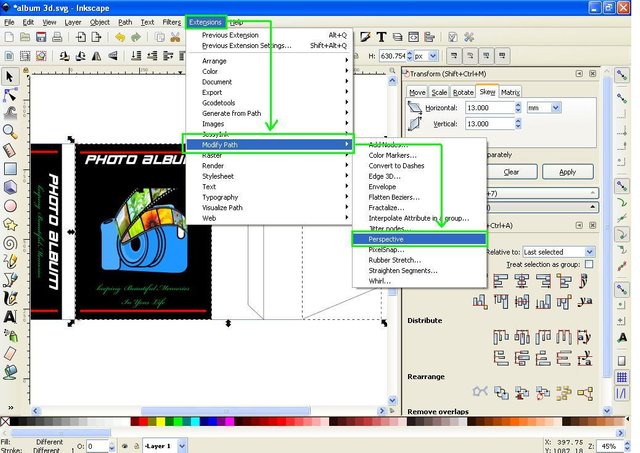
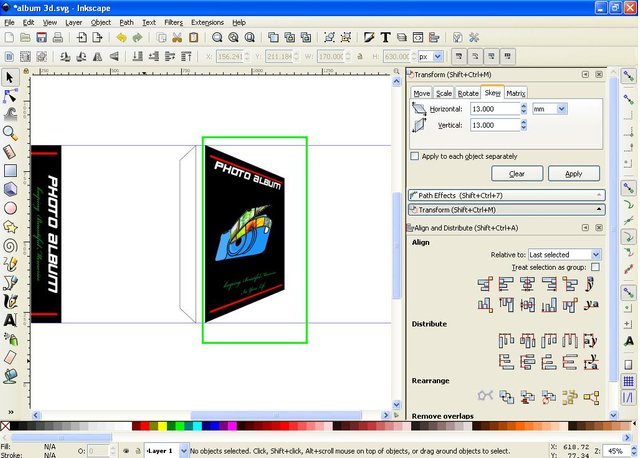
In the seventh step click or block the entire object, then click the path on the menu bar and select the path to object, then click the main object and block thoroughly then click the group icon on the menu bar, then hold down the SHIFT key on the keyboard then click the main object and vector that resembles the front wall, then click Extensions on the menu bar select Modify path and select Perspective, then the cover will automatically move to vector and resembles a wall. Do the same for the second object. If the two objects are already integrated with the vector then the second object is close then the cover that we make also appear to be like real.

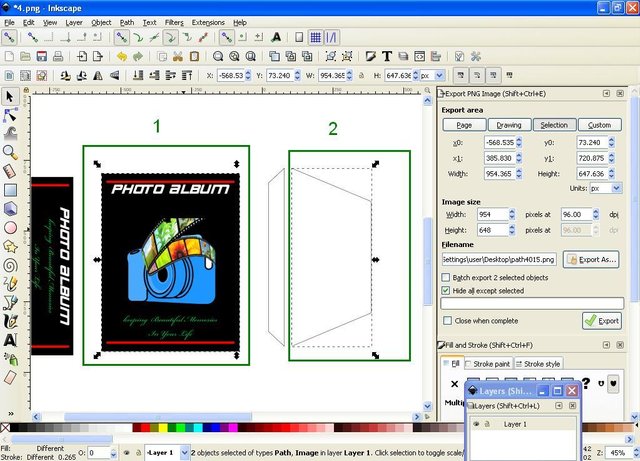
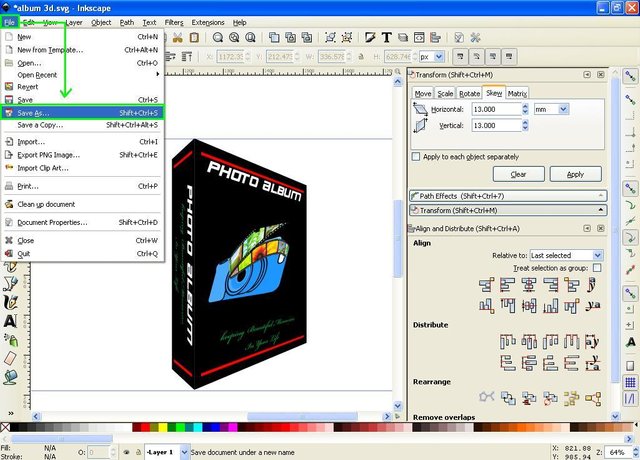
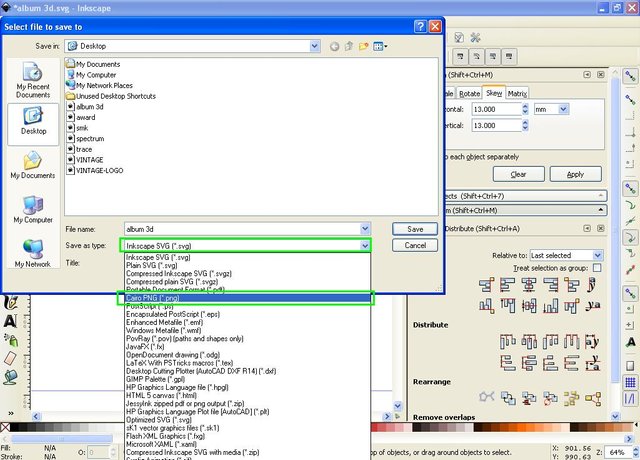
Step eight of the block thoroughly then click the icon group on the menu bar, then we save the file, as usual click the file then click Save As and select one of the desired file format, but I still recommend to save the file in two formats, the first save in SVG format and both save in PNG format, the SVG format function is to make it easier for us to re-edit when needed later. while for the PNG format is to facilitate us to upload files to any media.
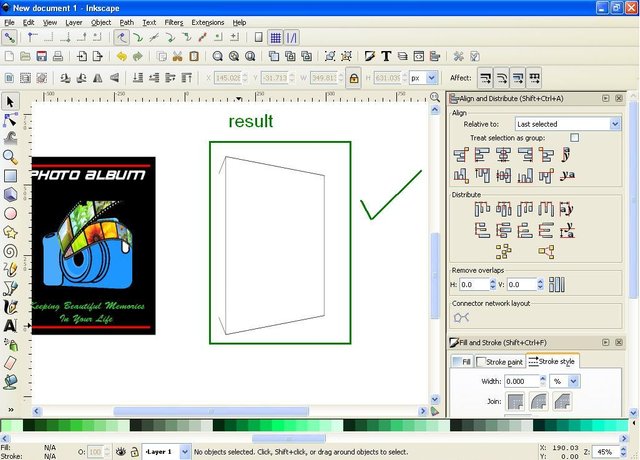
All right, all friends! That's all I can share in my tutorial today, hopefully useful to all of us. For you novice designers I suggest to try this Inkscape software, because this software is really easy, simple and interesting to learn. Okay see you again in the next tutorial. And below is the result of my design on this tutorial occasion.
Posted on Utopian.io - Rewarding Open Source Contributors
Thank you for the contribution. It has been approved.
You can contact us on Discord.
[utopian-moderator]
Thank you very much @manishmike10 #utopian-moderator
best software
Yeah. Nice buddy. I like your tutorial
Thanks Mr @podanrj
Hey @saini88 I am @utopian-io. I have just upvoted you!
Achievements
Suggestions
Get Noticed!
Community-Driven Witness!
I am the first and only Steem Community-Driven Witness. Participate on Discord. Lets GROW TOGETHER!
Up-vote this comment to grow my power and help Open Source contributions like this one. Want to chat? Join me on Discord https://discord.gg/Pc8HG9x