Pixel Explosion Effect (Photo-Manipulation) Artwork And The Detailed Photoshop Tutorial
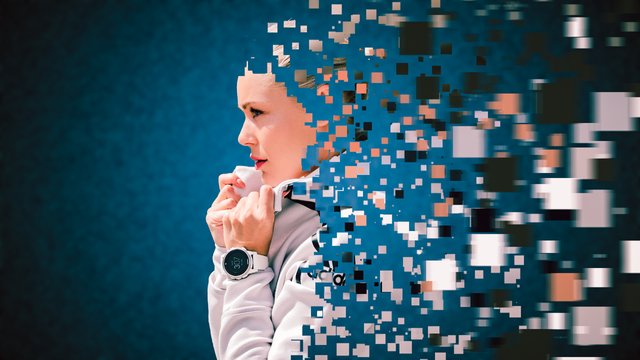

Hello friends, In this new tutorial we are going to create this Pixel Explosion Effect in Photoshop.This is really a very cool and creative photo-editing for your portraits. The ordinary portrait turns out to be awesome with this photo-manipulation.
You will learn really very cool techniques of brush and masking in it. Let us just enter the magical world of Photoshop and start creating the magic.
Step 1. Creating The New Document
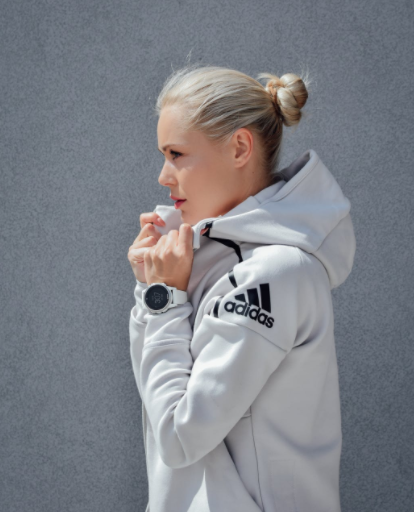
Source
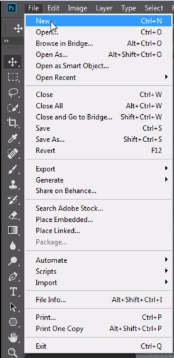
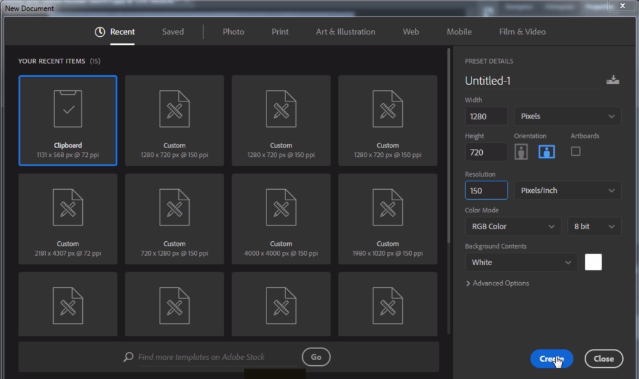
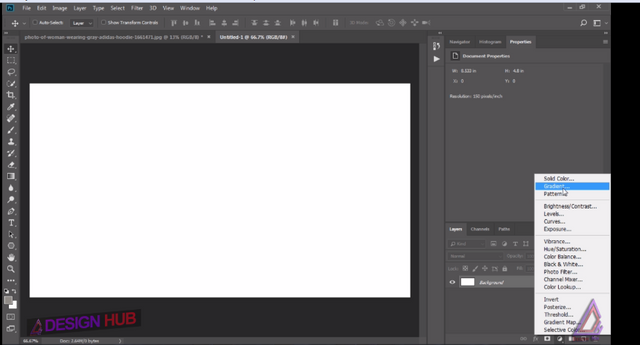
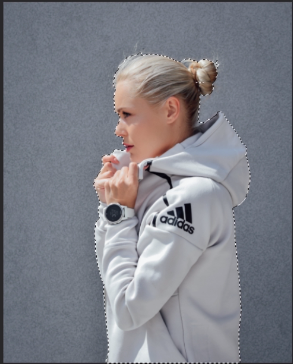
This is the stock image we will be using to create this effect. You can download it from the source above . After that open the Photoshop go to file menu ,we will take a new document with these settings as width 1280 pixels and height 720 pixels, resolution 150 pixels per inch and create it.
Step 2. Creating The Background
Then, we will create the background for this effect. For that we will take a new gradient adjustment layer.
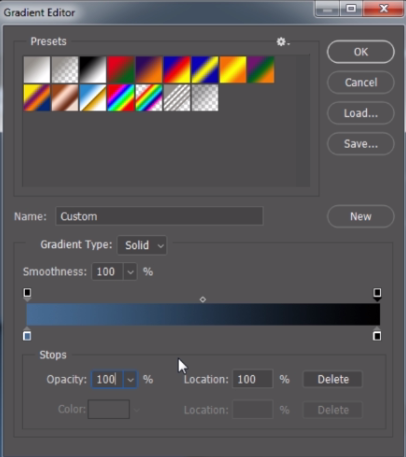
and set the two colors of the gradient as per your image. I am taking the first color here as 466c93 this one and the second color as black color. Set the opacity of both color stops as 100% here and click ok.
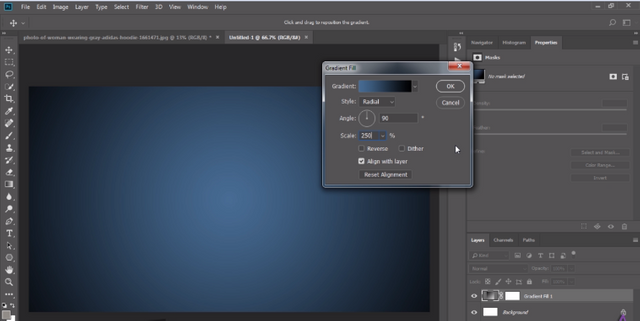
Now we will change the style to radial and the scale to around 250 percent and click ok.
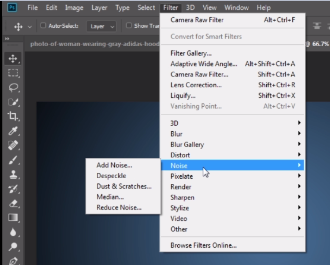
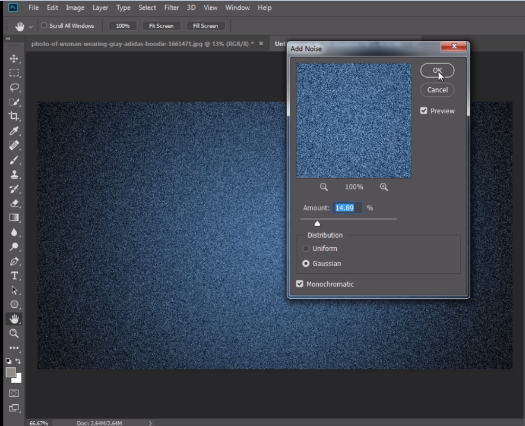
After that we will convert this layer to smart object. Now we will add some noise to it. Go to filter, noise and set the amount to 14%, distribution as gaussian and check the monochromatic box and then click, ok.
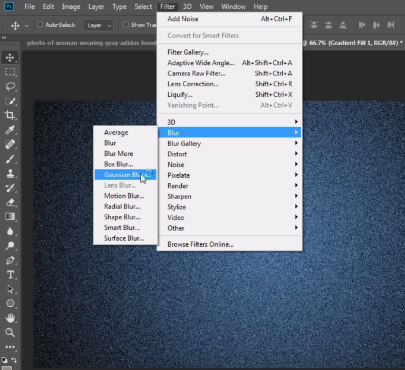
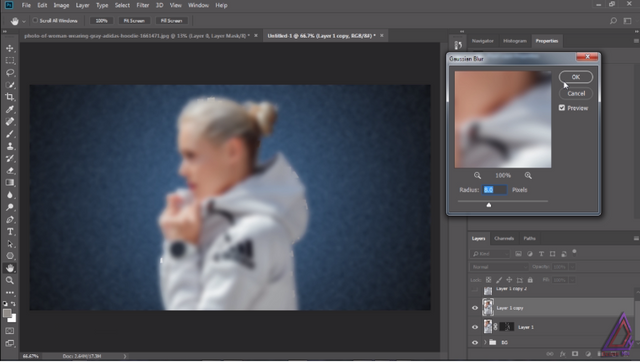
After that we will add some blur to it. Go to filter, select blur and then gaussian blur . In gaussian blur set the radius to 5 pixels. You can change these settings later as we are working on a smart object. This is the beauty of working with smart objects.

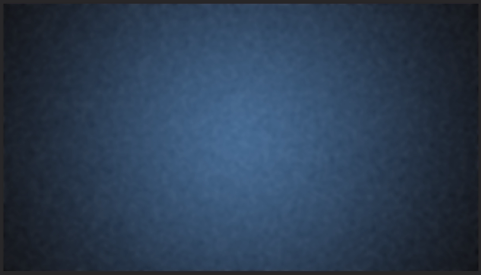
As we have created our background, we will put these two layers into a group and rename it as BG.If we wanna change anything in this group we can change it later.
Step 3. Cutting Out The Subject From Background
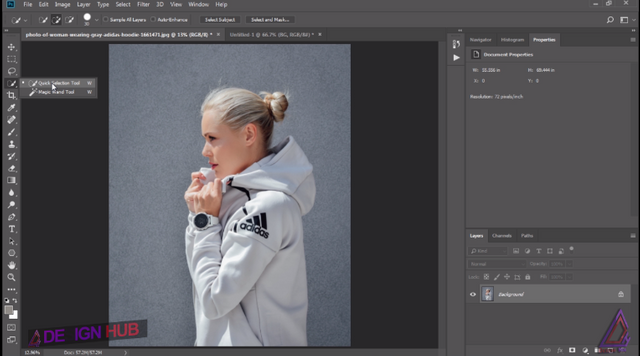
Now we will cut out this model from the background with the quick selection tool. In Photoshop cc, there is an option to cut out the subjects more easily by selecting the option "select subject" here, and, Photoshop will automatically cut out the subject from the background using its artificial intelligence.

So, click on select subject, and, wait for sometime as the Photoshop does its job for cutting out the subjects from the background. This takes some time . After the Photoshop has selected the subject and, if you need some corrections to it you can easily do with the quick selection tool.
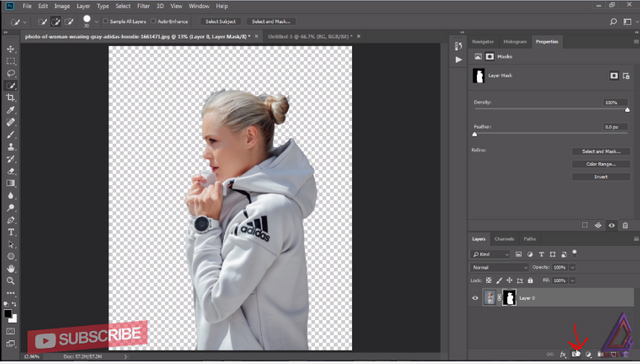
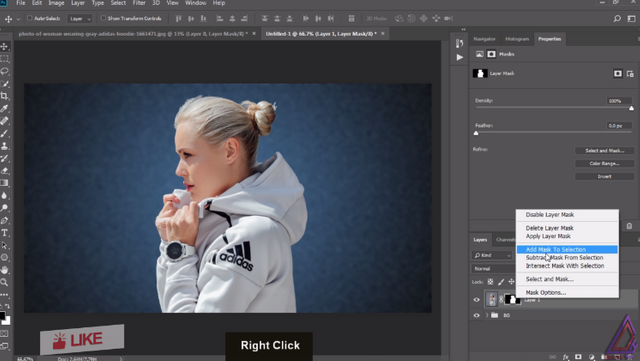
In this image, it is perfect so we will apply layer mask to it by clicking the mask icon here.
Step 4. Placing The Subject Over Background
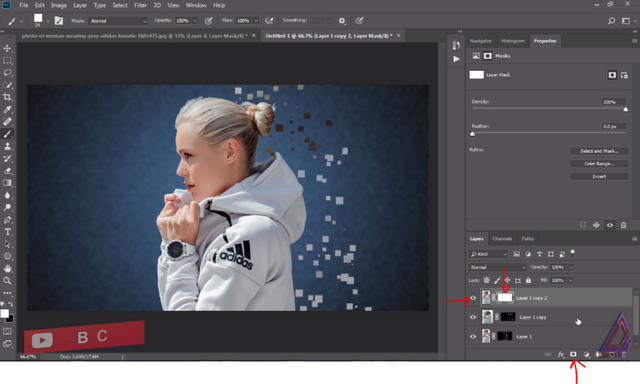
With the move tool we will drag this cut-out subject and place it over the background we have created in step 2.
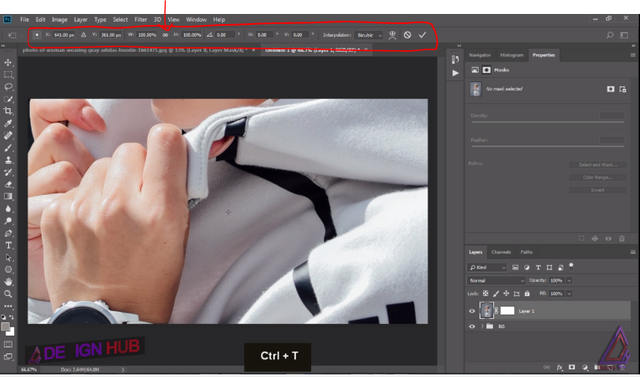
Then we will press Ctrl+T to open the transform properties and scale it down as it will fit in our scene. Click on this link icon between width and height to reduce the height and width proportionately.
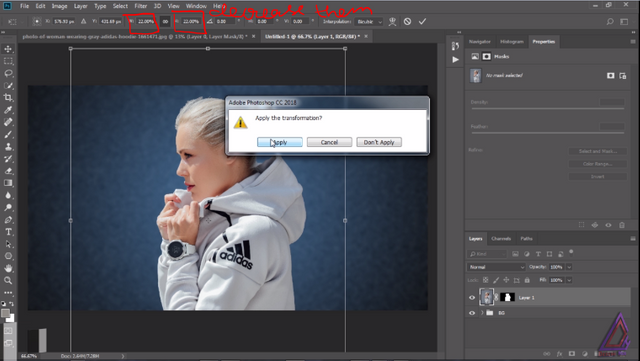
We will move it down till it looks perfect for our effect and click on apply the transformation. Then click on the mask and apply it to the subject layer.
Step 5. Masking And Painting
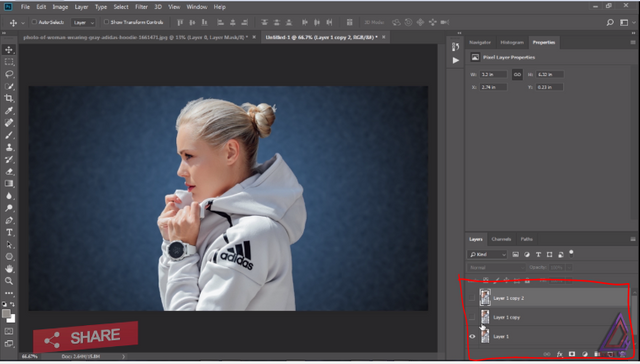
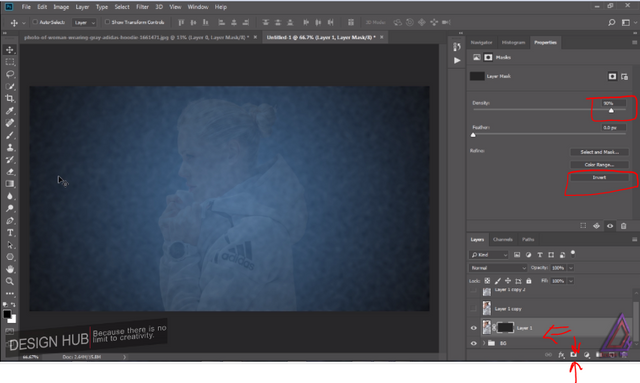
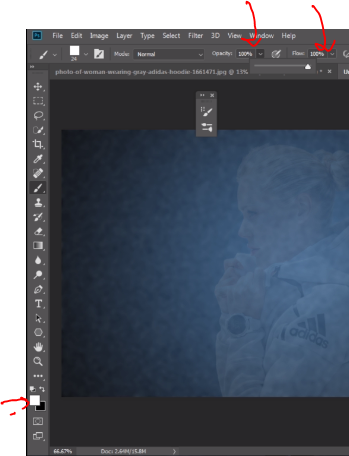
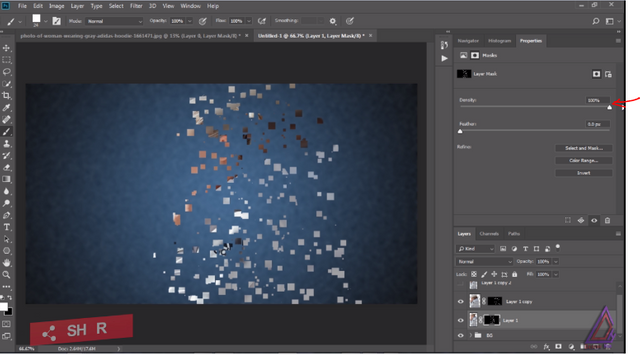
We will create two more copies of this layer and hide the upper two layers. We will work on this bottom layer first. Add the mask to this layer and invert the mask and it will hide the image. We will reduce the density a little bit so we can see the areas on which we will be painting with the white brush.
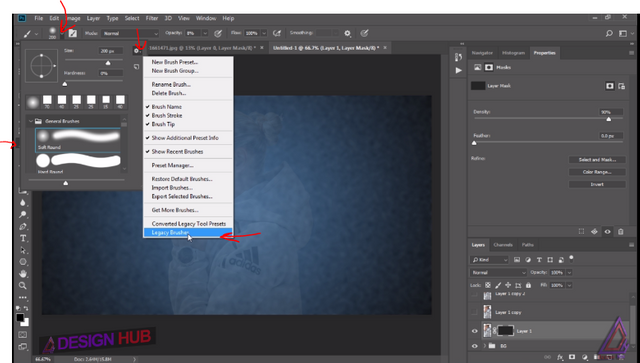
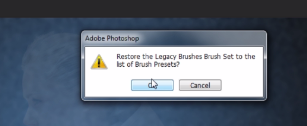
Select the legacy brushes from the sets of different option and click ok on the pop up. This will restore the legacy brushes on your brush presets list.
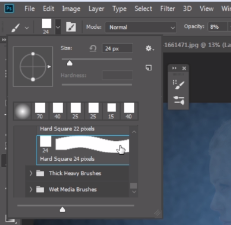
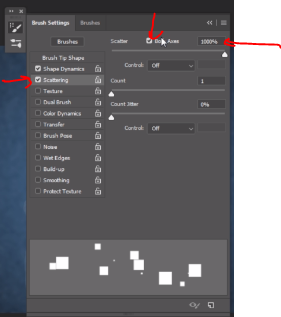
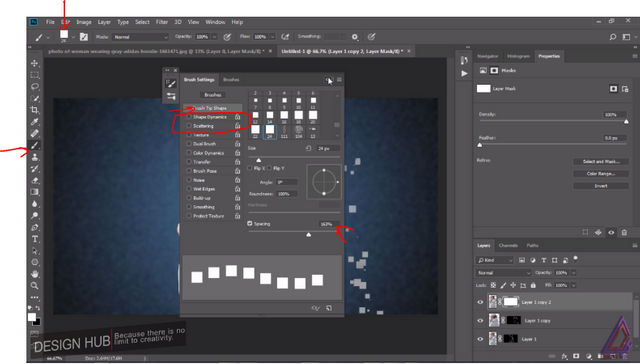
Now we will go to legacy brushes and select the square brushes. Choose the hard square 24 pixels square brush and change the brush settings like this.
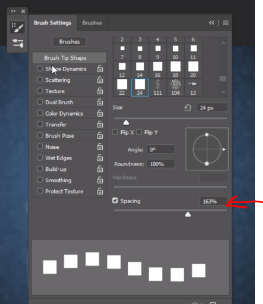
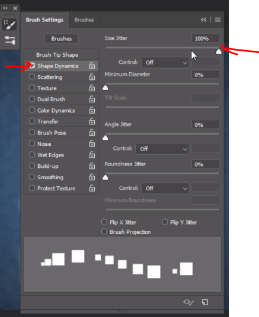
In the brush setting under the brush tip shape increase the spacing to around 160 %, In the shape dynamics we will increase the size jitter to the maximum . After that in the scattering we will increase the scatter to the maximum on both axis.
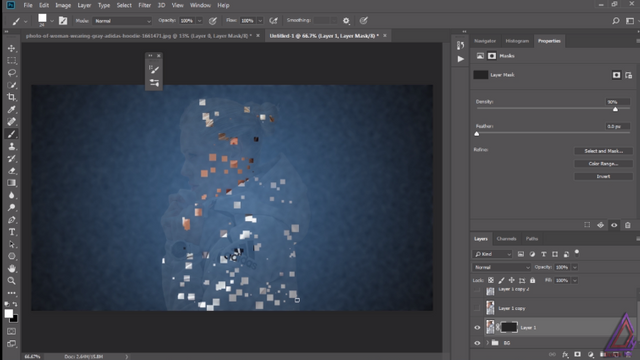
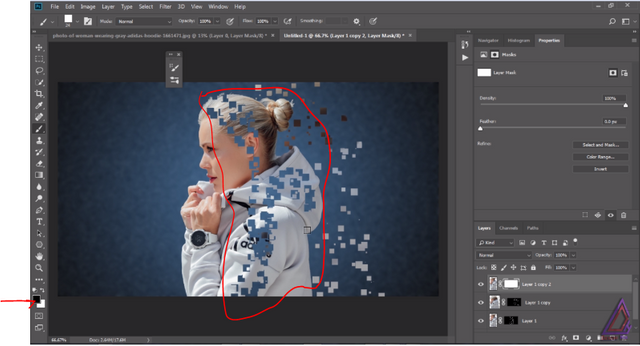
Now change the foreground color to white and increase its opacity and flow to 100 %. Now paint over the black mask on the model like this and create some scattered pixels. You are free to paint as how you want the pixels for your effect.
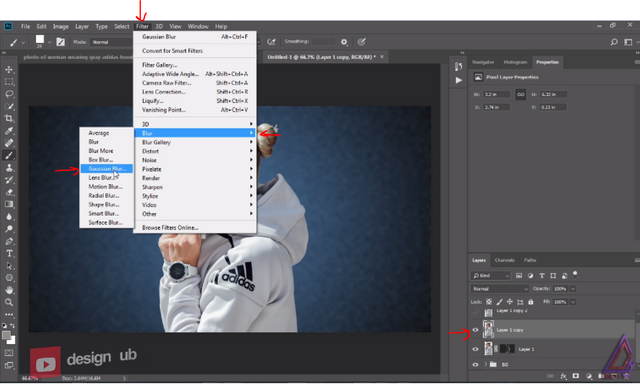
After this we will unhide the second layer and apply some blur to it. Go to filter, blur and gaussian blur and set the radius to 8 pixels and click ok.
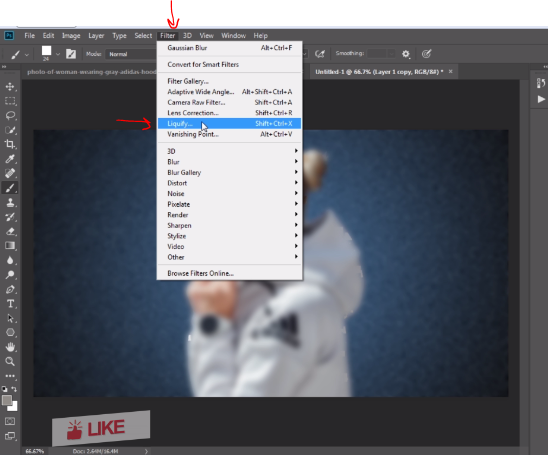
Now we will again go to filter and open the liquify effect in it. take this forward warp tool and paint on the right side pixels of the image to stretch them.
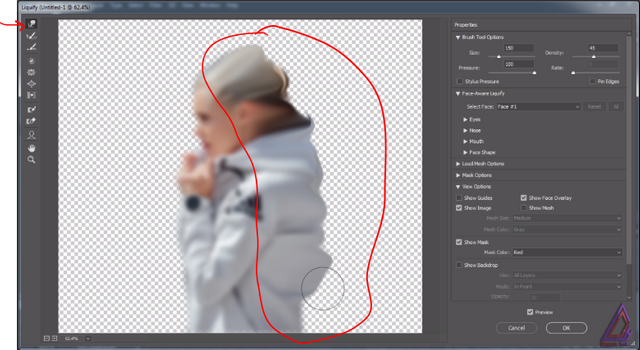
Again we will add a black color mask to this layer as we did before , reduce the density a little bit and take the white color as foreground and paint on the stretched part and create some blurred pixels in the scene.
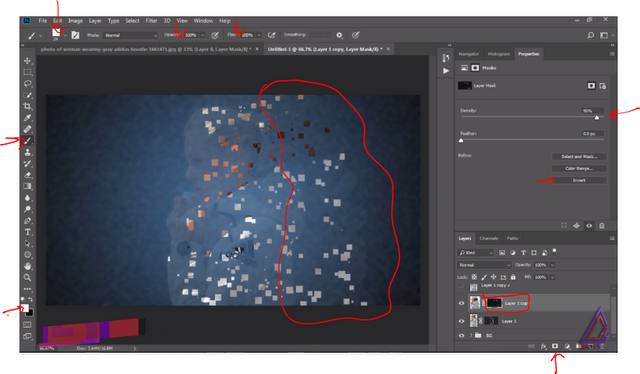
After we have finished the painting we will increase the density of the mask back to 100% for this layer as well as the first layer. Now we will unhide the top layer and add the white mask to it.
Again we will take the square brush but change its settings here. We will turn off the scattering and and shape dynamics effects off. We will only keep the spacing settings as before 163%.
One thing to remember here is that we will now change the brush color to black as our mask color is white. Now start painting over the image and hide the right side of the image completely. You can increase or decrease the brush size by pressing open or closed square brackets on your keyboard. Paint like shown in this image.
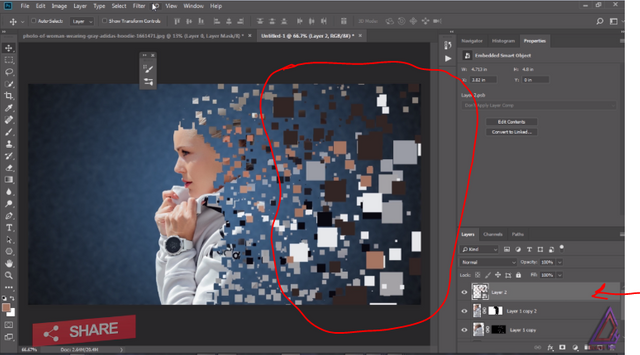
Step 6. Creating Some Random Pixels
After finishing the painting over the mask, we will create a new layer. In this new layer we will paint some random pixels appearing as flying in the air due to pixel explosion from our model. Again we will turn on these two settings and,' we will paint by taking the colors of the nearby pixels. Pressing the alt key on the keyboard the brush tool converts to eyedropper tool and then we can click on any color to select it and as we release the alt key it will again turn back to brush tool. This really helps in changing the colors and painting at the same time. We will select this color here and paint with the square brush here. On the other area, we will take this color and create the similar color pixels. repeat this process to create some random pixels in the scene. And remember one thing, as we move farther from the image, pixels size will go on increasing. So, increase the brush size accordingly with lest and right square brackets keys and paint with the bigger pixels to the right side of the layer. Do not over crowd the pixels.
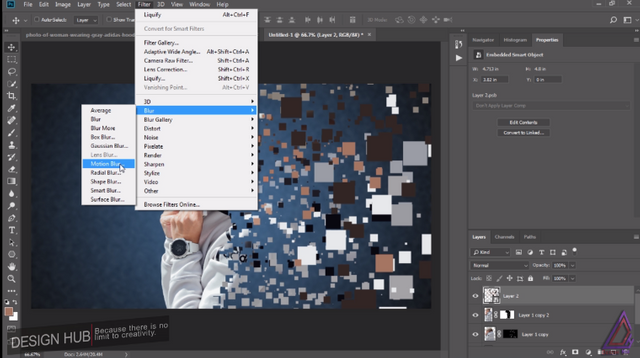
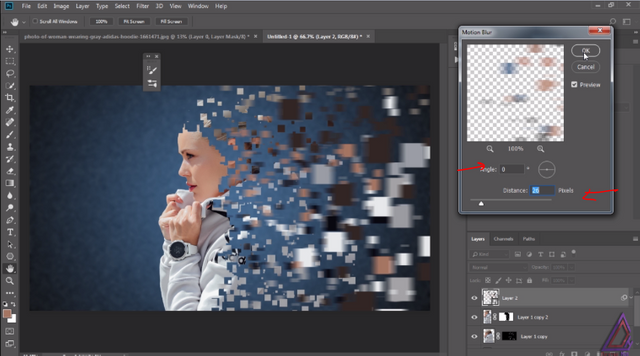
Now we will add some motion blur to these painted pixels to add realism to them as they are moving, For that first we will convert this layer to smart . Then we will go to filter and then blur gallery and select the motion blur. We will change the angle to zero degree and the distance to around 26 pixels and click ok.
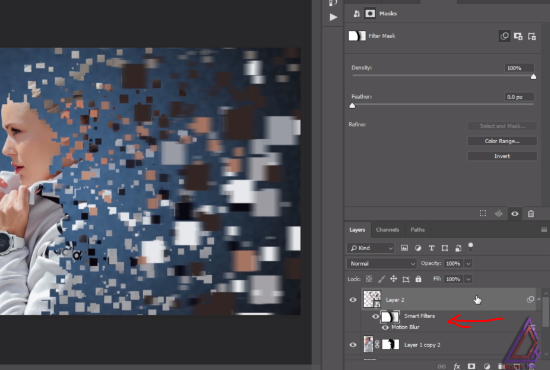
This will apply the motion blur to the whole layer but we want it zero at the left and maximum to the right hand side, so we will apply mask to it. Take the soft round brush and set the foreground color to black, now paint over the smart filters white mask. First we will keep the opacity to 100% and paint the left side with it. then we will reduce the opacity a little bit and paint some right side of the layer and we will keep on reducing the opacity of the brush and paint with 10% opacity over the right hand side bigger pixels as we want maximum blur to those pixels to show the maximum speed to them.
Step 7.Applying Camera Raw Filter
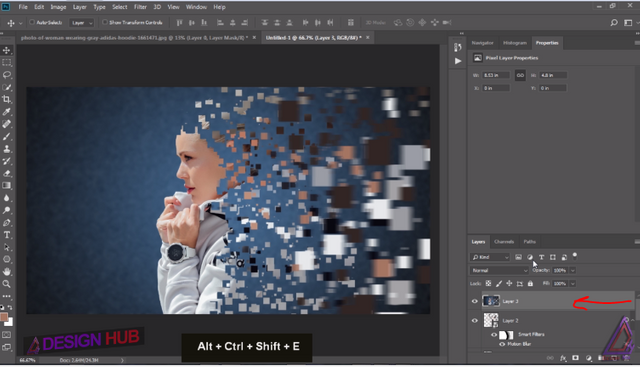
Now we will apply some color grading to our image. For that first we will merge all the layers into one layer. Press control+alt+shift+E on your keyboard and this will create a new layer merging all the layers.
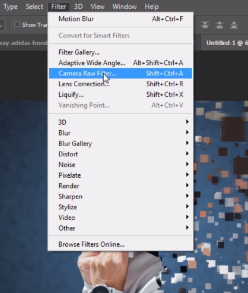
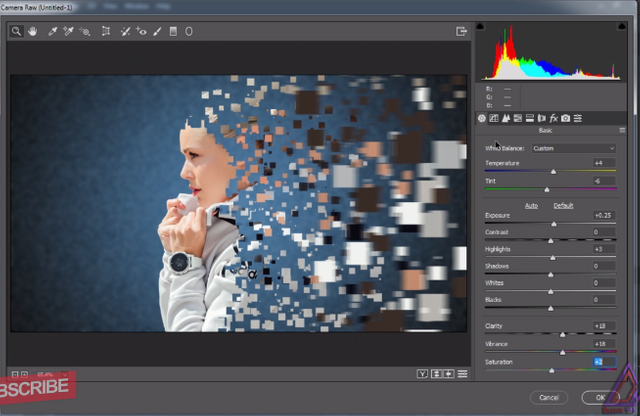
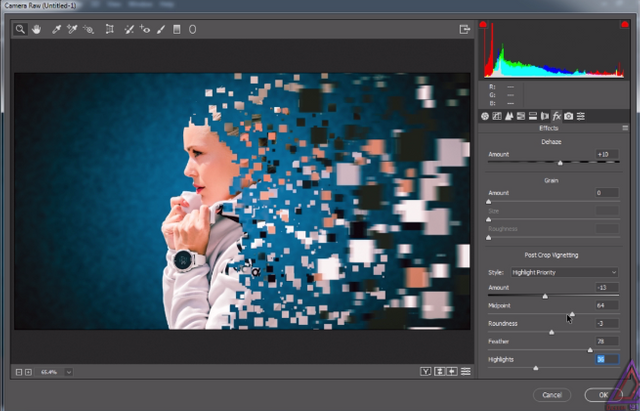
Convert this new layer to smart object and then go to filters and select camera raw filter. Play with the settings in it to give some special look to your image. This totally depends upon you how you want the image.
So guys we have now done. We have created this cool pixel explosion effect in Photoshop. I hope you loved this detailed tutorial for this effect and learnt new things by it. If you wanna watch the whole tutorial you can watch it on my YouTube channel.
Here is the link to the same tutorial on My YouTube channel "Design Hub"
.
I am a professional digital artist, photo-editor and motion designer having experience of 5 years. If you also want these cool effects and creative logo animations for your text, logo or graphics, I will design them for you at very reasonable prices. You may contact me on telegram, discord or Fiverr. Here are my contact ids for these social handles.
TELEGRAM : @gauravrocksg DISCORD : @rocksg#4832
FIVERR : https://www.fiverr.com/grocksg/ (Fiverr is a marketplace for the freelancer, you can watch my portfolio there and past works I have done for clients and place your own orders, it is very secure and safe)
Congratulations! Your post has been selected as a daily Steemit truffle! It is listed on rank 2 of all contributions awarded today. You can find the TOP DAILY TRUFFLE PICKS HERE.
I upvoted your contribution because to my mind your post is at least 3 SBD worth and should receive 205 votes. It's now up to the lovely Steemit community to make this come true.
I am
TrufflePig, an Artificial Intelligence Bot that helps minnows and content curators using Machine Learning. If you are curious how I select content, you can find an explanation here!Have a nice day and sincerely yours,

TrufflePigThanks for using eSteem!
Your post has been voted as a part of eSteem encouragement program. Keep up the good work!
Dear reader, Install Android, iOS Mobile app or Windows, Mac, Linux Surfer app, if you haven't already!
Learn more: https://esteem.app
Join our discord: https://discord.me/esteem