Arduino UNO Activity: An Application & Tutorial in Using Arduino to Eight LED Lights | Part 3 – “ One by One Turning on of LED Lights... Ensuring That LED 1 to 8 Will Turn On BUT The Previous LED Lights Will Not Be Turned Off “
Good day to all the readers! ^_^

This week (on my last two posts), I've been giving tutorials or activities involving Arduino/Arduino UNO. Those posts will be recapped by the given links below:
Tutorial/Activity 1. Four LED Lights Off While the other Four LED Lights On
Tutorial/Activity 2. Continuous Turning On of Eight LED Lights, One By One - From LED 1 to LED 8
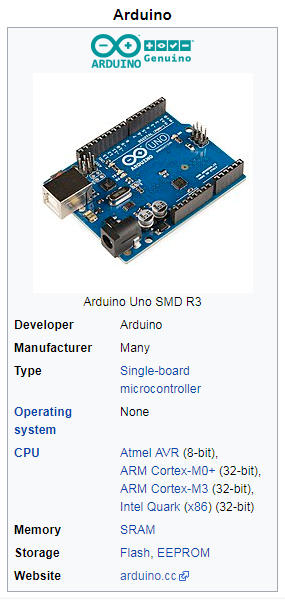
As I am always saying on my posts related to Arduino , modern engineering life became quite more advance leading most of engineering activities involve with technology. There is no doubt that Arduino is one of the invented software and/or hardware which has been used by engineers and programmers nowadays. Arduino is an open source computer hardware and software company, project, and user community that designs and manufactures single-board microcontrollers and microcontroller kits for building digital devices and interactive objects that can sense and control objects in the physical world. It is important for us to gain or enhance our knowledge about the said software/hardware since it is something which could be related to our generation nowadays. Well, we are lucky since it is an open source. And from the word " open " meaning, it is " free or accessible " to be downloaded and used by anyone.
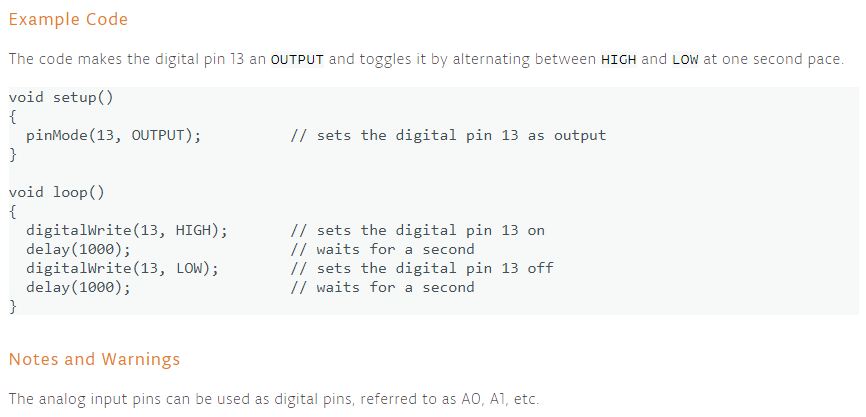
Code Explanation (What is pinMode? digitalWrite? )
What is pinMode?
Configures the specified pin to behave either as an input or an output. As of Arduino 1.0.1, it is possible to enable the internal pullup resistors with the mode INPUT_PULLUP. Additionally, the INPUT mode explicitly disables the internal pullups.
What are Digital Pins?
The pins on the Arduino can be configured as either inputs or outputs. This document explains the functioning of the pins in those modes. While the title of this document refers to digital pins, it is important to note that vast majority of Arduino (Atmega) analog pins, may be configured, and used, in exactly the same manner as digital pins.
What is digitalWrite?
Write a HIGH or a LOW value to a digital pin.
If the pin has been configured as an OUTPUT with pinMode(), its voltage will be set to the corresponding value: 5V (or 3.3V on 3.3V boards) for HIGH, 0V (ground) for LOW.
If the pin is configured as an INPUT, digitalWrite() will enable (HIGH) or disable (LOW) the internal pullup on the input pin. It is recommended to set the pinMode() to INPUT_PULLUP to enable the internal pull-up resistor. See the digital pins tutorial for more information.
If you do not set the pinMode() to OUTPUT, and connect an LED to a pin, when calling digitalWrite(HIGH), the LED may appear dim. Without explicitly setting pinMode(), digitalWrite() will have enabled the internal pull-up resistor, which acts like a large current-limiting resistor.
EXAMPLE CODE (FOR EXPLANATION)
What is a Resistor?
Resistor is a passive two-terminal electrical component that implements electrical resistance as a circuit element. In electronic circuits, resistors are used to reduce current flow, adjust signal levels, to divide voltages, bias active elements, and terminate transmission lines, among other uses. High-power resistors that can dissipate many watts of electrical power as heat may be used as part of motor controls, in power distribution systems, or as test loads for generators. Fixed resistors have resistances that only change slightly with temperature, time or operating voltage. Variable resistors can be used to adjust circuit elements (such as a volume control or a lamp dimmer), or as sensing devices for heat, light, humidity, force, or chemical activity.
Today is the third day in which I am able to use the Arduino Application and again, I realized its importance to engineering life nowadays. Using the said application sounds fun and challenging since if you are going to use it, you must have to analyze well the codes that should be used in order for the program to work well (brainstorming is a must) though it’s not that difficult to use.
For this activity, it is quite similar to the second activity, however there will be a twist. For this activity, eight LED Lights will be turned on one by one but the previous LED Lights will not be turned off. Meaning, each LED lights has its time interval to be turned on while the previous LED lights will remain turned on until the eight LED Lights are all turned on. After turning on the 8th LED Light, all eight LED Lights will turned off and so the 1st LED Light will turned on again, followed by the 2nd LED Light, etc. and the cycle continuous....
Activity Name:
Turning On of Eight LED Lights, One By One - From LED 1 to LED 8... Ensuring That LED 1 to 8 Will Turn On BUT The Previous LED Lights Will Not Be Turned Off (Continuous Rotation)
Equipment Used:
- Eight Resistors
- One Breadboard
- Eight LED Lights
- Connecting Wires
- Analog Multitester
- Arduino UNO with USB Cable
- Laptop with Arduino Application
Summarized Activity Instructions:
- Prepare the equipment needed for the activity.
- Use eight (8) LED lights and eight (8) resistors only for the activity. Use the Analog Multitester to test if the LED lights are operational. (Note: Operational LED lights will produce light when the terminals are connected properly)
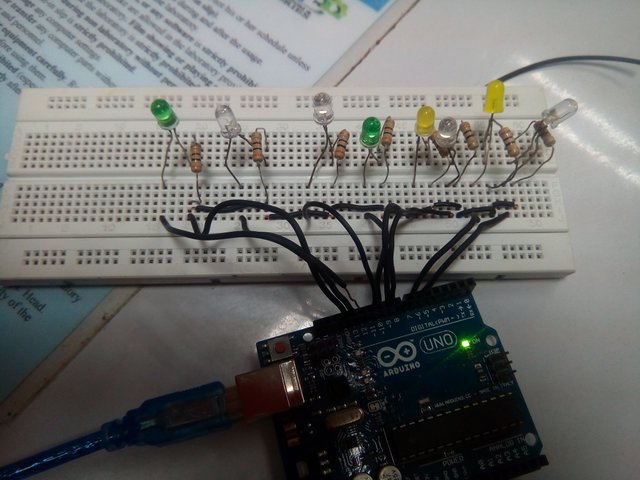
- With the breadboard provided, make a circuit involving the said eight (8) LED Lights and resistors which are connected to each other and corresponds to the objective of the activity.
- Make a program of the activity using the Arduino Application on the laptop and verify if the created program is working or ready for uploading to Arduino UNO. Additional Information: Arduino Application has a verification/test button of the created program before running and using it to the circuit created in the breadboard. This is to make sure if the program works well to avoid errors or malfunctions of the system.
- Connect the created circuit to Arduino UNO using the connecting wires. After which, connect the Arduino UNO to the laptop using the USB Cable.
- In the Arduino Application on the laptop, upload the created program to Arduino UNO and run the system.
What Resistor should I use? How many ohms and why?
The type of Resistor that will be used is a Linear Resistor having a value of 330 ohms. The reason why we will be using a 330 ohms resistor is because the amount of current and voltage that we will be producing is only small, about 5 volts only. The value of the said resistor will suffice the required amount of current and voltage on the circuit that will be made for the activity.
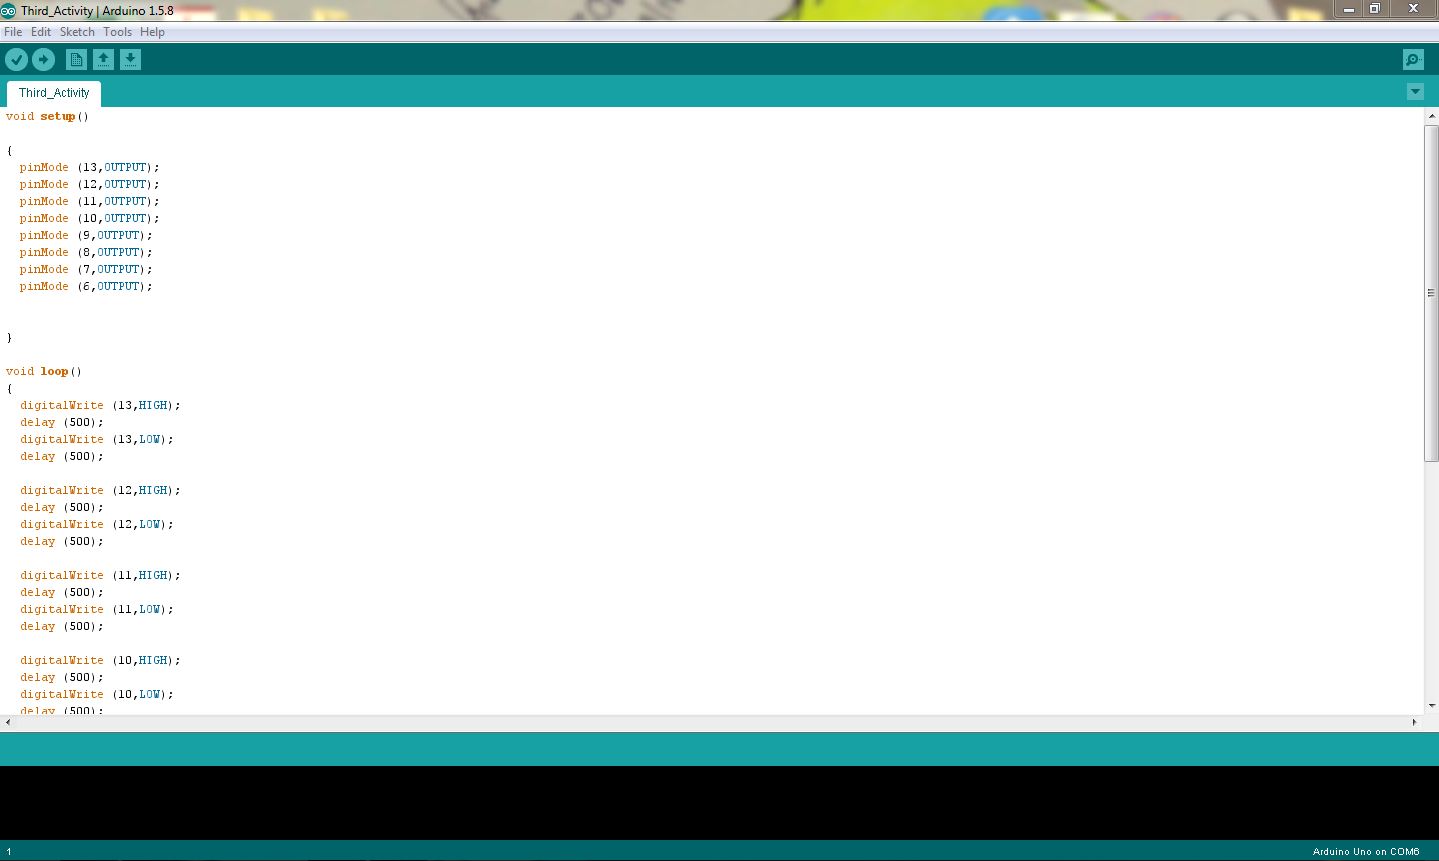
Activity Codes
void setup()
{
pinMode (13,OUTPUT);
pinMode (12,OUTPUT);
pinMode (11,OUTPUT);
pinMode (10,OUTPUT);
pinMode (9,OUTPUT);
pinMode (8,OUTPUT);
pinMode (7,OUTPUT);
pinMode (6,OUTPUT);
}
void loop()
{
digitalWrite (13,HIGH);
delay (500);
digitalWrite (13,LOW);
delay (500);
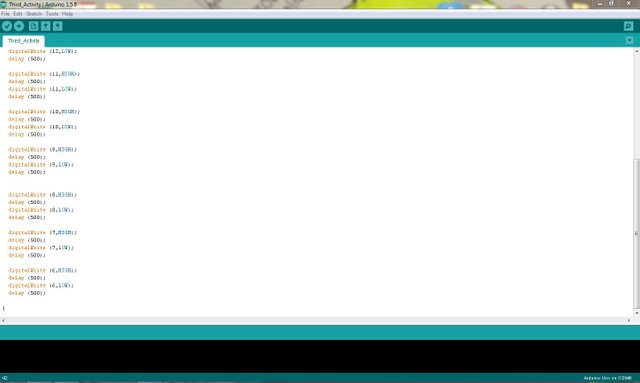
digitalWrite (12,HIGH);
delay (500);
digitalWrite (12,LOW);
delay (500);
digitalWrite (11,HIGH);
delay (500);
digitalWrite (11,LOW);
delay (500);
digitalWrite (10,HIGH);
delay (500);
digitalWrite (10,LOW);
delay (500);
digitalWrite (9,HIGH);
delay (500);
digitalWrite (9,LOW);
delay (500);
digitalWrite (8,HIGH);
delay (500);
digitalWrite (8,LOW);
delay (500);
digitalWrite (7,HIGH);
delay (500);
digitalWrite (7,LOW);
delay (500);
digitalWrite (6,HIGH);
delay (500);
digitalWrite (6,LOW);
delay (500);
}
| pinMode (13, OUTPUT); | sets the digital pin 13 as output |
| pinMode (12, OUTPUT); | sets the digital pin 12 as output |
| pinMode (11, OUTPUT); | sets the digital pin 11 as output |
| pinMode (10, OUTPUT); | sets the digital pin 10 as output |
| pinMode (9, OUTPUT); | sets the digital pin 9 as output |
| pinMode (8, OUTPUT); | sets the digital pin 8 as output |
| pinMode (7, OUTPUT); | sets the digital pin 7 as output |
| pinMode (6, OUTPUT); | sets the digital pin 6 as output |
| digitalWrite (13, HIGH) ; | sets the digital pin 13 on |
| digitalWrite (12, HIGH) ; | sets the digital pin 12 on |
| digitalWrite (11, HIGH) ; | sets the digital pin 11 on |
| digitalWrite (10, HIGH) ; | sets the digital pin 10 on |
| digitalWrite (9, HIGH) ; | sets the digital pin 9 on |
| digitalWrite (8, HIGH) ; | sets the digital pin 8 on |
| digitalWrite (7, HIGH) ; | sets the digital pin 7 on |
| digitalWrite (6, HIGH) ; | sets the digital pin 6 on |
| digitalWrite (13, LOW) ; | sets the digital pin 13 off |
| digitalWrite (12, LOW) ; | sets the digital pin 12 off |
| digitalWrite (11, LOW) ; | sets the digital pin 11 off |
| digitalWrite (10, LOW) ; | sets the digital pin 10 off |
| digitalWrite (9, LOW) ; | sets the digital pin 9 off |
| digitalWrite (8, LOW) ; | sets the digital pin 8 off |
| digitalWrite (7, LOW) ; | sets the digital pin 7 off |
| digitalWrite (6, LOW) ; | sets the digital pin 6 off |
| delay (500); | waits for 500 milliseconds |
THE CIRCUIT
THE PROGRAM
Thank you visiting and reading the context ^_^
Posted on Utopian.io - Rewarding Open Source Contributors
Congratulations! This post has been upvoted by SteemMakers. We are a community based project that aims to support makers and DIYers on the blockchain in every way possible. Find out more about us on our website: www.steemmakers.com
If you like our work, please consider upvoting this comment to support the growth of our community. Thank you.
thank you @steemmakers
Hey @rejzons I am @utopian-io. I have just upvoted you!
Achievements
Community-Driven Witness!
I am the first and only Steem Community-Driven Witness. Participate on Discord. Lets GROW TOGETHER!
Up-vote this comment to grow my power and help Open Source contributions like this one. Want to chat? Join me on Discord https://discord.gg/Pc8HG9x
thank you @utopian-io :)
Thank you for the contribution. It has been approved.
You can contact us on Discord.
[utopian-moderator]
thank you for the approval and appreciation sir @favcau.. noted! :)
I see you followed my advice, good post.
thanks @rpsreal :)