Image Editor Application With Electron(Part-4)
Repository
Electron GitHub Address
https://github.com/electron/electron
My GitHub Address
This Project GitHub Address
https://github.com/pckurdu/Image-Editor-Application-With-Electron-Part-4
What Will I Learn?
- You will learn
ng-clickevents in angularjs. - You will learn
ng-changeevents in angularjs. - You will learn
ng-repeatevents in angularjs. - You will learn
ng-showevents in angularjs.
Requirements
- basic electronjs knowledge
- basic css knowledge
- basic angularjs knowledge
- Atom Editor
Difficulty
- Basic
Tutorial Contents
In this tutorial we will continue to develop image editor application.
We have completed the installation of images into the application and we will place effect buttons to apply this tutorial to images with the help of these buttons we can edit images.
We will keep the effects in a series and set the properties on each element of the array.
We will use the ng-repeat feature when accessing the elements in the array. ng-repeat is a feature that allows rotation in more than one object. Here, we will use the ng-repeat feature according to the structure of our object.
I'll show ng-click for the button click event and show how to use the ng-repeat object in ng-click.
After clicking on the buttons, I will use the html range input to show how the ng-show is used.
Let's start.
Create Buttons
We were showing the image uploaded in the edit.html page. I will put the picture effect buttons next to the loaded picture.
For this, let's create a div called id=imageControl and let's create the effects we will use in this div.
<div id="imageControl">
        <div class="effectType">Contrast</div>
        <div class="effectType">Invert</div>
        <div class="effectType">Brightness</div>
        <div class="effectType">Grayscale</div>
        <div class="effectType">Sepia</div>
        <div class="effectType">Blur</div>

</div>
I want the picture and buttons to be next to each other. I'm going to need to design the imageControl , preview and imageEditor divs in this style.css file.
div#imageControl,div#preview
{
    display:flex;
    justify-content: center;
    align-items: center;
    flex: 1;
    flex-direction: row;
    flex-wrap: wrap;
}

div#imageEditor
{
    display: flex;
    flex-direction: row;
}
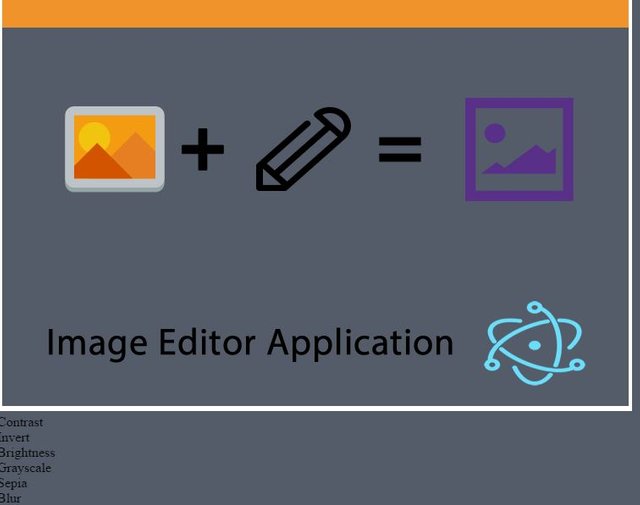
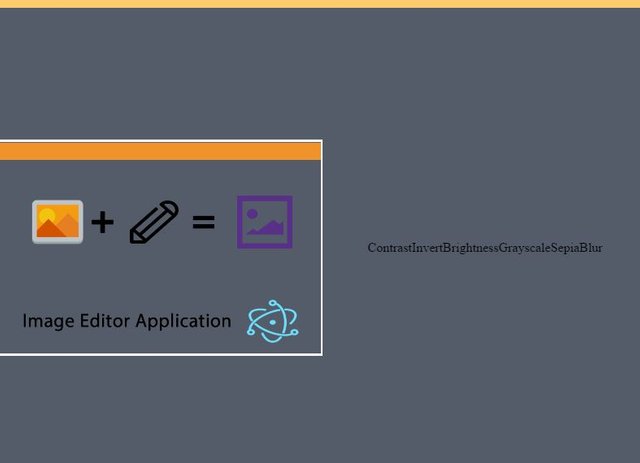
Now our application appears as follows.
We centered image and buttons but the buttons do not look nice, but also make the user's work harder.
To solve this problem, we need to edit the effectType class.
In style.css
div.effectType
{
    width: 50%;
    display: flex;
    justify-content: center;
    align-items: center;
    align-self: stretch;
    font-size: 1.5rem;
    cursor: pointer;
}
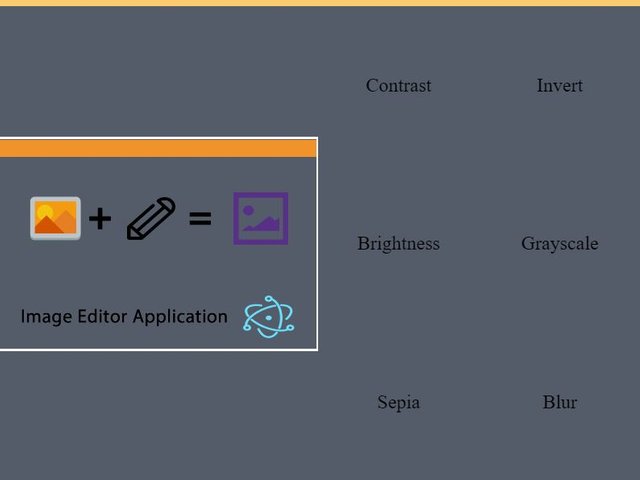
Now our effects look like buttons.
Effects With an Array
It will not be wise to use effects like this because you will need values like max and min values in the future.
Instead, we define these effects in the array with a number of properties. Thus, we increase the usage characteristics.
Let's define an array of the effects in editCtrl.
$scope.effects={
        'Contrast':{val:100,min:0,max:200,scale:'%'},
        'Invert':{val:0,min:0,max:100,scale:'%'},
        'Brightness':{val:100,min:0,max:200,scale:'%'},
        'Grayscale':{val:0,min:0,max:100,scale:'%'},
        'Sepia':{val:0,min:0,max:100,scale:'%'},
        'Blur':{val:0,min:0,max:5,scale:'px'},
    };
Here I have defined the value properties with the name of the effects. I'll check each effect with this value property in the future.
Now I can display these effect names in imageControl using ng-repeat.
<div class="effectType" ng-repeat="(effect,props) in effects" ng-click="imageEffect(effect)">
      {{effect}}
</div>
I named two variables called effect and props with ng-repeat. I'm holding effect names in the variable called effect, and I'm keeping properties in the called props variable.
When I gave the ng-click feature, these structures won the button feature exactly.
In the ng-click event, one function is running and taking effect as a parameter.
We need to define this function in editCtrl, and let's print the consola to see what the incoming value is.
  $scope.imageEffect=function(effectName){
        console.log(effectName);
    }
Adding Slider Input
When the buttons are pressed, a slider should appear and the picture should be adjusted with the slider.
When the button is clicked I want to show the slider where the buttons are.
For this, firstly, we should write the slider with the information of which button was clicked.
<div id="liveEffect">
     <div class="effect" ng-repeat="(effect,props) in effects">
     <div class="effectName">{{effect}}</div>
     <div class="quantity">{{props.val+props.scale}}</div>
     <div class="range-slider">
          <input type="range" class="slider-input" min="{{props.min}}" max="{{props.max}}" ng-value="props.val" ng-model="props.val" ng-change="setEffect(props.val)"/>
            </div>
     </div>
</div>
Here, we clicked the button to show what to write, but the problem was clicked which button was clicked.
We need to use the ng-show feature and we should just show the slider of the clicked button.
<div class="effect" ng-repeat="(effect,props) in effects" ng-show="effect==activeEffect">
If the effect object is equal to the activeEffect object, no other states to be displayed will be displayed.
In order for this query to work, we must ensure equality in editCtrl.
$scope.imageEffect=function(effectName){
        console.log(effectName);
        $scope.activeEffect=effectName;

    }
We defined the ng-change property in the slider.
With ng-change, we can capture the value of the slider. Each time the slider runs, the value will change with ng-change.
When we click on the button, we reveal the slider, but when the image is added to the application, two div also appear.
The slider should be displayed when the buttons are clicked and the buttons should not be displayed while the slider is displayed.
We define a variable called controlActive and set true when the button is clicked.
$scope.imageEffect=function(effectName){
        console.log(effectName);
        $scope.activeEffect=effectName;
        $scope.controlActive=true;

    }
Let set false when editCtrl is running.
In editCtrl
$scope.controlActive=false;
We can show the slider or buttons according to this variable.
<div id="imageControl" ng-show="!controlActive">
…
</div>
<div id="liveEffect" ng-show="controlActive">
…
</div>
We have added the slider but it doesn't look nice.
In style.css file, we need to give liveEffect div style.
div#liveEffect
{
    flex:1;
    display: flex;
    justify-content: center;
    align-items: center;
    text-align: center;
}
Also we will give style in the range-slider and slider-input classes.
.range-slider
{
    text-align: center;
    width: 100px;
}

.slider-input
{
    -webkit-appearance: none;
    width:100px;
    height: 10px;
    border-radius: 5px;
    background: #d7dfdf;
    outline: none;
    padding: 0;
    margin: 0;

}
Thus the final version of the application is as follows.

Curriculum
https://steemit.com/utopian-io/@pckurdu/image-editor-application-with-electron-part-1
https://steemit.com/utopian-io/@pckurdu/image-editor-application-with-electron-part-2
https://steemit.com/utopian-io/@pckurdu/image-editor-application-with-electron-part-3
Proof of Work Done
https://github.com/pckurdu/Image-Editor-Application-With-Electron-Part-4
Thank you for your contribution.
We suggest the points below:
Your tutorial is quite short for a good tutorial. We recommend you aim for capturing at least 2-3 concepts. You've focused a lot on CSS in this tutorial.
Nice work on the explanations of your code, although adding a bit more comments to the code can be helpful as well.
In general your tutorial is well explained and easy to understand. We hope to see more of your tutorials. Thank you.
Your contribution has been evaluated according to Utopian policies and guidelines, as well as a predefined set of questions pertaining to the category.
To view those questions and the relevant answers related to your post, click here.
Need help? Write a ticket on https://support.utopian.io/.
Chat with us on Discord.
[utopian-moderator]
Thank you for your review, @portugalcoin!
So far this week you've reviewed 8 contributions. Keep up the good work!
Upvoted.
DISCLAIMER: Your post is upvoted based on curation algorithm configured to find good articles e.g. stories, arts, photography, health, community, etc. This is to reward you (authors) for sharing good content using the Steem platform especially newbies.
If you're a dolphin or whales, and wish not to be included in future selection, please let me know so I can exclude your account. And if you find the upvoted post is inappropriate, FLAG if you must. This will help a better selection of post.
Keep steeming good content.
@Shares - Curation Service
Posted using https://Steeming.com condenser site.
Hey, @pckurdu!
Thanks for contributing on Utopian.
We’re already looking forward to your next contribution!
Get higher incentives and support Utopian.io!
Simply set @utopian.pay as a 5% (or higher) payout beneficiary on your contribution post (via SteemPlus or Steeditor).
Want to chat? Join us on Discord https://discord.gg/h52nFrV.
Vote for Utopian Witness!