i2C Oled display and 8glib Library arduino
What Will I Learn?
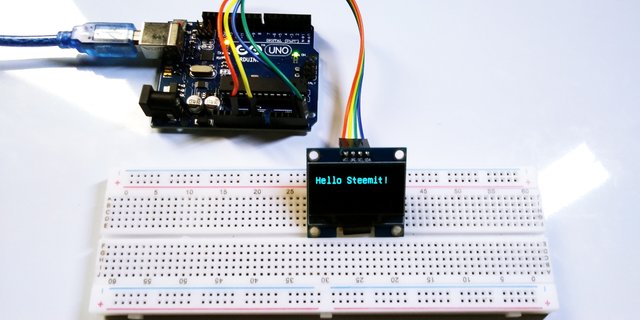
Today in this instructable i will going to show you how does the i2c oled display works, how to conect the i2c in toarduino, and we are going to add the 8glib library on the ide to make this this activity works easily, so lets start this,
Requirements
We need this couples of components in this tutorial:
- i2c OLED diaplay
- Arduino Board
- male to female jumper wires
- Breadboard (optional)
Difficulty
- Basic
Tutorial Contents
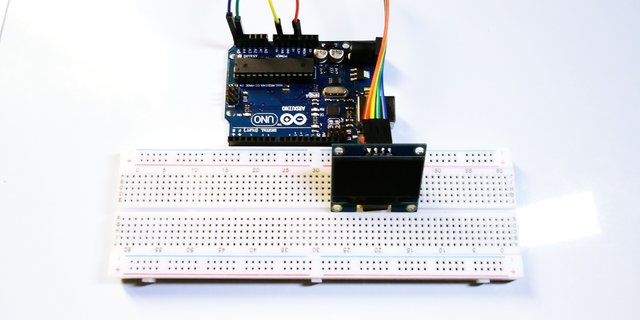
I am using a 1.3 ich i2c oled display and it has only 4 pins that will be connected to specified arduin pin out puts, i make a very simple circuit diagram that you may follow bellow;
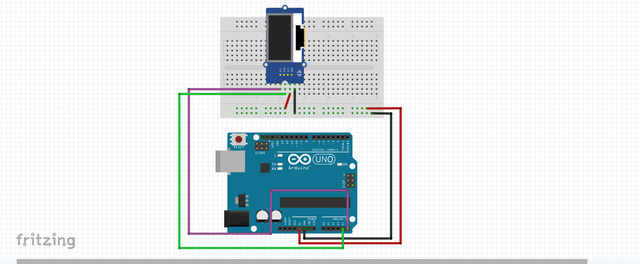
- GND - GND
- VCC - 3.3V
- SCL - A5
- SDA - A4
SOFTWARE
We are done building the circuit so lets start to set up and make a code for this. we are going to use the arduino ide, to set the sketch for this, if you dont have make sure to download the Arduino IDE for your specific operating system. I’ll leave a link to where you can download this software: https://www.arduino.cc/en/Main/Software
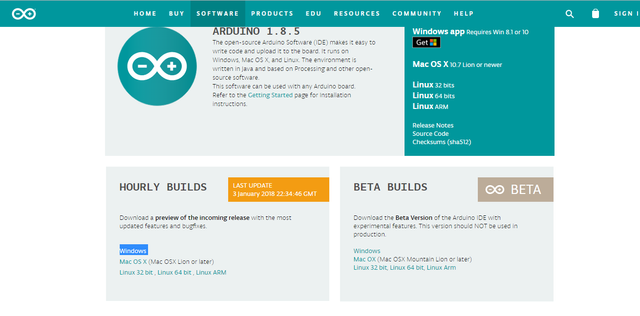
I have the IDE downloaded to my pc so lets go now for downloading the 8glib library;
download 8glib library here; https://bintray.com/olikraus/u8glib/Arduino
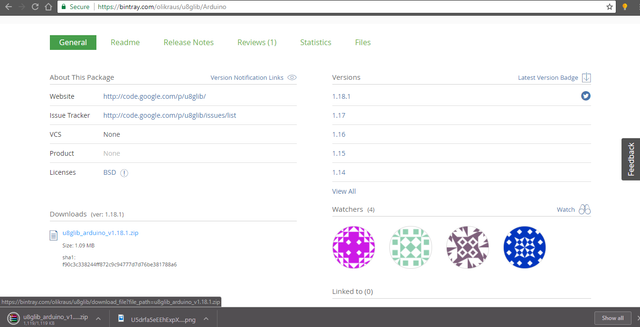
After the download is finished open the zip file then copy the 8glib folder inside the zip file then unzip the folder to your desktop you can rename it as well.
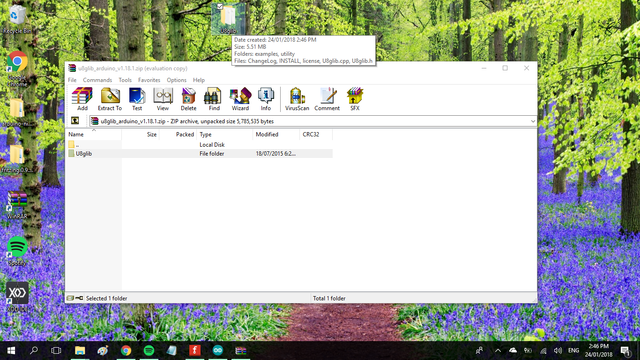
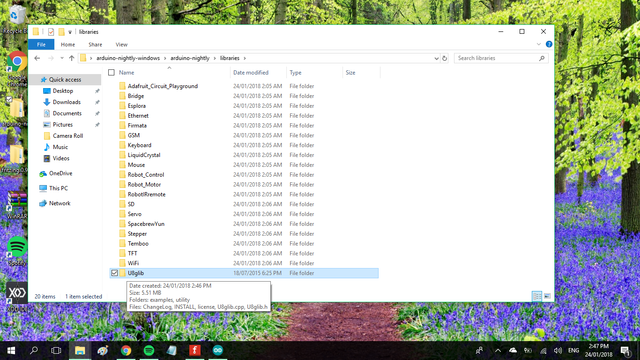
Cut the folder of the 8glib library in your desktop then go to your folders then locate the arduino folder>> libraries<< then paste it there. and now the folder library is already in the arduino ide libraries. you have another option for this you can add zip file directly from the IDE.
We will going to use the example sketch of the 8glib to booth upthe oled display to locate examples, just clcik on the >> FILE<<>>EXAMPLES>> locate the 8glib library>> click on HELLO WORLD<<.
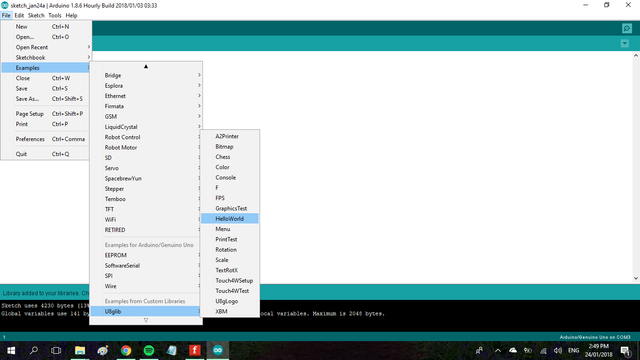
Select the lcd size and address of your lcd lets say that its: U8GLIB_SH1106_128X64 u8g(U8G_I2C_OPT_NONE); // I2C / TWI remove the // on the beginig of the address or delete the entire listed address example to lessen the code,
On the code below is the HELLO WORLD example from 8glib library ive change it to hello steemit on the print text that you want to show on your screen. here is the code;
#include "U8glib.h"
U8GLIB_SH1106_128X64 u8g(U8G_I2C_OPT_NONE);  // I2C / TWI
void draw(void) {
  // graphic commands to redraw the complete screen should be placed here
  u8g.setFont(u8g_font_unifont);
  //u8g.setFont(u8g_font_osb21);
  u8g.drawStr( 0, 22, "Hello Steemit!");
}
void setup(void) {
  // flip screen, if required
  // u8g.setRot180();
  // set SPI backup if required
  //u8g.setHardwareBackup(u8g_backup_avr_spi);
  // assign default color value
  if ( u8g.getMode() == U8G_MODE_R3G3B2 ) {
    u8g.setColorIndex(255);     // white
  }
  else if ( u8g.getMode() == U8G_MODE_GRAY2BIT ) {
    u8g.setColorIndex(3);         // max intensity
  }
  else if ( u8g.getMode() == U8G_MODE_BW ) {
    u8g.setColorIndex(1);         // pixel on
  }
  else if ( u8g.getMode() == U8G_MODE_HICOLOR ) {
    u8g.setHiColorByRGB(255,255,255);
  }
}
void loop(void) {
  // picture loop
  u8g.firstPage();
  do {
    draw();
  } while( u8g.nextPage() );
  // rebuild the picture after some delay
  delay(50);
}
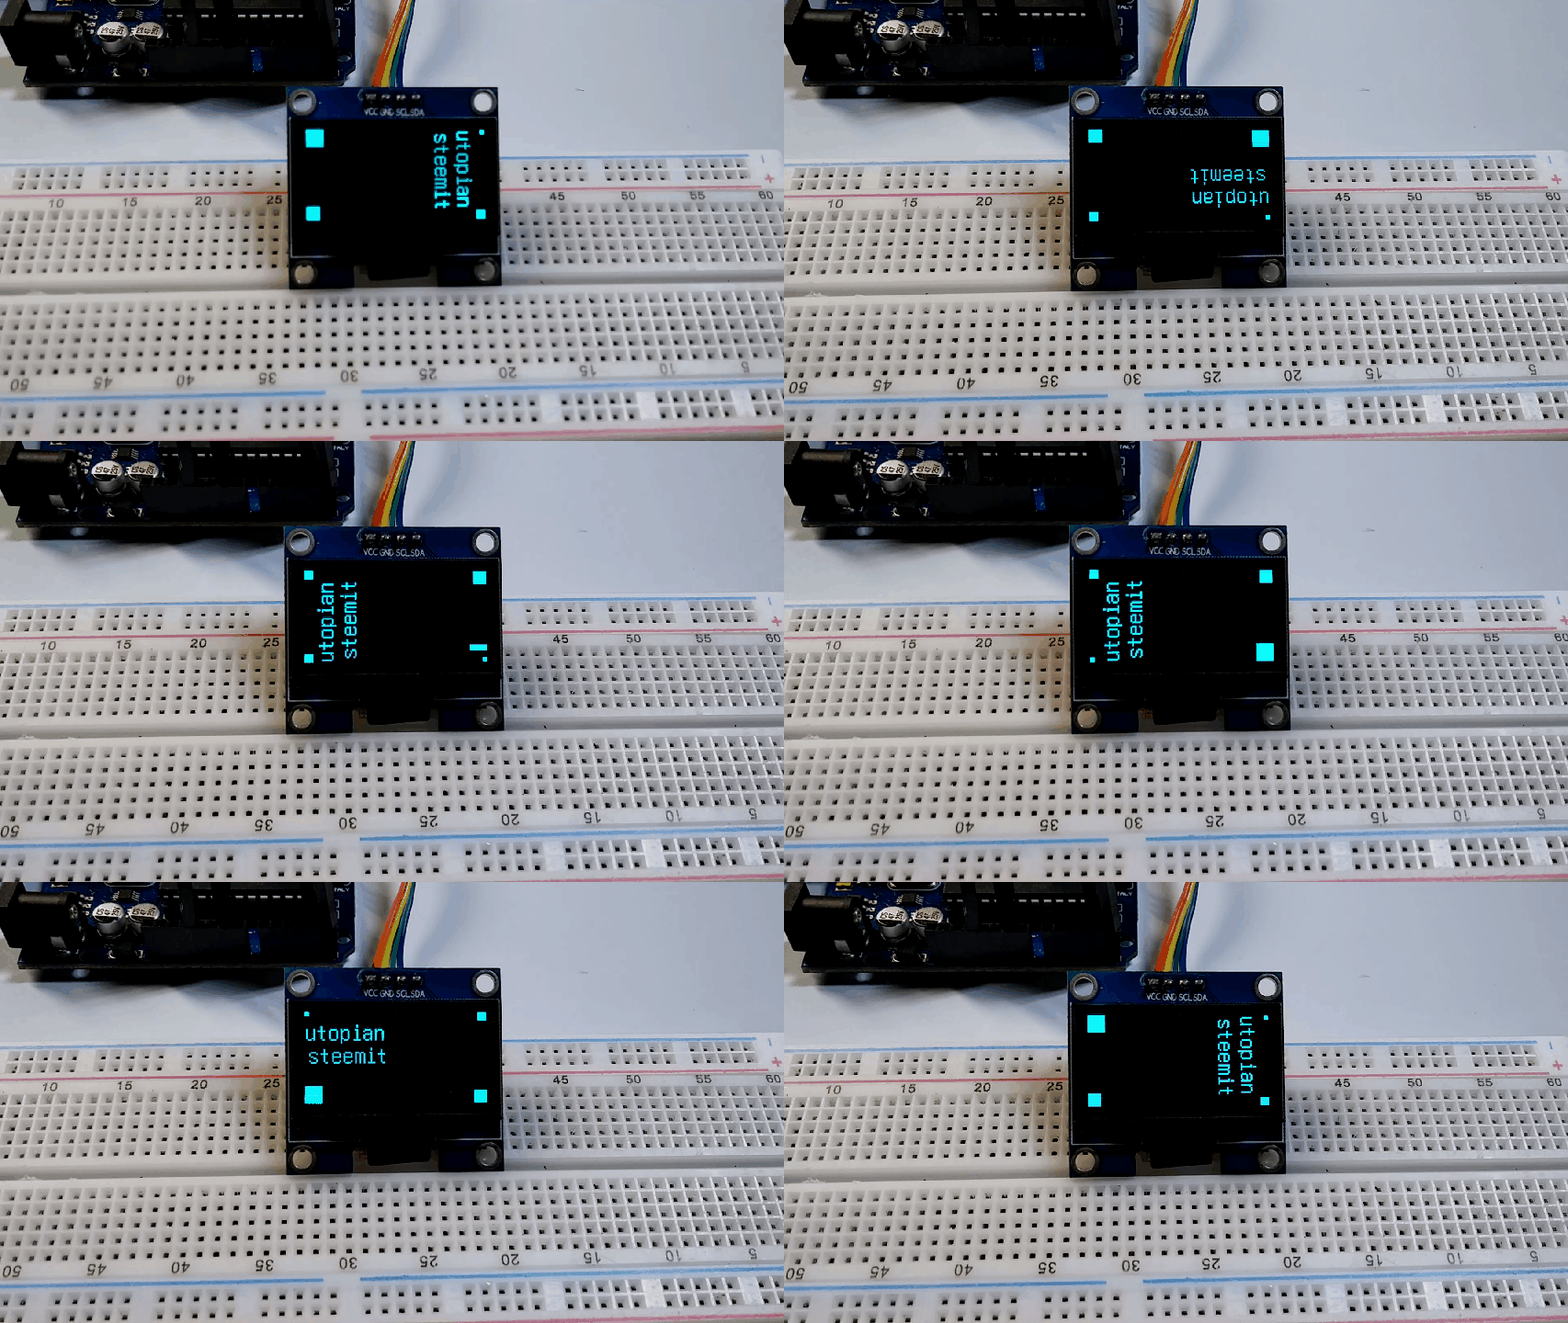
I make another example of the rotational text utopian and steemit heres the code;
#include "U8glib.h"
U8GLIB_SH1106_128X64 u8g(U8G_I2C_OPT_NONE); // I2C / TWI
uint8_t offset = 0;
void draw(void) {
  // graphic commands to redraw the complete screen should be placed here
  u8g.setFont(u8g_font_unifont);
  u8g.drawStr( 0+0, 20+0, "utopian");
  u8g.drawStr( 0+2, 20+16, "steemit");
  u8g.drawBox(0, 0, 3, 3);
  u8g.drawBox(u8g.getWidth()-6, 0, 6, 6);
  u8g.drawBox(u8g.getWidth()-9, u8g.getHeight()-9, 9, 9);
  u8g.drawBox(0, u8g.getHeight()-12, 12, 12);
}
void setup(void) {
}
void rotate(void) {
  static  uint8_t dir = 0;
  static  unsigned long next_rotation = 0;
  if ( next_rotation < millis() )
  {
    switch(dir) {
      case 0: u8g.undoRotation(); break;
      case 1: u8g.setRot90(); break;
      case 2: u8g.setRot180(); break;
      case 3: u8g.setRot270(); offset = ( offset + 1 ) & 0x0f; break;
    }
    dir++;
    dir &= 3;
    next_rotation = millis();
    next_rotation += 1000;
  }
}
void loop(void) {
  // screen rotation
  rotate();
  // picture loop
  u8g.firstPage();
  do {
    draw();
  } while( u8g.nextPage() );
  // rebuild the picture after some delay
  delay(100);
}
SAMPLE GRAPHICS CODE;
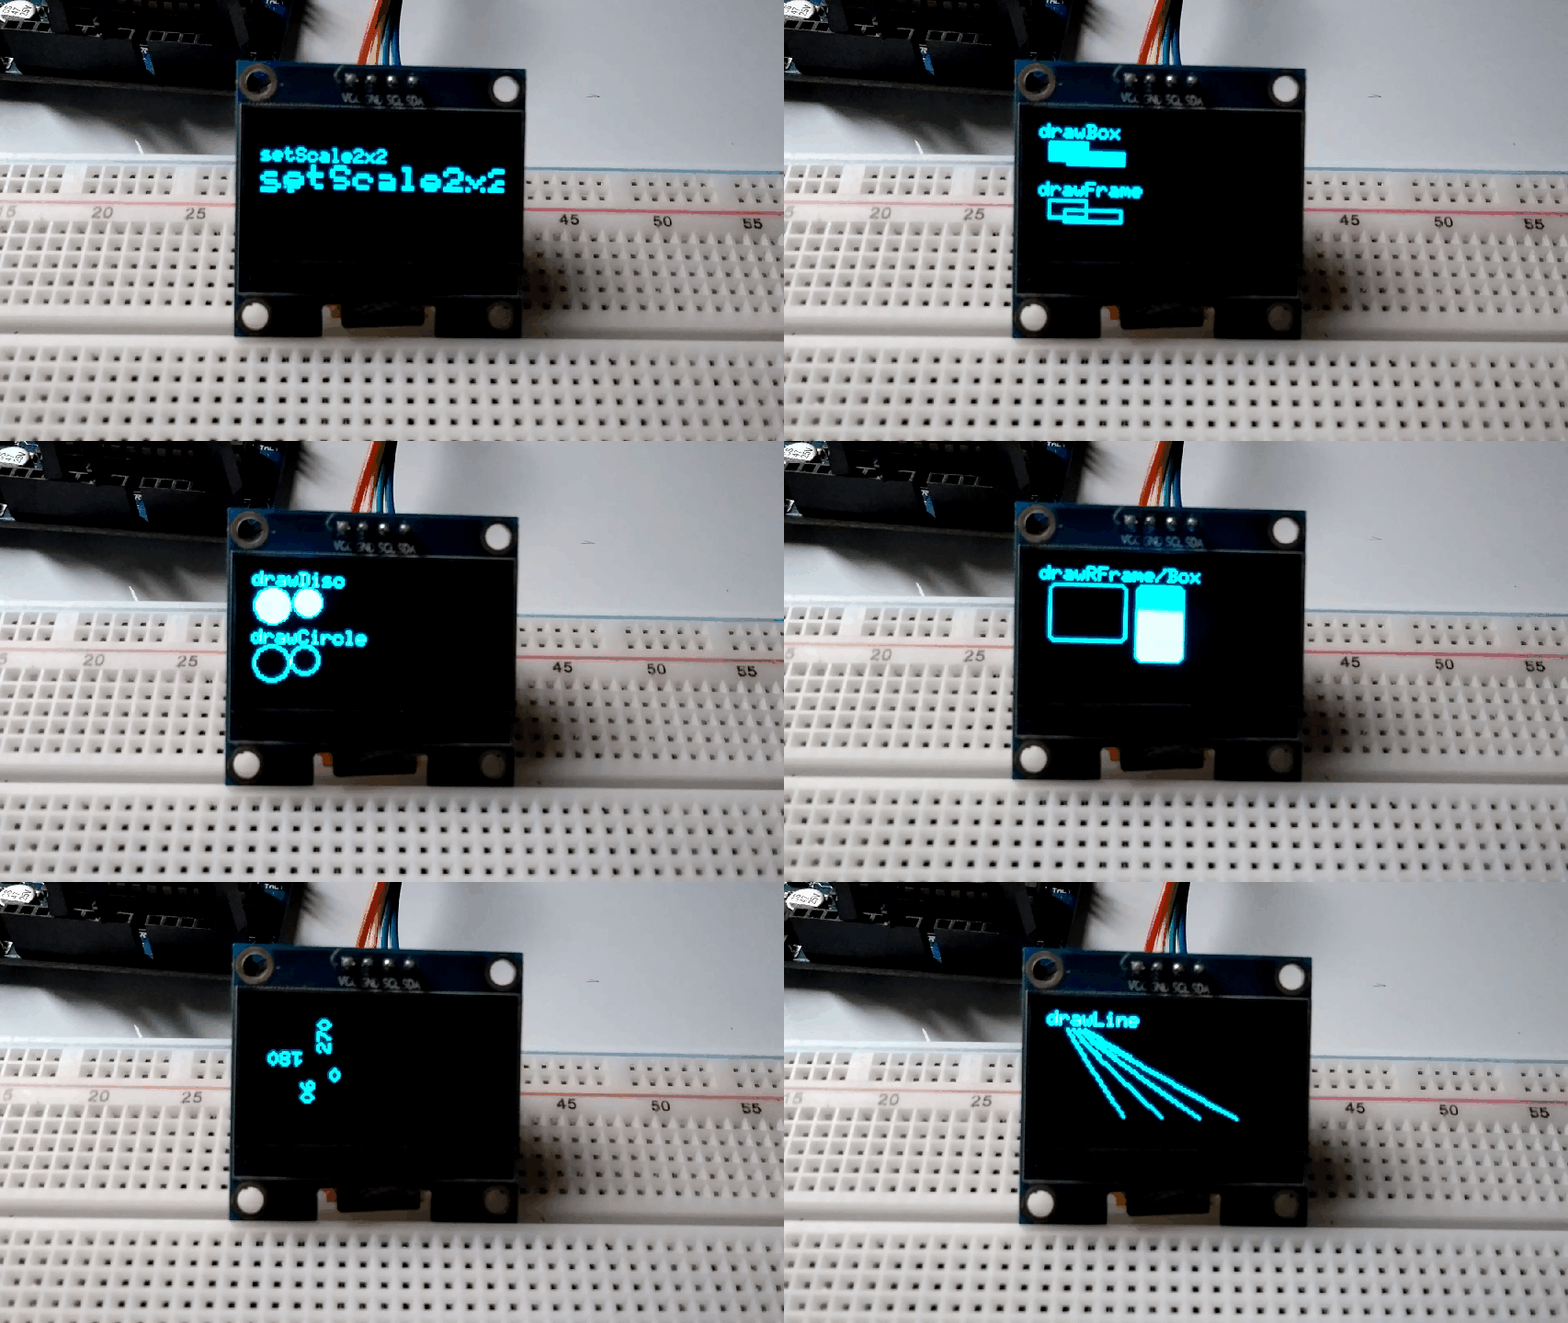
#include "U8glib.h"
U8GLIB_SH1106_128X64 u8g(U8G_I2C_OPT_NONE);  // I2C / TWI
void u8g_prepare(void) {
  u8g.setFont(u8g_font_6x10);
  u8g.setFontRefHeightExtendedText();
  u8g.setDefaultForegroundColor();
  u8g.setFontPosTop();
}
void u8g_box_frame(uint8_t a) {
  u8g.drawStr( 0, 0, "drawBox");
  u8g.drawBox(5,10,20,10);
  u8g.drawBox(10+a,15,30,7);
  u8g.drawStr( 0, 30, "drawFrame");
  u8g.drawFrame(5,10+30,20,10);
  u8g.drawFrame(10+a,15+30,30,7);
}
void u8g_disc_circle(uint8_t a) {
  u8g.drawStr( 0, 0, "drawDisc");
  u8g.drawDisc(10,18,9);
  u8g.drawDisc(24+a,16,7);
  u8g.drawStr( 0, 30, "drawCircle");
  u8g.drawCircle(10,18+30,9);
  u8g.drawCircle(24+a,16+30,7);
}
void u8g_r_frame(uint8_t a) {
  u8g.drawStr( 0, 0, "drawRFrame/Box");
  u8g.drawRFrame(5, 10,40,30, a+1);
  u8g.drawRBox(50, 10,25,40, a+1);
}
void u8g_string(uint8_t a) {
  u8g.drawStr(30+a,31, " 0");
  u8g.drawStr90(30,31+a, " 90");
  u8g.drawStr180(30-a,31, " 180");
  u8g.drawStr270(30,31-a, " 270");
}
void u8g_line(uint8_t a) {
  u8g.drawStr( 0, 0, "drawLine");
  u8g.drawLine(7+a, 10, 40, 55);
  u8g.drawLine(7+a*2, 10, 60, 55);
  u8g.drawLine(7+a*3, 10, 80, 55);
  u8g.drawLine(7+a*4, 10, 100, 55);
}
void u8g_triangle(uint8_t a) {
  uint16_t offset = a;
  u8g.drawStr( 0, 0, "drawTriangle");
  u8g.drawTriangle(14,7, 45,30, 10,40);
  u8g.drawTriangle(14+offset,7-offset, 45+offset,30-offset, 57+offset,10-offset);
  u8g.drawTriangle(57+offset*2,10, 45+offset*2,30, 86+offset*2,53);
  u8g.drawTriangle(10+offset,40+offset, 45+offset,30+offset, 86+offset,53+offset);
}
void u8g_ascii_1() {
  char s[2] = " ";
  uint8_t x, y;
  u8g.drawStr( 0, 0, "ASCII page 1");
  for( y = 0; y < 6; y++ ) {
    for( x = 0; x < 16; x++ ) {
      s[0] = y*16 + x + 32;
      u8g.drawStr(x*7, y*10+10, s);
    }
  }
}
void u8g_ascii_2() {
  char s[2] = " ";
  uint8_t x, y;
  u8g.drawStr( 0, 0, "ASCII page 2");
  for( y = 0; y < 6; y++ ) {
    for( x = 0; x < 16; x++ ) {
      s[0] = y*16 + x + 160;
      u8g.drawStr(x*7, y*10+10, s);
    }
  }
}
void u8g_extra_page(uint8_t a)
{
  if ( u8g.getMode() == U8G_MODE_HICOLOR || u8g.getMode() == U8G_MODE_R3G3B2) {
    /* draw background (area is 128x128) */
    u8g_uint_t r, g, b;
    b = a << 5;
    for( g = 0; g < 64; g++ )
    {
      for( r = 0; r < 64; r++ )
      {
    u8g.setRGB(r<<2, g<<2, b );
    u8g.drawPixel(g, r);
      }
    }
    u8g.setRGB(255,255,255);
    u8g.drawStr( 66, 0, "Color Page");
  }
  else if ( u8g.getMode() == U8G_MODE_GRAY2BIT )
  {
    u8g.drawStr( 66, 0, "Gray Level");
    u8g.setColorIndex(1);
    u8g.drawBox(0, 4, 64, 32);
    u8g.drawBox(70, 20, 4, 12);
    u8g.setColorIndex(2);
    u8g.drawBox(0+1*a, 4+1*a, 64-2*a, 32-2*a);
    u8g.drawBox(74, 20, 4, 12);
    u8g.setColorIndex(3);
    u8g.drawBox(0+2*a, 4+2*a, 64-4*a, 32-4*a);
    u8g.drawBox(78, 20, 4, 12);
  }
  else
  {
    u8g.drawStr( 0, 12, "setScale2x2");
    u8g.setScale2x2();
    u8g.drawStr( 0, 6+a, "setScale2x2");
    u8g.undoScale();
  }
}
uint8_t draw_state = 0;
void draw(void) {
  u8g_prepare();
  switch(draw_state >> 3) {
    case 0: u8g_box_frame(draw_state&7); break;
    case 1: u8g_disc_circle(draw_state&7); break;
    case 2: u8g_r_frame(draw_state&7); break;
    case 3: u8g_string(draw_state&7); break;
    case 4: u8g_line(draw_state&7); break;
    case 5: u8g_triangle(draw_state&7); break;
    case 6: u8g_ascii_1(); break;
    case 7: u8g_ascii_2(); break;
    case 8: u8g_extra_page(draw_state&7); break;
  }
}
void setup(void) {
  // flip screen, if required
  //u8g.setRot180();
#if defined(ARDUINO)
  pinMode(13, OUTPUT);
  digitalWrite(13, HIGH);
#endif
}
void loop(void) {
  // picture loop
  u8g.firstPage();
  do {
    draw();
  } while( u8g.nextPage() );
  // increase the state
  draw_state++;
  if ( draw_state >= 9*8 )
    draw_state = 0;
  // rebuild the picture after some delay
  //delay(150);
}
I hope you enjoy this actitvity if want to learn how arduino works, and how to make a sketch, then maybe this site http://educ8s.tv/ might help you, thanks to 8glib masters for making the library this makes our work easy! thats it stuff. thank you for stopping by.
You can also check my previous posts:
Control LED using Push Buttons/ Visual programming using XOD
Control Servo motor using Joystick
Stepper motor + Driver Uln2003 in arduino
Control Servo motor using potentiometer - arduino
Posted on Utopian.io - Rewarding Open Source Contributors
Hello, you received a boost courtesy of @steemdunk! Steem Dunk is an automated curation platform that is easy and free for use by everyone. Need an instant boost? Send 0.200 SBD with your full post url as the memo to @steemdunk for an upvote. Join us at https://steemdunk.xyz
Upvote this comment to support the bot and increase your future rewards!
Thank you for the contribution. It has been approved.
You can contact us on Discord.
[utopian-moderator]
Hey @pakganern I am @utopian-io. I have just upvoted you!
Achievements
Suggestions
Get Noticed!
Community-Driven Witness!
I am the first and only Steem Community-Driven Witness. Participate on Discord. Lets GROW TOGETHER!
Up-vote this comment to grow my power and help Open Source contributions like this one. Want to chat? Join me on Discord https://discord.gg/Pc8HG9x