Java programming tutorial with Official Hord - Making a QRCode Generator Part 1
What Will I Learn?
- You will learn to Generate QRCode (Quick Response Code) using java language
- You will generate QRCode from text.
- You will learn how to create files from byte array streams.
Requirements
- Netbeans IDE
- Java Basic Knowledge
- API's (zxing-j2se-1.7.jar, zxing-core-1.7.jar, qrgen-1.0.jar)
Difficulty
- Intermediate
Tutorial Contents
Creating a Quick response code could be easier than said by most programmers provided you use API's anyways lol, so heres the thing I was going to add QRCode Generation to an application I was writing earlier and the whole process was almost discouraging as I was working with a friend and he was so fixed to doing every single part of the coding himself so I decided to split up and work on my own, And guess what in Just 10 minutes I was done, her's how I worked it out.
Step 1
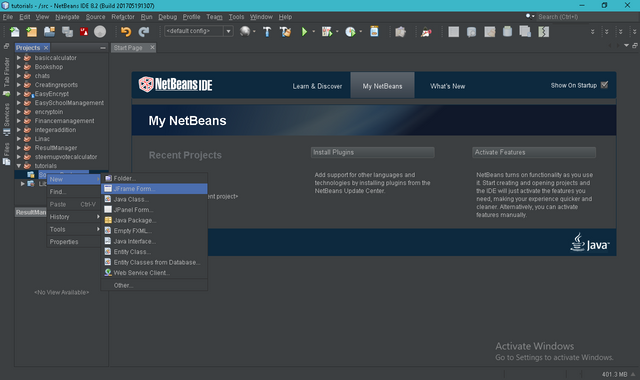
Create a new JFrameForm by right clicking on source packages in your project. Just as i have done in the screenshot below.
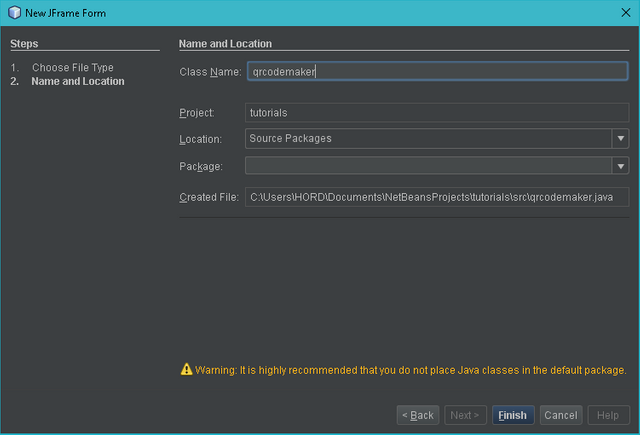
Then be sure to give it the name of your choice, as you will but be careful not to use anything related to classes or variable types.
Step 2
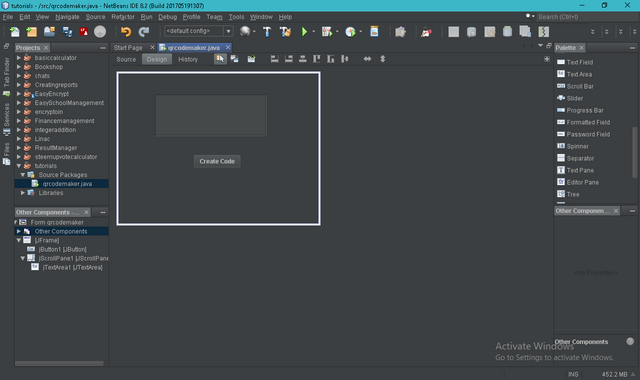
Add a text area and a button to the frame, the text area is to hold the text you want to convert to QRCode, while the button carries out the instruction of creating the barcode.
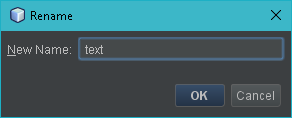
Now change the variable name of the text area, this can be done by simply right clicking on the text area and clicking change variable name option.
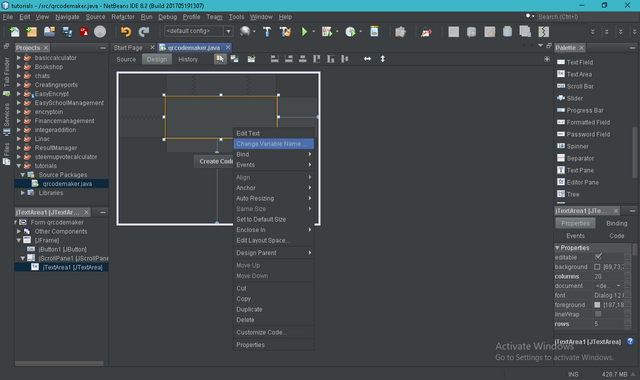
The name can be anything of your choice provided you can remember it, and also make it something in such a way that another programmer can understand it. So I'll name mine text.
Step 3
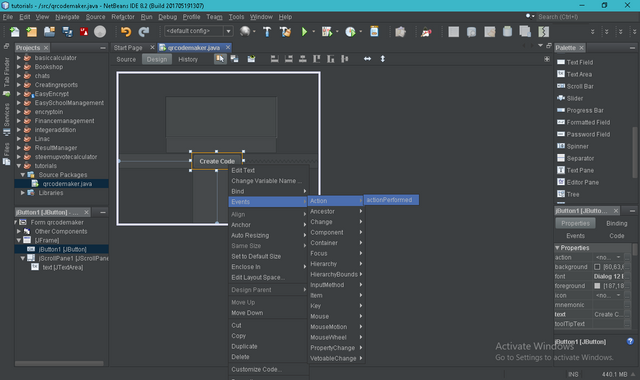
It's time to go to the backend lol, it gets Interesting here as you have add your API's and also input your codes. Basically we'll be working with the action performed event of the button we have placed in the program so, right click on the button, go to events, actions and click action performed as done in the screenshot below.
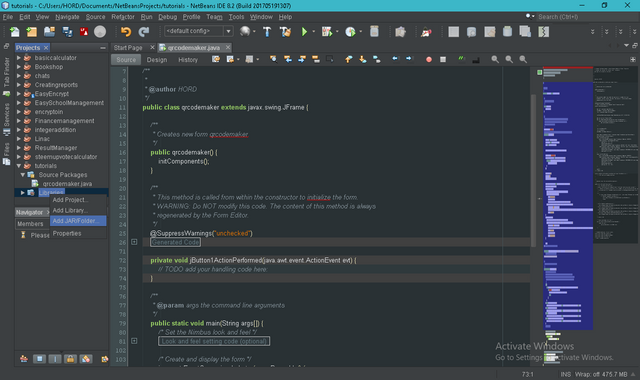
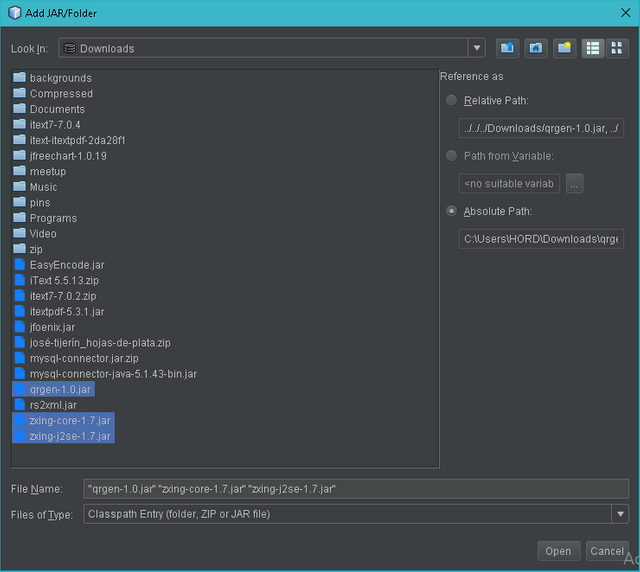
Next up we add the libraries/API's, these are the tools that will make the work faster for us. Right click on Libraries and select Add Jar file.
This dialog will show up so you can go to the location of the files you want to add to the project which you should have previously downloaded.
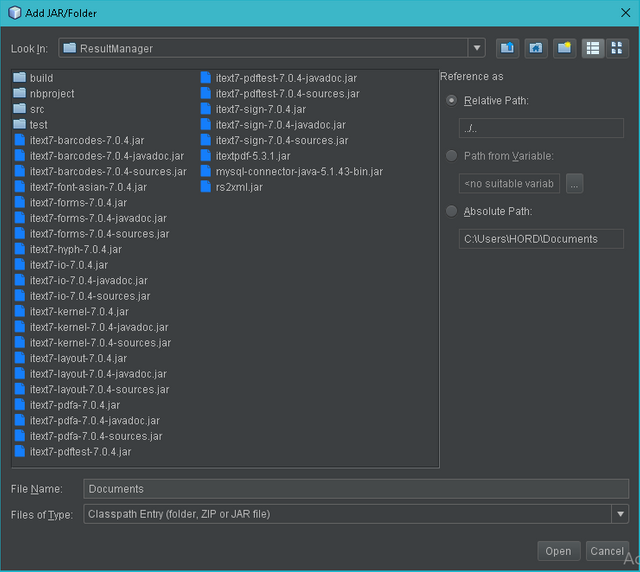
Here's the llist of files you'll need, not to worry they are virus free lol.
Now select all three and click ok, or open as the dialog may display its options.
Step 4 - Coding
import java.io.ByteArrayOutputStream; //This import is for the Output stream in which the data to be created is written into a byte array
import java.io.File; // This is the central class in working with files and directories
import java.io.FileOutputStream; // This Creates a file output stream to write to the specified file descriptor, which represents an existing connection to an actual file in the file system
import net.glxn.qrgen.QRCode; // This is a simple class that is built on top of ZXING, handles creating the QRCode.
import net.glxn.qrgen.image.ImageType; //  This handles the Image type or extension to be used.
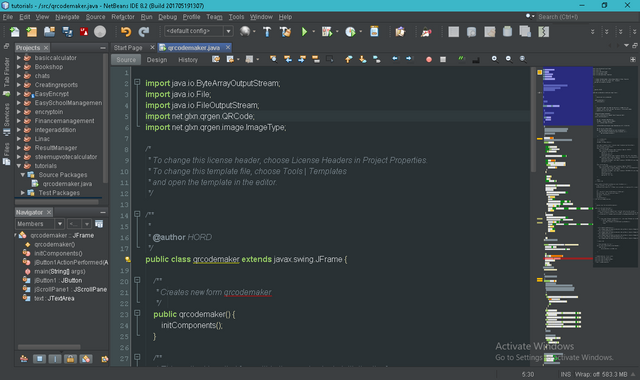
After Importing the required, we move to writing the required codes, first create a string to hold the text from the text area, then create a byte array for the QRCode Image to be created from.
  String textdetails = text.getText(); //getText() method collects the text input from the text area.
       ByteArrayOutputStream out = QRCode.from(textdetails).to(ImageType.JPG).stream(); // This creates the ByteArrayOutputStream, creating the QRCode from the text of the string we created before now.
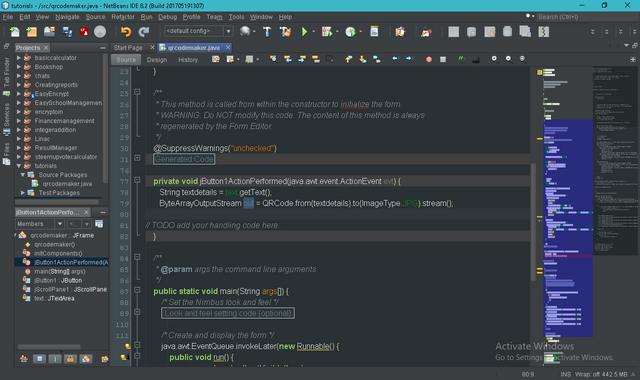
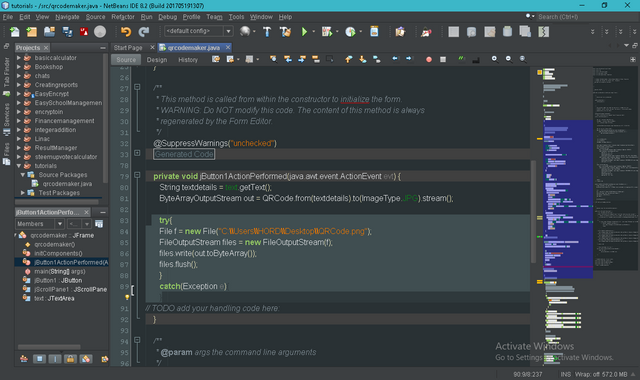
once all that is complete, create a try and catch block, this would hold the rest of the code in it. The catch block should handle an exception, I have not told the system what to do in this lesson because that's not our focus.
Now create a new file, using File filename = new File("filepath"); you can name the file whatever you want as it will only be seen in the program and refereed to also, but the name in the path will be what the user sees, so be careful not to interchange it.
We have only created the file, now we have to output the file using FileOutputStream desiredname = new FileOutputStream(filename); Like I said earlier we are now doing the output of the file so it can now be accessed by the user. Next is to write the QRCode to the file we have output, we use file.write(); method, in using this method, you input the formerly created ByteArrayOutputStream out while converting it from a stream to just an array in the parenthesis so it looks like this file.write(out.toByteArray()); and finally save all changes to the file using file.flush();, your code will look like this;
    try{
       File f = new File("C:\\Users\\HORD\\Desktop\\QRCode.png");
       FileOutputStream files = new FileOutputStream(f);
       files.write(out.toByteArray());
       files.flush();
       }
       catch(Exception e){
       }
Output
If the coding has been done as directed then your program should be ready to run, right click on your code and run, Input text in the text area and click the button.
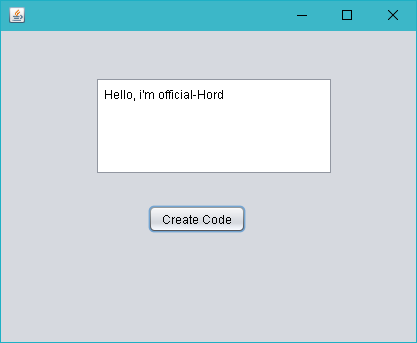
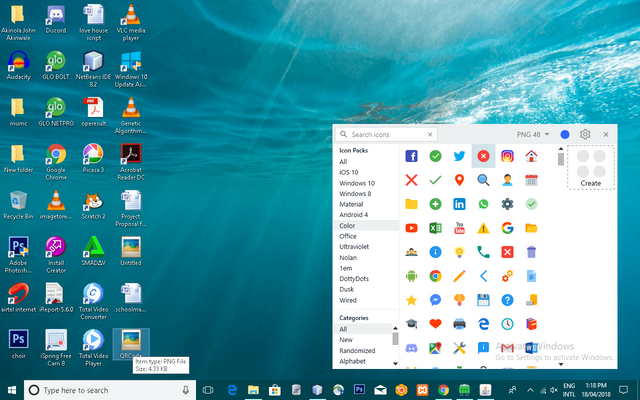
You should see the created file in the location you have chosen for it. Now open the image file.
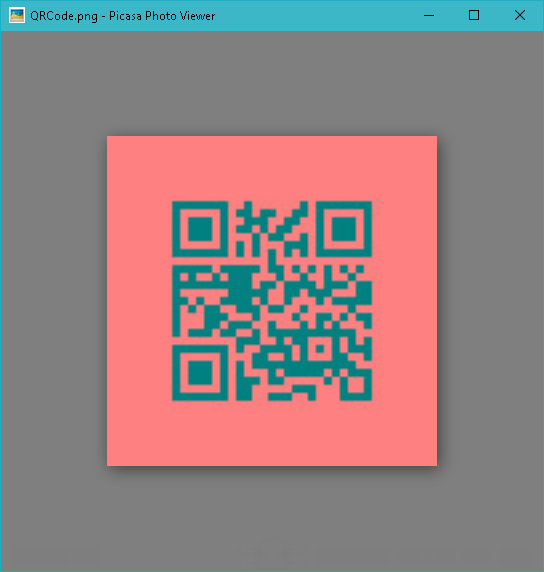
Here's the QRCode we've created, you can download any QRCode scanner from your phone's app store and scan it to be sure what you did was correct.
Codes Used
import java.io.ByteArrayOutputStream;
import java.io.File;
import java.io.FileOutputStream;
import net.glxn.qrgen.QRCode;
import net.glxn.qrgen.image.ImageType;

/*
 * To change this license header, choose License Headers in Project Properties.
 * To change this template file, choose Tools | Templates
 * and open the template in the editor.
 */

/**
 *
 * @author HORD
 */
public class qrcodemaker extends javax.swing.JFrame {

    /**
     * Creates new form qrcodemaker
     */
    public qrcodemaker() {
        initComponents();
    }

    /**
     * This method is called from within the constructor to initialize the form.
     * WARNING: Do NOT modify this code. The content of this method is always
     * regenerated by the Form Editor.
     */
    @SuppressWarnings("unchecked")
    // <editor-fold defaultstate="collapsed" desc="Generated Code">
    private void initComponents() {

        jButton1 = new javax.swing.JButton();
        jScrollPane1 = new javax.swing.JScrollPane();
        text = new javax.swing.JTextArea();

        setDefaultCloseOperation(javax.swing.WindowConstants.EXIT_ON_CLOSE);

        jButton1.setText("Create Code");
        jButton1.addActionListener(new java.awt.event.ActionListener() {
            public void actionPerformed(java.awt.event.ActionEvent evt) {
                jButton1ActionPerformed(evt);
            }
        });

        text.setColumns(20);
        text.setRows(5);
        jScrollPane1.setViewportView(text);

        javax.swing.GroupLayout layout = new javax.swing.GroupLayout(getContentPane());
        getContentPane().setLayout(layout);
        layout.setHorizontalGroup(
            layout.createParallelGroup(javax.swing.GroupLayout.Alignment.LEADING)
            .addGroup(layout.createSequentialGroup()
                .addGap(147, 147, 147)
                .addComponent(jButton1)
                .addContainerGap(javax.swing.GroupLayout.DEFAULT_SIZE, Short.MAX_VALUE))
            .addGroup(javax.swing.GroupLayout.Alignment.TRAILING, layout.createSequentialGroup()
                .addContainerGap(94, Short.MAX_VALUE)
                .addComponent(jScrollPane1, javax.swing.GroupLayout.PREFERRED_SIZE, javax.swing.GroupLayout.DEFAULT_SIZE, javax.swing.GroupLayout.PREFERRED_SIZE)
                .addGap(83, 83, 83))
        );
        layout.setVerticalGroup(
            layout.createParallelGroup(javax.swing.GroupLayout.Alignment.LEADING)
            .addGroup(javax.swing.GroupLayout.Alignment.TRAILING, layout.createSequentialGroup()
                .addContainerGap(46, Short.MAX_VALUE)
                .addComponent(jScrollPane1, javax.swing.GroupLayout.PREFERRED_SIZE, javax.swing.GroupLayout.DEFAULT_SIZE, javax.swing.GroupLayout.PREFERRED_SIZE)
                .addGap(30, 30, 30)
                .addComponent(jButton1)
                .addGap(109, 109, 109))
        );

        pack();
    }// </editor-fold>

    private void jButton1ActionPerformed(java.awt.event.ActionEvent evt) {
       String textdetails = text.getText();

       ByteArrayOutputStream out = QRCode.from(textdetails).to(ImageType.JPG).stream();

       try{
       File f = new File("C:\\Users\\HORD\\Desktop\\QRCode.png");
       FileOutputStream files = new FileOutputStream(f);
       files.write(out.toByteArray());
       files.flush();
       }
       catch(Exception e){
       }
// TODO add your handling code here:
    }

    /**
     * @param args the command line arguments
     */
    public static void main(String args[]) {
        /* Set the Nimbus look and feel */
        //<editor-fold defaultstate="collapsed" desc=" Look and feel setting code (optional) ">
        /* If Nimbus (introduced in Java SE 6) is not available, stay with the default look and feel.
         * For details see http://download.oracle.com/javase/tutorial/uiswing/lookandfeel/plaf.html
         */
        try {
            for (javax.swing.UIManager.LookAndFeelInfo info : javax.swing.UIManager.getInstalledLookAndFeels()) {
                if ("Nimbus".equals(info.getName())) {
                    javax.swing.UIManager.setLookAndFeel(info.getClassName());
                    break;
                }
            }
        } catch (ClassNotFoundException ex) {
            java.util.logging.Logger.getLogger(qrcodemaker.class.getName()).log(java.util.logging.Level.SEVERE, null, ex);
        } catch (InstantiationException ex) {
            java.util.logging.Logger.getLogger(qrcodemaker.class.getName()).log(java.util.logging.Level.SEVERE, null, ex);
        } catch (IllegalAccessException ex) {
            java.util.logging.Logger.getLogger(qrcodemaker.class.getName()).log(java.util.logging.Level.SEVERE, null, ex);
        } catch (javax.swing.UnsupportedLookAndFeelException ex) {
            java.util.logging.Logger.getLogger(qrcodemaker.class.getName()).log(java.util.logging.Level.SEVERE, null, ex);
        }
        //</editor-fold>

        /* Create and display the form */
        java.awt.EventQueue.invokeLater(new Runnable() {
            public void run() {
                new qrcodemaker().setVisible(true);
            }
        });
    }

    // Variables declaration - do not modify
    private javax.swing.JButton jButton1;
    private javax.swing.JScrollPane jScrollPane1;
    private javax.swing.JTextArea text;
    // End of variables declaration
}
Thanks for following, I hope you enjoyed coding with me, have a great day ahead.
Posted on Utopian.io - Rewarding Open Source Contributors
Thank you for the contribution. It has been reviewed. Score is low because your post is informal and can easily be used with a documentation.
Need help? Write a ticket on https://support.utopian.io.
Chat with us on Discord.
[utopian-moderator]
I guess that helped making people understand better.
Congratulations! Your post has been selected as a daily Steemit truffle! It is listed on rank 3 of all contributions awarded today. You can find the TOP DAILY TRUFFLE PICKS HERE.
I upvoted your contribution because to my mind your post is at least 26 SBD worth and should receive 113 votes. It's now up to the lovely Steemit community to make this come true.
I am
TrufflePig, an Artificial Intelligence Bot that helps minnows and content curators using Machine Learning. If you are curious how I select content, you can find an explanation here!Have a nice day and sincerely yours,

TrufflePigHey @official-hord! Thank you for the great work you've done!
We're already looking forward to your next contribution!
Fully Decentralized Rewards
We hope you will take the time to share your expertise and knowledge by rating contributions made by others on Utopian.io to help us reward the best contributions together.
Utopian Witness!
Vote for Utopian Witness! We are made of developers, system administrators, entrepreneurs, artists, content creators, thinkers. We embrace every nationality, mindset and belief.
Want to chat? Join us on Discord https://discord.me/utopian-io