(Club5050) Hagamos una piñata de Dulce Nube con material reciclado #manualidades-sc | Let's make a Sweet Cloud piñata with recycled material #manualidades-sc | Tutorial Esp-Eng | por @nohe15
Queridos amigos y amigas amante de las Artes y las Manualidades, hoy me encuentro de nuevo con todos ustedes en la temática de Bricolaje, Costura, Decoración, Manualidades y Reciclaje #manualidades-sc compartiendo el paso a paso de una hermosa piñata de Dulce Nube que tanto le gusta a las chiquitinas de la casa. En este tutorial utilizaremos material reciclado, El Cartón y el papel, de manera que contribuyamos a la conservación de nuestro querido planeta.
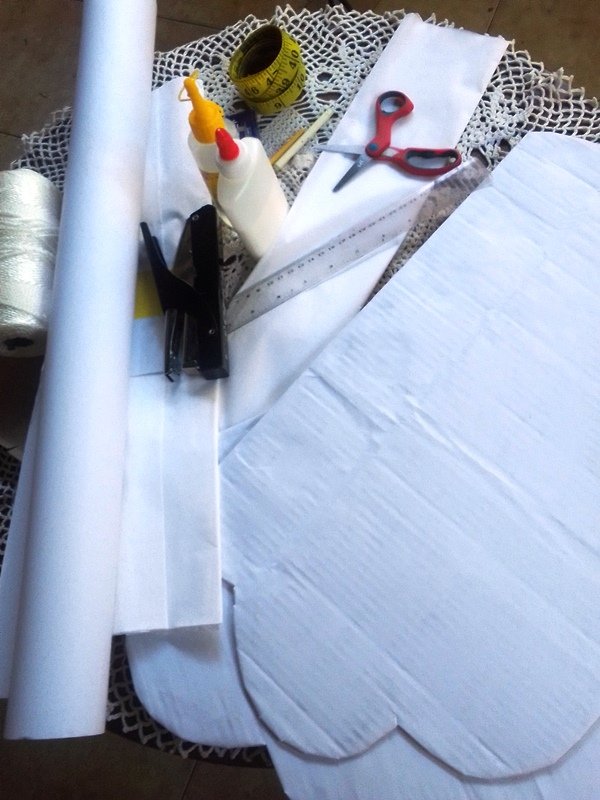
Los materiales utilizados en este proyecto fueron los siguientes:
- Cartón (reciclado)
- hojas Blancas recicladas
- Papel crepe blanco
- Tijeras
- Hojas de colores recicladas
- Engrapadora
- Cúter o exacto
- Hilo de tejer #18
- Lápiz de grafito
- Regla o cinta métrica
- Pegamento
Procedimiento del Paso a Paso
Paso 1
Tomamos una caja de cartón, marcamos dos figuras de nubes con la ayuda del lápiz de grafito de aproximadamente 50 X 30 centímetros (medidas a gusto personal) y recortamos con el exacto. Con la cinta métrica medimos el contorno de la nube, esta medida más 8 centímetros será el largo de una franja rectangular que recortaremos con el cartón reciclado por un ancho de 20 centímetros, para realizar los laterales del tambor de la piñata. De lado y lado a lo largo de esta franja realizamos piquetes de un centímetro que doblaremos para poder unir esta pieza a las otras dos de forma de nubes. Resultando que el ancho lateral de la piñata quedará de 18 centímetros de ancho, ya que estamos reduciendo con los piquetes 2 centímetros (esta medida varía a gusto personal).
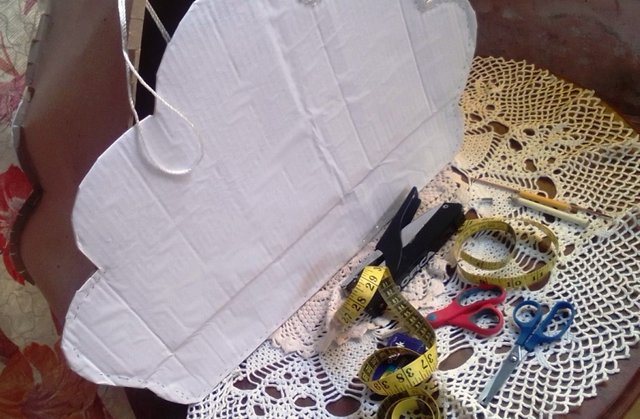
Luego con la engrapadora unimos estas tres piezas en los contornos de la nube con el largo de la franja donde realizamos los piquetes y el doblez. Tomamos las hojas recicladas agregamos pegamento al tambor que realizamos y forramos con ella el mismo, de manera que al pegar el papel crepe no cambie el color blanco a causa del color de la caja reciclada que en este caso es marrón y también con esta técnica damos firmeza al tambor.
Realizamos una perforación, tipo ventana, en la parte superior del tambor, desde donde rellenaremos de golosinas la piñata. En la parte inferior realizamos dos pequeños agujeros, en los cuales introduciremos un trozo de hilo de tejer número 18 hasta lograr sacar por la parte superior del tambor, luego reforzamos las perforaciones que realizamos para introducir el hilo. Así tendremos el cordón sostén que sujetará nuestra piñata.
Paso 2
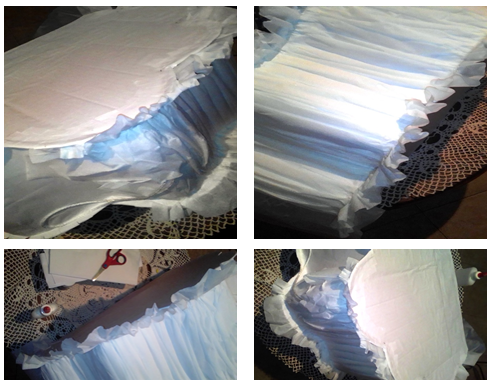
Tomamos el papel crepe y recortamos una franja de 22 centímetros de ancho por el doble de la medida resultante del contorno de la nube realizada en el primer paso. Pegamos esta franja en los laterales de la piñata arruchando continuamente a medida que pegamos el papel, tomando en cuenta realizar los ajustes en la abertura tipo ventana que realizamos en la parte superior del tambor.
En la misma presentación en que adquirimos el papel crepe cortamos franjas de 6 centímetros de ancho realizando piquete en forma de flecos, desdoblamos la franja con mucho cuidado y procedemos a pegar desde la parte inferior en dirección a la superior en el frontal y trasero del tambor.
Paso 3
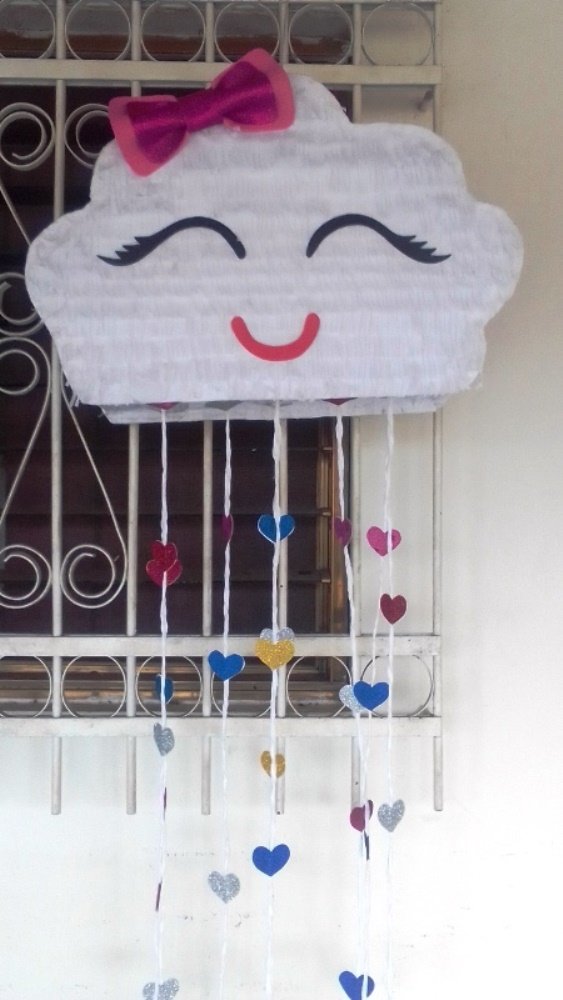
Tomamos retazos de papel de colores reciclados y recortamos figuras de corazones, ojos y boca acordes con la imagen. Con el papel crepe recortamos tiras que pegaremos en la parte inferior de la piñata y en ellas lo corazones para simular lluvia de corazones.
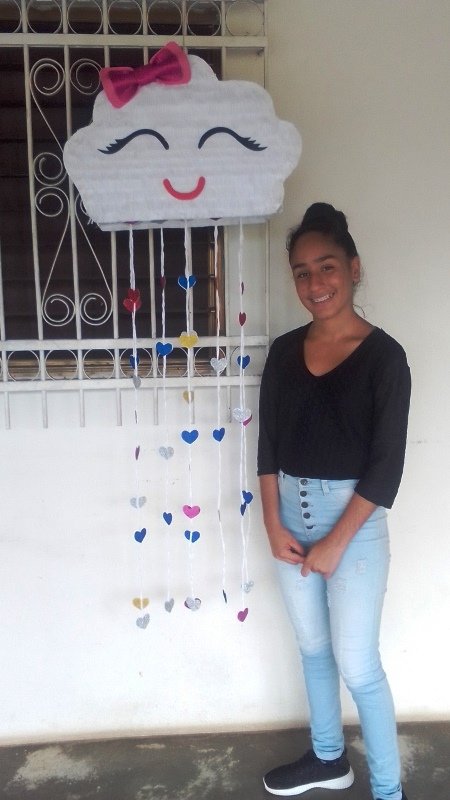
Pegamos las figuras de los ojos y boca en el frontal de la piñata y por ultimo con papel de color reciclado realizamos un lazo que terminaremos de colocar a nuestra creación para dar por terminada nuestra labor en el día de hoy, espero les guste.

Dear friends and friends who love Arts and Crafts, today I meet all of you again on the theme of DIY, Sewing, Decoration, Crafts and Recycling #manualidades-sc sharing the step by step of a beautiful piñata from Dulce Nube that The little girls in the house like it so much. In this tutorial we will use recycled material, Cardboard and paper, so that we contribute to the conservation of our beloved planet.
The materials used in this project were the following:
- Recycled carton
- recycled white sheets
- White crepe paper
- Pair of scissors
- Recycled colored sheets
- Stapler
- Cutter or exact
- Knitting yarn #18
- Graphite pencil
- Ruler or tape measure
- Glue
Step by Step Procedure
Step 1
We take a cardboard box, we mark two figures of clouds with the help of the graphite pencil of approximately 50 X 30 centimeters (measurements to personal taste) and we cut with the exact one. With the tape measure we measure the contour of the cloud, this measurement plus 8 centimeters will be the length of a rectangular strip that we will cut with the recycled cardboard for a width of 20 centimeters, to make the sides of the piñata drum. From side to side along this strip we make one centimeter pickets that we will bend to be able to join this piece to the other two in the shape of clouds. As a result, the side width of the piñata will be 18 centimeters wide, since we are reducing 2 centimeters with the pickets (this measurement varies to personal taste).
Then with the stapler we join these three pieces in the contours of the cloud with the length of the strip where we make the pickets and the fold. We take the recycled sheets and add glue to the drum that we made and line it with it, so that when gluing the crepe paper the white color does not change because of the color of the recycled box, which in this case is brown, and also with this technique we give firmness to the drum.
We make a perforation, window type, in the upper part of the drum, from where we will fill the piñata with sweets. In the lower part, we make two small holes, in which we will introduce a piece of knitting thread number 18 until it comes out through the upper part of the drum, then we reinforce the perforations that we made to introduce the thread. This way we will have the support cord that will hold our piñata.
Step 2
We take the crepe paper and cut out a strip 22 centimeters wide by twice the resulting measurement of the contour of the cloud made in the first step. We glue this strip on the sides of the piñata, continuously curling as we glue the paper, taking into account making adjustments in the window-type opening that we made in the upper part of the drum.
In the same presentation in which we acquired the crepe paper, we cut strips 6 centimeters wide making fringe-shaped pickets, unfold the strip very carefully and proceed to paste from the bottom to the top on the front and back of the drum.
Step 3
We take scraps of recycled colored paper and cut out shapes of hearts, eyes and mouth according to the image. With the crepe paper we cut strips that we will glue to the bottom of the piñata and in them the hearts to simulate a rain of hearts.
We paste the figures of the eyes and mouth on the front of the piñata and finally with recycled colored paper we make a bow that we will finish placing on our creation to finish our work today, I hope you like it.
Hola amiga, me gustó mucho como quedó está piñata, se ve que cuídaste cada detalle.
Te sugiero, para futuras publicaciones, que coloques más fotos para explicar cada paso, y hacer párrafos de máximo 10 líneas para facilitar la lectura. Ojo me encantó tu post, solo es una humilde recomendación de mi parte.
Saludos y bendiciones
Muchísimas gracias @naka05 amiga activaré mas el ojo fotográfico de mi teléfono, lo que pasa que la emoción cuando la estoy elaborando me hace olvidar del fotografiado.
Que bonita quedo la piñata, muchas gracias por compartir con nosotros su elaboración.
Saludios y Bendiciones.

Gracias amiga es un placer compartir con todos ustedes.
Una hermosa creación; esa piñata quedó muy bien hecha, e ideal para las más pequeñas en su cumpleaños.
Gracias amigo por su apreciación y visita.
Gracias por el apoyo
Congratulations..!!!
Your quality post has been supported by @nishadi89 member of "Arts Curator Team", using the @steemcurator04 account. We appreciate your efforts, keep making quality posts and get a chance to win a vote from our Curation team.
Muy agradecida con el apoyo del Equipo de Curadores de arte, gracias @ nishadi89 por la visita..