New linocut of the Blue Tit! Progress and thoughts.
Good morning everyone!
Today I wanted to share with you what I've spent my weekend obsessed with, a new lino print!
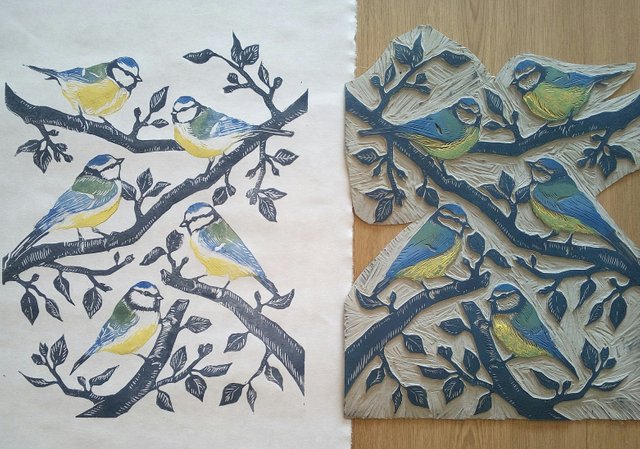
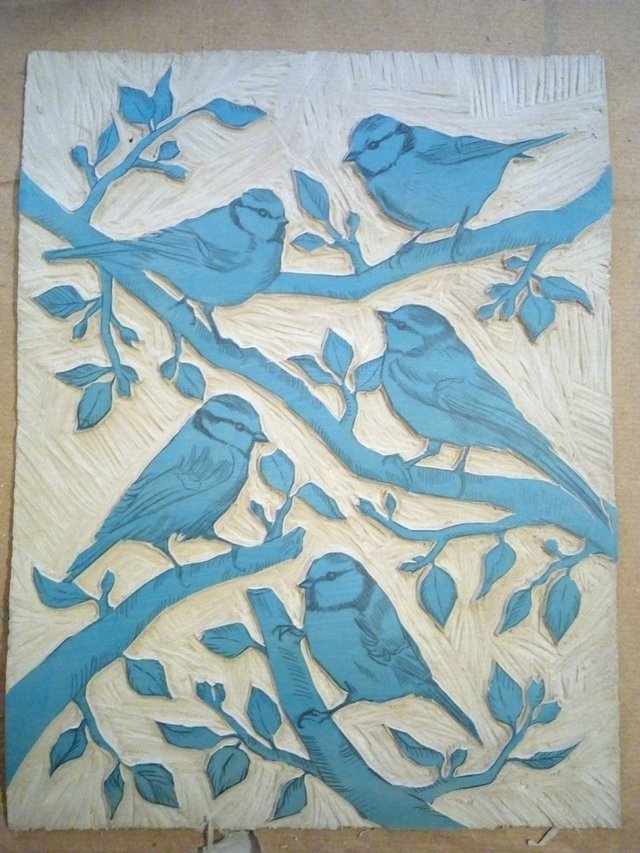
Print and plate next to each other..
I think I'm on a bird mission these days and this time I wanted to create something with color! I also wanted it to be a bird that was native to Scandinavia so I ended up with the beautiful Blue Tit. It almost looks like something you would find in the jungle with it's green, blue and bright yellow feathers, but there it is jumping around in people's garden!
I am starting to get more the hang of my carving and the process of everything lino related which is making it even more fun!
Here are some photos from the weekend;
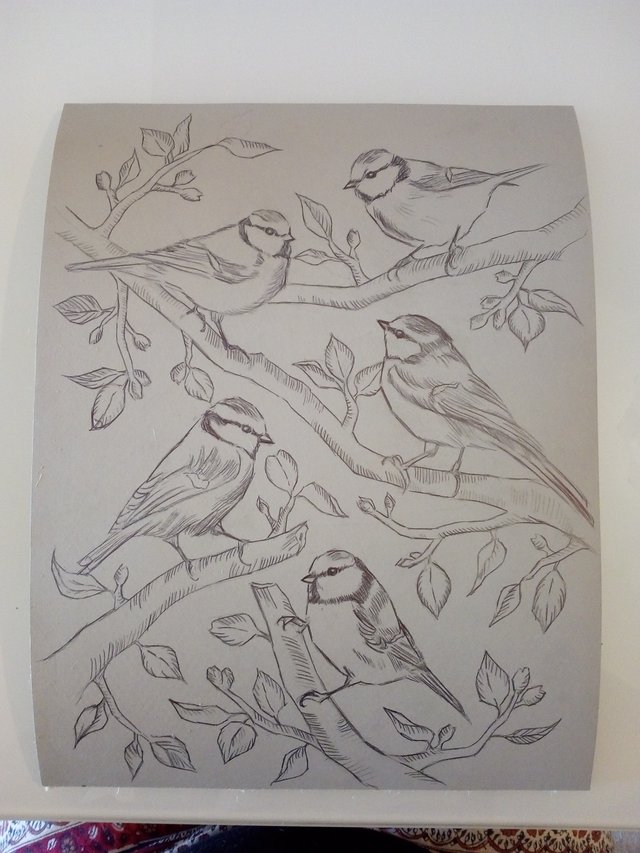
First I composed and drew my birds on the lino. First with a pencil and then with a waterproof pen. For this piece I knew I wanted several birds in the image so I took a little while to rearrange and figure out where and how many to put in the image.
It's really worth working a bit longer on this first stage as it's going to essentially determine everything that follows. Also remember that when you print the image will be in reverse!
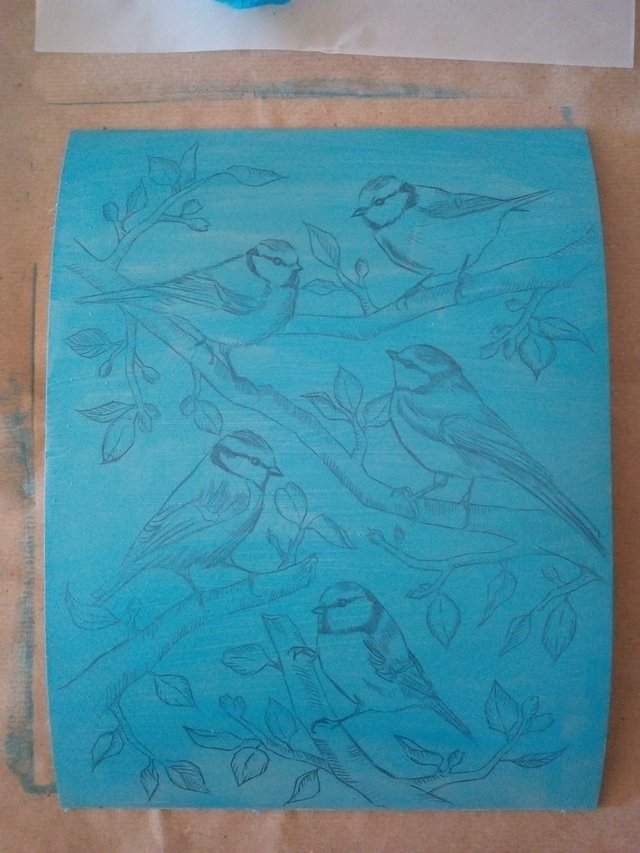
To make my carving easier I put a light layer of an acrylic based paint that dryes quickly over the lino sheet. This will make it easier for me to assess what the finished print effect will be as I carve.
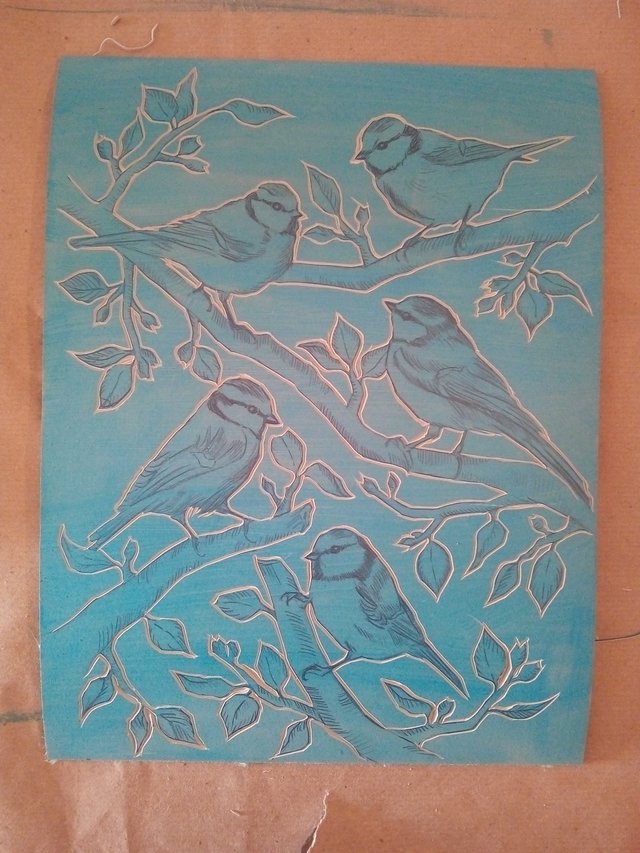
The first thing I do when I start my carvings is to take a thin v-shaped blade and go around all the outlines of object I will carve. This is so that when I use a bigger blade to carve out the background the blade will stop cutting at this point and not continue into the birds and branches.
I then spend a looooooong time carving out all the empty spaces that will be without ink. This is also worth taking some time doing to make sure you get your edges clean and sharp.
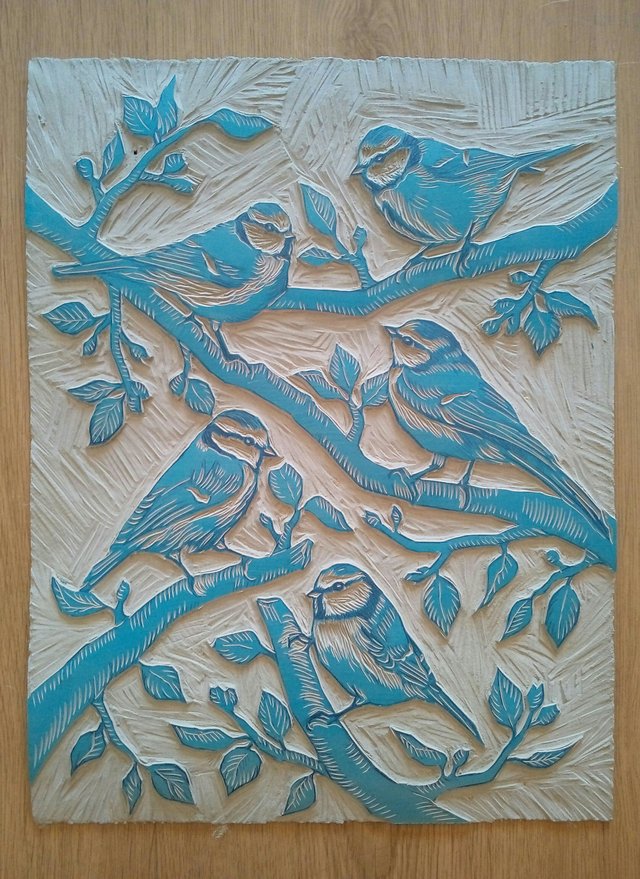
After all the big carving is done it's time for the details. Here I go back in with a thin v-shaped blade. Remember that if your cutting is too shallow it won't show when you ink it up so that you need to cut at least a millimeter to get a good effect when printing.
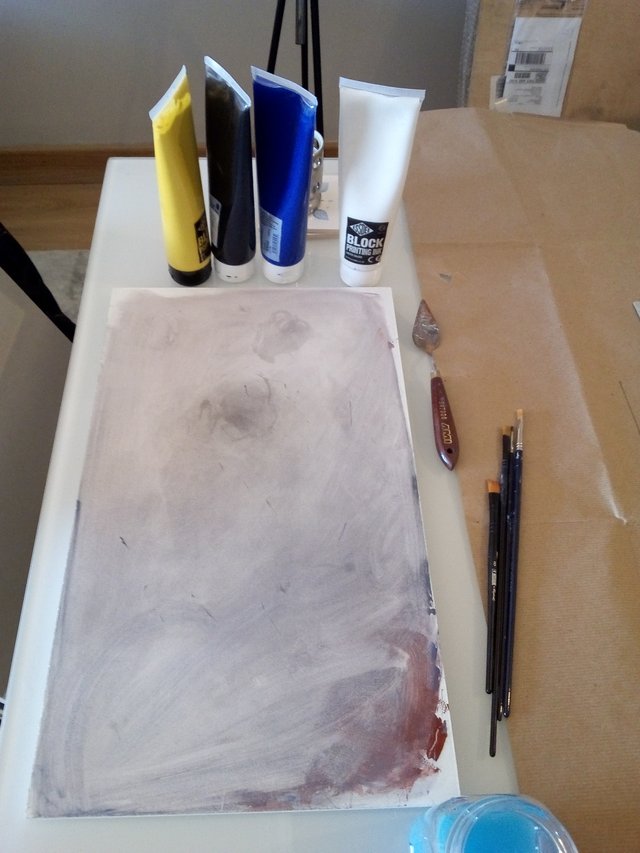
In the photo above you can see the wooden board I use for rolling the ink, my inks, a palette knife I will use for mixing my colors and some brushes that I will use to handpaint some of the colors onto the print.

Print being pulled.
To ink up this print I first rolled on a dark blueish grey on the whole sheet and then with some water and a cloth removed the first layer if paint in the areas I wanted a different color. I can do this because my inks are water based.
I used a flat soft brush to paint on the other colors. Remember that if you do the you must hold the brush horizontal when you put on the paint so that the paint doesn't go into your carvings and fill up the spaces.
For this print I used Japanese paper which is my favorite paper for lino print. It's quite thin but the ink goes on to it beautifully!
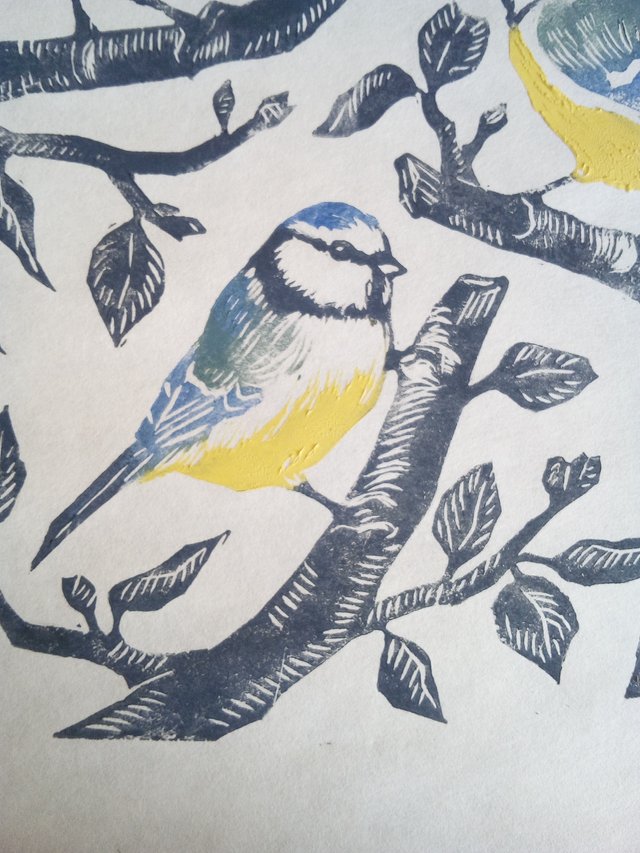
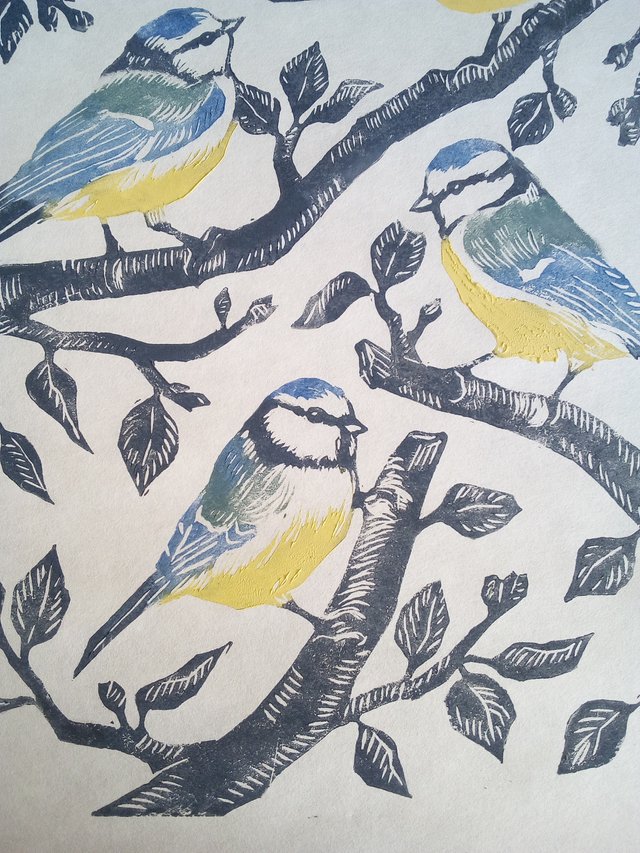
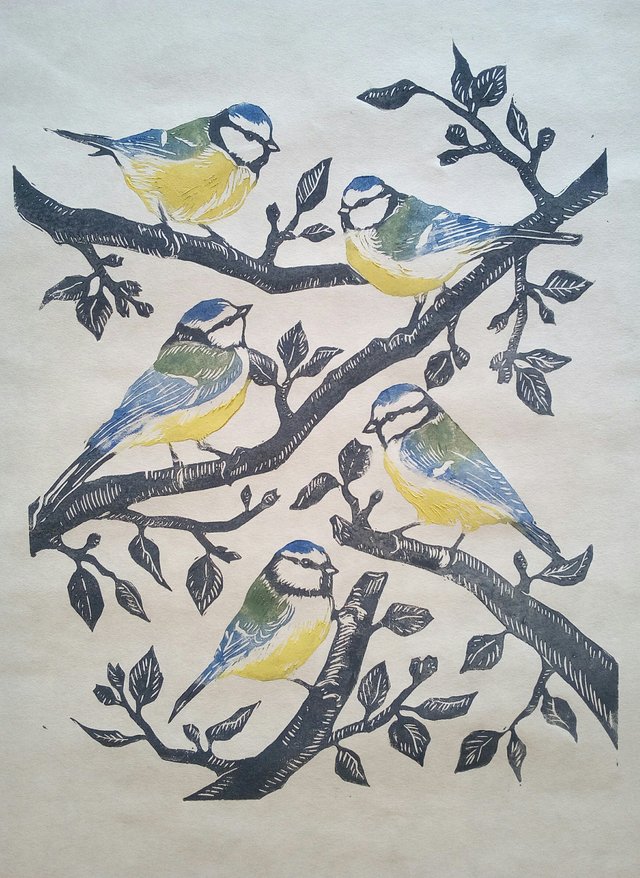
The finished print..
And that's it
I think I will print a few in a lighter blueish grey as well as a second option. It's only a couple of days until I go to Norway though and I need to have everything ready and packed up by then so it's going to be a few busy days!
Wish me luck!
And as always good people, I hope you are having a wonderful and creative day!
❤🐦😊
Hi mayasky,
Visit curiesteem.com or join the Curie Discord community to learn more.
Thank you so much for the upvoting @curie!! 😄😍 A great day to you as well!! ☀
We still see these sparrows in India mostly in black and white combo. The print and carving process is amazing. Wish you good luck on your journey.
Thank you very much for your kind words @daan007! 😊 I guess sparrows are all over the world, hehe!
Amazing!!! I loved it. 😊
Thank you @alexisricardo! 😊
I know its take time and really eforce to make this kind of print, so i really congrats you, it's so beautiful!
Thank you so much @missadeyes!! I really appreciate your support! 😊🌸
This is amazing, I really do love linocuts. I'm finally back to playing with my printmaking now that I have access to my larger studio.
I love the design and colours, I'd love this as wallpaper!
Thank you so much @donnadavisart!! 😊 I know right?! They are so much fun!! I'm gonna keep an eye out to see if you are posting some of your print work on steemit! ;)
I was actually thinking of making something larger out of this, hmm, who knows... 😏
Have fun making your prints, a larger studio sounds wonderful! 🌸☀❤
Beautiful piece! Very well done tutorial too. Thanks for sharing!
My pleasure @elsbeth-upton!! 😊
That is stunning! Good choice on the colorful birds. I'm sure it took some time to get the ink on there just right, but it looks soooo good! And really great job on explaining each step too. Fantastic post!
Amazing work, so creative.
Keep creating :)