Android tutorial: Changing an Image's Background with Adobe Photoshop Touch
Launched on February 19, 1990 precisely, the 27-year-old sophisticated raster graphics editor is unarguably the top software for photo editing these days. In fact, it's popularity has earned it an unofficial place in the English dictionary with the noun and verb "photoshop". This software's ability to make something out of nothing has no doubt proved to be its selling point. The world is now in a state where every seeming "too good to be true" picture needs to be placed under intense scrutiny to confirm its veracity. One of its most outstanding feature however, is the ability to flawlessly change the background of an image. Photoshop is known to dominate the windows and mac operating system but guess what? It is also available for android users with the name "Adobe Photoshop Touch". In this tutorial, I will be teaching how to change the background of your picture to your preferred. I will try my best to make this as understandable as possible. Tightening your belts.
First and foremost, where to download the adobe photoshop? It can be gotten by searching its package name- PS touch- on google. It should be noted that there are two different versions: v 1.3.7 for android phones and v 1.7.7 for android tablets. Whichever it is for you, download.
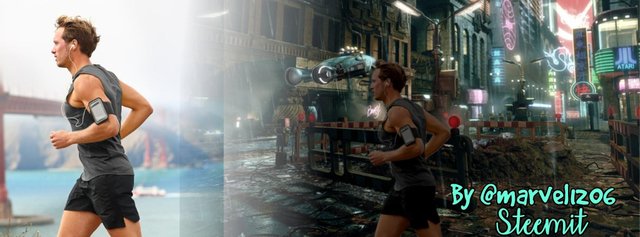
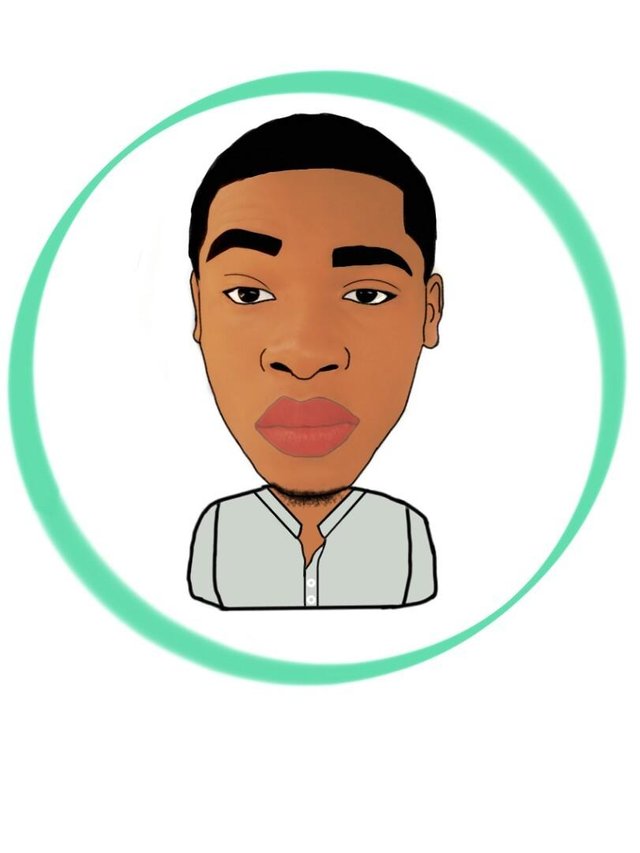
We are going to create this.
With this
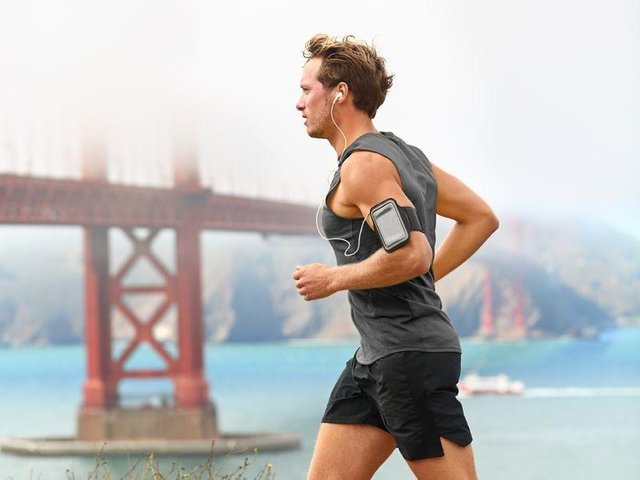
IMAGE SOURCE
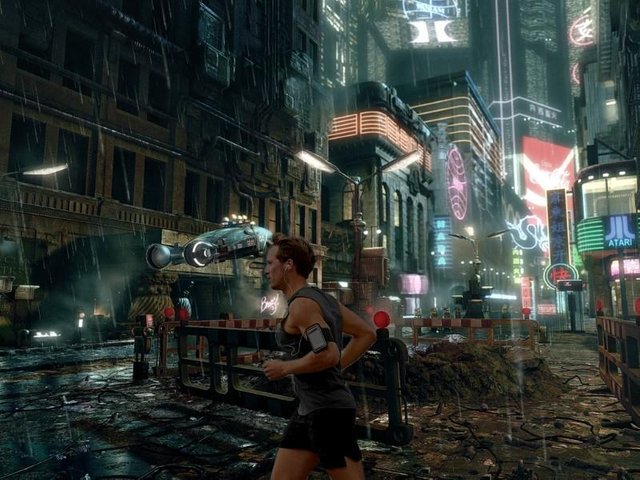
And
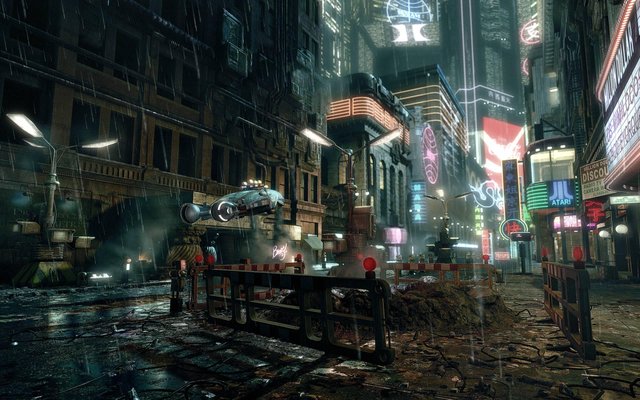
IMAGE SOURCE
The first thing that greets you is the "End User License Agreement" which should be accepted. Then it asks to choose where a project should be started from.
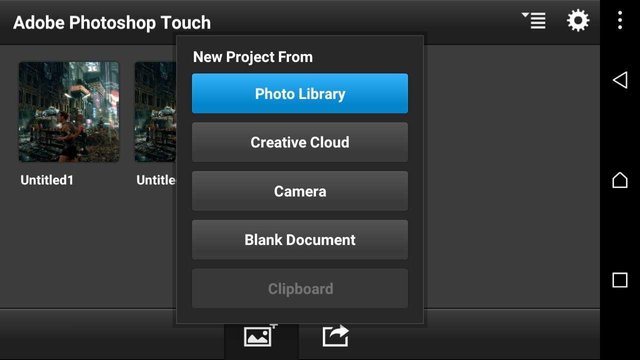
- Photo Library (Gallery)
- Creative Cloud
- Camera
- Blank Document
- Clipboard.
We will be navigating to the folder where our image is located. The image which we want to change its background and since it is already in the gallery, photo library would be chosen.
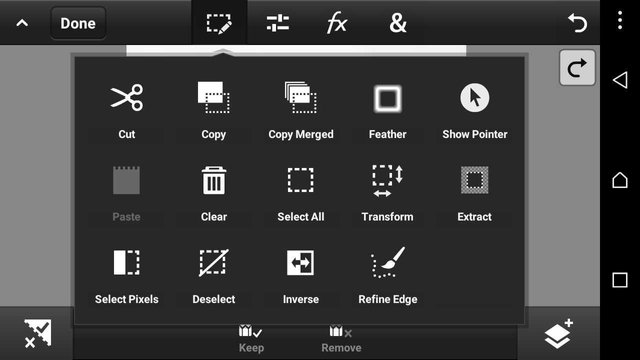
First of all, let me list some of the tools we have at our disposal. We have:
- Smudge Tool
- Clone Stamp Tool
- Healing Brush Tool
- Blur Tool
- Paint Tool
- Effects Paint Tool
- Spray Tool
- Eraser Tool
- Magic Wand Tool
- Scribble Selection Tool
- Brush Selection Tool
- Quick Selection Tool
- Marquee Selection Tool
- Circle Selection Tool
- Lasso Selection Tool
- Polygon Selection Tool
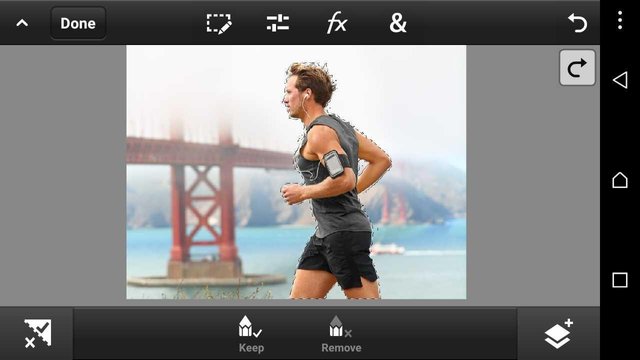
Without much ado, let's get straight to the point. We would be using the Scribble Selection Tool for this work and trust me, it is easy but it equally requires patience.
HOW SCRIBBLE SELECTION TOOL WORKS
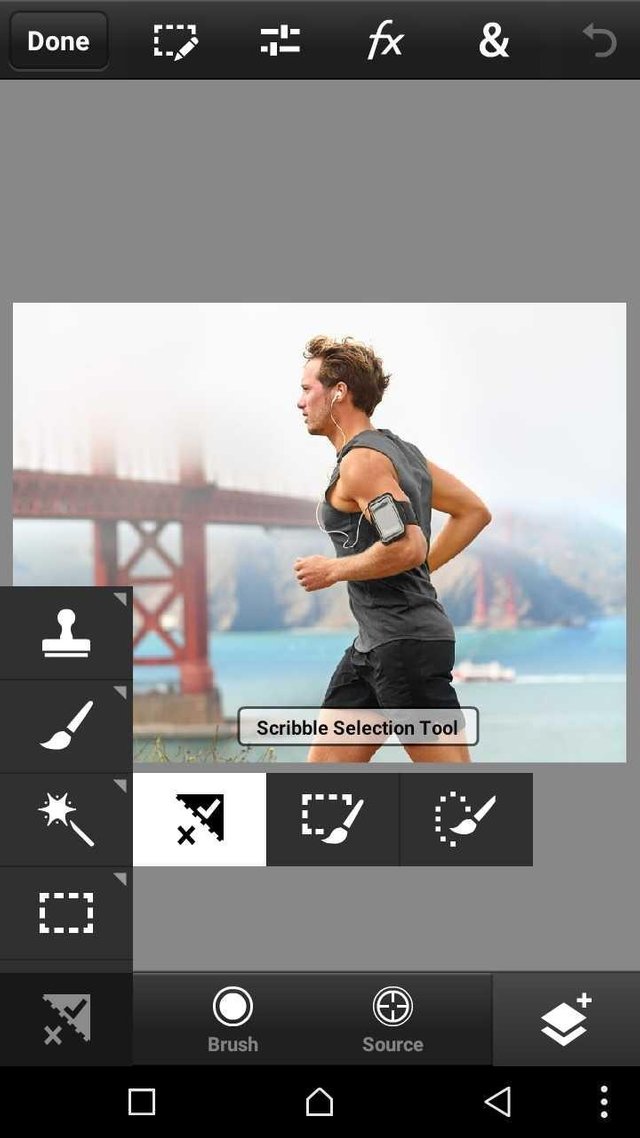
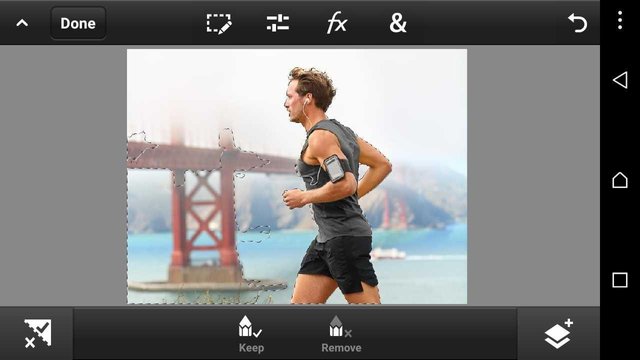
It works by just highlighting the edges that would be needed to be kept safe before cutting the rest of the picture away in a process called extraction. It consists of two sub-tools: Keep and Remove. The "Keep" tools needs to be applied in form of a green paint on the places that needs to be preserved while the remove tool, in form of a red paint needs to be applied just right where the green paint stops so as to start extracting from there. As you can see, that is where it earned the name "Scribble selection tool" because of the scribbling activity that needs to be done. You may be a little confused now but as we get to it, you will understand better.
The Scribble selection/keep tool has been selected and all we have to do is to mark the areas that needs to be preserved. I will be zooming the image a little closer to make scribbling easier and precise. Let's start.
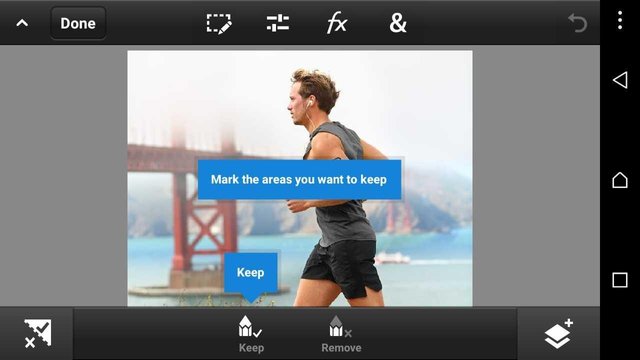
'The keep tool' is not much of a work as the selection only starts with the 'remove tool'.
The keep tool has been successfully applied on the edges of the body of the man in the picture. It took me about a minute to do this.
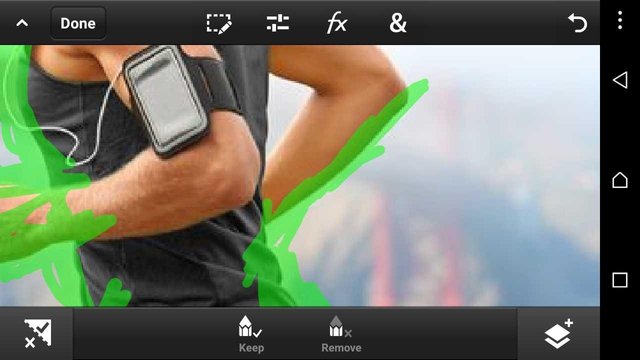
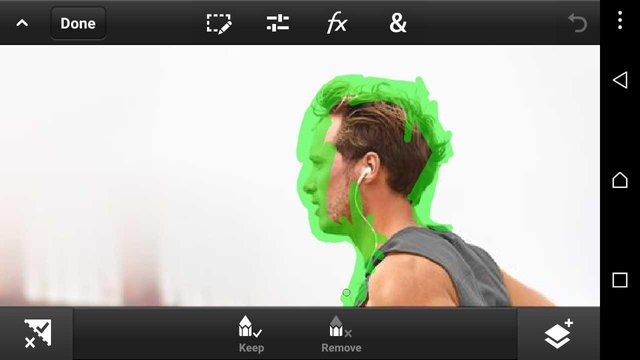
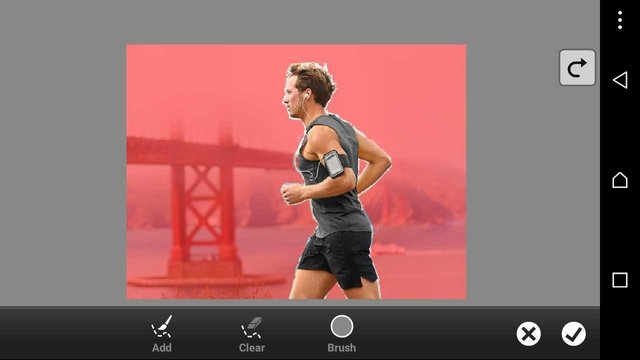
Moving on to the "Remove tool". Please note that this has to be applied carefully so it doesn't touch the body of the man or of areas which needs to be kept, if not those areas will be marked for demolition. Lol! I mean removal. So let's start applying. Selecting the 'remove tool and zooming in'

You can pause at intervals to watch the selection.
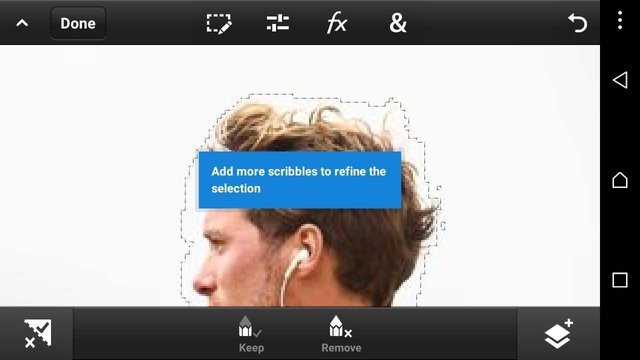
This selections can be refined with more scribbles and if peradventure a mistake occurs, it can be undone by clicking the undo button right at the top right corner of the screen.
Let's get down to work and finalize the "remove tool" selection.

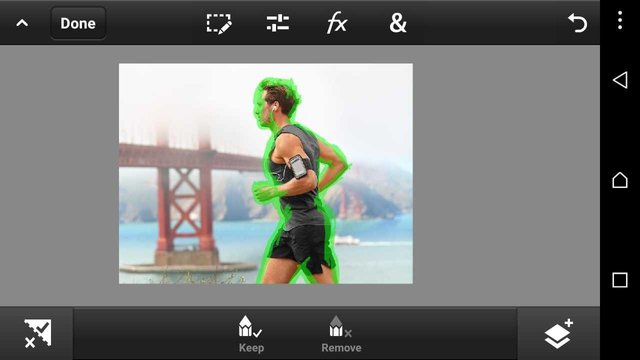
And I'm done. It took 15 minutes to complete the selection and this is what we have.
As you can see, the selection is not perfect and it doesn't need to be because what this does is just to get the idea of where and where should be marked as keep and remove. In and outside the red zone will be removed completely. Let's take a look at what we have.
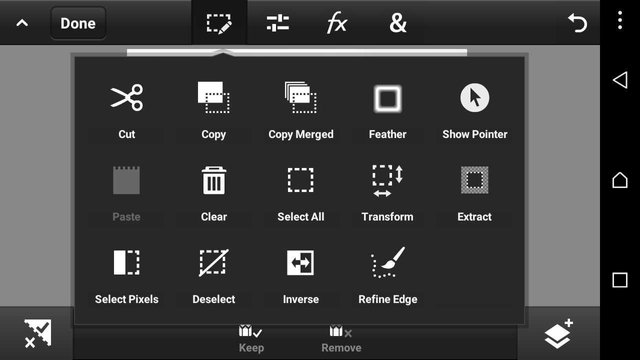
REFINE EDGE
What we will be doing next is to refine the selection. Refine selection is helps to make the selection more neat. It compares the difference between the edges and the background and smartly selects the edges.
"Refine edge" tool can be found by selecting the icon as in the image above. And by clicking on it, we have our current selection.
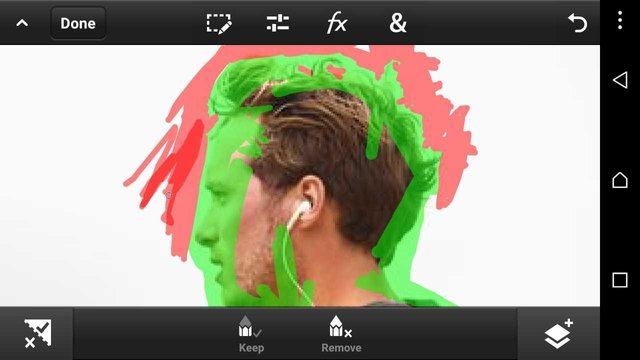
There are two options there: 'add' and 'clear'. ADD works by smarting selecting the areas which needs to be added to the danger zone while remove is the reverse of "ADD". It needs to be carefully done so as to make the selection neat. All that needs to be done is just to gently swipe the edges that needs refine and watch the magic happen. Let's zoom in and do some work.
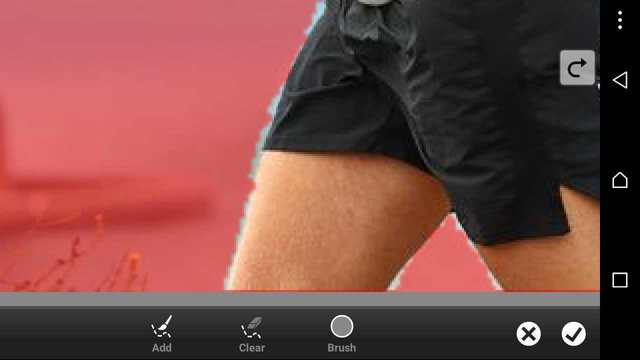
And... done. The selection looks cooler now.
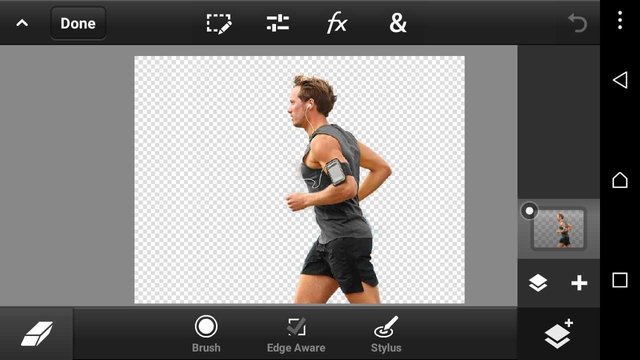
Let's extract it. The extract can be found in the section where refine edge is as in the image below.
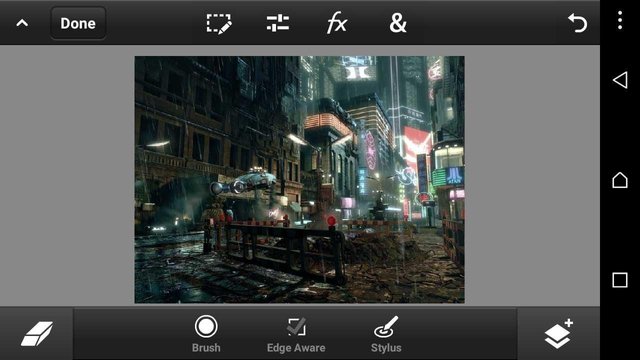
The image has been extracted and we have something like this. Cool huh? Ok.
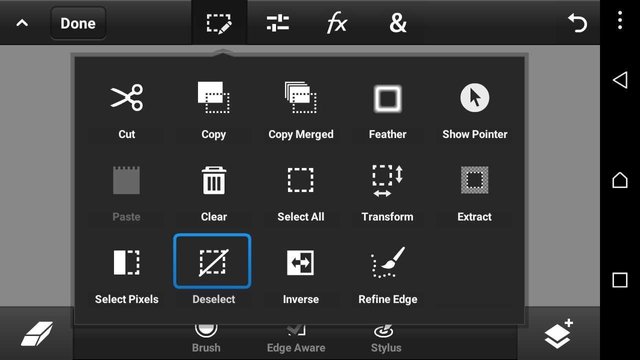
The image needs to be deselected by clicking the deselect button as seen in the image below.
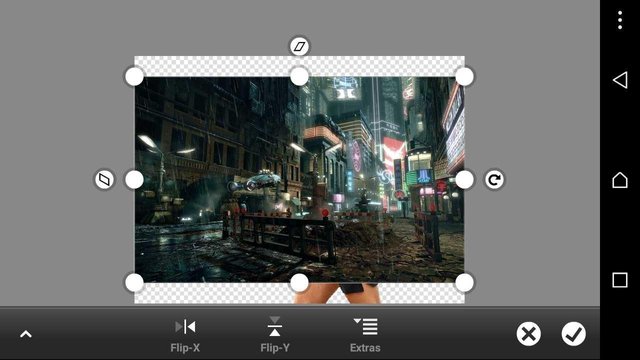
Then we are going to add our preferred background. This can be done by clicking the icon at the bottom right corner of the screen as show in the image below.
Then click on the + button to add and photo layer to add the image that is going to be used as the background.

What I'm going to do is scale it a bit in order to fit into the background perfectly like this.
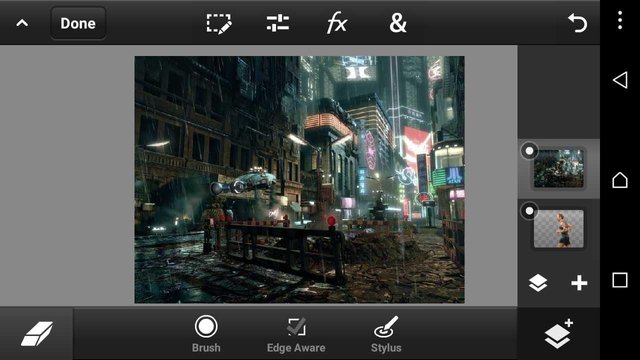
Then the next step is to click on the layer tab at the bottom right corner again to shuffle the background below the guy's image like this.
BLENDING THE IMAGE WITH THE BACKGROUND
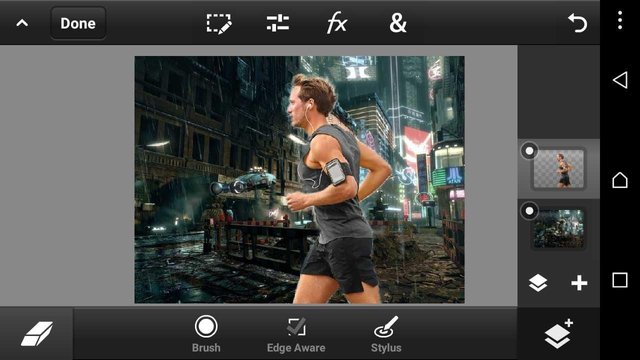
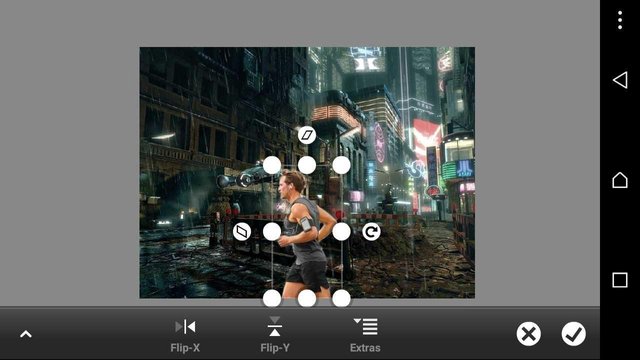
The guy appears on the background and as you can see, the difference is clear and it is pretty obvious that this image is edited so we have to make it look more realistic. First there are things to consider, the guy's size. It is pretty to big for the background and one cannot imagine his feet touching the ground in synchrony with the background so we have to scale it down. As you can see, the image is already selected in the layer tab and all we have to do is click this & symbol and click "Transform" like this.
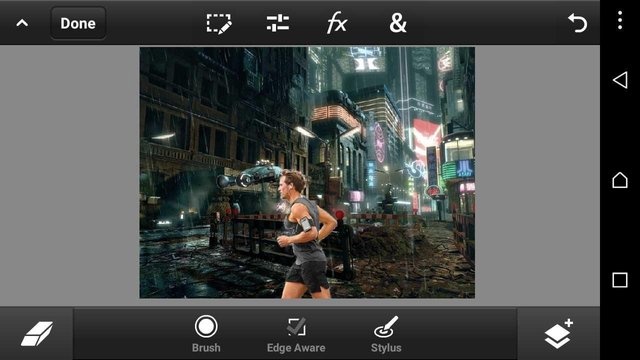
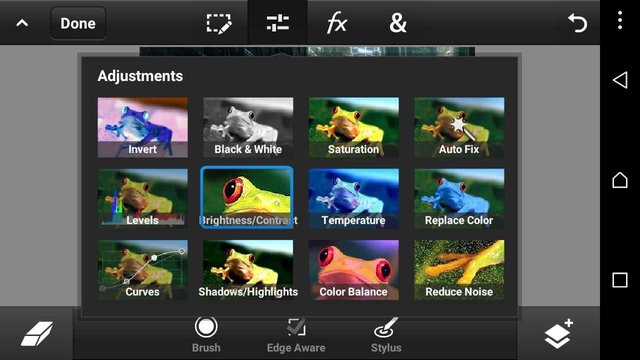
The image has been scaled down and it looks more cooler. The next thing to consider is the colour, the guy has huge saturation and bright colours in contrast to the background which is mildly saturated and is a night scene, so we need to adjust the brightness. It can be done by clicking the settings/brightness /contrast as shown
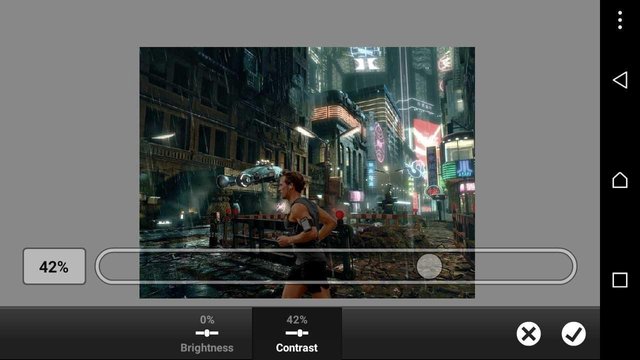
It has been reduced to -72 and now almost perfectly blends with the background if not for the low contrast.
Then we need to increase the contrast by 42% and wow! It is "perfect". You may want to play with some more settings though as per your choice but this is the best I can do. Also note that there are different settings for different backgrounds.
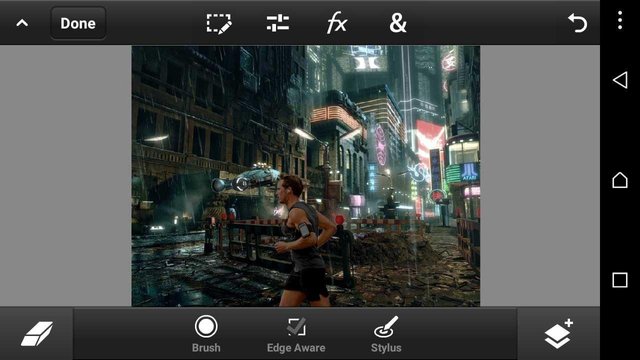
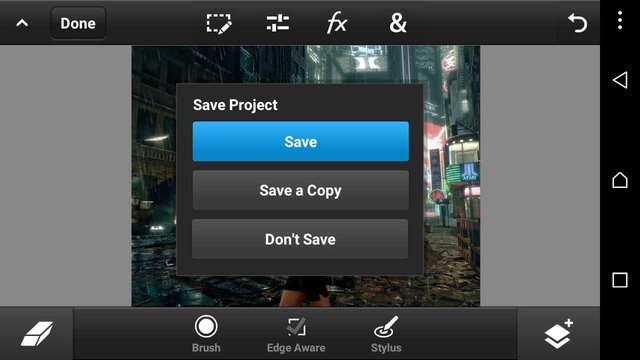
The image can be saved by clicking "Done" on the far left corner.
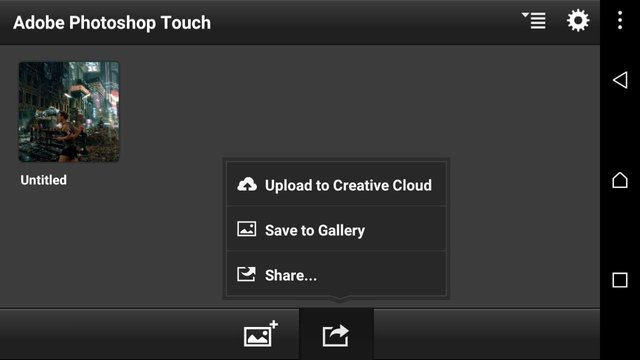
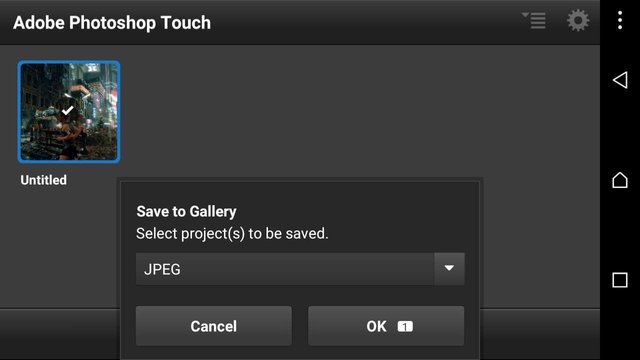
It can be saved to the gallery by clicking the icon as shown in the image and choosing the preferred image format.
That's it guys! I hope you've learnt a new thing. I love playing with images alot and I don't know why. It is cool though.
All screenshots are from my phone and the images used for this tutorial have been sourced.
If you enjoyed this read, upvote, comment and resteem.
Thanks to @camzy for this portrait
may this post gets trhe reward deserved
Very helpful info!
Thanks bro
great post man! ive bookmarked this post to my evernote! i love tutorials like this! very helpful! thank you sooo much! :)
Thank you for going through
This post has received gratitude of 1.00 % from @jout
This is well researched.. I have been trying to change an Image's background with Adobe Photoshop Touch for a very long time yet unsuccessful
I'm definitely going to put this into practice
Glad I could help sir!
Congratulations @marvel1206! You have completed some achievement on Steemit and have been rewarded with new badge(s) :
Click on any badge to view your own Board of Honor on SteemitBoard.
For more information about SteemitBoard, click here
If you no longer want to receive notifications, reply to this comment with the word
STOPMarvel... My tech wizard. This is amazing.
How about in give this a shot.... Should I?
Try it bro. With patience
@originalworks
The @OriginalWorks bot has determined this post by @marvel1206 to be original material and upvoted(1.5%) it!
To call @OriginalWorks, simply reply to any post with @originalworks or !originalworks in your message!
First trial
I hope I try, thanks for the tutorial
Wow man. This is awesome for a first trial. You get better as you do more. I started doing this 2014
Oyaaaa...
👏👏👏👏👏👏 help junak change the background of his sense naaa
Hahahaha