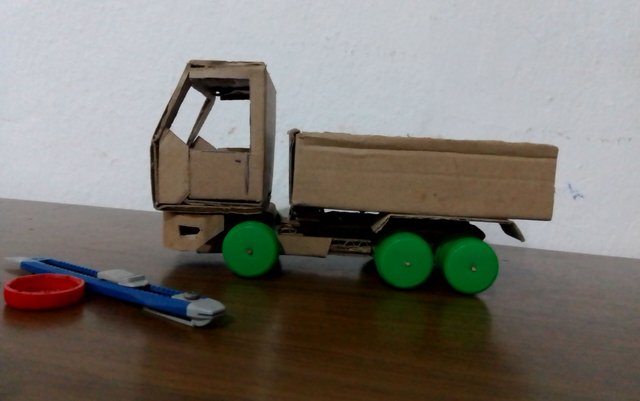
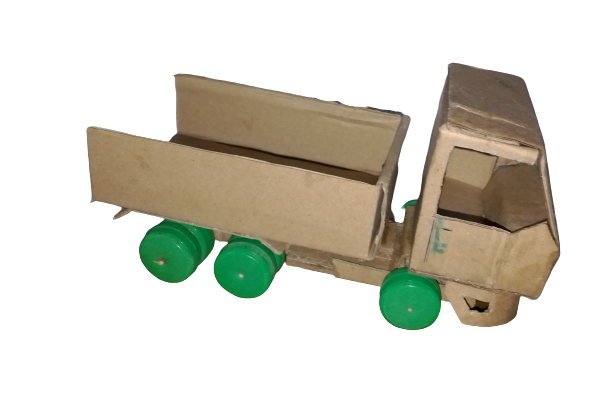
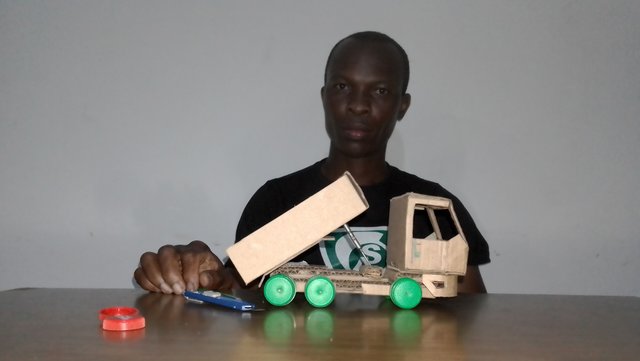
Recycling Materials | Making a Dump truck out of cardboard and bottle covers.
Dear kids, it has been a real long time since I last made one of this toys, I guess it's because I grow up. Here I will be showing you how I made my dump truck (locally known as a tipper)
How it all Started
To keep us indoors, our parents bought a variety of toys ranging from toy guns to sport cars and utensils, the girls got different types of doll and this really kept us company and somehow had great effect on me.
At some point the toys stoped coming but we were not ready to stop playing. We had to device a way and it ignited Creativity in us. My brothers were older and had started creating toys out of anything they could lay their hands on. The toys were made out of cans, tins, bamboo, wires, cardboards, clay, grass, scrap fabric and everything else was useful.
Form this materials we made dolls, cars, trucks, airplanes, houses, furnitures and a few useful tools.
I became good at making toys out of wires then latter connected motor and batteries to get the vehicles moving. I really had fun growing up as a kid and hope you kids are having fun too.
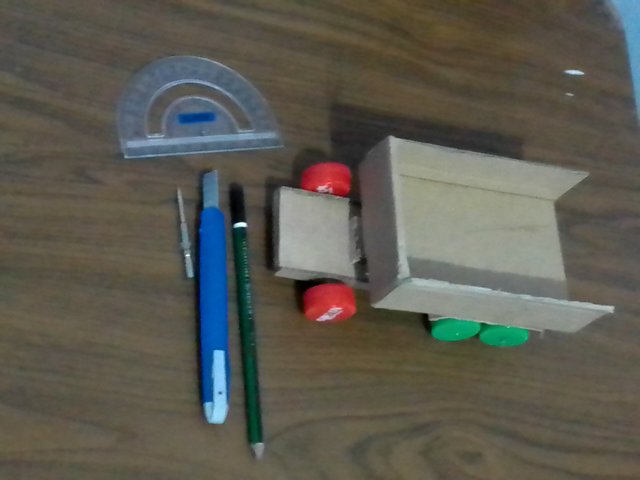
Materials and Tools for this project
Though I had stoped creating this toys, I think I still remember some of the things I got used to doing.
Needed materials
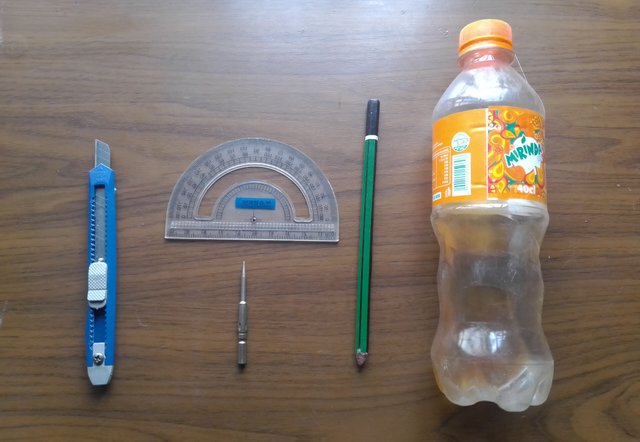
You will be using the following tools and materials
| Material | Quality |
|---|---|
| Bottle cover | 20 |
| Cardboard | # |
| Cutting tool | 1 |
| Paper glue | 1 |
| Cutting surface | 1 |
| Set square | 1 |
| Pencil | 1 |
 • The tools and materials used in this constriction..
• The cardboard, bottle covers, glue, pencil, punching tool and set square.
The bottle covers will function as tires, the cardboard will be the main material for the constitution. We will need the blade for cutting the cardboard and the bottle covers, glue will be used to hold the various parts together. Placing the cardboard on a cutting surface prevent accidental scoring of the table. The set square and pencil will help mark and draw straight line.
Precautions
This section often comes at the end of most write-ups. I feel you should get it now before you get started.
- This should be attempted only with close supervision.
- Cutting tools like the one used here can result in serious injury so adult supervision is recommended.
- Glue can cause serious health challenges if ingested or gets in contact with the eyes.
Construction
I started the constriction with the tires. I needed a total of 20 bottle covers because the vehicle will be a ten wheeled vehicle. Each tier was made of two battle covers. I used the blade to cut the bottle covers
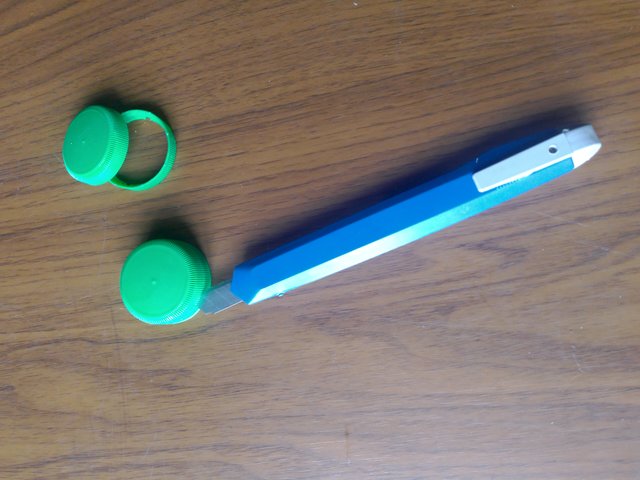 • Cutting the plastic bottle covers
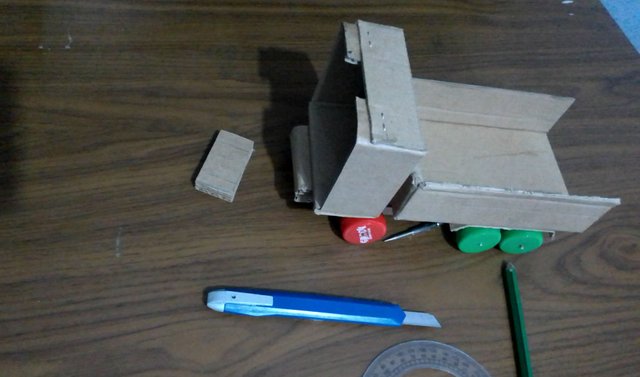
After the tires, I decided to make the ladder frame which is more like the skeleton of the truck providing it with the main supporting system. It holds the suspension, the tires and the body. Here is how I cut out the truck's ladder frame.
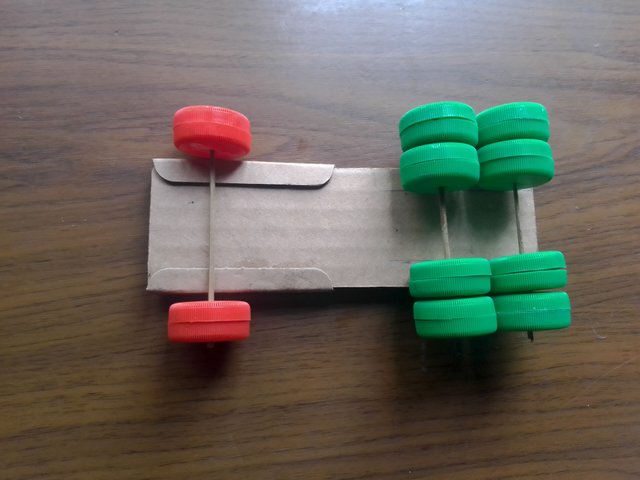 • The ladder frame for the truck..
• Double tires at the back makes it comfortably to carry very heavy materials.
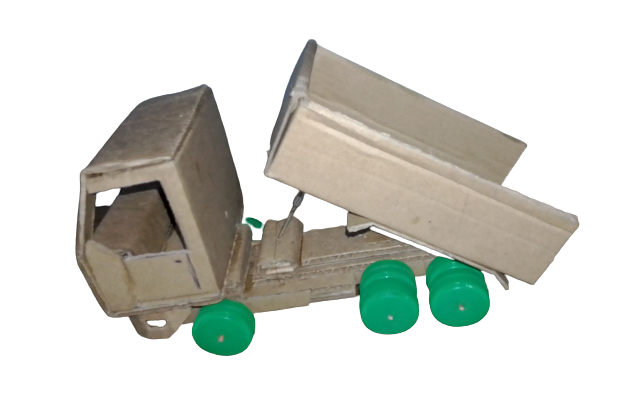
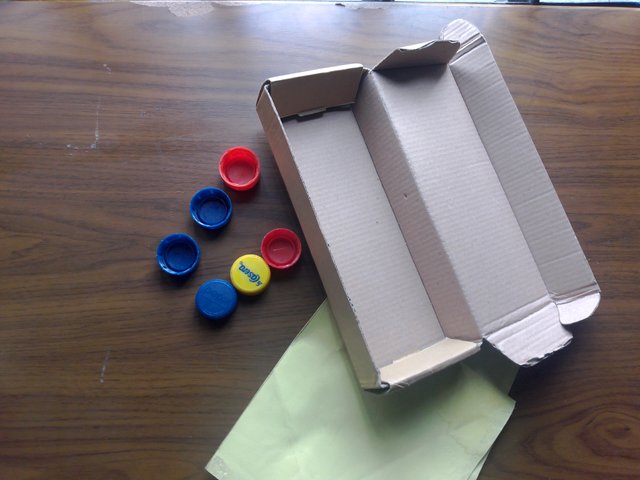
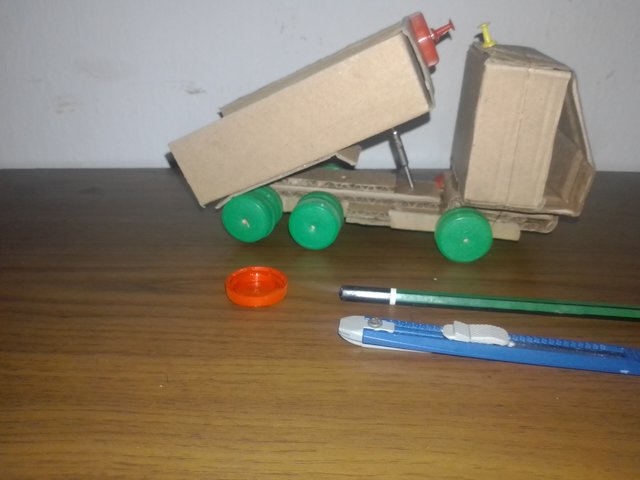
It's time to create the open-box bed at the back of the truck. This is that part of the truck where the sand, gravel or soil is put, transported and at the destination, a hydraulic ram will help lift and dump it's content. This part is cut out of a box that houses a laptop's battery. Cutting it out of the box made it a lot easier compered to making it from scratch.
 • The dump body at the back of the truck..
• This is cut out of the carton that houses a laptop battery.
Initially, the front tires of the truck was going to be red because I did not have enough green plastic covers.
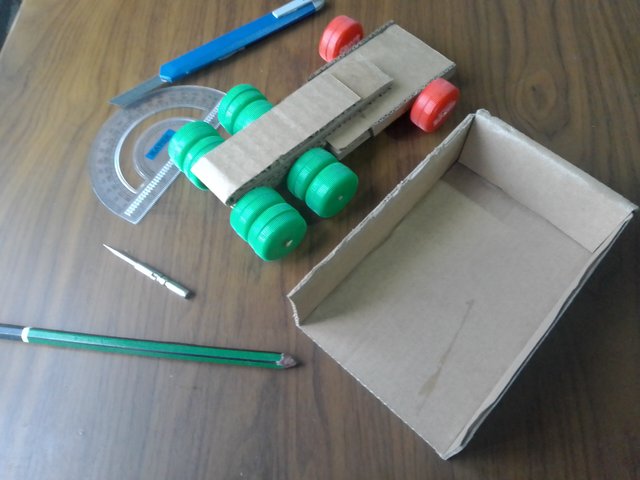
A little platform is raised on the ladder frame so the open-box bed will not rest on the rear tires. Now you can see the open bed on the ladder frame and it's beginning to take shape.
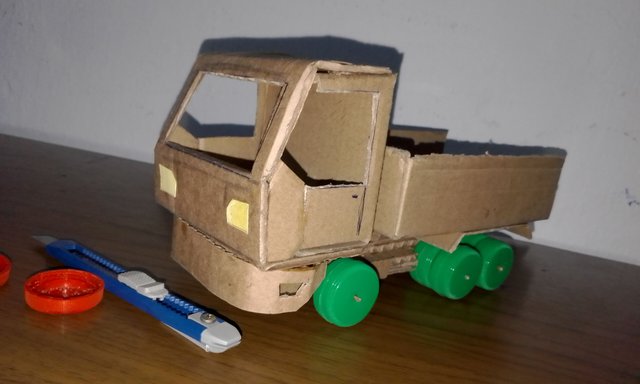
Now that we have got the dump body of the truck in place, it's time to build the cab section.
 • The dump body is now placed on the frame..
• The free space at the front side will carry the cab section
The cab is the front section of the dump truck where we have the driver. It offers the driver some protection during work. I made this section out of the remaining half of the laptop battery box. I did not have to build it from scratch, but it still needed some amendment as you can see in the picture below.
 • The main cab section has been mounted on the ladder frame..
At this point, a windshield was needed, so I cut in so more cardboard and used it as windshield on the truck. It looked finished but lacked the perfect touch. I looked at it again...
 • The windshield is now mounted.
It needed details like doors and windows, so I caved out the windows and added a few more details to the front. I also found more green bottle covers for the front tires.
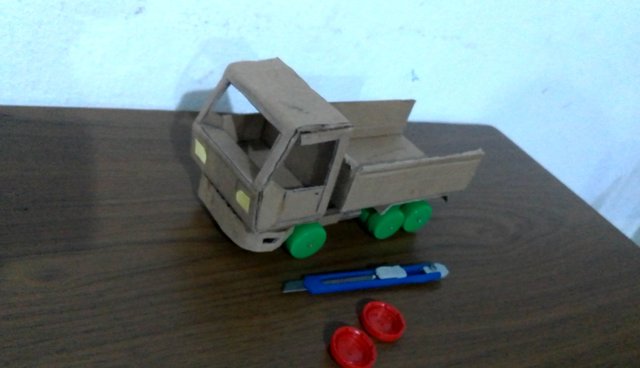 • We now have the front area cut out ..
• headlights and doors are now clearly seen.
I wish this will inspire some creativity in some of you. If you will like to know in details how I achieved any of the steps I summarized in this post, please feel free to place the question at the comment section below.
Conclusion
Creating this toys became a kind of play for me and doing it while growing up developed my eye-hand coordination, improved dexterity and has impacted positively on my problem solving skills and technical aptitude. Some traces of what you do as a kid grows up with you and shapes your performance regardless of the field of endeavour you choose to engage in.
This is so nice, very creative work for children. I also love the presentation of the steps which makes it easy to follow. Putting it to practice will greatly improve creativity. Thank you!
POWER UPs| 122.854 STEEM
Hello @manuelhooks, Your post has been selected as one of the quality posts for the day by steemkids community. Congratulations! Please keep making quality and original contents with us here. We love you so much and will like to read more of your posts.
Please endeavour to resteem, vote and comment on the post of selection. Thank you!
Hola @manuelhooks, se ve muy lindo el camión volteo, es muy útil para nuestra distracción y compartir jugando con nuestros amiguitos, aúnque ya tengo un poco más de edad tengo recuerdos muy divertidos de mi infancia con juguetes, es un muy buen tutorial, saludos y muchas bendiciones. El camioneta genial felicidades.
Gracias por apreciar mi camioneta, hace mucho que deje de hacer esas cosas pero aun lo recuerdo como si fuera ayer. Alrededor del 70% de mi conocimiento se vio reforzado por las diferentes actividades que realicé durante el juego. Así que recomiendo una buena dosis de juego creativo para todos los niños.