DIBUJANDO AL TIO GORDO CON ADOBE ILUSTRATOR
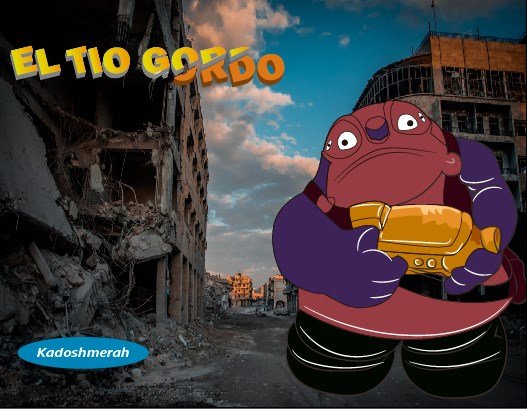
Buenas tardes a toda la comunidad hispana, Saludos a todos, y a los que siguen de cerca mis post de diseño con Adobe Ilustrator. Hoy les traigo un pequeño dibujo tipo caricatura fusionado con un escenario real, dedicado a mi hijo, este juguete es su preferido, él lo llama “Tio Gordo”; Y como siempre, espero que les guste…
Necesitamos Adobe Ilustrator, si no lo tienes puedes descargarlo Aquí
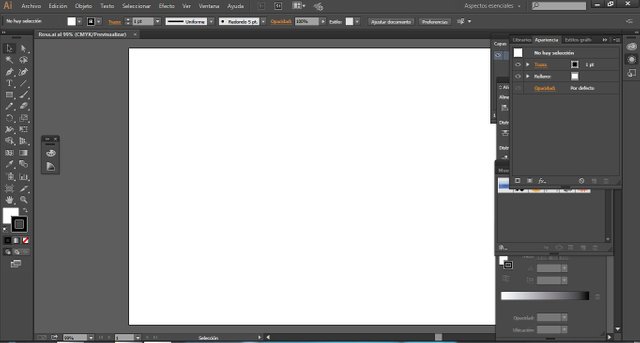
PASO 1
Abrimos un documento en blanco.
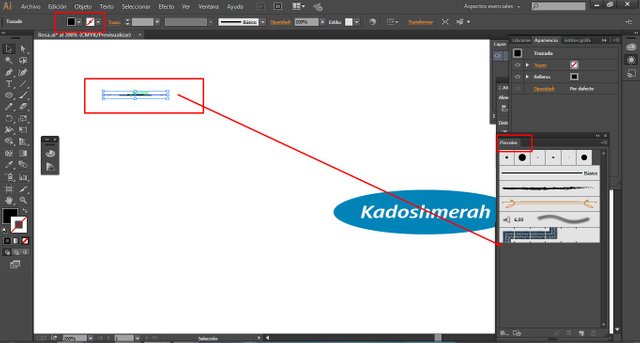
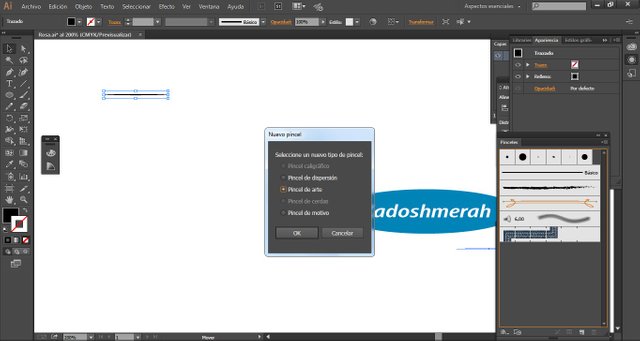
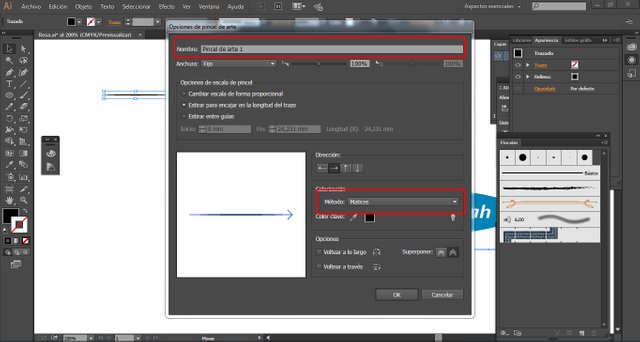
Hacemos nuestro propio pincel, para ello, hacemos un ovalo muy delgado sin trazo. Luego lo arrastramos a nuestra ventana de pinceles. Si no sabes donde esta tú ventana de pinceles puedes ir al menú “ventana” y seleccionarla allí. Bueno se nos abrirá una ventana y elegimos “pincel de arte” le damos un nombre, elegimos método mátices y listo ya tememos nuestro propio pincel para trabajar.
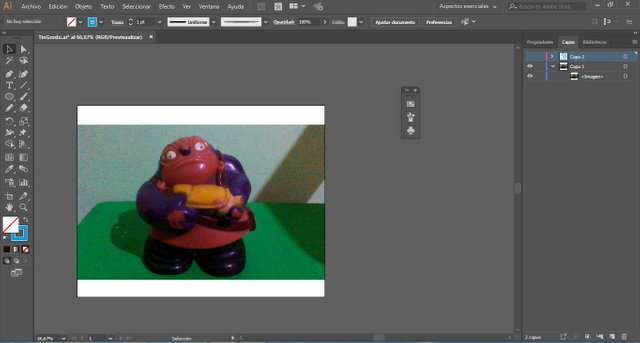
Pegamos nuestra fotografía modelo y la bloqueamos para que no se nos mueva, hacemos una capa nueva y empezamos a realizar las líneas base con nuestro pincel.
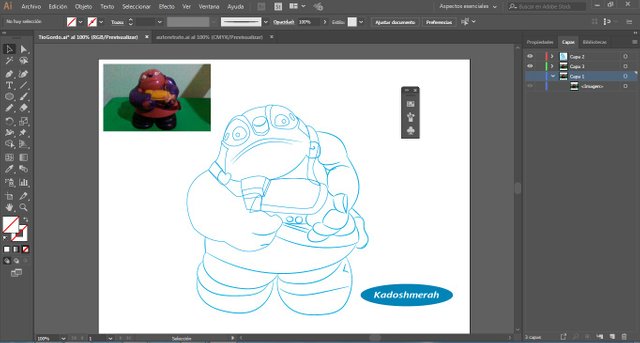
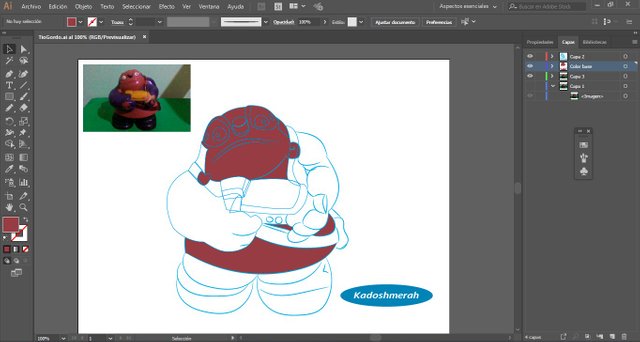
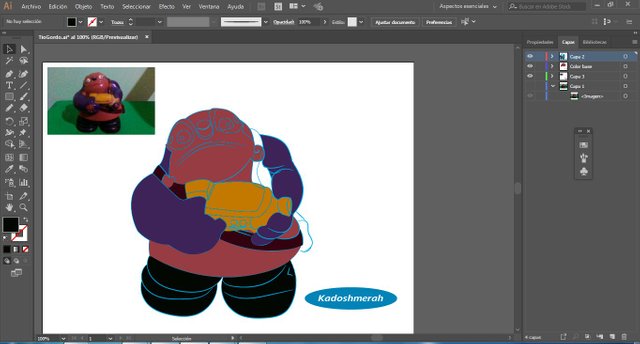
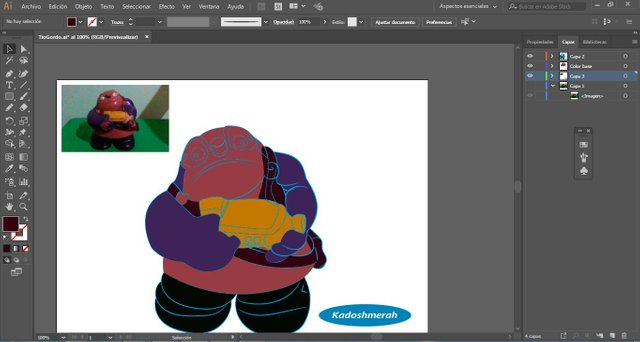
Teniendo nuestro esbozo, pasamos a colorear.
PASO 3

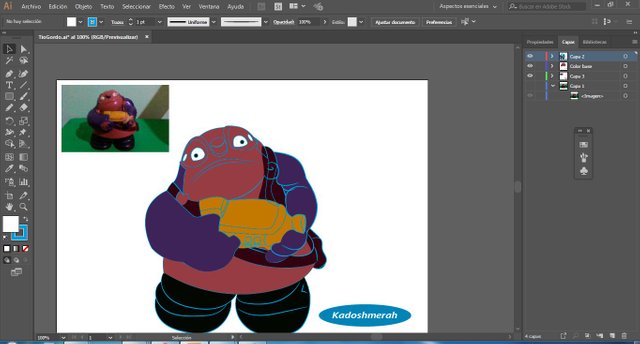

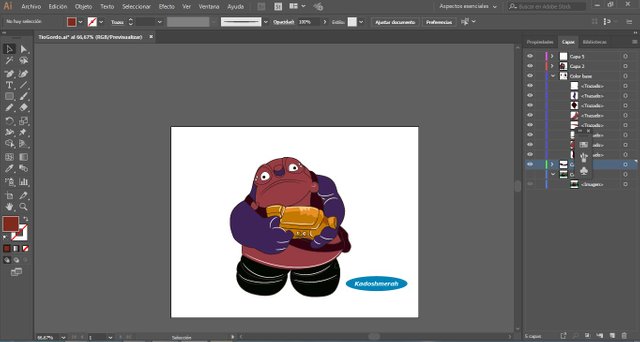
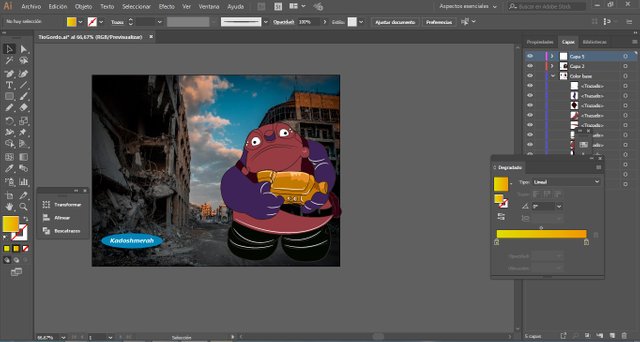
agregamos una imagen de fondo.
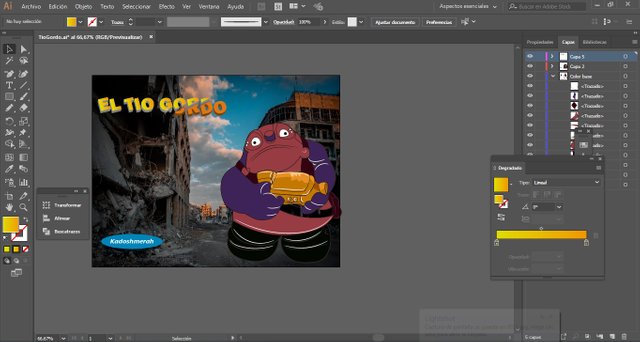
Agregamos un texto para el nombre y listo
Hasta aquí este esté tutorial. Esperando que te sea de utilidad. Soy kadoshmenorah y hasta una próxima oportunidad y no olvides dejar tus comentarios acá abajo.

Buenas tardes a toda la comunidad hispana, Saludos a todos, y a los que siguen de cerca mis post de diseño con Adobe Ilustrator. Hoy les traigo un pequeño dibujo tipo caricatura fusionado con un escenario real, dedicado a mi hijo, este juguete es su preferido, él lo llama “Tio Gordo”; Y como siempre, espero que les guste…
Necesitamos Adobe Ilustrator, si no lo tienes puedes descargarlo Aquí
Abrimos un documento en blanco.
Hacemos nuestro propio pincel, para ello, hacemos un ovalo muy delgado sin trazo. Luego lo arrastramos a nuestra ventana de pinceles. Si no sabes donde esta tú ventana de pinceles puedes ir al menú “ventana” y seleccionarla allí. Bueno se nos abrirá una ventana y elegimos “pincel de arte” le damos un nombre, elegimos método mátices y listo ya tememos nuestro propio pincel para trabajar.
Pegamos nuestra fotografía modelo y la bloqueamos para que no se nos mueva, hacemos una capa nueva y empezamos a realizar las líneas base con nuestro pincel.
Teniendo nuestro esbozo, pasamos a colorear.
agregamos una imagen de fondo.
Agregamos un texto para el nombre y listo
Hasta aquí este esté tutorial. Esperando que te sea de utilidad. Soy kadoshmenorah y hasta una próxima oportunidad y no olvides dejar tus comentarios acá abajo.
Congratulations! This post has been upvoted from the communal account, @minnowsupport, by kadoshmenorah from the Minnow Support Project. It's a witness project run by aggroed, ausbitbank, teamsteem, someguy123, neoxian, followbtcnews, and netuoso. The goal is to help Steemit grow by supporting Minnows. Please find us at the Peace, Abundance, and Liberty Network (PALnet) Discord Channel. It's a completely public and open space to all members of the Steemit community who voluntarily choose to be there.
If you would like to delegate to the Minnow Support Project you can do so by clicking on the following links: 50SP, 100SP, 250SP, 500SP, 1000SP, 5000SP.
Be sure to leave at least 50SP undelegated on your account.
Congratulations @kadoshmenorah! You have completed the following achievement on the Steem blockchain and have been rewarded with new badge(s) :
You can view your badges on your Steem Board and compare to others on the Steem Ranking
If you no longer want to receive notifications, reply to this comment with the word
STOPVote for @Steemitboard as a witness to get one more award and increased upvotes!