Long Exposure photography without ND filters
When travelling, my hand luggage is always overweight and the reason is my camera equipment. Four years ago I changed my entire camera system from Nikon to Fujifilm, and one of the reasons was the weight (definitely not the only reason!). But my hand luggage is still overweight, just not that much anymore (currently my camera bag is about 8.5kg and the allowable weight is normally 7kg).
Part of the problem is the extras, such as my filter set. I am using the NISI filter set for their high image quality and also because their 10,11 and 15 stop filters do not produce any colour shift. But they are made of glass and glass is heavy!
When going out on a hike, I sometimes do not take my filters with, and then I need to rely on my photoshop skills to get the result I normally get with my filters. On my Guilin trip, I did take my filters with me, but on many of the (hot) photoshoot outings, I left the filters at home. I am also using the Fujifilm X100F quite a bit for my travel photos, and currently, I do not have the correct adaptor ring for the X100F to use the NISI filters.
That does not mean that I will not attempt a long exposure. I have learned how to create a long exposure photo from a set of photos. One of the nicest features of the Fujifilm cameras (from the most entry-level camera up to the most advanced camera) is the built-in interval timer functionality.
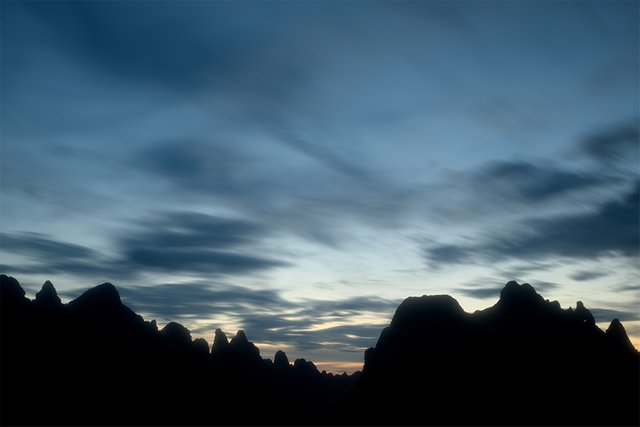
The photo above is one such photo. It was taken with the Fujifilm X100F with the TCL adapter attached, giving a 35mm field of view in full frame terms. By the way, this photo is one of many I took from the balcony of our hotel while visiting Xiang Gong Shan. You will see these mountains in many future posts!
I used the interval timer set to take twenty photos one second apart. I have learned that the shorter the time between photos the smoother the blending will be. Edit: This will result in the equivalent of a 20-second exposure. If the clouds are moving fast, I sometimes use a 2-second interval resulting in a 40-second exposure. In some cases, I have used a 3-second interval with success, but most of the times it will result in a ripple effect which is not desirable.
Initially, I did the blending of the photos manually. The basic way to do this is to load all the photo in layers and then change the opacity of the layers. Start with the bottom layer and keep its opacity at 100%. Then change the opacity of the layer directly above to be half that of the underlying layer, so the next layer will be 50%, then the next one 25%, the next one 12.5% and so on. I normally stick to 20 photos as I cannot see any visual benefit from having more than 20 photos.
But, since Photoshop introduced the Smart Objects feature, there is a simpler way to do this. You still load the photos into layers, but then, afterwards, select all the layers and convert them to a Smart Object. Once done, go the to the Layers menu and select "Mean" for the "Smart Object/Stack Mode" sub-menu. The result will be exactly the same as the manual process.
I haven't posted a long exposure photo for some time, hope I can get back into the habit...
Hope you like it
World of Photography
>Visit the website<
You have earned 6.50 XP for sharing your photo!
Daily photos: 1/2
Daily comments: 0/5
Multiplier: 1.30
Block time: 2018-08-05T16:37:45
Total XP: 820.22/1600.00
Total Photos: 47
Total comments: 5
Total contest wins: 11
Follow: @photocontests
Join the Discord channel: click!
Play and win SBD: @fairlotto
Daily Steem Statistics: @dailysteemreport
Learn how to program Steem-Python applications: @steempytutorials
Developed and sponsored by: @juliank
Oh nice i like your post and your title also . Fantastic work friend.