Landrover Defender Lego Build: Two
Hey y'all, as promised here's some photos from my latest Lego build. Now, before you get too excited it's not complete and currently looks like a random collection of Lego pieces snapped together without rhyme or reason...Ah hell, who am I to stop you from getting excited...Knock yourselves out! 😃
In my first post I mentioned being a little fearful that there may be some missing pieces however I'm pleased to report that there was not - Not that I am aware of anyway. This build phase of the rear-end and gearbox assembly went smoothly and so far everything works.

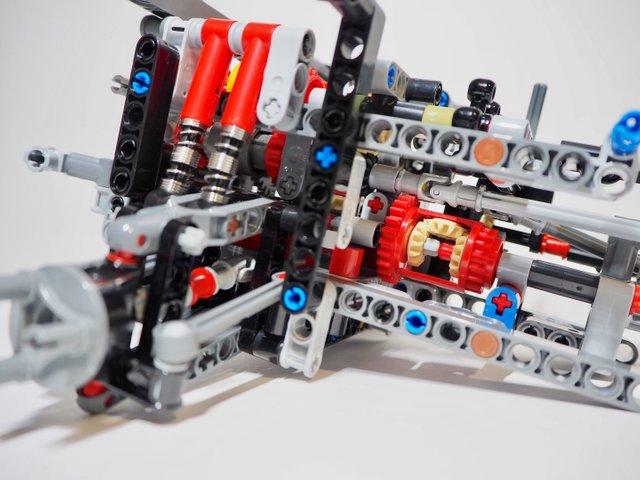
(Above) Close up showing some of the suspension and drive-shaft components.
This first part of the build-process happens over three parts with the main frame section and rear axle/suspension being partially completed prior to the gearbox/transfer case sub-assembly being completed separately. From there the two sub-assemblies are brought together and the remainder of the work is completed, including adding the four shocks/struts that provide independent suspension to the rear of the vehicle.
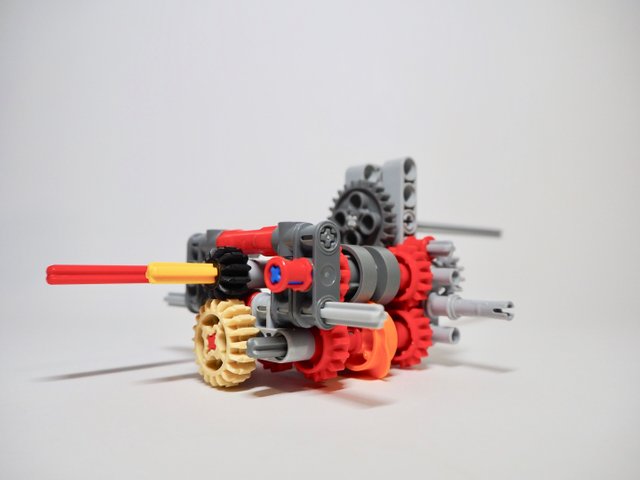
(Above) Part of the gearbox, Lego's most sophisticated gearbox to date. From what you see here it grew to over double this size with the other gearbox components added.
The build took me just over four hours to get to this stage and I followed the instructions to the letter. Not doing so would result in an assembly that would fail to work as the instructions specify certain gaps and tolerances to allow the vehicle to switch from high range to low range easily - Or at all!
It seems a long time however it is a complicated gearbox and assembly, the parts are often small and some care needs to be taken to ensure the right parts are used - They provide a scale to measure parts that may be confused with similar ones so the builder can ensure the right components are used.

(Above) Part one completed - This shows the assembly from the front. You can see the left-hand-side rear wheel and suspension to the right of image.
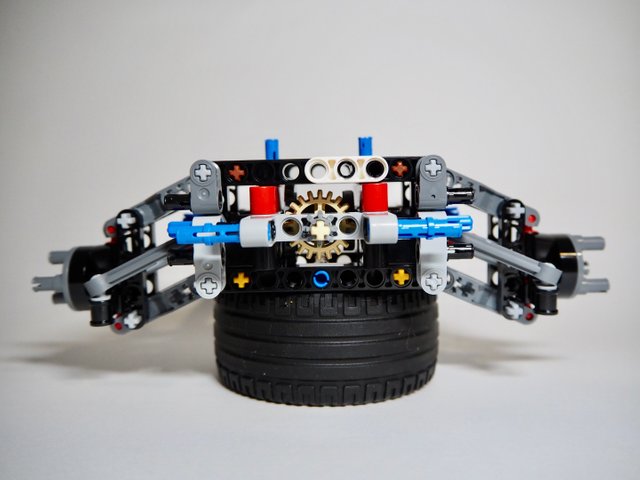
(Above) Part of the assembly shot from the rear. Right wheel to right, left to left. That cream-coloured wheel in the middle is part of the differential.
The two images above are of the completed part-one assembly. From here I moved to the part two assembly which is the gearbox itself and then on to combining them and completing the first-stage of the total project.
Getting something wrong in the early phase of this build will mean nothing will work right. Clipping a piece into the assembly in the wrong location will mean nothing else will fit and considering the complex nature of it doing so would mean the entire assembly would need to be broken down to the point the error was made and restarted.
Fortunately, as far as I know, I have made no mistakes and the dual-range gearbox works fine. Time will tell though.
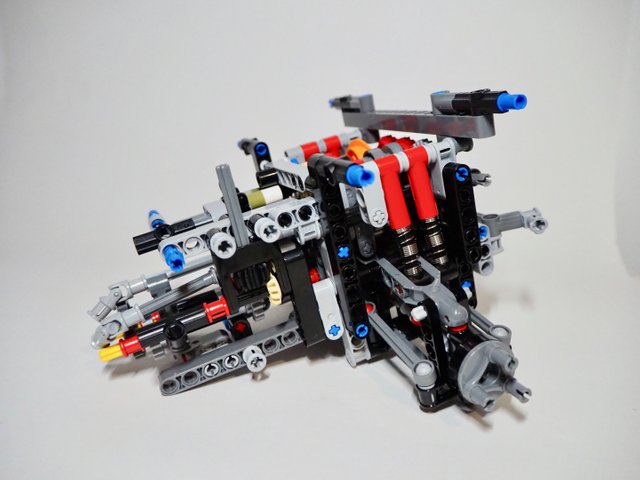
The next images are of the totally completed rear-sub-assembly of the vehicle. From here the next stage begins which introduces components that will make it look more like an actual car.
(Above) Here you may note the two driveshafts (light grey) that make the whole vehicle work in the same way the real vehicle would. These are the shafts with the uni-joints on the end that just sort of hang at the very front of the assembly.
(Above) - The suspension was simple enough to construct with just a little coaxing due to the angles involved. Compressing the two struts on each side (red things with springs) was a bit difficult and in doing so I actually tore a piece off the front of the assembly. It only took me 15 minutes to work out where it came off from. 😳
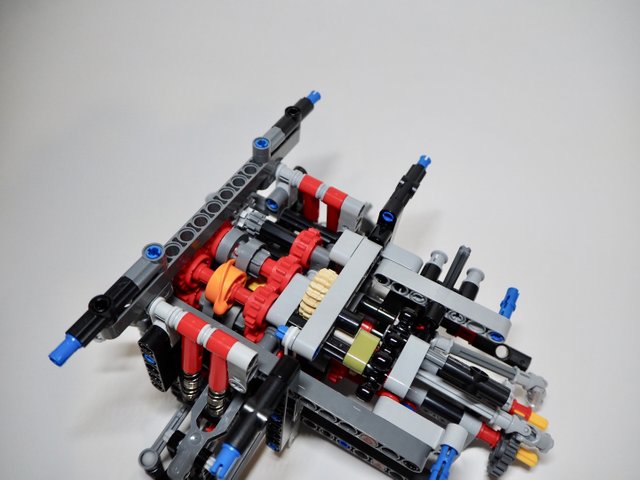
(Above) This image shows the gearbox from the top - Literally none of this comes pre-assembled. If you look carefully you can see a small khaki-coloured piece next to some black ones. This is the section of the gearbox that switches it from high-range to low-range which all happens like magic thanks to some ingenious engineering from Lego. The orange part you see is the cam that affects the change.
I'm not sure how long I have to go on this build although due to the speed at which I'm going I would say it could be another 20 hours or so. I guess I don't really know what's coming as far as complexity however I have a suspicion the front-end and engine will be very complex also. All part of the challenge I guess.
I'll update you of course and for those who haven't seen it, take the time to look at the little video from Lego below as it shows some of the working parts, and the completed vehicle, which is pretty cool.
Stay tuned.
Design and create your ideal life, don't live it by default
Discord: @galenkp#9209 🇦🇺
Damn! That looks awesome dude. You’re making me miss my legos set. My brother and I growing up probably amassed like 10,000 legos. Thankfully they are in my parents attic so not totally lost but I want to play with them now lol. Looking forward to when our little one will be old enough to play with them!
LEGO is very cool. My brothers and I played LEGO's from a very young age and made all sorts of things. As an adult now I'm enjoying it, the challenge, the relaxation and, of course satisfaction, of the end result.
I feel so fucking cheated.......
Photo of my Lego set from childhood...... h ttps://images.brickset.com/sets/images/852468-1.jpg
Hmm, I wonder what you made with that set?
Anything with a square box, or rectangular shape..... In other words. Not a whole hell of a lot.
But they were great projectiles when in fights with my older brother.
Lego: The most dangerous weapon known to mankind.
That looks awesome. Hope you are enjoying the meditative process
It's a lot of fun and I'm finding it relaxing and exciting st the same time. The dichotomy of Lego. 😉
That is a pretty intricate assembly. Designing that to work in LEGO has got to be a challenge.
They sure know how to engineer them right.
Sup Dork?!? Enjoy the Upvote!!! Keep up with the dorky content for more love!!!