BMP180 Barometric Pressure Sensor Arduino Library Setup and Functions Usage Shown With an Example Project - Tutorial
Introduction
This is a tutorial of an open source Arduino library, which lets you turn your Arduino to a “Barometer”, with a BMP180 Barometric Pressure Sensor breakout circuit, that measures atmospheric pressure and altitude. I will show you how to install the library to Arduino IDE and make an example project with the library, throughout this tutorial while giving information barometers and their working principle.
What Will I Learn?
In this tutorial you will learn:
- General knowledge about barometers and atmospheric pressure.
- How to install BMP180 library to Arduino IDE.
- How to use BMP180 library and how to use its functions.
- How to apply barometer project using the library functions.
Requirements
This tutorials requirements are:
- Arduino UNO or equivalent microprocessor.
- Arduino IDE (Download here)
- BMP180 Arduino library (Download here)
- BMP180 Barometric Pressure Sensor breakout circuit, Breadboard, Jumper Wires.
Difficulty
This tutorials difficulty is:
- Intermediate
Tutorial Contents
What is a Barometer and How It Works
A barometer is an instrument that is used for measuring atmospheric pressure. First barometer is invented by the famous Italian physicist and mathematician Evangelista Toricelli in 1643. There are two main types of barometers, mercury (Toricellian) and aneroid barometers. Mercury barometer is a tall closed tube standing upside down in a pool of mercury. Atmospheric pressure makes the mercury rise in the closed tube to a height of 76 centimeters (760mm) at the sea level (0 meter altitude), which is called 1 atm. Mercury level changes as the altitude changes. Aneroid barometers are mercury free barometers, which most household barometers have. It shows the atmosphere pressure with a air sealed spring mechanism, as the atmospheric pressure changes, spring expands or contracts, so it moves the pressure indicator.
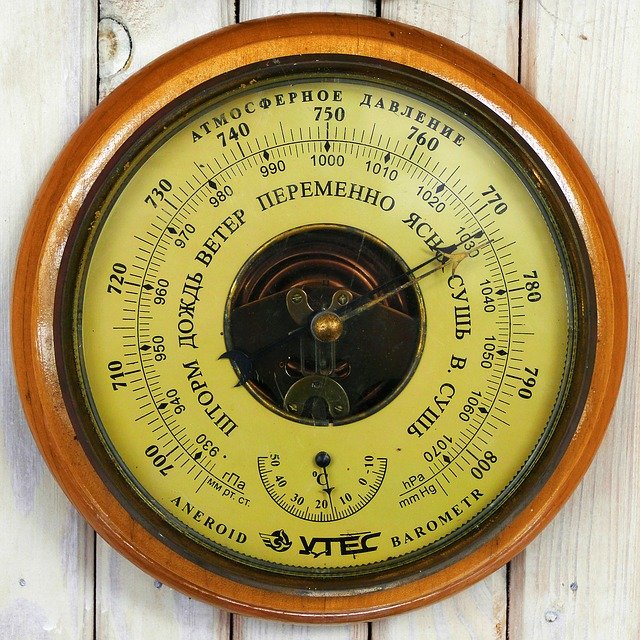
Aneroid barometer. Image Source (CC0)
Barometers can also be used for measuring altitude. Altitude is measured based on the atmospheric pressure, lower pressure means higher altitudes while higher pressure means lower altitudes. These type of barometers are called barometric altimeters, which we’ll make one using a BMP180 Barometric Pressure Sensor breakout circuit, and its Arduino library, are used in aircrafts.
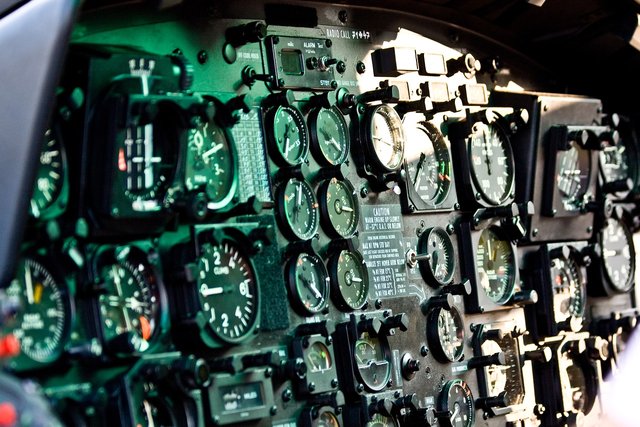
Barometric altimeters are used in aircrafts to measure altitude. Image Source (CC0)
How to Install BMP180 Library to Arduino IDE
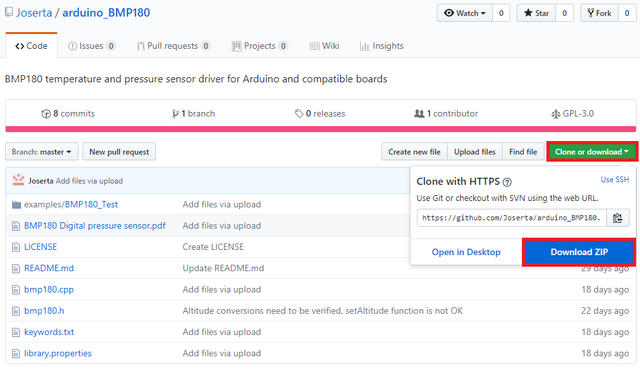
1. Download the library from https://github.com/Joserta/arduino_BMP180.
2. Open Arduino IDE. Then go to and select Sketch->Include Library->Add .ZIP Library.
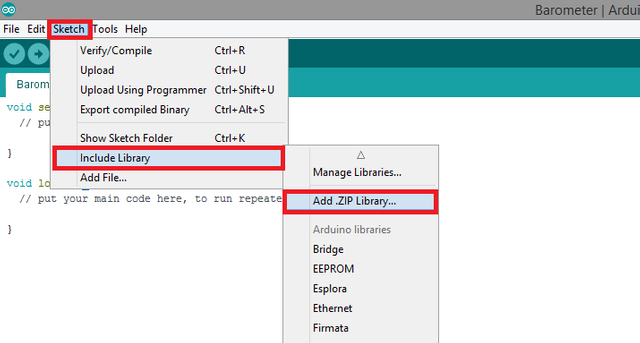
3. Choose arduino_BMP180-master.zip file and click to Open.
An Example Project Using BMP180 Arduino Library
I'll show you step by step how to use the BMP180 Barometric Pressure Sensor Arduino library with a simple example. In this example project, we will make a barometer which will measure atmospheric pressure. Then we will make Arduino print the atmospheric pressure and altitude to serial monitor. See the steps for how to do these actions. Connections for BMP180 Barometric Pressure Sensor breakout circuit to Arduino is shown below.
If you use this library in your other projects please tell in the comments.
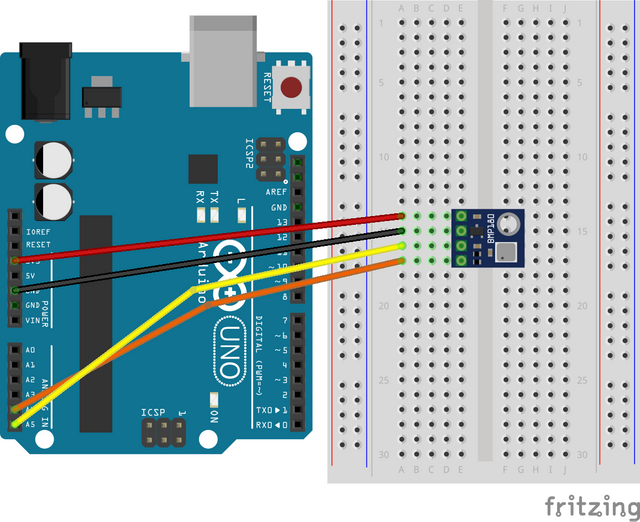
Connection diagram for BMP180 Barometric Pressure Sensor breakout circuit to Arduino. Made with Fritzing.
1. Open a new sketch and save it as "Barometer”.
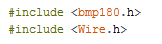
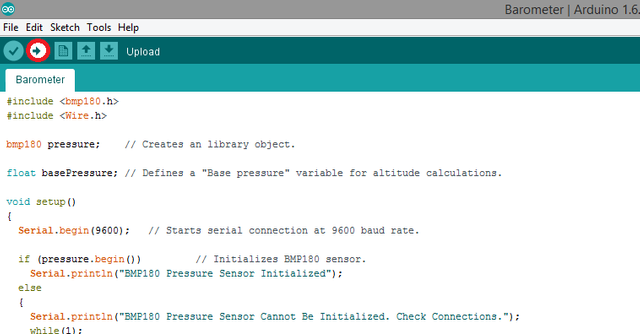
2. To add our libraries to our sketch, type #include <bmp180.h> and #include <Wire.h> at the beginning of the code.
3. After you’ve added the libraries, create the BMP 180 library object and define it “pressure”. Then define a "base pressure" variable for altitude calculations that we’ll make later.

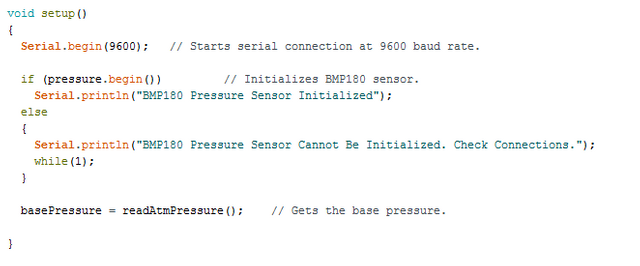
4. In the void setup() function, add the code that starts serial connection at 9600 baud rate. Then add an if statement that will trigger when BMP180 Barometric Pressure Sensor is initialized and make it print that the sensor is initialized to the serial monitor. Add an else statement that will do the opposite, inform the user that the BMP180 Barometric Pressure Sensor is not initialized and make it halt all procedure adding a while loop. After if-else statement is created, add the library function gets the base pressure.
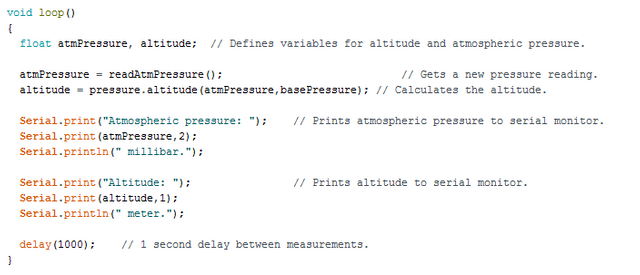
5. In the void loop() function, define two float variables for altitude and atmospheric pressure. Define two library functions that will get new pressure reading and calculate the altitude respectively. Add the print commands for atmospheric pressure to serial monitor and altitude to serial monitor using the variables we created for altitude and atmospheric pressure. Then add a 1 second delay between measurements for convenience.
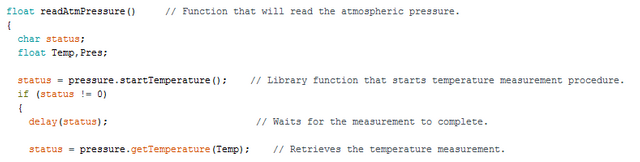
6. Next we’ll have to create a float type function that will read the atmospheric pressure, named “readAtmPressure” for this example. Create three variables, one character variable for readings status, one float variable for temperature readings and one float variable for pressure readings. Then assign the variable “status” to the library function that starts temperature measurement procedure. Create an if statement that will trigger when temperature measurement procedure has started. Add a delay of status in the if condition in order to wait for the measurement to complete. Then assign the variable “status” to the library function that retrieves the temperature measurement.
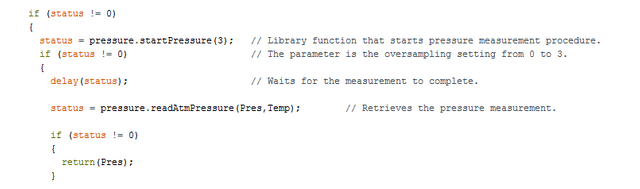
7. Create another if condition that will trigger when temperature measurement is retrieved. Assign the status variable to library function that starts pressure measurement procedure when the condition is met. Assign a parameter ranging from 0 to 3 to the library function that will start pressure measurement procedure which is the oversampling setting. Then add a delay for the measurement to be complete. Assign the status variable to the library function that retrieves the pressure measurement. Add a final if statement that will trigger once the pressure measurement is retrieved. Make the condition return “Pres” pressure variable.
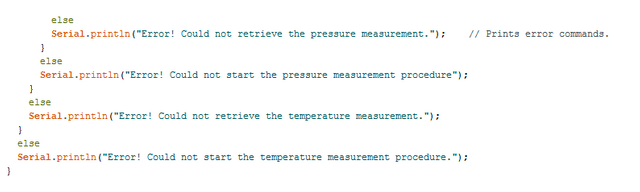
8. Add error outputs for each if statement to make sure the user is informed about the error source. Use the following print commands for this.
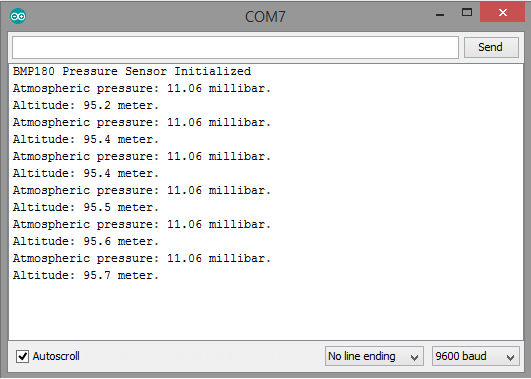
9. Click “Verify” and then “Upload” in order to compile and execute your codes. You should see a readings screen like this. Make sure your COM port and board setting is set right. Please double check the ground connections and all your wirings before running the code.
Conclusion
In this tutorial I’ve shown how to install “BMP180” Arduino library, written by GitHub user “Joserta” to Arduino IDE, showing how to use the library functions with an example, while giving information about barometers and atmospheric pressure.
I hope that you enjoyed this tutorial and the information that I’ve given. Thank you for reading.
If you want more information about the library and the source use the link below.
Github: https://github.com/Joserta/arduino_BMP180
Code
#include <bmp180.h>
#include <Wire.h>

bmp180 pressure;    // Creates an library object.

float basePressure; // Defines a "Base pressure" variable for altitude calculations.

void setup()
{
  Serial.begin(9600);   // Starts serial connection at 9600 baud rate.

  if (pressure.begin())         // Initializes BMP180 sensor.
    Serial.println("BMP180 Pressure Sensor Initialized");
  else
  {
    Serial.println("BMP180 Pressure Sensor Cannot Be Initialized. Check Connections.");
    while(1);
  }

  basePressure = readAtmPressure();    // Gets the base pressure.

}

void loop()
{
  float atmPressure, altitude;  // Defines variables for altitude and atmospheric pressure.

  atmPressure = readAtmPressure();                            // Gets a new pressure reading.
  altitude = pressure.altitude(atmPressure,basePressure); // Calculates the altitude.

  Serial.print("Atmospheric pressure: ");    // Prints atmospheric pressure to serial monitor.
  Serial.print(atmPressure,2);
  Serial.println(" millibar.");

  Serial.print("Altitude: ");                // Prints altitude to serial monitor.
  Serial.print(altitude,1);
  Serial.println(" meter.");

  delay(1000);    // 1 second delay between measurements.
}


float readAtmPressure()     // Function that will read the atmospheric pressure.
{
  char status;
  float Temp,Pres;

  status = pressure.startTemperature();    // Library function that starts temperature measurement procedure.
  if (status != 0)
  {
    delay(status);                          // Waits for the measurement to complete.

    status = pressure.getTemperature(Temp);    // Retrieves the temperature measurement.

    if (status != 0)
    {
      status = pressure.startPressure(3);   // Library function that starts pressure measurement procedure.
      if (status != 0)                      // The parameter is the oversampling setting from 0 to 3.
      {
        delay(status);                      // Waits for the measurement to complete.

        status = pressure.readAtmPressure(Pres,Temp);        // Retrieves the pressure measurement.

        if (status != 0)
        {
          return(Pres);
        }

        else
        Serial.println("Error! Could not retrieve the pressure measurement.");    // Prints error commands.
      }
      else
      Serial.println("Error! Could not start the pressure measurement procedure");
    }
    else
    Serial.println("Error! Could not retrieve the temperature measurement.");
  }
  else
  Serial.println("Error! Could not start the temperature measurement procedure.");
}
Previous Tutorials
- TCS230 RGB Color Sensor Arduino Library Setup and Functions Usage Shown With an Example Project - Tutorial
- ResponsiveAnalogRead Analog Input Smoothing Arduino Library Setup and Functions Usage Shown With an Example Project - Tutorial
- MPU6050 3 Axis Gyroscope & Accelerometer Module Setup, Arduino Library Use Shown With an Example Project
- Adafruit PCA9685 PWM Servo Driver Setup, Arduino Library Use Shown With an Example Project
Posted on Utopian.io - Rewarding Open Source Contributors
Thank you for the contribution. It has been approved.
You can contact us on Discord.
[utopian-moderator]
Hey @forkonti, I just gave you a tip for your hard work on moderation. Upvote this comment to support the utopian moderators and increase your future rewards!
Hey @drencolha I am @utopian-io. I have just upvoted you!
Achievements
Suggestions
Get Noticed!
Community-Driven Witness!
I am the first and only Steem Community-Driven Witness. Participate on Discord. Lets GROW TOGETHER!
Up-vote this comment to grow my power and help Open Source contributions like this one. Want to chat? Join me on Discord https://discord.gg/Pc8HG9x
Congratulations @drencolha! You received a personal award!
Click here to view your Board
Congratulations @drencolha! You received a personal award!
You can view your badges on your Steem Board and compare to others on the Steem Ranking
Vote for @Steemitboard as a witness to get one more award and increased upvotes!