HOW TO DO SHADING ON PICTURE "PAUS IN THE SEA BASIS WITH A LITTLE BOAT"
Goodnight guys..
Now I will discuss how to sharpen with pencil. Shading in the drawing process with pencil is not only to cover a part but also to build a shape. In order to form a drawing looks to have the depth and volume it needs to set dark light. In this case the shading can affect the light dark setting.
There are several things in how to shade with pencils to consider such as shading, shading in a section, how to hold the pencil and the level of pencil concentration used. Later will be explained further.
Pressure when shading
The first thing to consider in shading with graphite pencils is pressure. How strongly you press the pencil when shading a part can affect the shade density. The simple explanation is the greater the pressure the more concentrated the results of shading and vice versa. As an additional tip should be when you want to make a dark shading / do not press the pencil too hard because it can damage the paper. To make a thick shading better reproduce it repeatedly in place with a little pressed pencil, but not too hard.Repeat Archives
The second thing that is also important in the way to sharpen with pencil is the repetition of the shading in a section. At the top it is mentioned to make a concentrated shading one of them is by repeatedly shading on the part that is being drawn. How to accumulate such shading can also help smooth the work done by making gradations between the dark and the lighter.How to Hold a Pencil
Another important point in how to shade using a pencil is how to hold a pencil. About how to hold the pencil is also discussed on the basis of drawing with pencil on the way of holding a pencil. Generally how to hold a pencil when shading there are two that if you use the 1 way to shading then usually the result is thinner arsirannya. Another advantage of holding this pencil is faster to close the part you want to shade. The disadvantage is that it is rather difficult to build the shape. This method 1 is suitable for making basic shading or for smoothing a part that has clear shape but less smooth gradation. The way 2 of the shading results can be thicker and thicker than the 1st way. In addition, this 2nd way is easier to direct the direction of shading and building shapes. Holding a pencil in this way is also quite helpful when working on the details.Pencil Density Level
Another consideration in how to sharpen with pencil is the level of concentration selected. The pencil concentration is usually encoded with the letters H and B such as 2H, 3H, 4H or 2B, 3B, 4B. the number indicates the level of pencil concentration used. For H if the number is higher then the pencil will be more transparent or faded. As for B when the number is higher then the more concentrated. In addition to making basic shading I usually use a H or HB pencil. As for drawing shapes I use 2B and 3B pencils. for the darkest part I use 5B and 6B pencils.Shuffle order*
In shading with pencil sequence order is also important. You can start shading with the thin one and then stacked up to the darkest. Can also vice versa that is with the darker part first new last thin arisiran. The other sequence in shading is to make the overall shape of the image with a rough hoop and then smoothed with a repeated thin shade. I especially like this way because it's usually faster to work on an image.
4 Types of Scratch Techniques that Can Make Your Picture More Cool
Hatching technique is one of the most important techniques in painting by using pencils, a solid shade greatly determines the quality of painting images and will certainly add to the aesthetic value of the painting image. Types of hatching in painting using pencils are very diverse:
Arsir Hatching Technique
The first hatching technique is hatching, this hatching technique is the most basic technique used in making hatching and the easiest to do. We only need to create parallel lines in parallel. The more dense the spacing we make, the better the result.
Crosshatching Arsir Technique
This shading technique is almost similar to hatching hatching technique. The difference is that there are crossed lines in this shadow. So this shading often we make by way in the pile. This shadow is often used in making shadows in making face paintings by using a pencil.
Circusilm Arsir Technique
This technique of scribbling is different from the above shading technique, because of how to make this shading by making stacked little circles, the hatching technique is rarely used, but this technique is often used in painting faces using colored pencils. Maybe in this next article we will discuss about how to paint by using color pencil.
The technique of Arsir Pointilism
It is actually a type of painting, but the technique of pointilism shading is often used in painting faces using pencils, but this technique is less effective in shading a leather and is very difficult to collaborate with other hatching techniques.
Well for those of you who want to learn to make hatching, below is a tutorial to learn to draw by using hatching technique. Here are the steps you should do when learning to draw using the hatching technique.
• Practicing hatching techniques can be done by creating a single row of boxes.
• The number of boxes is up to you. Then shade each box using a different pencil.
• When shading, everything is done with the same pressure.
• You can compare the differences in the brightest dark intensity produced by each pencil.
• Then the gradation shading can be generated in another way, ie you can make some boxes.
• Then use a few pencils such as B, 4B and 9B pencils.
• Compare again the bright dark intensity resulting from the pencils.
• The next exercise you can make the composition of the basic shape, then on each base shapes provide shading with different intensity levels. How, make a box with various sizes and shapes that have been distorted. Then compose the boxes.
TOOLS REQUIRED TO DRAW AUTHORITY
To draw an object with a shading technique, then we have to prepare some writing purposes such as:
DRAWING PAPER
To pour a painting then we need the image media in the form of drawing paper. But if we want to make a shadow drawing we can use a sketchbook that you can get in bookstores. sheet of paper separately because there already packed in the form of a sketch book. Also that is not less important for your shadow drawing good results, you should choose a sketchbook surface smooth.PENCIL
Because here we want to make a hatching image then the main tool is a pencil. Yes, you can choose 2B, HB, 7B, F or H pencils. All those pencil ranges can be used and are able to give good results in every mess. Because we do not use color pencils at all.ERASER
This eraser is necessary if we find a mistake or there is a dark degradation of light that is less precise.
LEARNING DRAWING WITH ARSIR TECHNIQUES
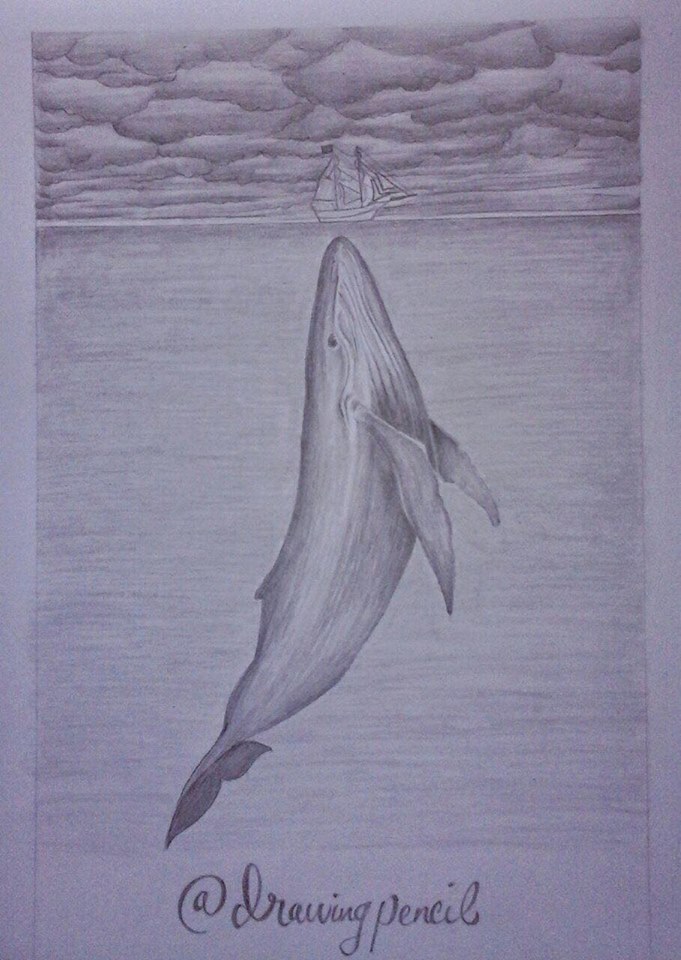
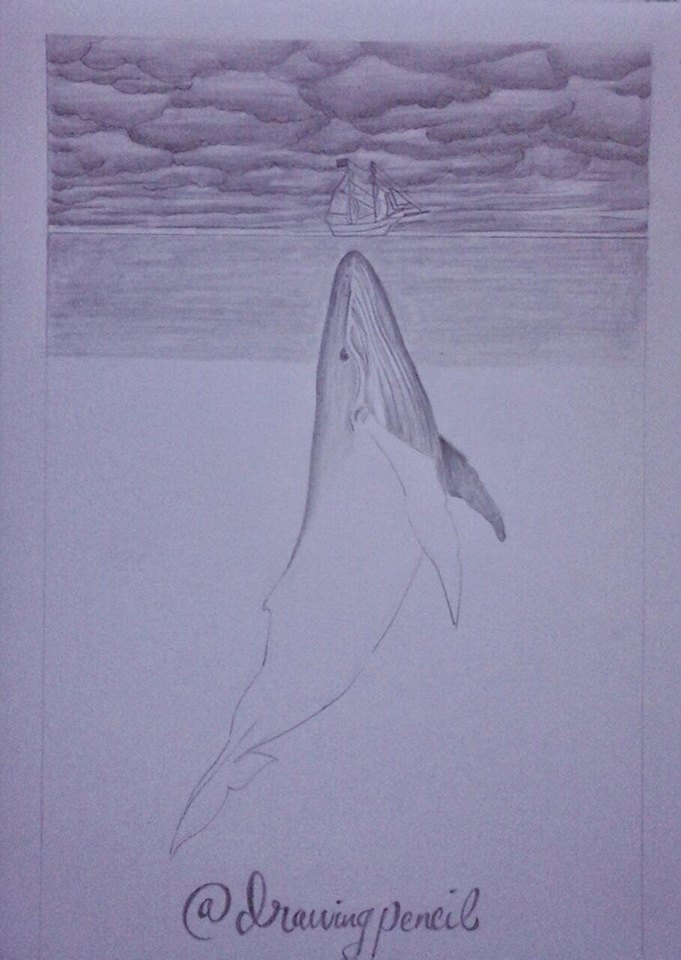
Well for you who want to learn to draw, below there are examples of learning to draw objects that are around us. For example here draw a whale that is on the seabed by boat on the surface of the sea and in decorate also with a thick cloud. So we can draw using a variety of hatches so as to show the material character of the object we draw.
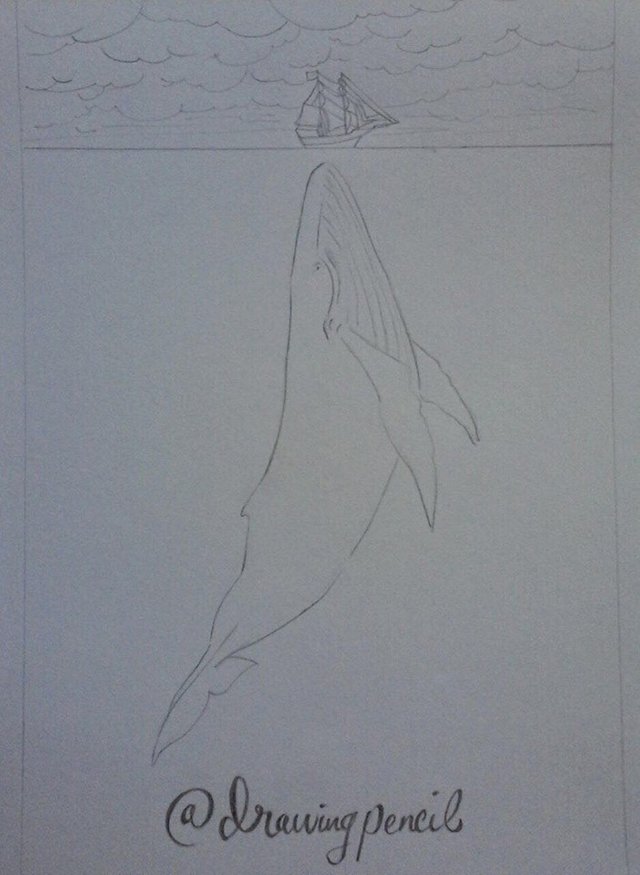
- First, because here I will share tips how to shade painting and not drawing, then I have drawing painting pattern first.
- To marshal the cloud image must be more detailed and also gradation shading must be really paid attention. Because if we can not do that, we will not get the appropriate shade results with the cloud form.
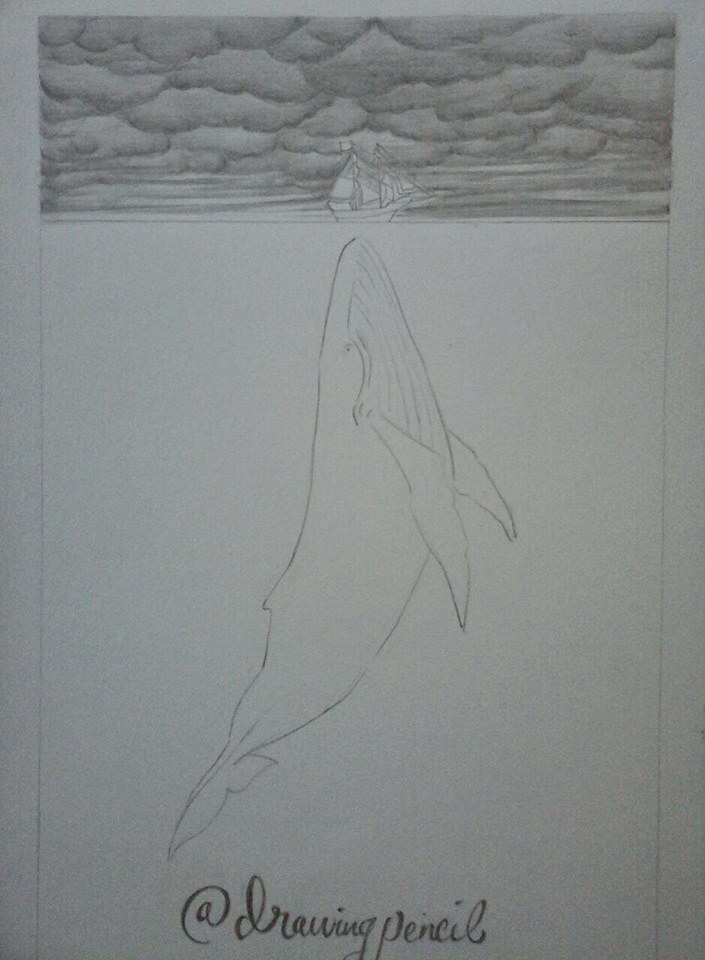
- Further shading the bottom of the sea, gradations of pencil color should be noted to describe the condition of actual sea water.
- While the techniques used above is a hatching technique where the way the hatching is done in the same direction and not crossed.
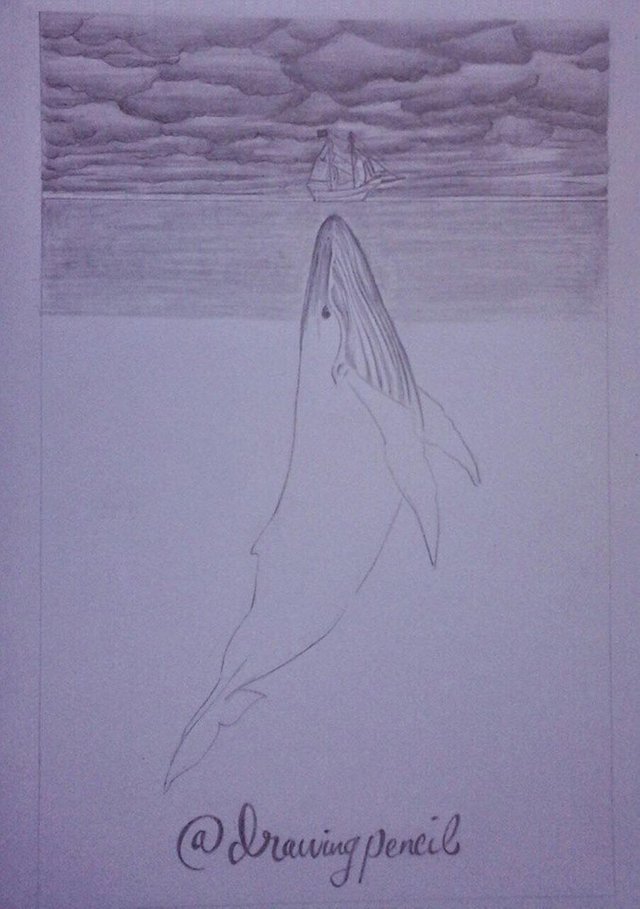
- The next step gives a thicker gradation effect on the whale body.
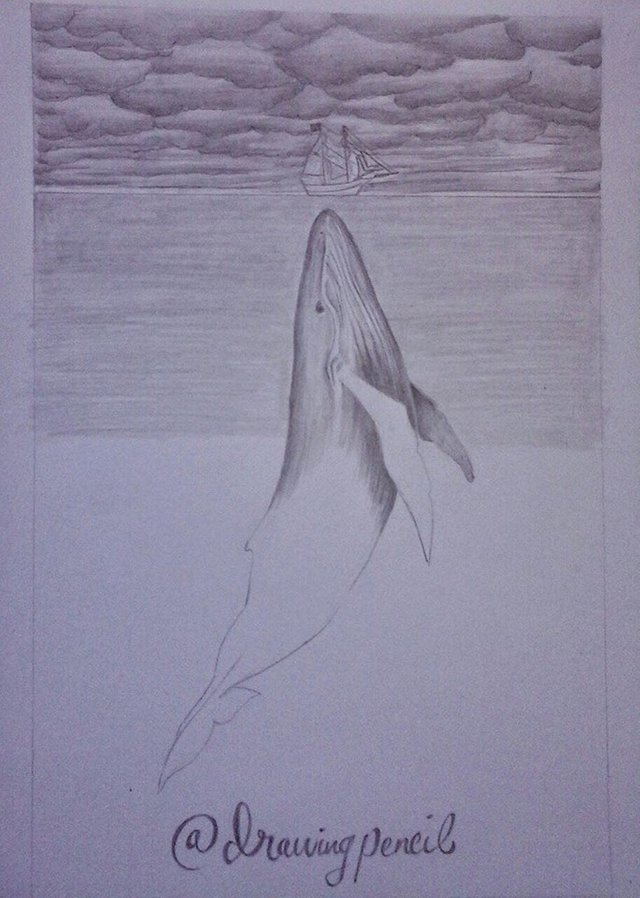
- An important part in shading is creating depth effects. Depths can form when we are shading in the right area. In the fins and grooves of a whale, the thickness of the grooves should be the deepest in the curve.
- Thread a one-way picture according to which you are most comfortable. Furthermore, to differentiate with depth in other areas, timpalah with a 15-degree incline. This inclination of skew must also be constantly shaded in another part that has not been shaded yet. Then the best step is to shoot all the parts first, then you then override with a thicker hatching again.
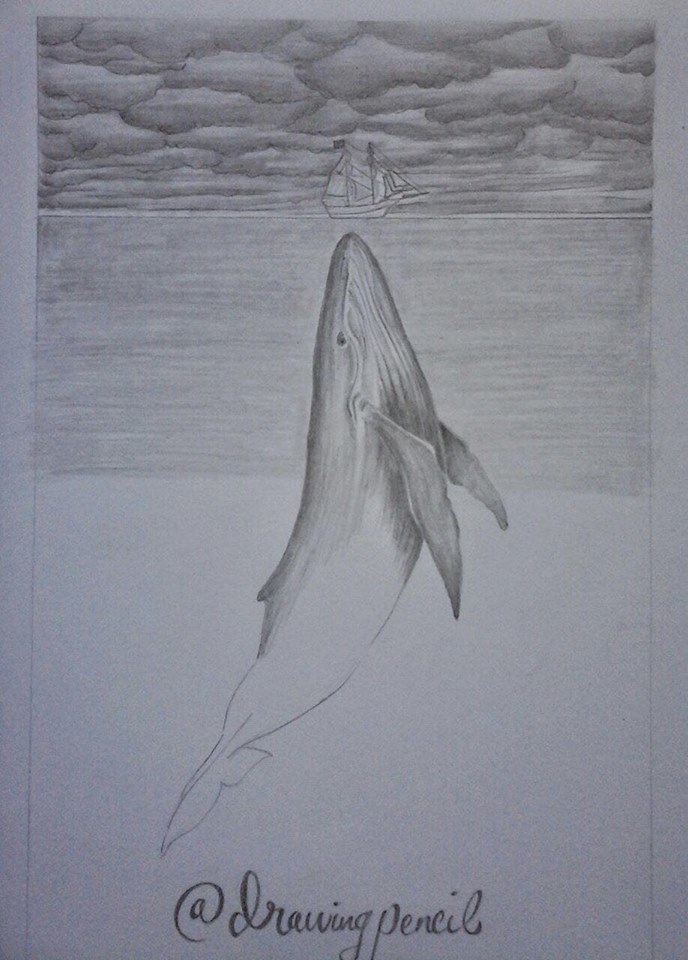
- The next section, give a thick hatching effect on the whale's tail. And the shading of this image looks beautiful.
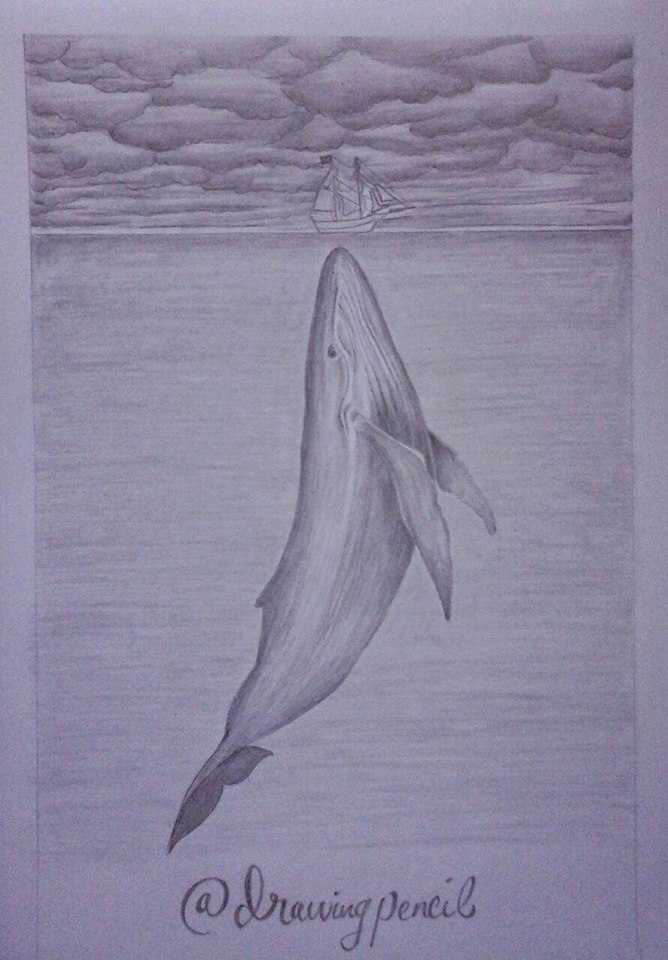
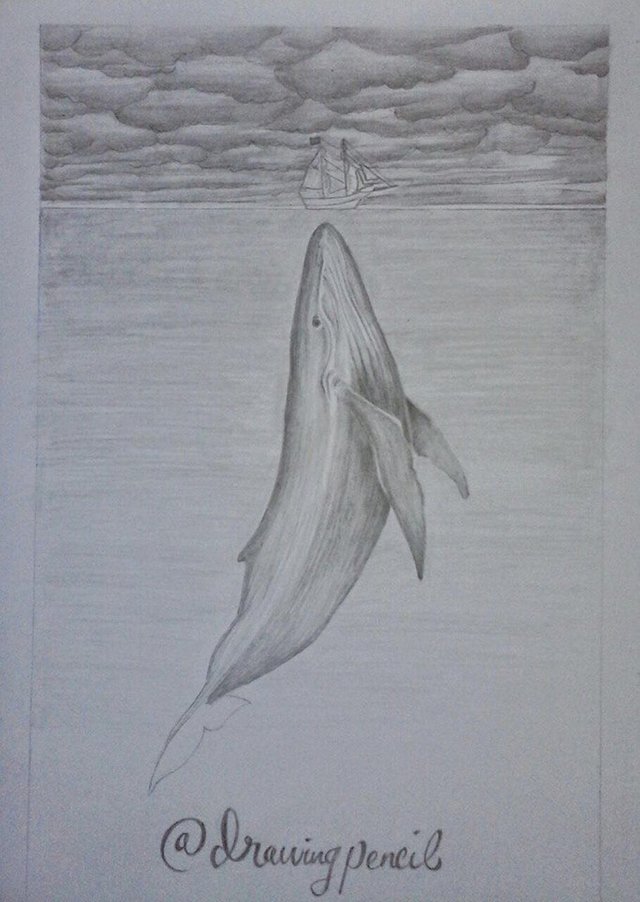
To be able to draw a good, then the process from the beginning we must live. We can create the first picture frame like the example image above until the image can be perfect with the shading technique.
Nearly everything you do is of no importance, but it is important that you do it.
- Mahatma Gandhi