Streaming with OBS Studio, Open Broadcaster Software Tutorial # 1 Basic configuration and how to use it on Youtube, Twitch and Mixer.
We want to transmit live video, fast and with quality image, but with a computer not very powerful and with free programs, it seems impossible, right? If possible with OBS Studio and here I explain how.
Open Broadcaster Software, known as OBS Studio, is a video transmission and recording program that allows Streaming consuming few resources and providing a quality video and quickly. It's free, open source and completely cross-platform: Mac, Windows and Linux. When combined with a solid audio and video editing software, it is a very powerful video screencasting tool for our transmissions.
OBS Studio is a tool to transmit your desktop for example if you are playing and you want to transmit your game live, sound, webcam, taking your video to YouTube and other platforms, I have not yet tried it with Dlive but I promise to do it, and so you can and chat with your channel followers and make transmissions without having a super powerful machine.
Learn more about Open Broadcaster Software at https://obsproject.com
Once you set it up and configure it correctly, it's amazing, but it can be a bit difficult to get to that point. I discovered that certain combinations of configurations were more likely to cause stability problems, while others were solid.
In addition we all want our video to look good, that's fundamental: the configuration must create a good balance between the quality of the video and the size of the file.
Let's start:
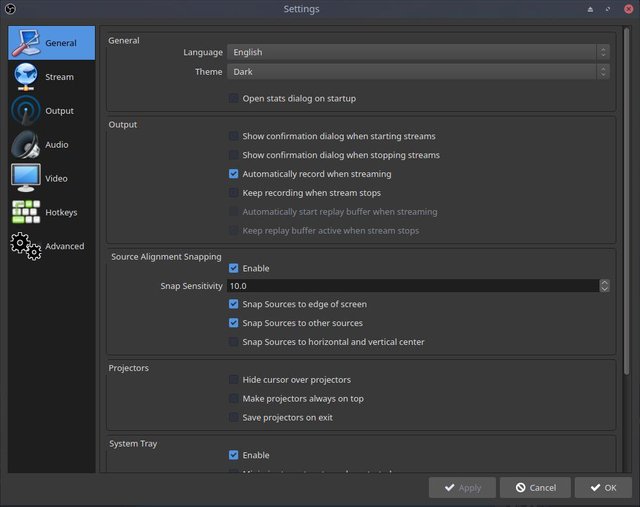
First select "Record automatically when transmitting".
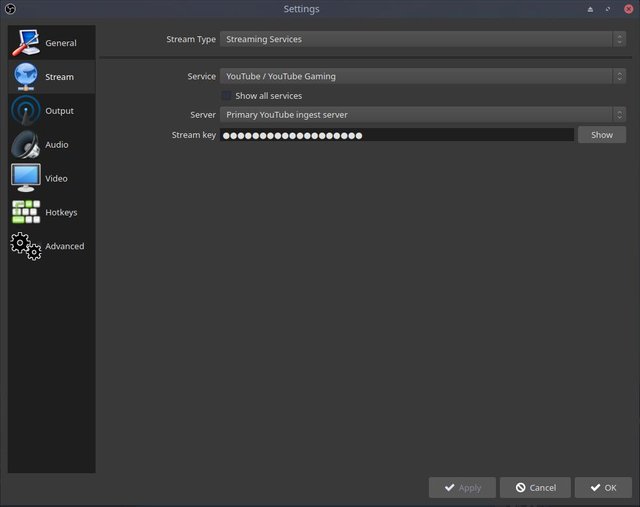
You must obtain your personal transmission key from your channel on YouTube as seen in the image. For Twitch and Mixer there are similar solutions since the program is compatible with all these platforms.
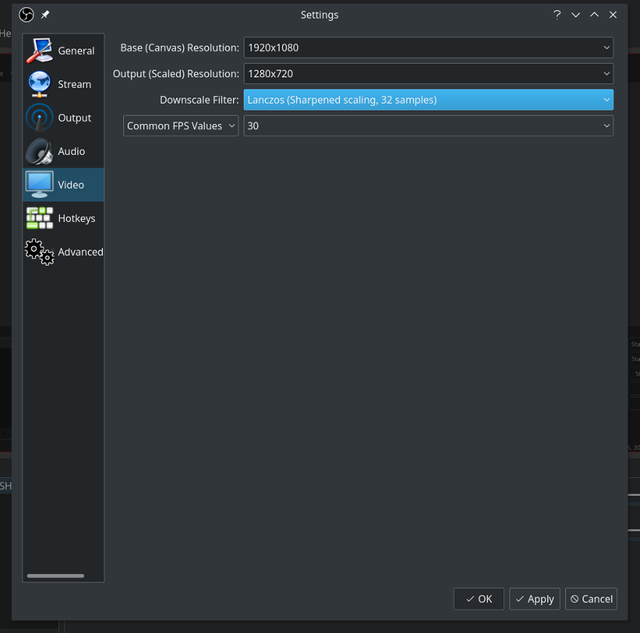
Select in the Video part of the configuration. This is where you will configure the: Capture size, Output size, Scale reduction and Frame rate (FPS) so we get a small and manageable video size.
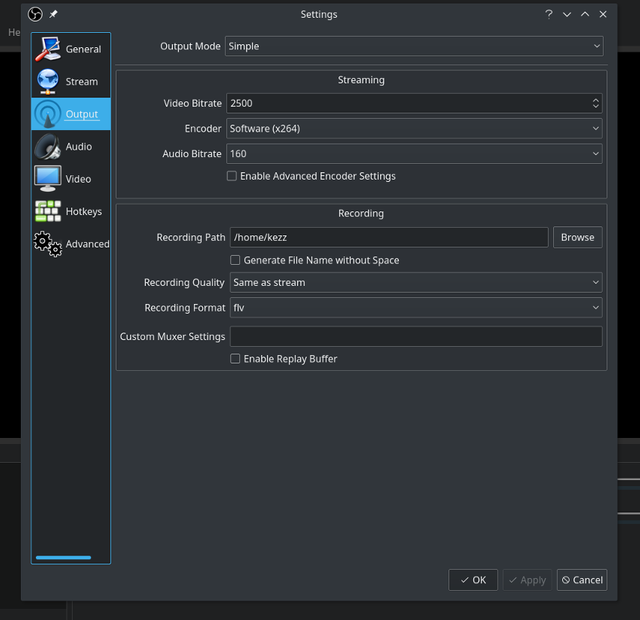
In the output configuration option, it is determined with what type of video file is terminated. By default, the output configuration will be in simple mode and will look like the image:
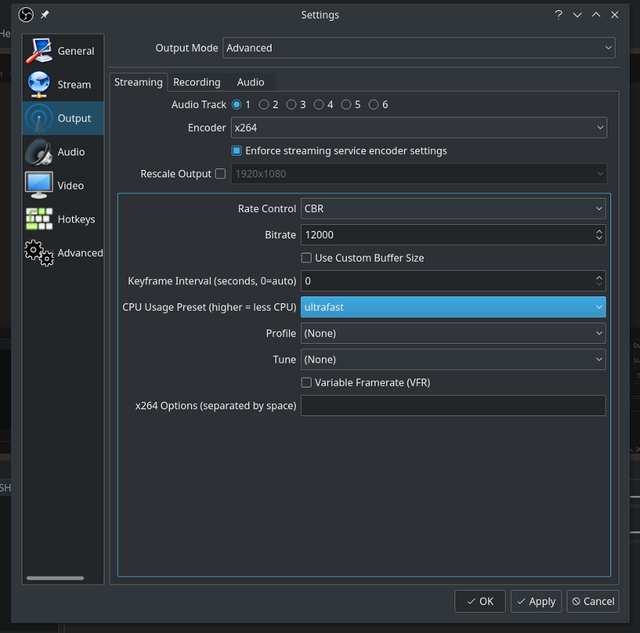
Now switch to the Streaming tab and make three changes: change Bitrate to 12000, this will make the CPU usage very fast and make sure that the x264 encoder is selected.
Everything else can be left by default and not touch anything else if you do not know what you are doing. In my experience, this configuration provides a good quality recording along with stability when transmitting, I hope you will use this little tutorial to improve your experience in the world of live broadcasts.
To learn more or if you have any questions on the official website of the project, they have a community forum where you can find all the information you need.
Thank you for your contribution.
Tutorials that target basic on-screen instructions for software solutions are not normally part of the contributions we are looking for as Utopian.
Feel free to check out our guidelines here
Need help? Write a ticket on https://support.utopian.io/.
Chat with us on Discord.
[utopian-moderator]
Resteemed your article. This article was resteemed because you are part of the New Steemians project. You can learn more about it here: https://steemit.com/introduceyourself/@gaman/new-steemians-project-launch