Tutorials For PhotoShop CS6 - Making A Logo For Print And Web
Hello Steemians!
It's diamondvisuals on tutorials this time and today we will be learning how to make a nice logo for Print and Web. You can use this transparent logo on any website and also print it out with proper pixels.
Here are twenty (20) steps you can achieve this.
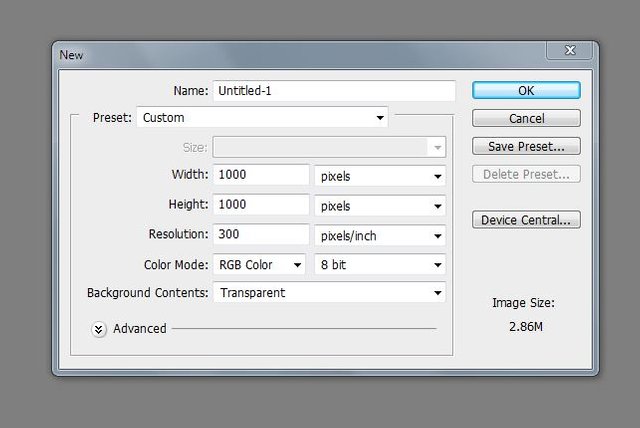
Step 1. Open a document with these dimensions and make sure to set resolution to 300:
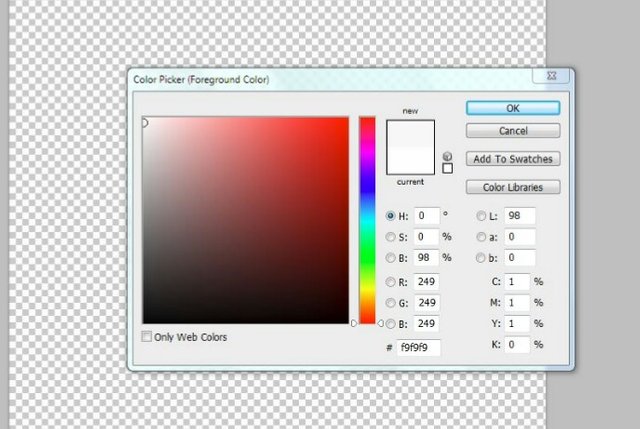
Step 2. Set a nice background for drafting... use #F9F9F9. I would use a soft white like this instead of a pure white:
Step 3. This is exactly how your canvas should look:

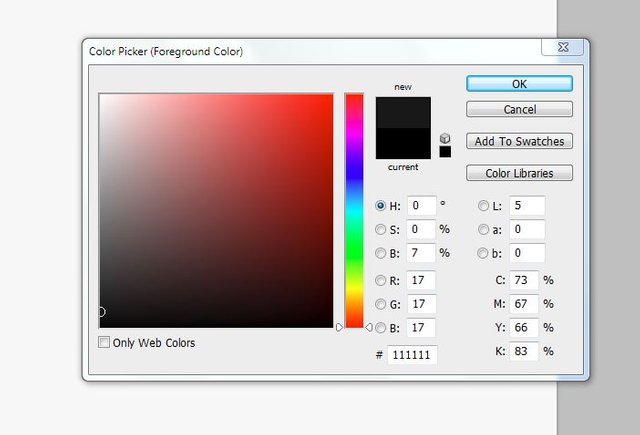
Step 4. Now you should choose a nice font colour. Try #111111... That's when you're dealing with black.
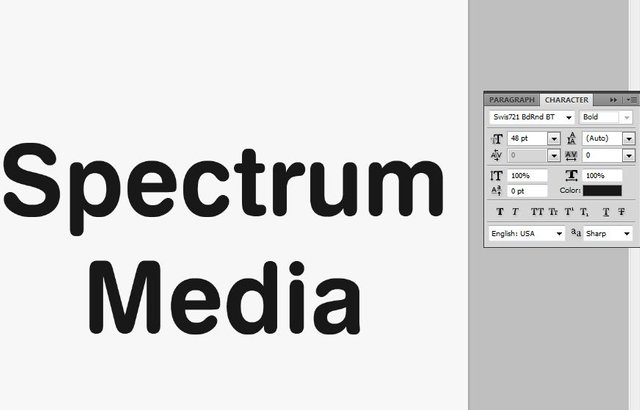
Step 5. Choose any font you would like to work with. Swis721 BD Rnd BT Bold can be used generally:
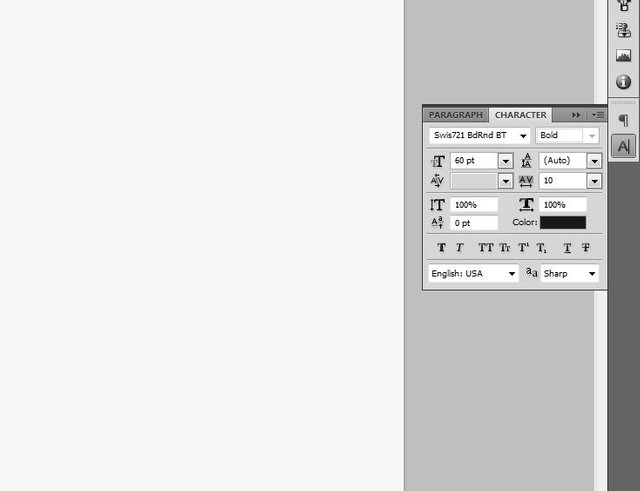
Step 6. Set font size to 48px and type your logo name on the canvas:
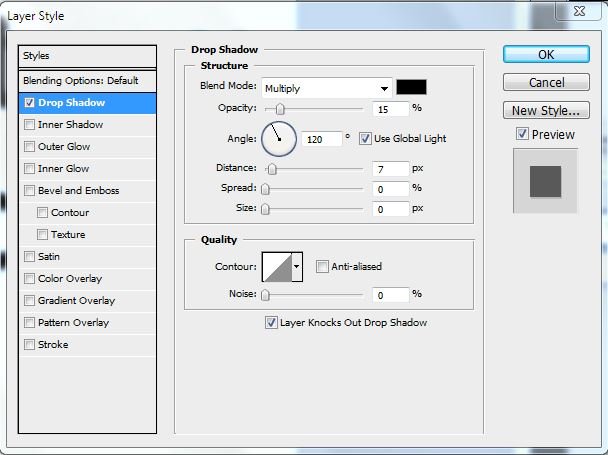
Step 7. Choose blending options by right clicking this layer... with these settings, select Drop Shadow applying a very light drop shadow:
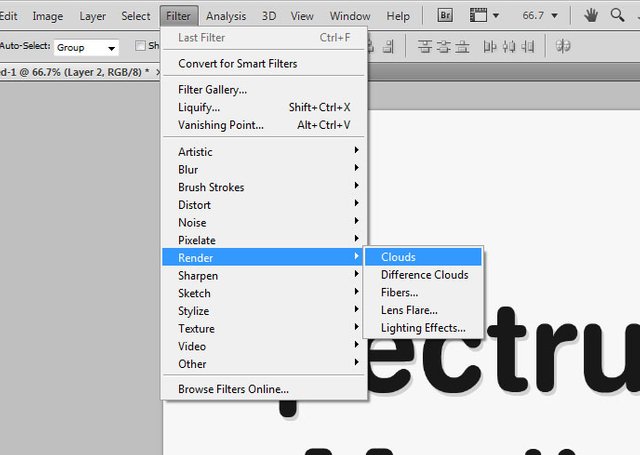
Step 8. Create a new Logo, make sure it's above the logo. Choose Filter>Render>Clouds:
Step 9. To clip the top layer to the bottom layer.
With your mouse pointer between the two layers, hold down ALT key until the mouse point changes to the Clipping Group Icon.
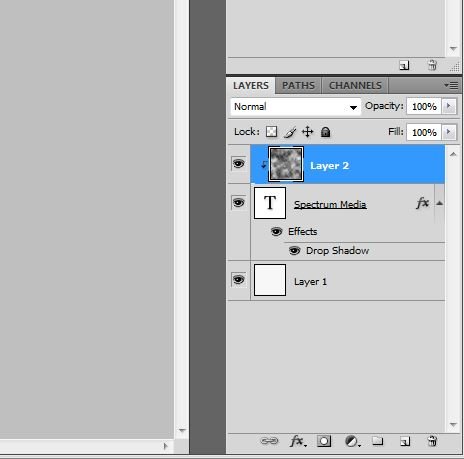
Step 10. You should have same effect as this:

Step 11. Give you logo a nice Mosaic pixels.
Follow exact steps below
Go to Filter>Pixelate>Mosaic
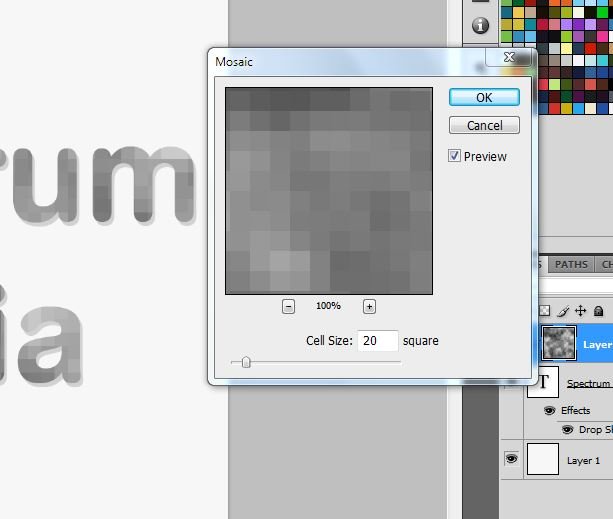
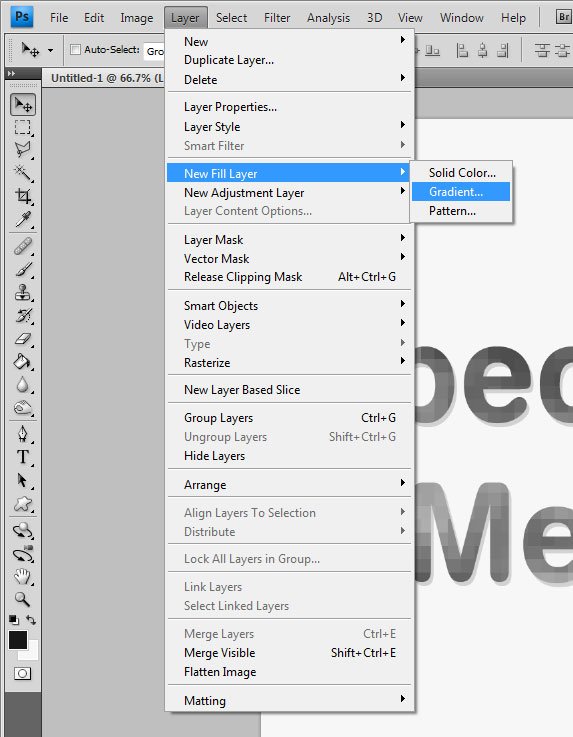
Step 12. Now to add some colour
Go to Layer>New Fill Layer>Gradient as shown below:
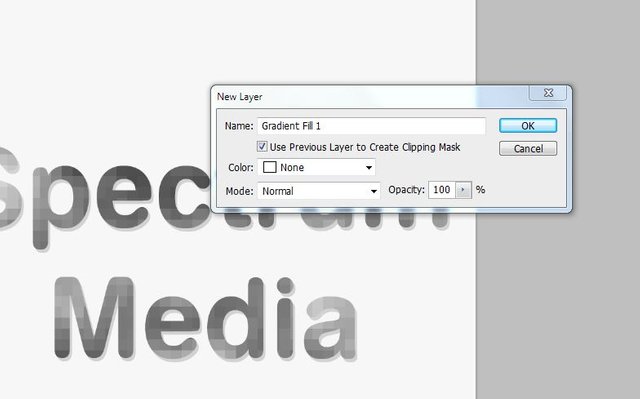
Step 13. Be sure to confirm the box that says "Use previous Layer to Create Mask".
Cilck OK:
Step 14. Change the Gradient Fill;
Click on the small preset Arrow.
Choose Colour Harmonies #1
Select the first rainbow colored Fill:
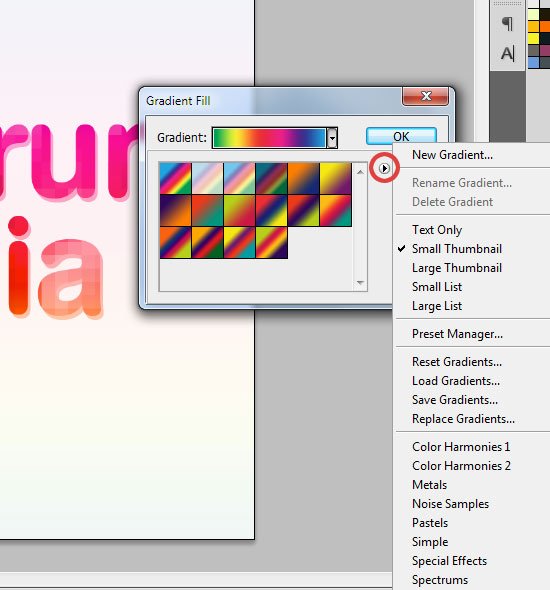
Step 15. Once done with step 14 above, double click the Gradient Fill layer to change the gradient to reverse:
Like this
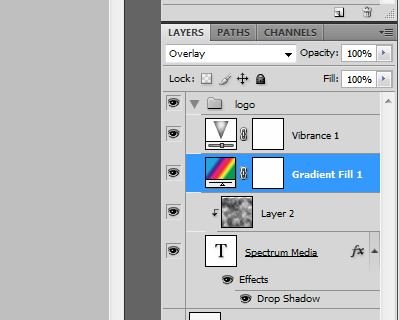
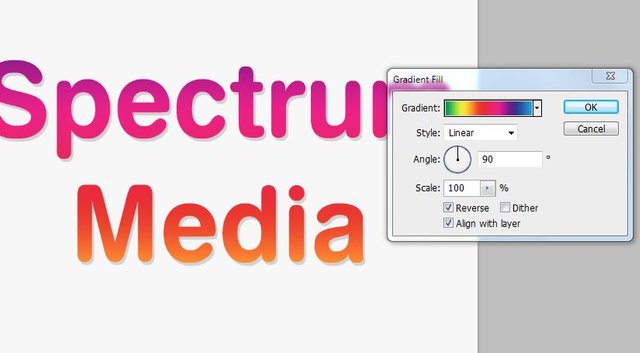
Step 16. Your result so far

Step 17. Thighten the font a bit more.
Go to Font layer, follow the settings below for the Leading and Tracking:
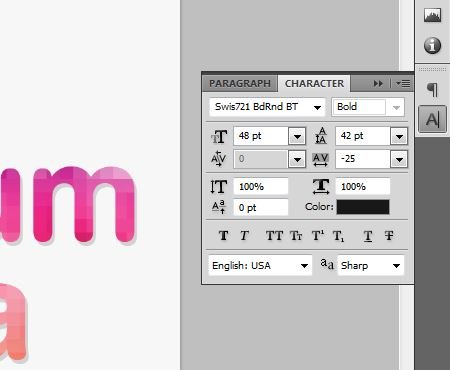
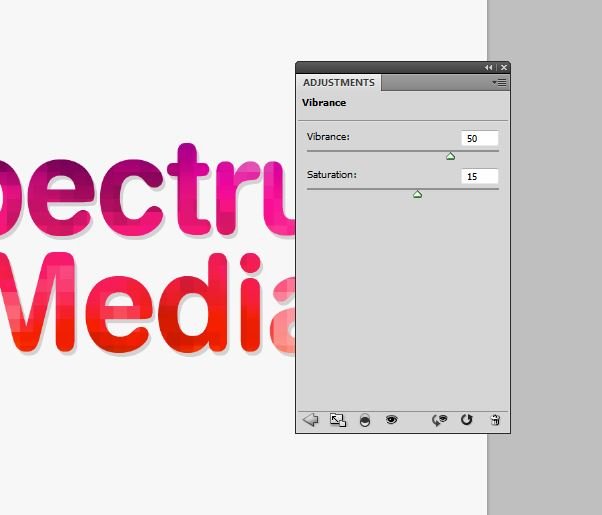
Step 18. Give the logo some vibrance.
Go to Layers>New adjustment Layer>Vibrance:
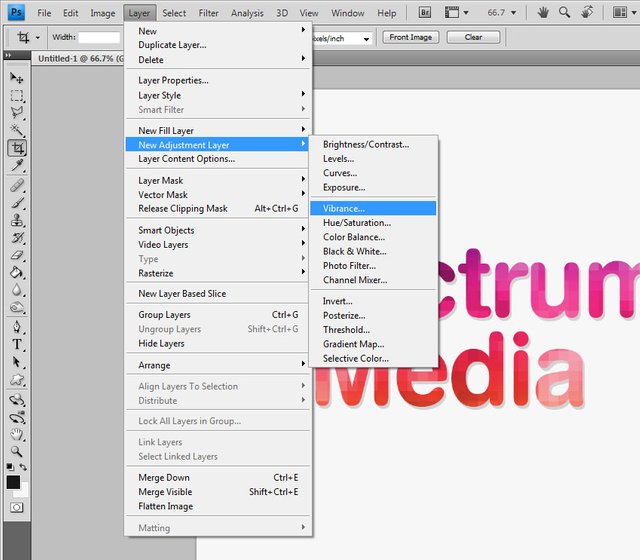
Step 19. And finally you need to adjust sliders to match these settings below:
Step 20. Now your work here is done!
Make your logo transparent by turning off the background layer.
Then File>Save for web and Devices.
Finally, choose PNG24 and save.
This should be your final result:

ENJOY!!!


Posted on Utopian.io - Rewarding Open Source Contributors
Enjoy the vote and reward!
Thanks a lot
Thanks for the post its quite educative
Thank you... Glad you liked it
Steemit is a platform where we gain knowledge and also give out our piece the way we can.
The step by step breakdwn is wowwww so so educative
Thnz, this are the kind of post I need
Your contribution cannot be approved because it does not refer to or relate to an open-source repository. See here for a definition of "open-source."
You can contact us on Discord.
[utopian-moderator]