How To Mix Your Vocals - Mix Vocals Like The Pros Are Doing With The Major Hits
Hello! In this post I'm going to cover up the whole process on "How To Mix Your Vocals" properly using the technique that professional audio engineers use to get that perfectly mixed vocals.
Using this technique will change the view on your mixing strategy not only for vocals, but for other sounds as well.
Mixing is actually a very complex process, and by definition; every sound that you mix in your track has to have that perfect balance of volume, frequency spectrum and placement in the mix.
However, the lead sound of your vocal tracks are exactly that - vocals.
NOTE: This technique also works on vocals from people that don't have talent for singing, so you can transform yourself into a very good singer in your track with those steps.

1. Noise Reduction
When you record your vocals, it doesn't matter if it's in a professional studio or just at your home studio, there will be noise in the recording that can mess up the quality later on.
Noise reduction is a simple technique that you can use without buying any 3rd party VST plugin, because there is a FREE software called Audacity that can do the noise reduction very well.
LINK TO A TUTORIAL:
https://www.youtube.com/watch?v=tAJ4Sg-nO6A
Download Audacity for FREE:
http://www.audacityteam.org/download/
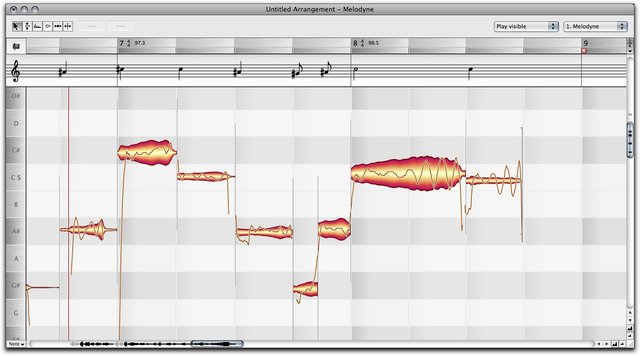
2. Pitch Correction
Pitch correction method is the most important step for vocal processing, because if you miss this step, you will have a bad quality merging with the instrumental, since the vocals won't be tuned properly to the instrumental.
Pitch correction method is useful for 3 purposes:
- It corrects the vocal notes according to the scale of the track.
- It can perfect the notes to add variation for the vocal melody.
- It makes your track sound perfect, no matter how good you have sang.
If you sing or you have a singer who made you the vocal track for your track, he/she probably didn't sang all of the notes accordingly to the key of the track. Maybe he/she missed a few notes, or made them slightly on a different note that you want.
Luckily, with pitch correction tools you can change the notes, the key of the individual sound that's produced (every single word or a separate sound is 1 key) and scale those notes however you like and not ruin the quality of the recording.
That's why your track can sound perfect, since you have the full control of the vocals, not just on the notes, but on the duration, transitioning and harmonies.
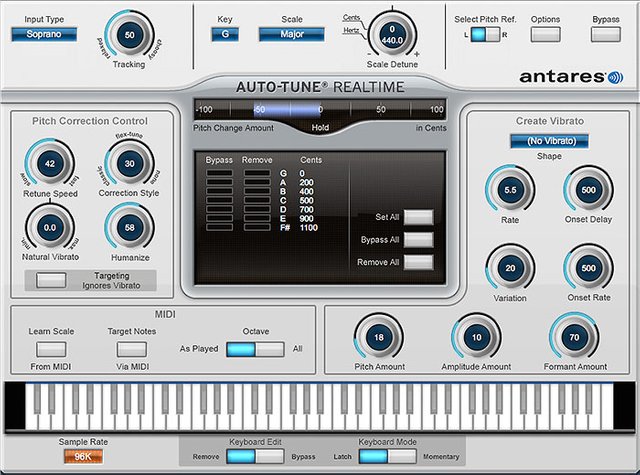
The best tools for pitch correction are Melodyne and Antares Autotune.
You can buy Melodyne - https://shop.celemony.com/cgi-bin/WebObjects/CelemonyShop
Get Antares Autotune - http://www.antarestech.com/download/latest-software.php
3. EQ + Compression
EQ is the most common and the most basic thing in music production. You need to EQ almost everything to balance out the sound so that you can get a clean mix.
EQ for vocals is pretty much the simplest EQ-ing there is, since you don't need a lot of stuff to do because the technique you need to use are very much on what kind of energy for your vocals do you need in your track.
Here is a little guideline of what different frequencies represent in the vocal sound:
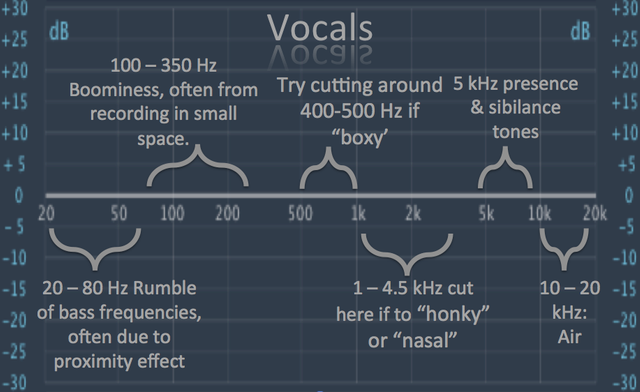
The chart is showing on exactly as I've mentioned, it's basically used by the needs for your track. Depending on the style of the track, you would need to adjust the EQ properly.
You can use any EQ out there, since the most basic ones from different companies do the same job quality-vise.
Compression comes after the EQ, with a small attack and a higher release, with not more than 2.5:1 ratio, and the Threshold set up so on the DB level, the vocal is at the same volume it was before the EQ. (Don't over-compress the vocals, because over-compressing the vocals will prevent the vocals to stand out in the mix)
Any compressor is fine, analog ones are the best.
4. Saturation
What saturation actually does is it brings the DB level down, but retaining the same "volume" as before.
Our ears get tricked with that since our ears cannot recognize the 2dB difference, so our brain thinks that it's the same volume.
Saturation is great on any sound, since you will have a lot of headroom in your mix, but over-saturating your sound will lead to distortion.
You can use any saturation plugin you find most useful, since they are practically doing the same job bringing the same quality of the need.
5. De-Essing
De-Essing is a powerful tool that can turn-around your quality of your vocals.
It's a tool that filters out S-s, T-s, C-s and other "high-frequency" letters that are popping out, and the reason that's bad is because when you're doing the mastering, those frequencies clash with other frequencies in the same range, and then the mastering engineer has the problem since those sounds are popping up in a high volume and the mix sounds muddy.
To avoid that, you should use De-Essing as a "must-have" tool in your mixing chain for your vocals, but remember not to over-filter those frequencies, since those frequencies are essential for the vocals to stand out.
You can use any De-Essing tool that you like, the quality for the purpose is the same.
6. Reverb And Delay
Reverb and Delay are the tools to get the vocals much more energy, but people do often mistake the usage of those 2 tools.
The reason why the vocals give that much power in the mix in professionally mixed and mastered tracks is just because of the settings they are using for the Reverb and Delay.
The vocal must be the "stand-out" sound in the mix, but Reverb and Delay push the sound back in the mix. The mistake is that people often put tons of Reverb And Delay, and that's just ruining the overall mix.
The right way to do it is to set up the early reflection to 0, and to put the predelay to 75-100 milliseconds to achieve those clean in your face vocals, but with enough reverb to give the energy and fill the track, since the early reflection will assure that the Reverb starts right away, but the predelay will tell the Reverb to start on the effect the X number of milliseconds after the sound has been played.
The next crucial thing is to low-cut the Reverb to not more than 5-6k hz because you don't want those popping high frequencies on your Reverb.
The same needs to be used on the Delay.
You can use any plugins, recommended to use the DAW stock plugins, since they use less CPU than 3rd party ones.
7. Honorable Mentiones
These other plugins may or may not be used, and those plugins can be used with automating the effects to make the track more interesting.
Stereo Wideness - Brings a Stereo effect on vocals, best for choruses.
Distortion - Light distortion can also bring the dB down, but use it before the Reverb and Delay.
Buss Compression - Useful and most efficient to reduce high dynamics of the vocals and to pop-out the vocals from the other sounds, bringing more drive to the vocals and energy as well.
EQ - Boosting high frequencies of the vocals if your vocal doesn't stand out that well in the mix, boost over 10k hz.
Multiband Compression - If some parts of the vocals are still muddy or popping out too much, use the MB Compressor to compress different frequency ranges separately or just boost them.
Doubler/Flanger - Best for creating doubling effects that you often hear on the peaks (choruses) of tracks. Gives a track that euphoric/climax feel and makes the track even more exciting and professional.
I really hope that you loved this little tutorial, suggest me in the comments on what I should write next!
Take Care,
- Chris
Congratulations @chrisfayer! You have completed some achievement on Steemit and have been rewarded with new badge(s) :
Click on any badge to view your own Board of Honor on SteemitBoard.
For more information about SteemitBoard, click here
If you no longer want to receive notifications, reply to this comment with the word
STOPCongratulations @chrisfayer! You have completed some achievement on Steemit and have been rewarded with new badge(s) :
Click on any badge to view your own Board of Honor on SteemitBoard.
For more information about SteemitBoard, click here
If you no longer want to receive notifications, reply to this comment with the word
STOP