ESP8266 tutorials -- graph show real time temperature and humidity
What Will I Learn?
Get temperature and humidity from the sensor
Upload temperature and humidity to HTTP server
Show the graph of the real time temperature and humidity


Requirements
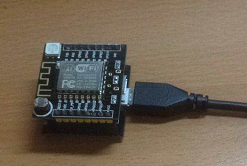
ESP8266 -12F
Arduino IDE (版本要大于1.6.7)

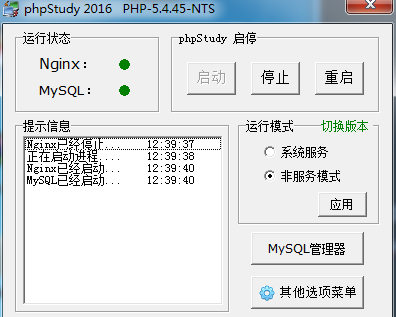
phpstudy
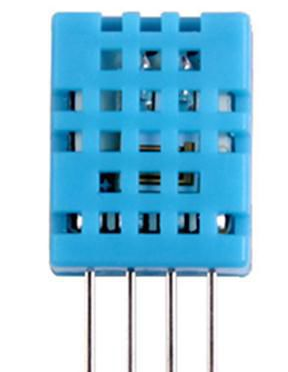
DHT11 sensor
Web UI
Difficulty
Advanced
Tutorial Contents
Connect DHT11 sensor to ESP8266
There are three pins on the DHT11 sensor:
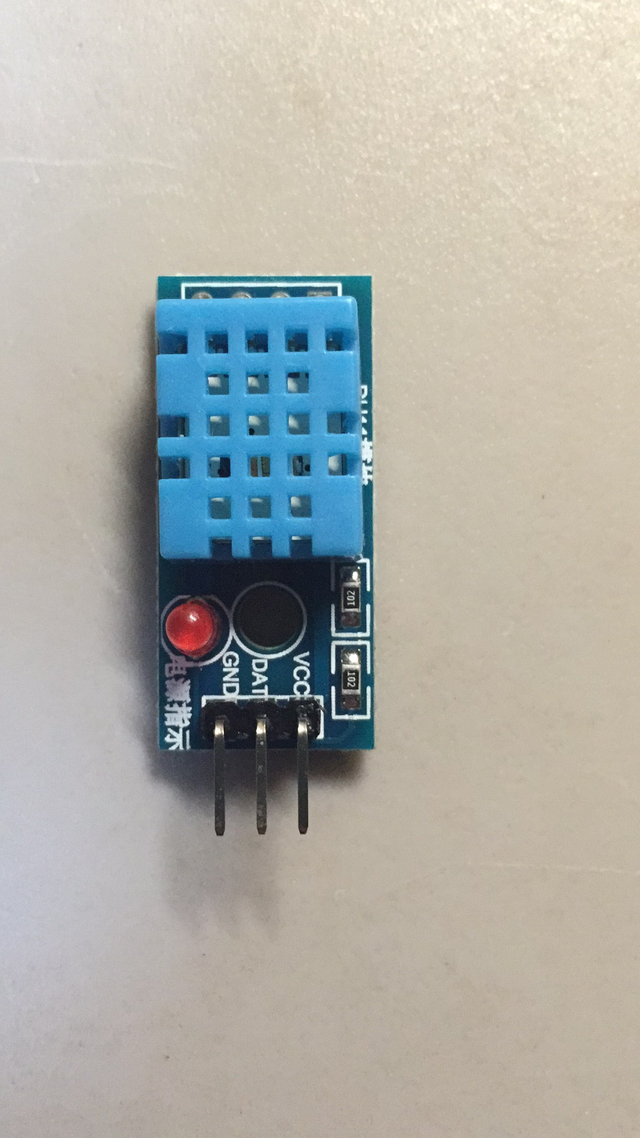
- VCC : The pin is to connect to the power anode
- DAT : The pin is to get the data from the sensor ,which should be connected to the digital pin of the ESP8266-12F
- **GND ** :The pin is to connect to the power cathode
- Red LED :When the sensor is operating ,the LED will be on
Connection with ESP8266-12F
| DHT11 | ESP8266 |
|---|---|
| VCC | GND |
| GND | VCC |
| DAT | GPIO4 |

- The white wire --------> VCC
- The orange wire --------> DAT
- The blue wire --------> GND
Programming to get temperature and humidity from the sensor
Add into the DHT11 library
#include <dht11.h>
dht11 DHT11;
Define the variable
#define PIN_DHT11 4
float temp,humi;
Init in the setup()
void setup() {
  Serial.begin(9600);
  temp=0;
  humi=0;
}
Get the data in the loop()
void loop() {
  DHT11.read(PIN_DHT11);
  humi = (float)DHT11.humidity;
  temp = (float)DHT11.temperature;
  Serial.println(humi, 2);
  Serial.println(temp, 2);
}
Check the temperature and humidity by open the monitor
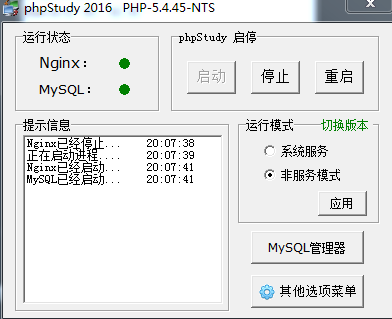
Set up the HTTP server with phpstudy
1.Open the phpstudy.exe to run the server
2.Set up a HTTP server to get data from ESP8266
<?php
    $temp = $_GET['temp'];
    $humi = $_GET['humi'];
    $b = array(
            'temp'=>$temp,
            'humi'=>$humi
    );
    $data = json_encode($b);
    echo($data);
?>
- GET : By useing GET method to get the parameters of HTTP request
- json_encode : Convert the data to a json format
- echo : Output the data
create the Web UI
1.Programming to create web UI
<div style="height:410px;min-height:100px;margin:0 auto;" id="main"></div>
- main: Create a container to show the graph in HTML
2.Update the temperature and humidity to show a real time graph
<script type="text/javascript">
var json_temp = 0;
var json_humi = 0;
function update(){
var xht = new XMLHttpRequest();
xht.open('GET','temp_humi.php',true);
xht.onreadystatechange = function () {
if(xht.status == 200 && xht.readyState ==4){
var str = xht.responseText;
var json1 = JSON.parse(str);
// alert(json_temp);
json_temp = json1['temp'];
json_humi = json1['humi'];

}
};
xht.send();
}
Highcharts.setOptions({
global: {
useUTC: false
}
});
function activeLastPointToolip(chart) {
var points = chart.series[0].points;
chart.tooltip.refresh(points[points.length -1]);
}
var temp_1 = 10.21;
// alert(json_temp);
$('#main').highcharts({
chart: {
type: 'spline',
animation: Highcharts.svg, // don't animate in old IE
marginRight: 10,
events: {
load: function () {

// set up the updating of the chart each second
var series_temp = this.series[0],
series_humi = this.series[1],
chart = this;
setInterval(function () {
var x = (new Date()).getTime(), // current time
y_temp = json_temp,
y_humi = json_humi;
// alert(y_temp);
series_temp.addPoint([x, y_temp], true, true);
series_humi.addPoint([x, y_humi], true, true);
activeLastPointToolip(chart);
// update();
}, 1000);
}
}
},
title: {
text: 'temperature & humidity data  ---by cha0s0000 '
},
credits: {
enabled: false //不显示LOGO
},
xAxis: {
type: 'datetime',
tickPixelInterval: 150
},
yAxis: {
title: {
text: '值'
},
plotLines: [{
value: 0,
width: 1,
color: '#808080'
}]
},
tooltip: {
formatter: function () {
return '<b>' + this.series.name + '</b><br/>' +
Highcharts.dateFormat('%Y-%m-%d %H:%M:%S', this.x) + '<br/>' +
Highcharts.numberFormat(this.y, 2);
}
},
legend: {
enabled: false
},
exporting: {
enabled: false
},
series: [
{
name: '温度',
data: (function () {
// generate an array of random data
var data = [],
time = (new Date()).getTime(),
i;
for (i = -19; i <= 0; i += 1) {
data.push({
x: time + i * 1000,
y: Math.random()
});
}
return data;
}())
},
{
name: '湿度',
data: (function () {
// generate an array of random data
var data = [],
time = (new Date()).getTime(),
i;
for (i = -19; i <= 0; i += 1) {
data.push({
x: time + i * 1000,
y: Math.random()
});
}
return data;
}())
}]
}, function(c) {
activeLastPointToolip(c)
});
</script>
- XMLHttpRequest : Use XMLHttpRequest object to constantly load the data which is uploaded from ESP8266
- xht.status == 200 && xht.readyState ==4 : When request successfully , get the data from HTTP server
- series_temp.addPoint([x, y_temp], true, true) : Set the temperature to the graph
- series_temp.addPoint([x, y_humi], true, true) : Set the humidity to the graph
- dateFormat : Configure the time format
- title : Set the graph title
- yAxis : Set data to the Y axis
- xAxis : Set the real time to the X axis
- activeLastPointToolip : When update the new data , keep the old data still
- data.push() : Update data in real time
Programming in ESP8266 to upload temp and humi to the HTTP server
1.Connect to WIFI and configure the ESP8266
#include <Arduino.h>
#include <ESP8266WiFi.h>
#include <ESP8266WiFiMulti.h>
#include <ESP8266HTTPClient.h>
const char* ssid = "steemit";
const char* password = "cha0s0000";
HTTPClient http;
void setup() {
    WiFi.begin(ssid, password);
    while (WiFi.status() != WL_CONNECTED) {
    delay(500);
    Serial.print(".");
  }
}
- ssid : Set the WIFI name
- password : Set the WIFI password
- HTTPClient : Init the HTTP client
- WiFi.begin : Connect to the WIFI
2.Send HTTP request to HTTP server
void loop() {
  DHT11.read(PIN_DHT11);
  Serial.print("Humidity (%): ");
  humi = (float)DHT11.humidity;
  Serial.println(humi, 2);
  Serial.print("Temperature (oC): ");
  String url = "/weatherobserve/test/showInfoIndex.php?temp=";
  url += temp;
  url += "&humi=";
  url += humi;
  temp = (float)DHT11.temperature;
  http.begin("192.168.0.102", 80, url); //HTTP
}
DHT11.read(PIN_DHT11); :Get data from the Pin which connecting to the DHT11 sensor
url : Set up the url according to the HTTP server parameters
begin : Start to request to the IP + URL
3.The whole code of ESP8266
#include <Arduino.h>
#include <ESP8266WiFi.h>
#include <ESP8266WiFiMulti.h>
#include <ESP8266HTTPClient.h>
const char* ssid = "steemit";
const char* password = "cha0s0000";
HTTPClient http;
void setup() {
    WiFi.begin(ssid, password);
    while (WiFi.status() != WL_CONNECTED) {
    delay(500);
    Serial.print(".");
  }
}
void loop() {
  DHT11.read(PIN_DHT11);
  Serial.print("Humidity (%): ");
  humi = (float)DHT11.humidity;
  Serial.println(humi, 2);
  Serial.print("Temperature (oC): ");
  String url = "/weatherobserve/test/showInfoIndex.php?temp=";
  url += temp;
  url += "&humi=";
  url += humi;
  temp = (float)DHT11.temperature;
  http.begin("192.168.0.102", 80, url); //HTTP
}
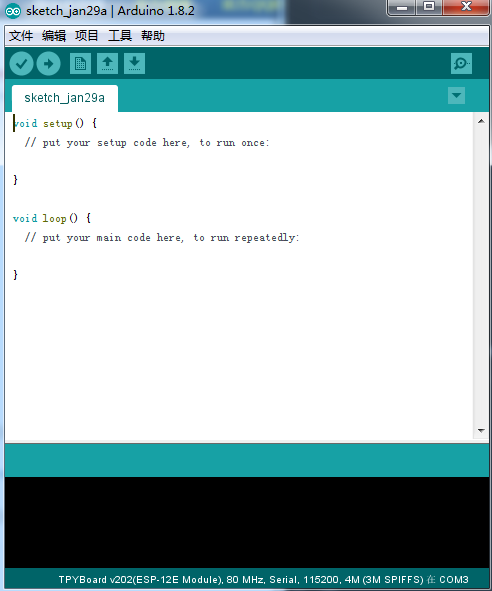
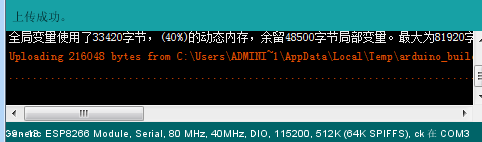
Upload code to ESP8266 and test the effect
1.Open Arduino IDE
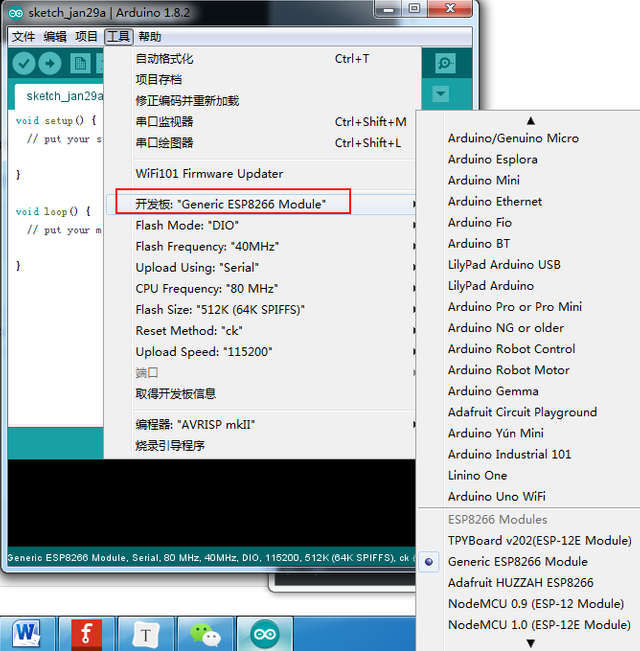
2.Select the right type of board
3.Click the upload button
notice:Before uploading ,press RST button on the ESP8266

4.Testing:
Access the web UI

Run the ESP8266 module
The real time data
Posted on Utopian.io - Rewarding Open Source Contributors
@cha0s0000, Contribution to open source project, I like you and upvote.
Cool project!
these ESP controllers are really cool, I think I need to get one myself. Arduino and Wifi in one chip is just really handy.
Thank you for the contribution. It has been approved.
You can contact us on Discord.
[utopian-moderator]
Hey @cha0s0000 I am @utopian-io. I have just upvoted you!
Achievements
Suggestions
Get Noticed!
Community-Driven Witness!
I am the first and only Steem Community-Driven Witness. Participate on Discord. Lets GROW TOGETHER!
Up-vote this comment to grow my power and help Open Source contributions like this one. Want to chat? Join me on Discord https://discord.gg/Pc8HG9x