How to Create a Secured User Login Authentication and Display User Details of a Logged in User Using PHP and MySQLi(Procedural)
What Will I Learn?
- You will learn how to create a secured login script using PHP and MySQLi
- You will learn how to use PHP session to deny unauthorized users from having access to a particular page.
- You will learn how to transfer values from one page to another using session
- You will learn how fetch users data/information from database of a logged in user
- You will also learn how to create a logout query/logic.
Requirements
For the purpose of this tutorial, the following are required:
- A computer system.
- PHP/MySQL web server utility stack which may be WAMP/MAMP/LAMP/XAMPP or any other .
- A Text Editor(Notepad ++, Sublime text2, Brackets, Codeblocks, PHP Storm, Atom or any other text editor).
- A Basic Knowledge on HTML, CSS, PHP and MySQL.
Difficulty
- Intermediate
Tutorial Contents
Most websites and web applications are built with a login page in which only registered users on the website will have access to it privileges and the platform in full. In this tutorial, we are going to explain the step by step procedures on how to build a secured login system and also how create a logout script. This is a continuation of our previous tutorial where learnt to create a user registration script.
STEP 1: Create an HTML Login Form
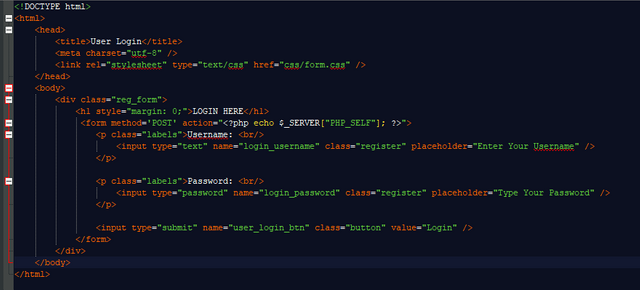
<!DOCTYPE html>
<html>
    <head>
        <title>User Login</title>
        <meta charset="utf-8" />
        <link rel="stylesheet" type="text/css" href="css/form.css" />
    </head>
    <body>
        <div class="reg_form">
            <h1 style="margin: 0;">LOGIN HERE</h1>
            <form method='POST' action="<?php echo $_SERVER["PHP_SELF"]; ?>">
                <p class="labels">Username: <br/>
                    <input type="text" name="login_username" class="register" placeholder="Enter Your Username" />
                </p>

                <p class="labels">Password: <br/>
                    <input type="password" name="login_password" class="register" placeholder="Type Your Password" />
                </p>

                <input type="submit" name="user_login_btn" class="button" value="Login" />
            </form>
        </div>
    </body>
</html>
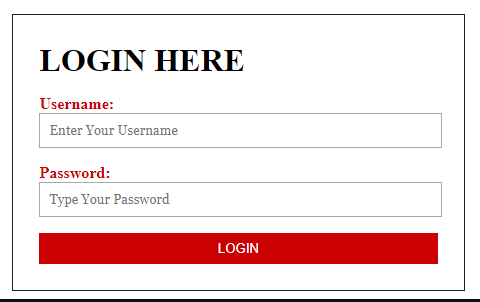
Login page Preview
Code Explanation
<link rel="stylesheet" type="text/css" href="css/form.css" />This is the link to an external stylesheet.action="<?php echo $_SERVER["PHP_SELF"]; ?>"This means that login is to be processed in the same page.namethis attribute in all the input tags is used by the PHP script to access tha form.
Note: Its is assumed that user has a basic knowledge on HTML hence the other tags used here are meant to be familiar.
STEP 2: Create a CSS(Cascading Style Sheet) file to give the form some nice look.
Here we will use CSS to style the form
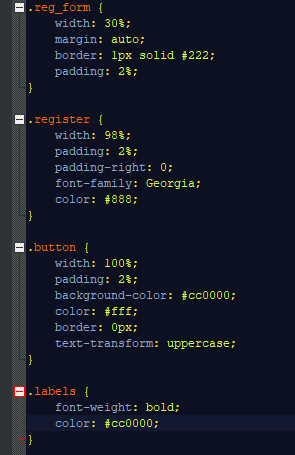
.reg_form {
width: 30%;
margin: auto;
border: 1px solid #222;
padding: 2%;
}

.register {
width: 98%;
padding: 2%;
padding-right: 0;
font-family: Georgia;
color: #888;
}

.button {
width: 100%;
padding: 2%;
background-color: #cc0000;
color: #fff;
border: 0px;
text-transform: uppercase;
}

.labels {
font-weight: bold;
color: #cc0000;
}
The codes above is the CSS used in styling for the HTML login form.
STEP 3: Create a user session
This will check if the user is logged in and if not it will deny access. This should be saved as a separate file as user_session.php
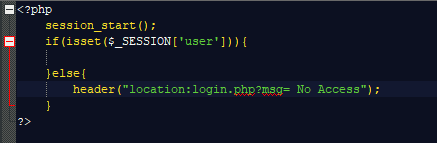
<?php
session_start();
if(isset($_SESSION['user'])){

}else{
header("location:login.php?msg= No Access");
}
?>
Code Explanation
session_start();This is a PHP built-in function that initializes the session.if(isset($_SESSION['user'])){}else{header("location: login.php?msg= No Access");}This checks if the user is logged in, if the user is not logged in it will redirect to the login authentication page.
STEP 4: Create a function for form input security/sanitizing
This will protect input fields from special characters and white spaces.

<?php
//////////// FUNCTION TO REMOVE SLASHES AND TO REMOVE SPACES //////////
function inject_checker ($connection, $field){
return (htmlentities(trim(mysqli_real_escape_string($connection, $field))));
}
?>
Code Explanation
function inject_checker ($connection, $field){return (htmlentities(trim(mysqli_real_escape_string($connection, $field))));}This protect the form fields from the use of special characters and empty spaces.
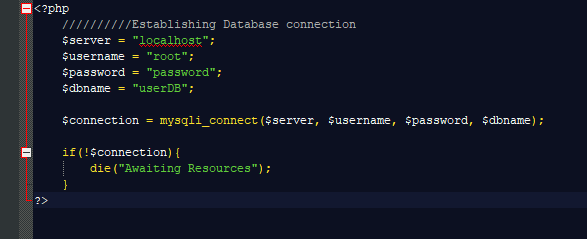
STEP 5: Create a database connection in a separate file
Here you will create a connection to the database that has the records of the users. This is the database that was used in the previous tutorial. The file should be saved as connection.php
<?php
//////////Establishing Database connection
$server = "localhost";
$username = "root";
$password = "password";
$dbname = "userDB";

$connection = mysqli_connect($server, $username, $password, $dbname);

if(!$connection){
die("Awaiting Resources");
}
?>
The code above was used to create a connection to the database. Hence the database servername is localhost, database user is root, database password is password and the database name is userDB.
STEP 6: Write the Login Query/Logic
Here we will write the login logic using PHP and MySQLi
<?php
require_once("connection.php");
require_once("functions.php");
?>

<?php
if(isset($_POST['user_login_btn'])){
$login_username = inject_checker($connection, $_POST['login_username']);
$login_password = inject_checker($connection, $_POST['login_password']);

if(empty($login_username)){
$error_msg = "Username Field Can not be empty";
}
elseif(empty($login_password)){
$error_msg = "Password Field Can not be empty";
}else{
$query = " SELECT * FROM `users` WHERE `username` = '{$login_username}' AND `password` = '{$login_password}' ";
$run_query = mysqli_query($connection, $query);

if(mysqli_num_rows($run_query) == 1){
session_start();

while($result = mysqli_fetch_assoc($run_query)){
$user_id = $result['id'];
$_SESSION['user'] = $user_id;

header("Location:profile.php");
}
}else{
$error_msg = "Login Failed";
}
}
}
?>
Code Explanation
require_once("connection.php");Here the connection file i included so that it can be used in this current page.require_once("functions.php");This includes the user defined function that will sanitize the input fields.if(isset($_POST['user_login_btn']))This checks if the login button has been clicked. If it is clicked, the queries nested in its curly braces will be executed.if(empty($login_username)){$error_msg = "Username Field Can not be empty";}elseif(empty($login_password)){$error_msg = "Password Field Can not be empty";}This codes checks if the the form field is empty before the login button was clicked if it is empty, it will display the corresponding error message, but if not empty, it will proceed to the next query.session_start();This is where the session is initialized on the page.while($result = mysqli_fetch_assoc($run_query)){$user_id = $result['id'];$_SESSION['user'] = $user_id;header("Location:profile.php");}This series of codes, fetches the id of a user from the database and stores it to a session variable so that it can be transfer to another page. The query then redirects to another page if the login is successful. That is if the user exist. Else it will display a messageLogin Failed.
STEP 7: Write the query that will fetch the data of the logged in user from database if login is successful
This will be inside the profile.php page that contains the HTML codes for the user profile. Because the fetched data from the database will be displayed on that same page.
<?php
require_once("user_session.php");
require_once("connection.php");
require_once("functions.php");
?>

<?php
$query = " SELECT * FROM `users` WHERE id = '{$_SESSION['users']}' ";
$run_query = mysqli_query($connection, $query);

if(mysqli_num_rows($run_query) == 1){
while($result = mysqli_fetch_assoc($run_query)){
$user_name = $result['name'];
$user_username = $result['username'];
$user_phone = $result['phone'];
$user_address = $result['address'];
}
}
?>
Code Explanation
require_once("user_session.php");This is where we include the user session file that was created earlier. It will check if the session has been set. If it is not set, it will redirect back to the login page.$query = " SELECT * FROMusersWHERE id = '{$_SESSION['users']}' ";This selects all the data in the database where the databaseidis the same with the id that was fetched in the login page which was stored in the session variable transferred to the profile page via session.$run_query = mysqli_query($connection, $query);This executes the query above.if(mysqli_num_rows($run_query) == 1){while($result = mysqli_fetch_assoc($run_query)){$user_name = $result['name'];$user_username = $result['username'];$user_phone = $result['phone'];$user_address = $result['address'];}This codes check for the for the user with theidif it exist, it will then fetch all the details related to that user.
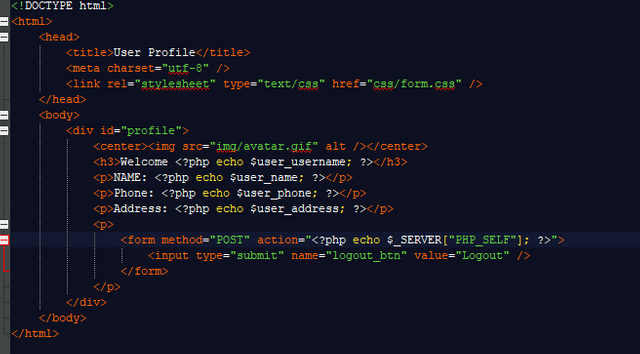
STEP 8: Using HTML and CSS design the interface of the profile page
This is also in the profile.php page that contains the codes in STEP 7. This will be used to display the user details fetched from the database using the code logic in STEP 7.
<!DOCTYPE html>
<html>
    <head>
        <title>User Profile</title>
        <meta charset="utf-8" />
        <link rel="stylesheet" type="text/css" href="css/form.css" />
    </head>
    <body>
        <div id="profile">
            <center><img src="img/avatar.gif" alt /></center>
            <h3>Welcome <?php echo $user_username; ?></h3>
            <p>NAME: <?php echo $user_name; ?></p>
            <p>Phone: <?php echo $user_phone; ?></p>
            <p>Address: <?php echo $user_address; ?></p>
            <p>
                <form method="POST" action="<?php echo $_SERVER["PHP_SELF"]; ?>">
                    <input type="submit" name="logout_btn" value="Logout" />
                </form>
            </p>
        </div>
    </body>
</html>
Code Explanation:
Here we designed the profile page of the logged in user which displays all the user details.
<?php echo $user_username; ?>This displays the username of the user that was fetched from the database.<?php echo $user_name; ?>This displays the registered name of the user.<?php echo $user_phone; ?>This displays the registered phone number of the user.<?php echo $user_address; ?>This displays the registered address of the user
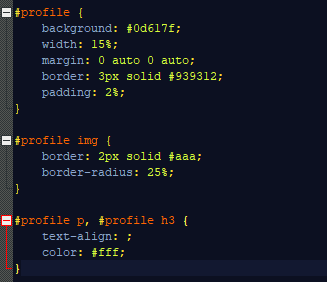
STEP 9: CSS for the profile page
#profile {
background: #0d617f;
width: 15%;
margin: 0 auto 0 auto;
border: 3px solid #939312;
padding: 2%;
}

#profile img {
border: 2px solid #aaa;
border-radius: 25%;
}

#profile p, #profile h3 {
text-align: ;
color: #fff;
}
This is the CSS file used in styling the profile page.
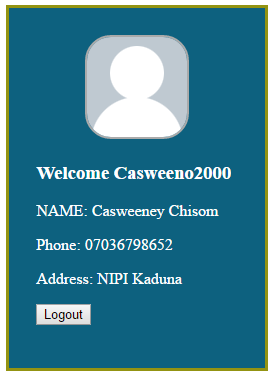
Profile page preview
STEP 10: Write the Logout Query
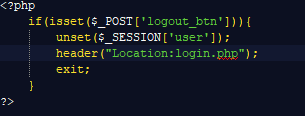
<?php
if(isset($_POST['logout_btn'])){
unset($_SESSION['user']);
header("Location:login.php");
exit;
}
?>
if(isset($_POST['logout_btn']))This means if the logout button is clicked, then it will execute all the query nested in its curly braces.unset($_SESSION['user']);header("Location:login.php");exit;This code destroy/unset the user session that was created and then redirects to the login page.
Note: You can also use the session_destroy(); function to destroy session.
Curriculum
Related Topics
Other Topics on Utopian
- How to Export Data from MySQL Database to a CSV file Using PHP and MySQLi
- How to Upload CSV file into MySQL Database Using PHP
Posted on Utopian.io - Rewarding Open Source Contributors
Thank you for the contribution. It has been approved.
You can contact us on Discord.
[utopian-moderator]
Thanks @yokunjon for approval.
Hey @yokunjon, I just gave you a tip for your hard work on moderation. Upvote this comment to support the utopian moderators and increase your future rewards!
good tutorial
Thanks. Hope you learnt from it?
plz translate your post to my language
What is your language sir?
english to myanmar
I don't understand your language. Don't know how to do that.
Hey @casweeney I am @utopian-io. I have just upvoted you!
Achievements
Suggestions
Get Noticed!
Community-Driven Witness!
I am the first and only Steem Community-Driven Witness. Participate on Discord. Lets GROW TOGETHER!
Up-vote this comment to grow my power and help Open Source contributions like this one. Want to chat? Join me on Discord https://discord.gg/Pc8HG9x
Thanks Mr casweeney. Your tutorial helped me very well. Good job.
thanks for sharing. just wondering where to put the codes at step 6?.. or filename for this file?