How to Display Bitmap Images on Nokia Arduino LCD
Hello world! I would like to introduce you to this project on how to load graphical images on nokia display using arduino, those images are Bitmap Graphics, We are going to design our own bitmap graphics using Paint.net application and then learn how to load them using the Arduino IDE. Let's get started!
What Will I Learn?
Write here briefly the details of what the user is going to learn in a bullet list.
- You will learn connect eclectronic components to arduino
- You will learn how to convert image to bmp format
- You will learn how to load graphic to nokia 5110 display
- You will learn how to make a sketch code to arduino IDE
Requirements
- Step 1: Gather all the Requirements
HARDWARE
- Nokia 5110 LCD Display
- Arduino Microcontroller board
- Connecting wires
- Breadboard
- Usb cable
- PC
- Extra battery pack
Difficulty
This is BASIC electronic tutorial I will provide the connection of pin to arduino and the sketch code to make our programming easily.
Tutorial Contents
- Step 2: Build the Display
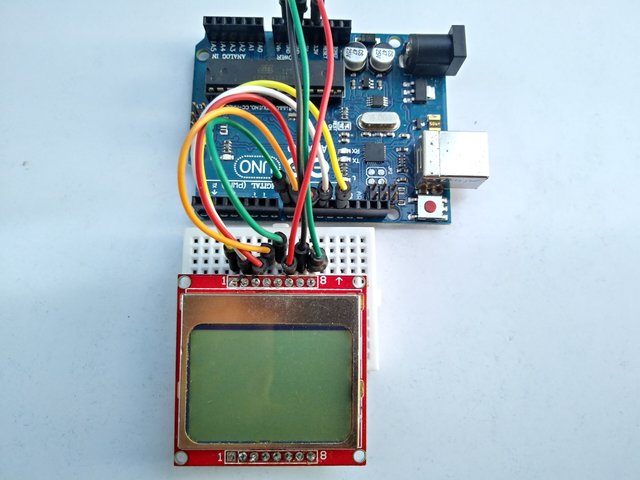
I use this display on my recent gamebuino tutorial, This display is made of 84x48 individual pixels, so you can use it for graphics, text or bitmaps. so less expensive than using oled display. this display module has built in 8 pin outputs, the power pins GND and VCC the LIGHT pin and the 4 data pin which will be connected to specified arduino pins. the connection of the pins on my recent gamebuino tutorial is different from this tutorial.
| Nokia LCD | ARDUINO |
|---|---|
| RST | D12 |
| CE | D11 |
| DC | D10 |
| DIN | D9 |
| CLK | D8 |
| VCC | 3.3V |
| LIGHT | GND |
| GND | GND |
Follow the 'Nokia 5110/3310 Monochrome LCD' tutorial from Adafruit to hookup and test your lcd.
Arduino Nokia LCD address Code:
LCD5110 lcd(8,9,10,12,11);
#define SCR_CLK 8;
 #define SCR_DIN 9;
 #define SCR_DC  10;
 #define SCR_CS  11;
 #define SCR_RST 12;
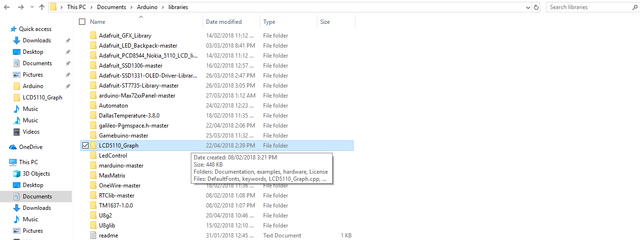
- Step 3: Download the arduino software and libraries
Download the Arduino IDE for your specific operating system. I’ll leave a link to where you can download this software: https://www.arduino.cc/en/Main/Software
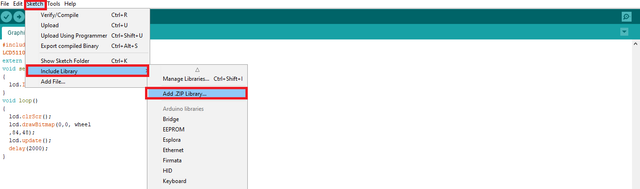
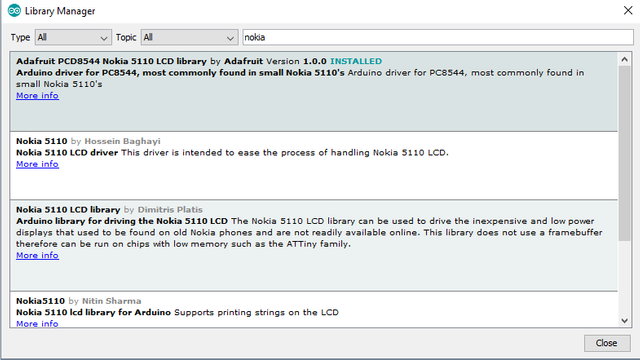
Adafruit-GFX-Library; https://github.com/adafruit/Adafruit-GFX-Library
Adafruit-PCD8544-Nokia-5110-LCD-library; https://github.com/adafruit/Adafruit-PCD8544-Nokia-5110-LCD-library/
- Step 4: Build Graphics .Bitmap format
Let’s create a simple bitmap image in Paint and then load it into the Nokia 5110 display. you can download the paint application using this paint.net 4.0.21
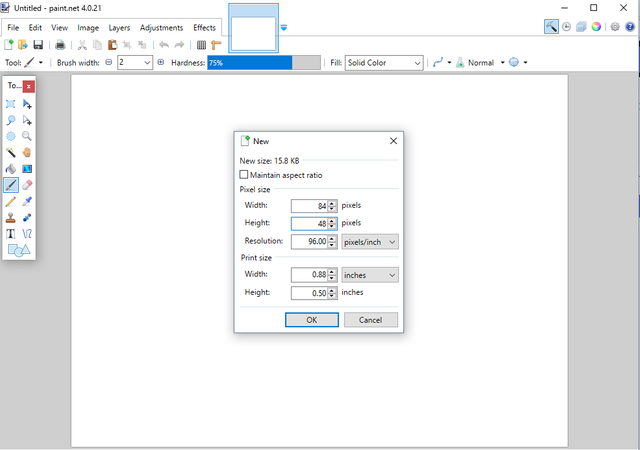
The white board will going zoom out that’s the new file. As you can see, it is too small we have to zoom in with Ctrl + in order to be able to work with it. So, let’s now create some simple graphics. I’m going to use the shape tool here, you can use any tool you like from the software and draw some simple shapes you can click here and choose any shape you like.


We are going to save it as a bitmap, NOT the other image format png/imag .etc be careful, bitmap and we can give it any name we want for example star.bmp and save. Okay, it is now saved.

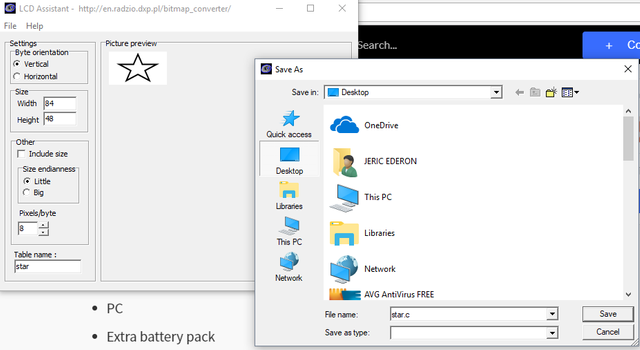
- Step 6: Convert Bitmat image to Byte C arrays
We are going to use the LCD Assistant software, it is a free tool for converting monochromatic bitmaps images to data C file arrays for for embedded systems with microcontrollers and graphics monochromatic LCD displays download LCD Assistant software
We are going to use the instruction from the website, so first convert image from bitmap file to data array select from File menu command 'Load image'. then locate the bmp file, remember the file name you used on saving the image from paint, lets say star look for the filename star in bmp format from your dicuments.

Next, select byte orientation If in data array must be image size (width and height) select 'Include size' checkbox and specify endianness of size. Size are placed in two 16-bit variables at the begin of data array. Next, specify pixels/byte parameter, the width must be 84 pizels and the height is 48 pixels of the nokia 511- lcd Display

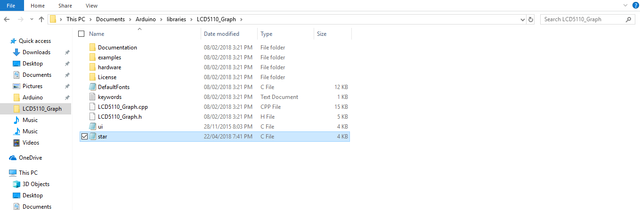
Select the .c from you documents open the file with your notes app, the byte arrays should reflect from the file, for example the code .c of the star that i make recently.
#include <avr/pgmspace.h>
const unsigned char star [] PROGMEM = {
0x00, 0x00, 0x00, 0x00, 0x00, 0x00, 0x00, 0x00, 0x00, 0x00, 0x00, 0x00, 0x00, 0x00, 0x00, 0x00,
0x00, 0x00, 0x00, 0x00, 0x00, 0x00, 0x00, 0x00, 0x00, 0x00, 0x00, 0x00, 0x00, 0x00, 0x00, 0x00,
0x00, 0x00, 0x00, 0x00, 0x00, 0x00, 0x00, 0x00, 0xC0, 0x30, 0x30, 0xC0, 0x00, 0x00, 0x00, 0x00,
0x00, 0x00, 0x00, 0x00, 0x00, 0x00, 0x00, 0x00, 0x00, 0x00, 0x00, 0x00, 0x00, 0x00, 0x00, 0x00,
0x00, 0x00, 0x00, 0x00, 0x00, 0x00, 0x00, 0x00, 0x00, 0x00, 0x00, 0x00, 0x00, 0x00, 0x00, 0x00,
0x00, 0x00, 0x00, 0x00, 0x00, 0x00, 0x00, 0x00, 0x00, 0x00, 0x00, 0x00, 0x00, 0x00, 0x00, 0x00,
0x00, 0x00, 0x00, 0x00, 0x00, 0x00, 0x00, 0x00, 0x00, 0x00, 0x00, 0x00, 0x00, 0x00, 0x00, 0x00,
0x00, 0x00, 0x00, 0x00, 0x00, 0x00, 0x00, 0x00, 0x00, 0x60, 0x18, 0x06, 0x01, 0x00, 0x00, 0x00,
0x06, 0x18, 0x60, 0x80, 0x00, 0x00, 0x00, 0x00, 0x00, 0x00, 0x00, 0x00, 0x00, 0x00, 0x00, 0x00,
0x00, 0x00, 0x00, 0x00, 0x00, 0x00, 0x00, 0x00, 0x00, 0x00, 0x00, 0x00, 0x00, 0x00, 0x00, 0x00,
0x00, 0x00, 0x00, 0x00, 0x00, 0x00, 0x00, 0x00, 0x00, 0x00, 0x00, 0x00, 0x00, 0x00, 0x00, 0x00,
0x00, 0x00, 0x00, 0x00, 0x00, 0x00, 0x04, 0x04, 0x0C, 0x0C, 0x1C, 0x04, 0x24, 0x04, 0x44, 0x84,
0x84, 0x04, 0x04, 0x04, 0x04, 0x04, 0x04, 0x04, 0x04, 0x04, 0x04, 0x04, 0x03, 0x00, 0x00, 0x00,
0x00, 0x00, 0x00, 0x00, 0x00, 0x00, 0x00, 0x03, 0x04, 0x04, 0x04, 0x04, 0x04, 0x04, 0x04, 0x04,
0x04, 0x04, 0x04, 0x84, 0x84, 0x44, 0x44, 0x24, 0x04, 0x1C, 0x0C, 0x0C, 0x04, 0x04, 0x00, 0x00,
0x00, 0x00, 0x00, 0x00, 0x00, 0x00, 0x00, 0x00, 0x00, 0x00, 0x00, 0x00, 0x00, 0x00, 0x00, 0x00,
0x00, 0x00, 0x00, 0x00, 0x00, 0x00, 0x00, 0x00, 0x00, 0x00, 0x00, 0x00, 0x00, 0x00, 0x00, 0x00,
0x00, 0x00, 0x00, 0x00, 0x00, 0x01, 0x01, 0x02, 0x02, 0x04, 0x64, 0x18, 0x00, 0x00, 0x00, 0x00,
0x00, 0x00, 0x00, 0x00, 0x00, 0x00, 0x00, 0x00, 0x00, 0x00, 0x00, 0x00, 0x00, 0x00, 0x00, 0x00,
0x18, 0x64, 0x84, 0x02, 0x02, 0x01, 0x01, 0x00, 0x00, 0x00, 0x00, 0x00, 0x00, 0x00, 0x00, 0x00,
0x00, 0x00, 0x00, 0x00, 0x00, 0x00, 0x00, 0x00, 0x00, 0x00, 0x00, 0x00, 0x00, 0x00, 0x00, 0x00,
0x00, 0x00, 0x00, 0x00, 0x00, 0x00, 0x00, 0x00, 0x00, 0x00, 0x00, 0x00, 0x00, 0x00, 0x00, 0x00,
0x00, 0x00, 0x00, 0x00, 0x00, 0x00, 0x00, 0x00, 0x00, 0x00, 0xC0, 0x30, 0x0C, 0x83, 0x80, 0x40,
0x40, 0x20, 0x20, 0x10, 0x00, 0x08, 0x04, 0x04, 0x02, 0x02, 0x02, 0x02, 0x04, 0x04, 0x08, 0x00,
0x10, 0x20, 0x20, 0x40, 0x40, 0x80, 0x81, 0x0C, 0x30, 0xC0, 0x00, 0x00, 0x00, 0x00, 0x00, 0x00,
0x00, 0x00, 0x00, 0x00, 0x00, 0x00, 0x00, 0x00, 0x00, 0x00, 0x00, 0x00, 0x00, 0x00, 0x00, 0x00,
0x00, 0x00, 0x00, 0x00, 0x00, 0x00, 0x00, 0x00, 0x00, 0x00, 0x00, 0x00, 0x00, 0x00, 0x00, 0x00,
0x00, 0x00, 0x00, 0x00, 0x00, 0x00, 0x00, 0x00, 0x00, 0x00, 0x00, 0x00, 0x00, 0x02, 0x03, 0x01,
0x01, 0x00, 0x00, 0x00, 0x00, 0x00, 0x00, 0x00, 0x00, 0x00, 0x00, 0x00, 0x00, 0x00, 0x00, 0x00,
0x00, 0x00, 0x00, 0x00, 0x00, 0x00, 0x00, 0x00, 0x00, 0x00, 0x00, 0x01, 0x01, 0x03, 0x03, 0x00,
0x00, 0x00, 0x00, 0x00, 0x00, 0x00, 0x00, 0x00, 0x00, 0x00, 0x00, 0x00, 0x00, 0x00, 0x00, 0x00,
0x00, 0x00, 0x00, 0x00, 0x00, 0x00, 0x00, 0x00,
};- Step 7: PROGRAMMING
The first line should include the nokia5110 library and define the address pin, you can get the address from the address code on the build the display part of the tutorial.
#include >LCD5110_Graph.h>
LCD5110 lcd(8,9,10,12,11);
Define the External address of the .c file from example i used the code star name of the byte arrays you can edit the uint8_t code from your own .c filename
extern uint8_t star[];setup() is where you want to do any initialisation steps, and in loop() you want to run the code over and over again.
void setup()
{
  lcd.InitLCD(); // start the lcd
}
void loop()
{
  lcd.clrScr();
  lcd.drawBitmap(0,0,star,84,48); // .c address and dimension of the image to be displayed
  lcd.update();
  delay(2000); // delay time 1000 is 1sec.
}- Step 8: Experimental Procedures
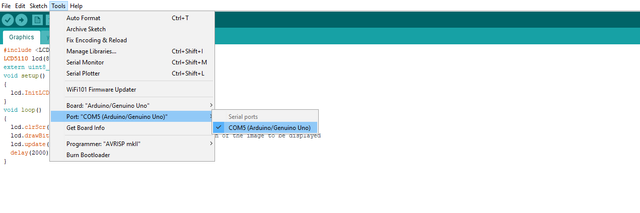
- Step 9: Upload code to Microcontroller board
Connect the arduino uno board nano/mega/r3 to your computer via type b usb cable.
your computer will automatically scan the device driver, to verify the board of the arduino, on the IDE click >. TOOLS then verify the board type and PORT where the USB is connected.

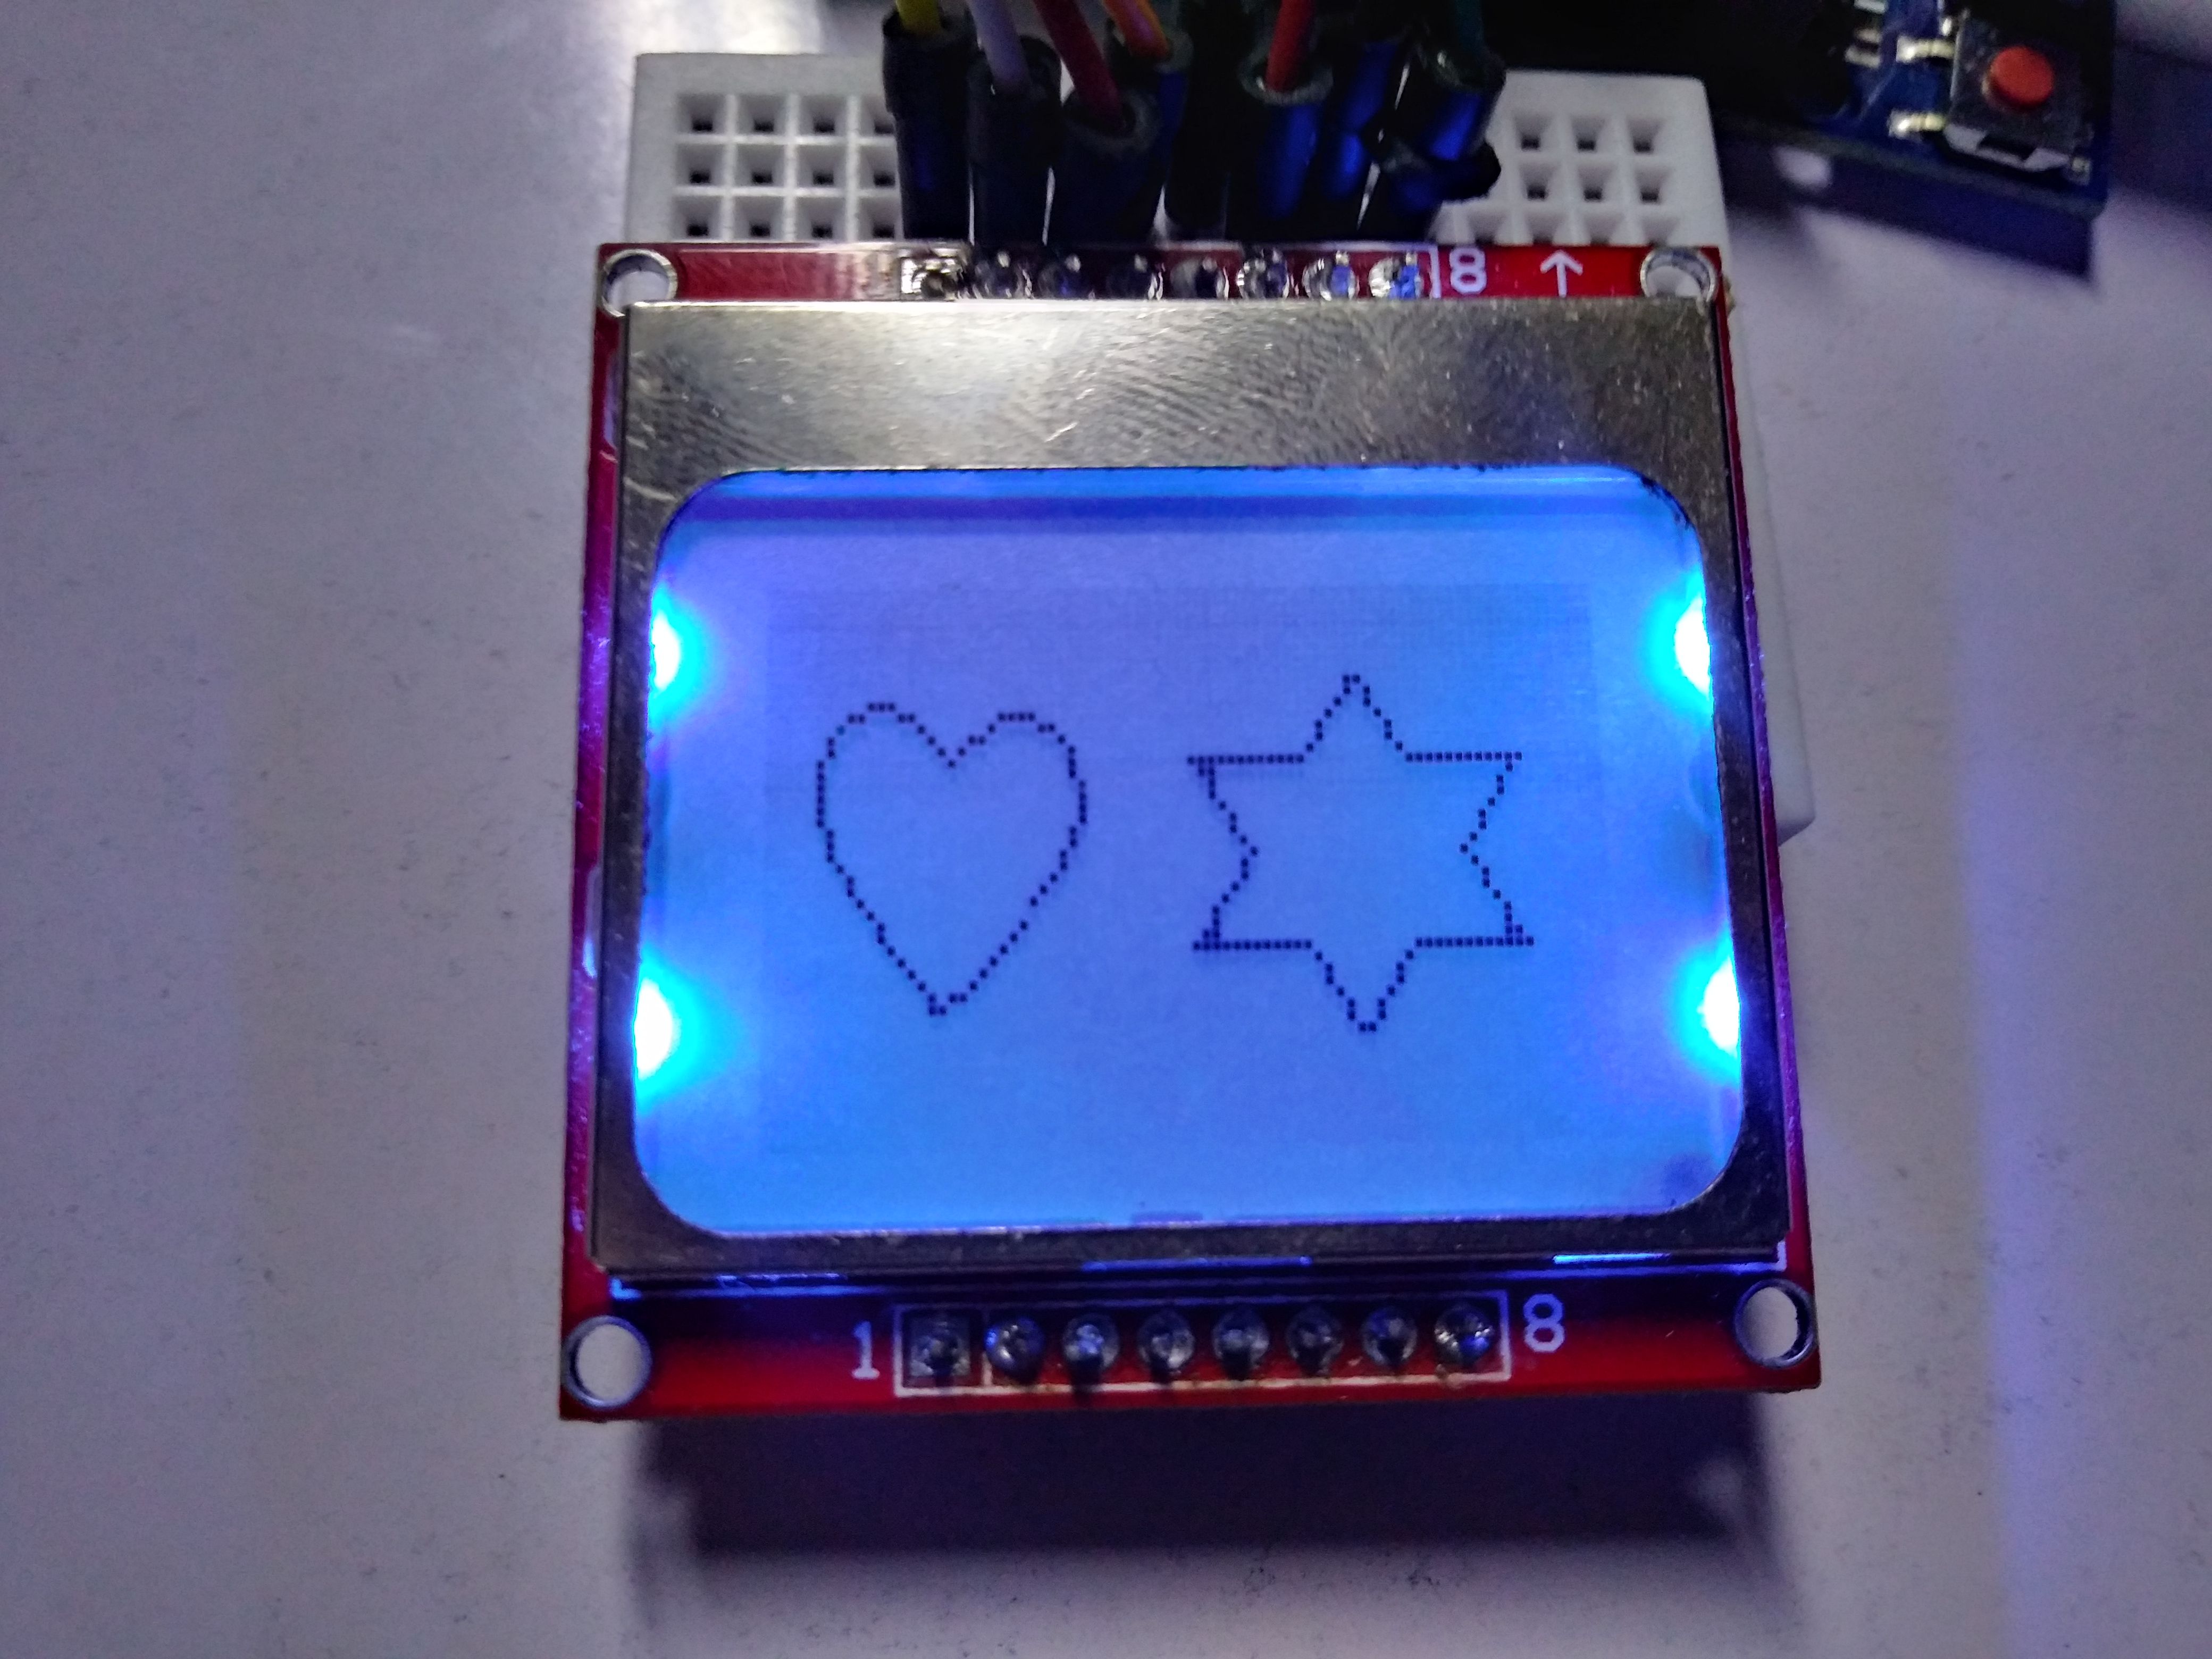
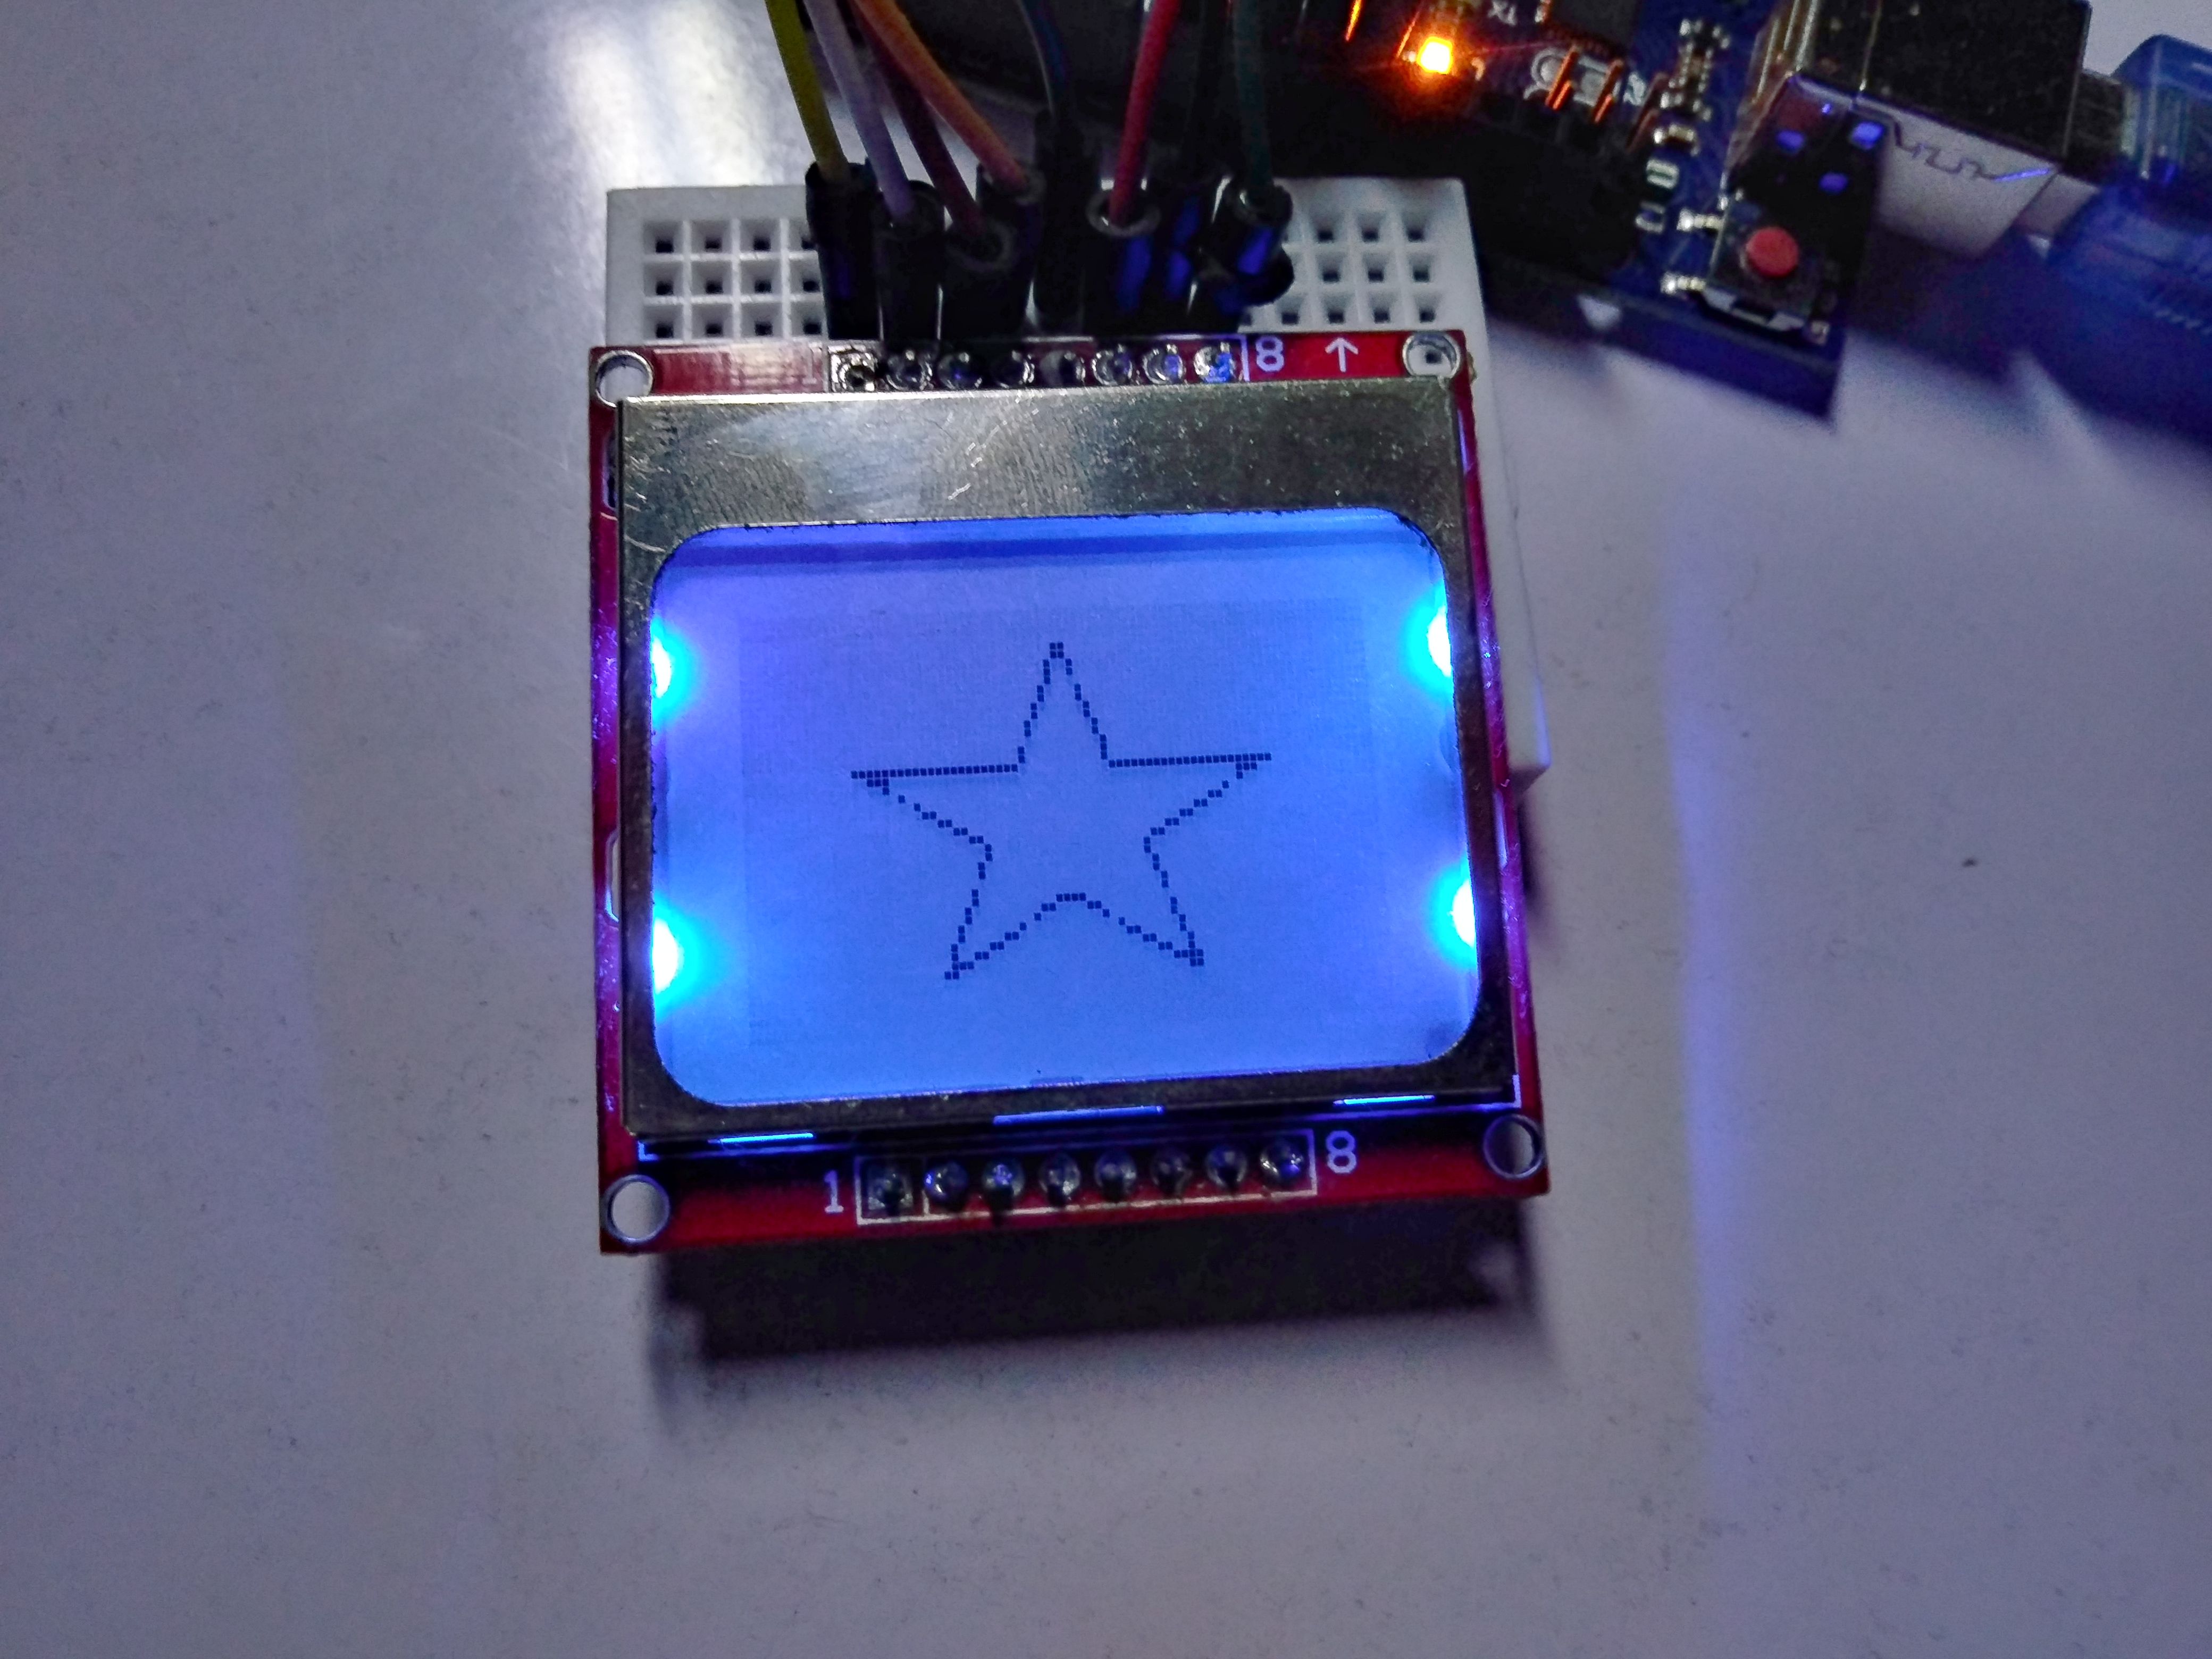
When the LCD main screen is turned on as shown below without any problem! Youre now ready to make your own images to be shown from the LCD( you can turn off the backlight by unpining the LIGHT pin of the LCD to arduino)
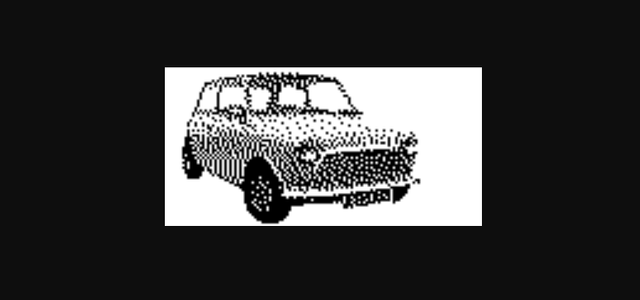
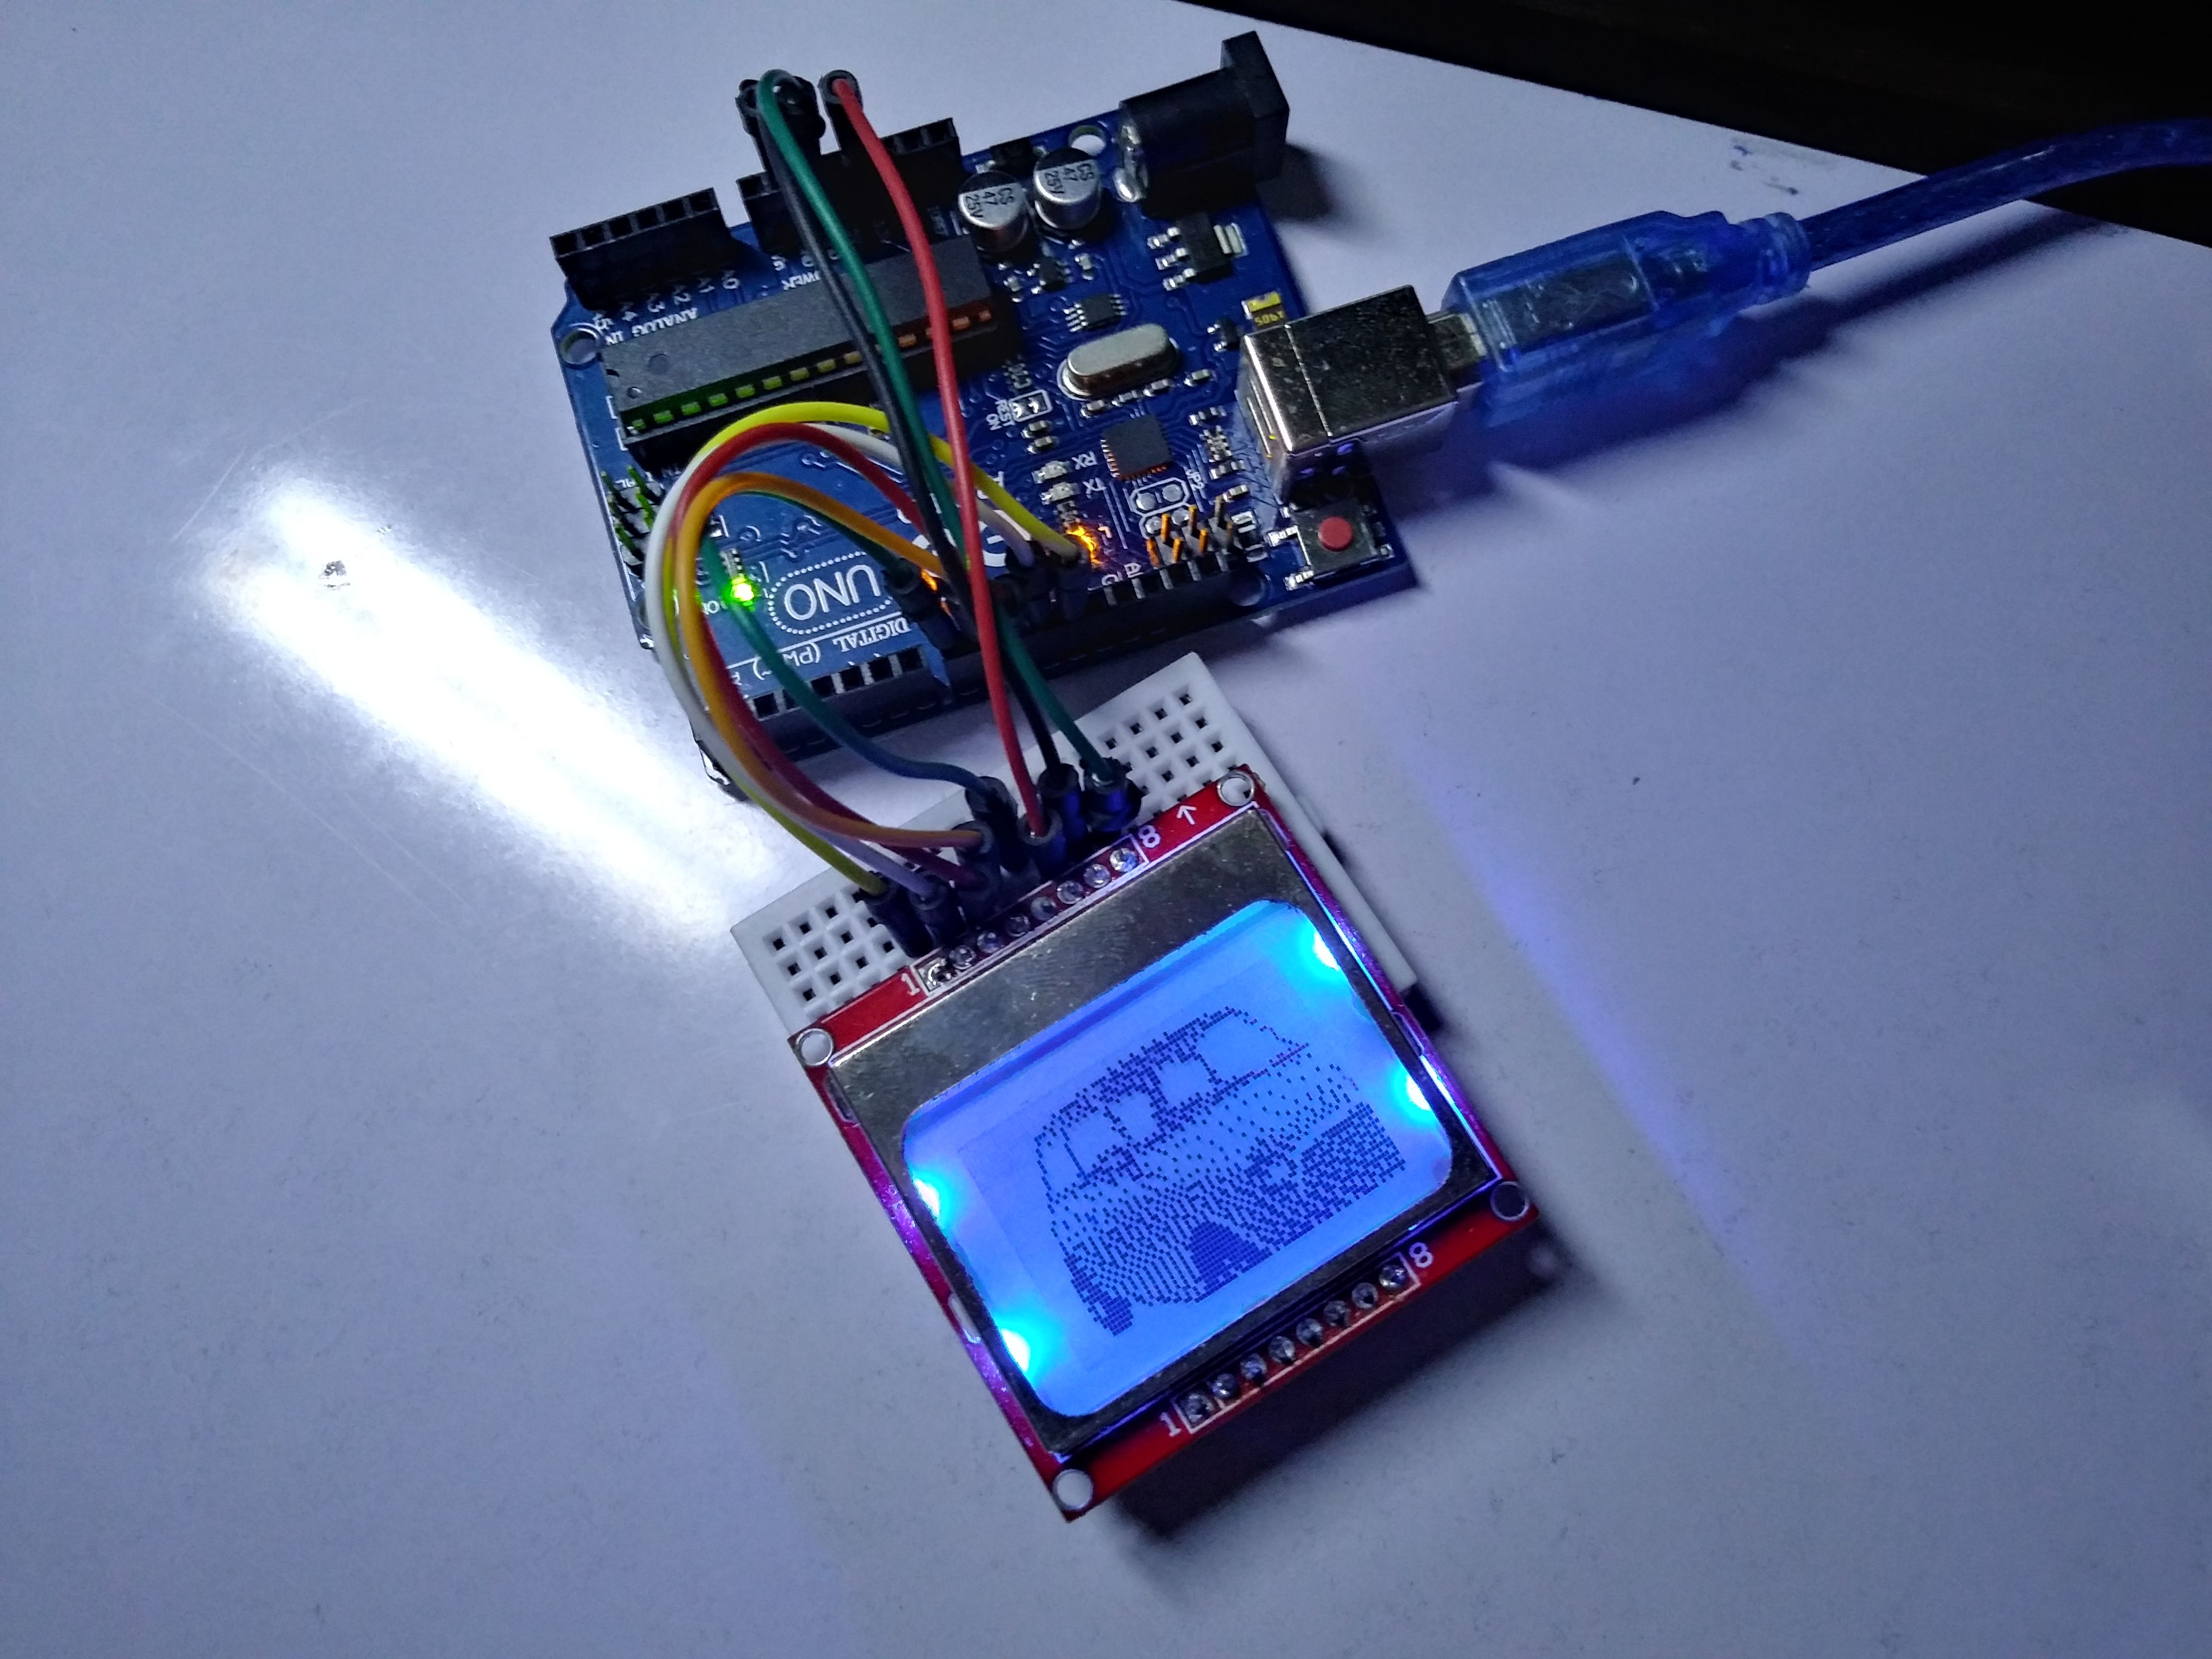
We can also use bitmap images on google and convert it to byte C arrays code to display on 5110 LCD for example i will use thid mini BMW
My other tutorials
How to make your own DIY gaming console GAMEBUINO
Posted on Utopian.io - Rewarding Open Source Contributors
Join our Discord Channel to connect with us and nominate your own or somebody else's posts in our review channel.
Help us to reward you for making it ! Join our voting trail or delegate steem power to the community account.
Your post is also presented on the community website www.steemmakers.com where you can find other selected content.
If you like our work, please consider upvoting this comment to support the growth of our community. Thank you.
Your contribution cannot be approved because it does not follow the Utopian Rules/Guidelines.
Violated Rule(s)/Guideline(s):
Submissions addressing only circuit design and/or the build of specific electronic modules will be rejected.
Submissions focused on the use of functions that are already well documented in the project documentation will be rejected.
Submissions containing substantial instruction in ubiquitous functions (Save, Open, Print, etc.) or basic programming concepts (variables, operators, loops, etc.) will be rejected.
My Opinion(s):
Need help? Write a ticket on https://support.utopian.io.
Chat with us on Discord.
[utopian-moderator]