Micro-controlled Soil Sensors
Table of Contents:
- Intro
- Parts
- Physical Set up
- Coding
- Making it prepper/survivalist friendly
- Final Thoughts
Notes at the end
Intro
This set-up will help you monitor the water level in containers.
You can use this for normal gardening and hydroponic systems.
For this project I have used the Arduino Uno.
Parts
1 Arduino Uno
1 6V Buzzer
1 - 6 Soil Sensors
1 LED
(optional) A resistor
1 Breadboard
Plant pots
Physical Set up
The soil sensor I used
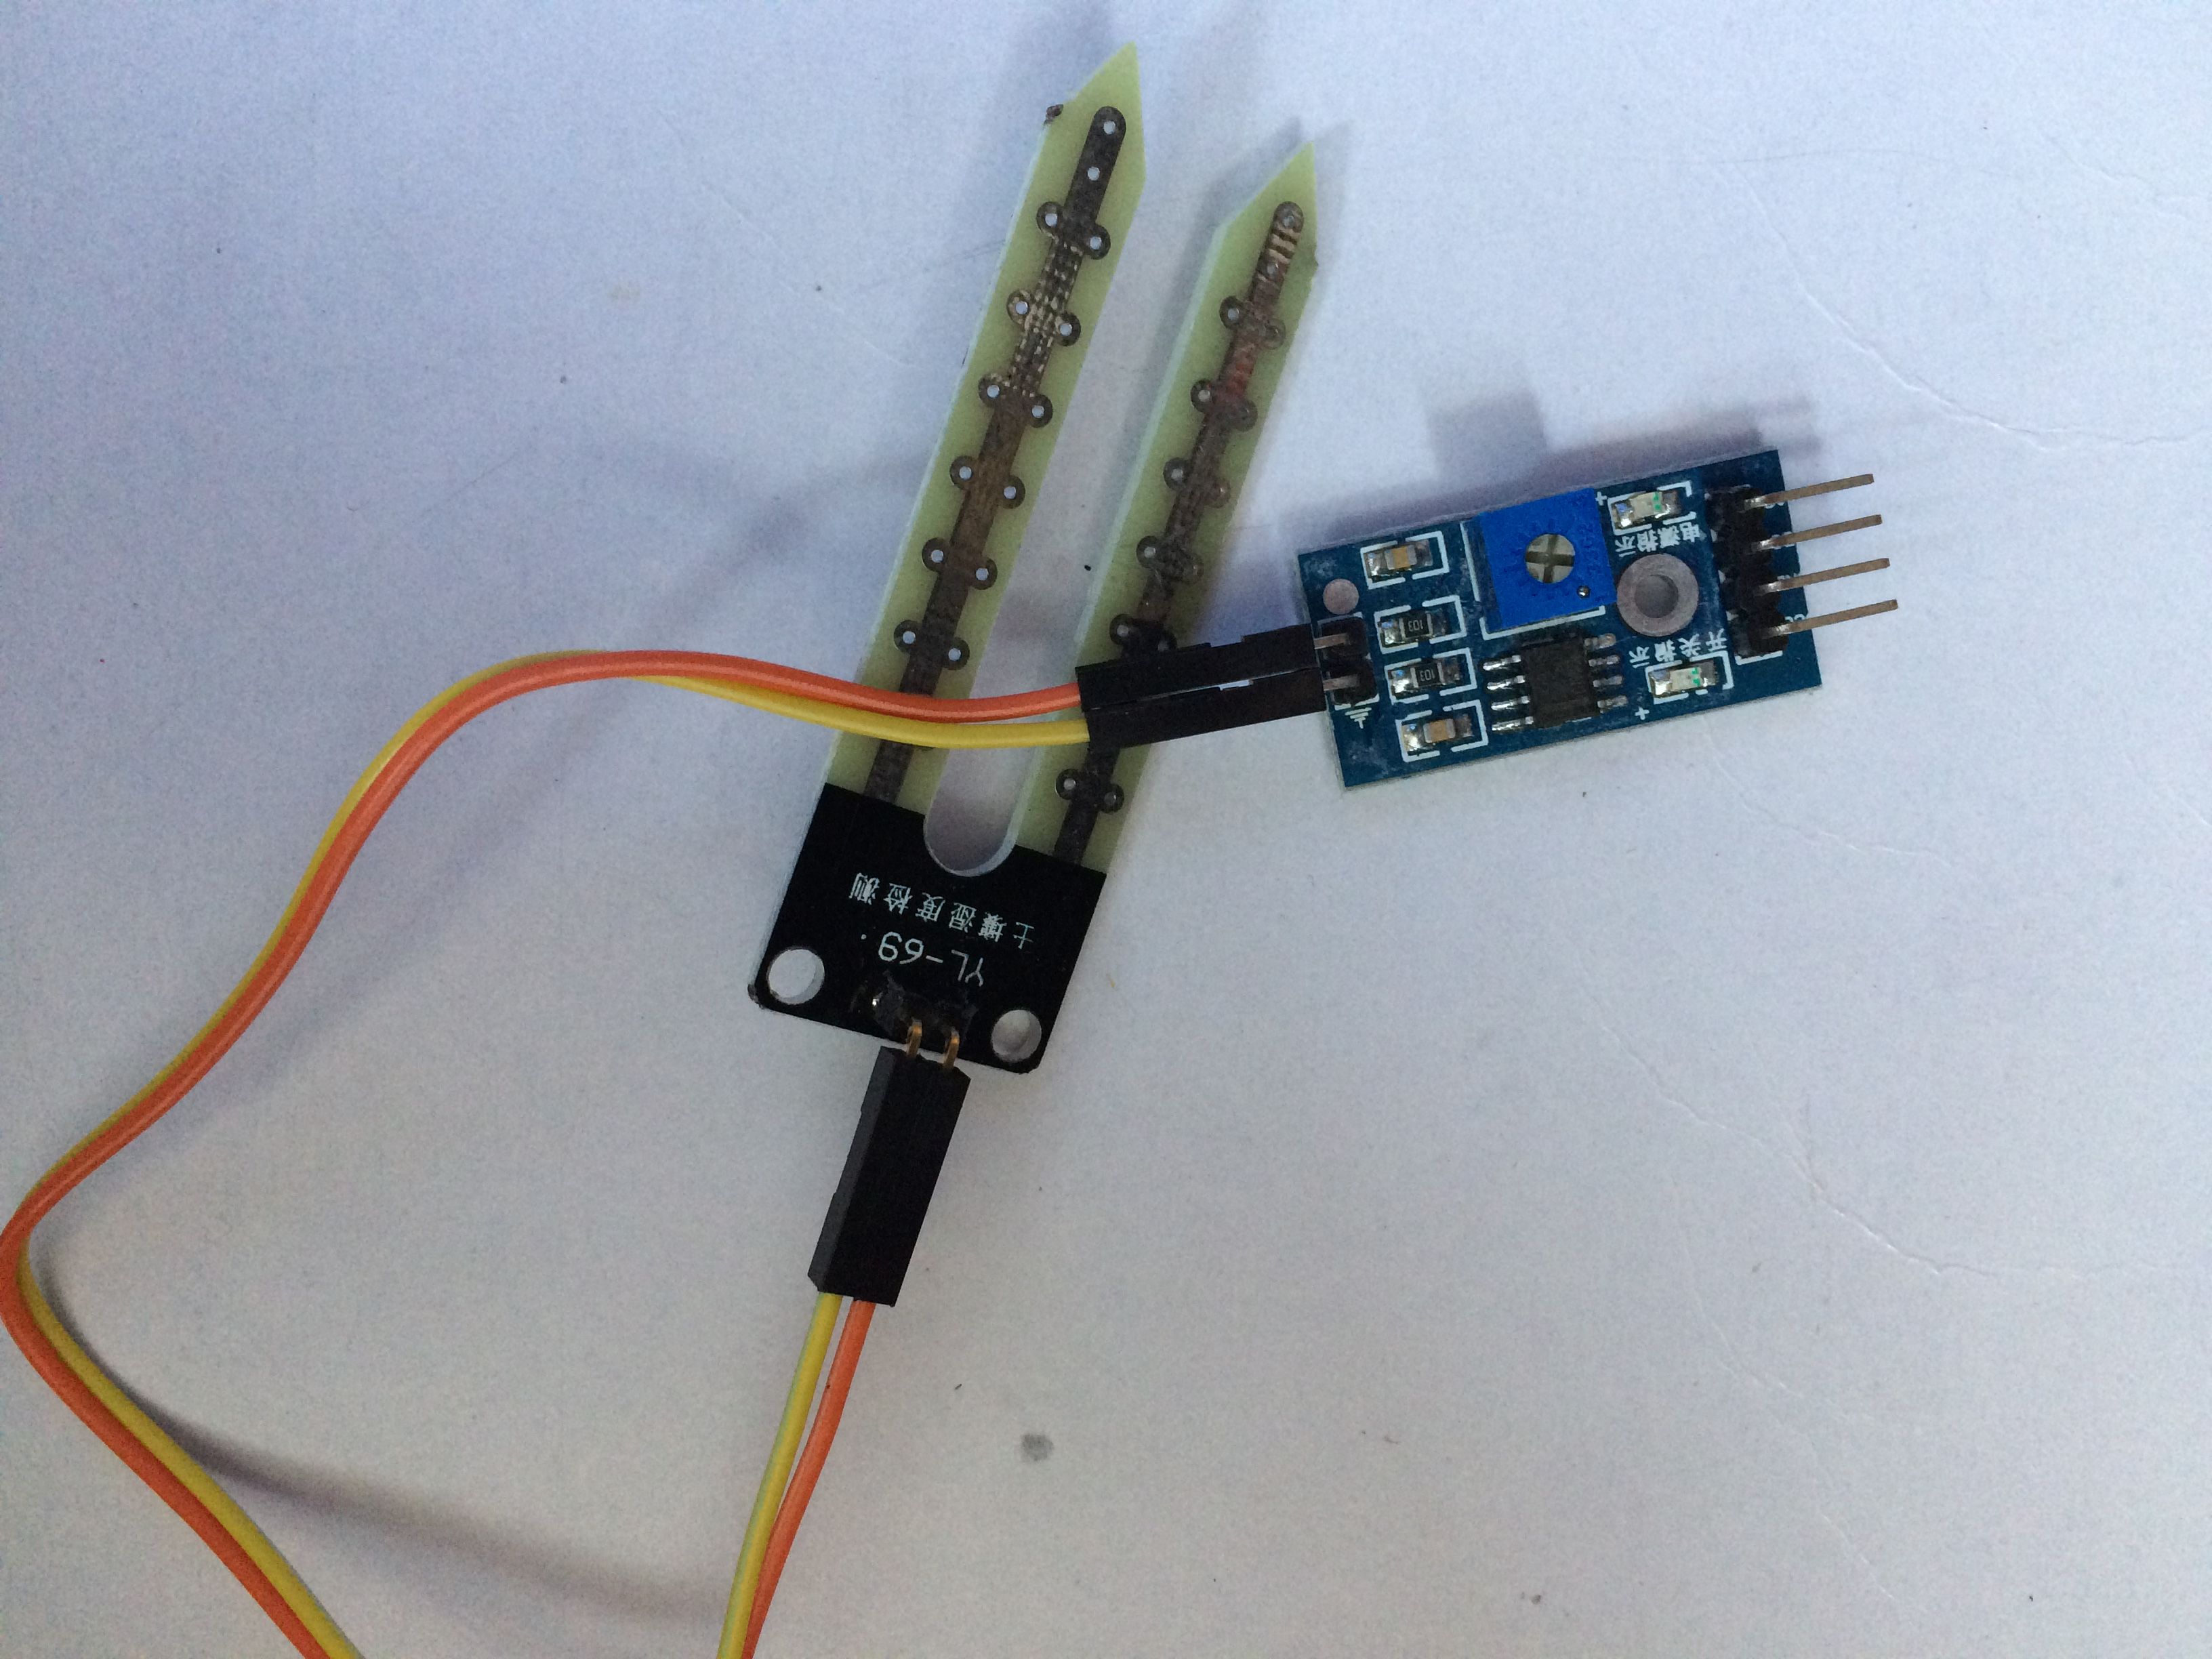
Attach the A0 to an analog port on the Arduino (they will all have A in front of a number). The VCC goes to the 5v port and the gnd to a gnd port, repeat the above for each sensor (up to six).
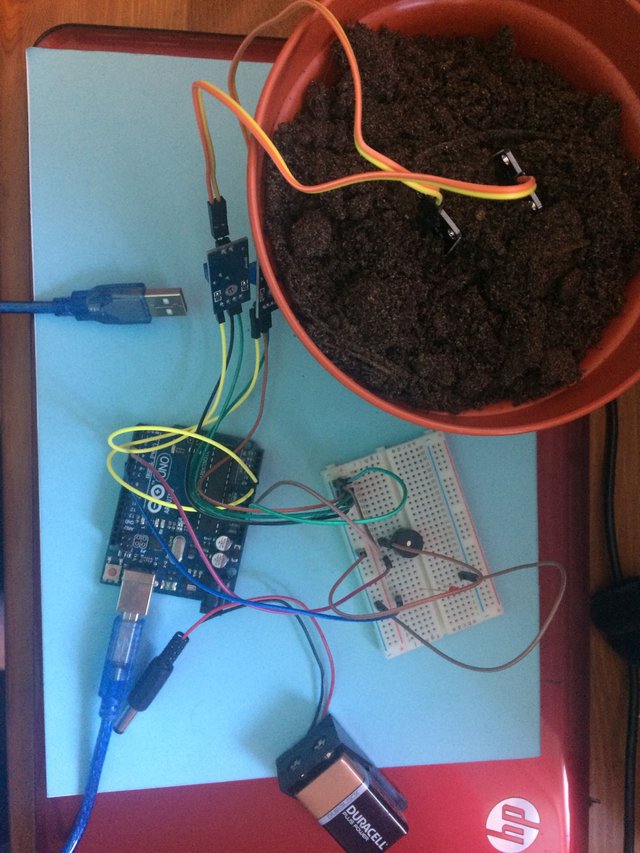
Here is the completed set up
Micro-controller connections
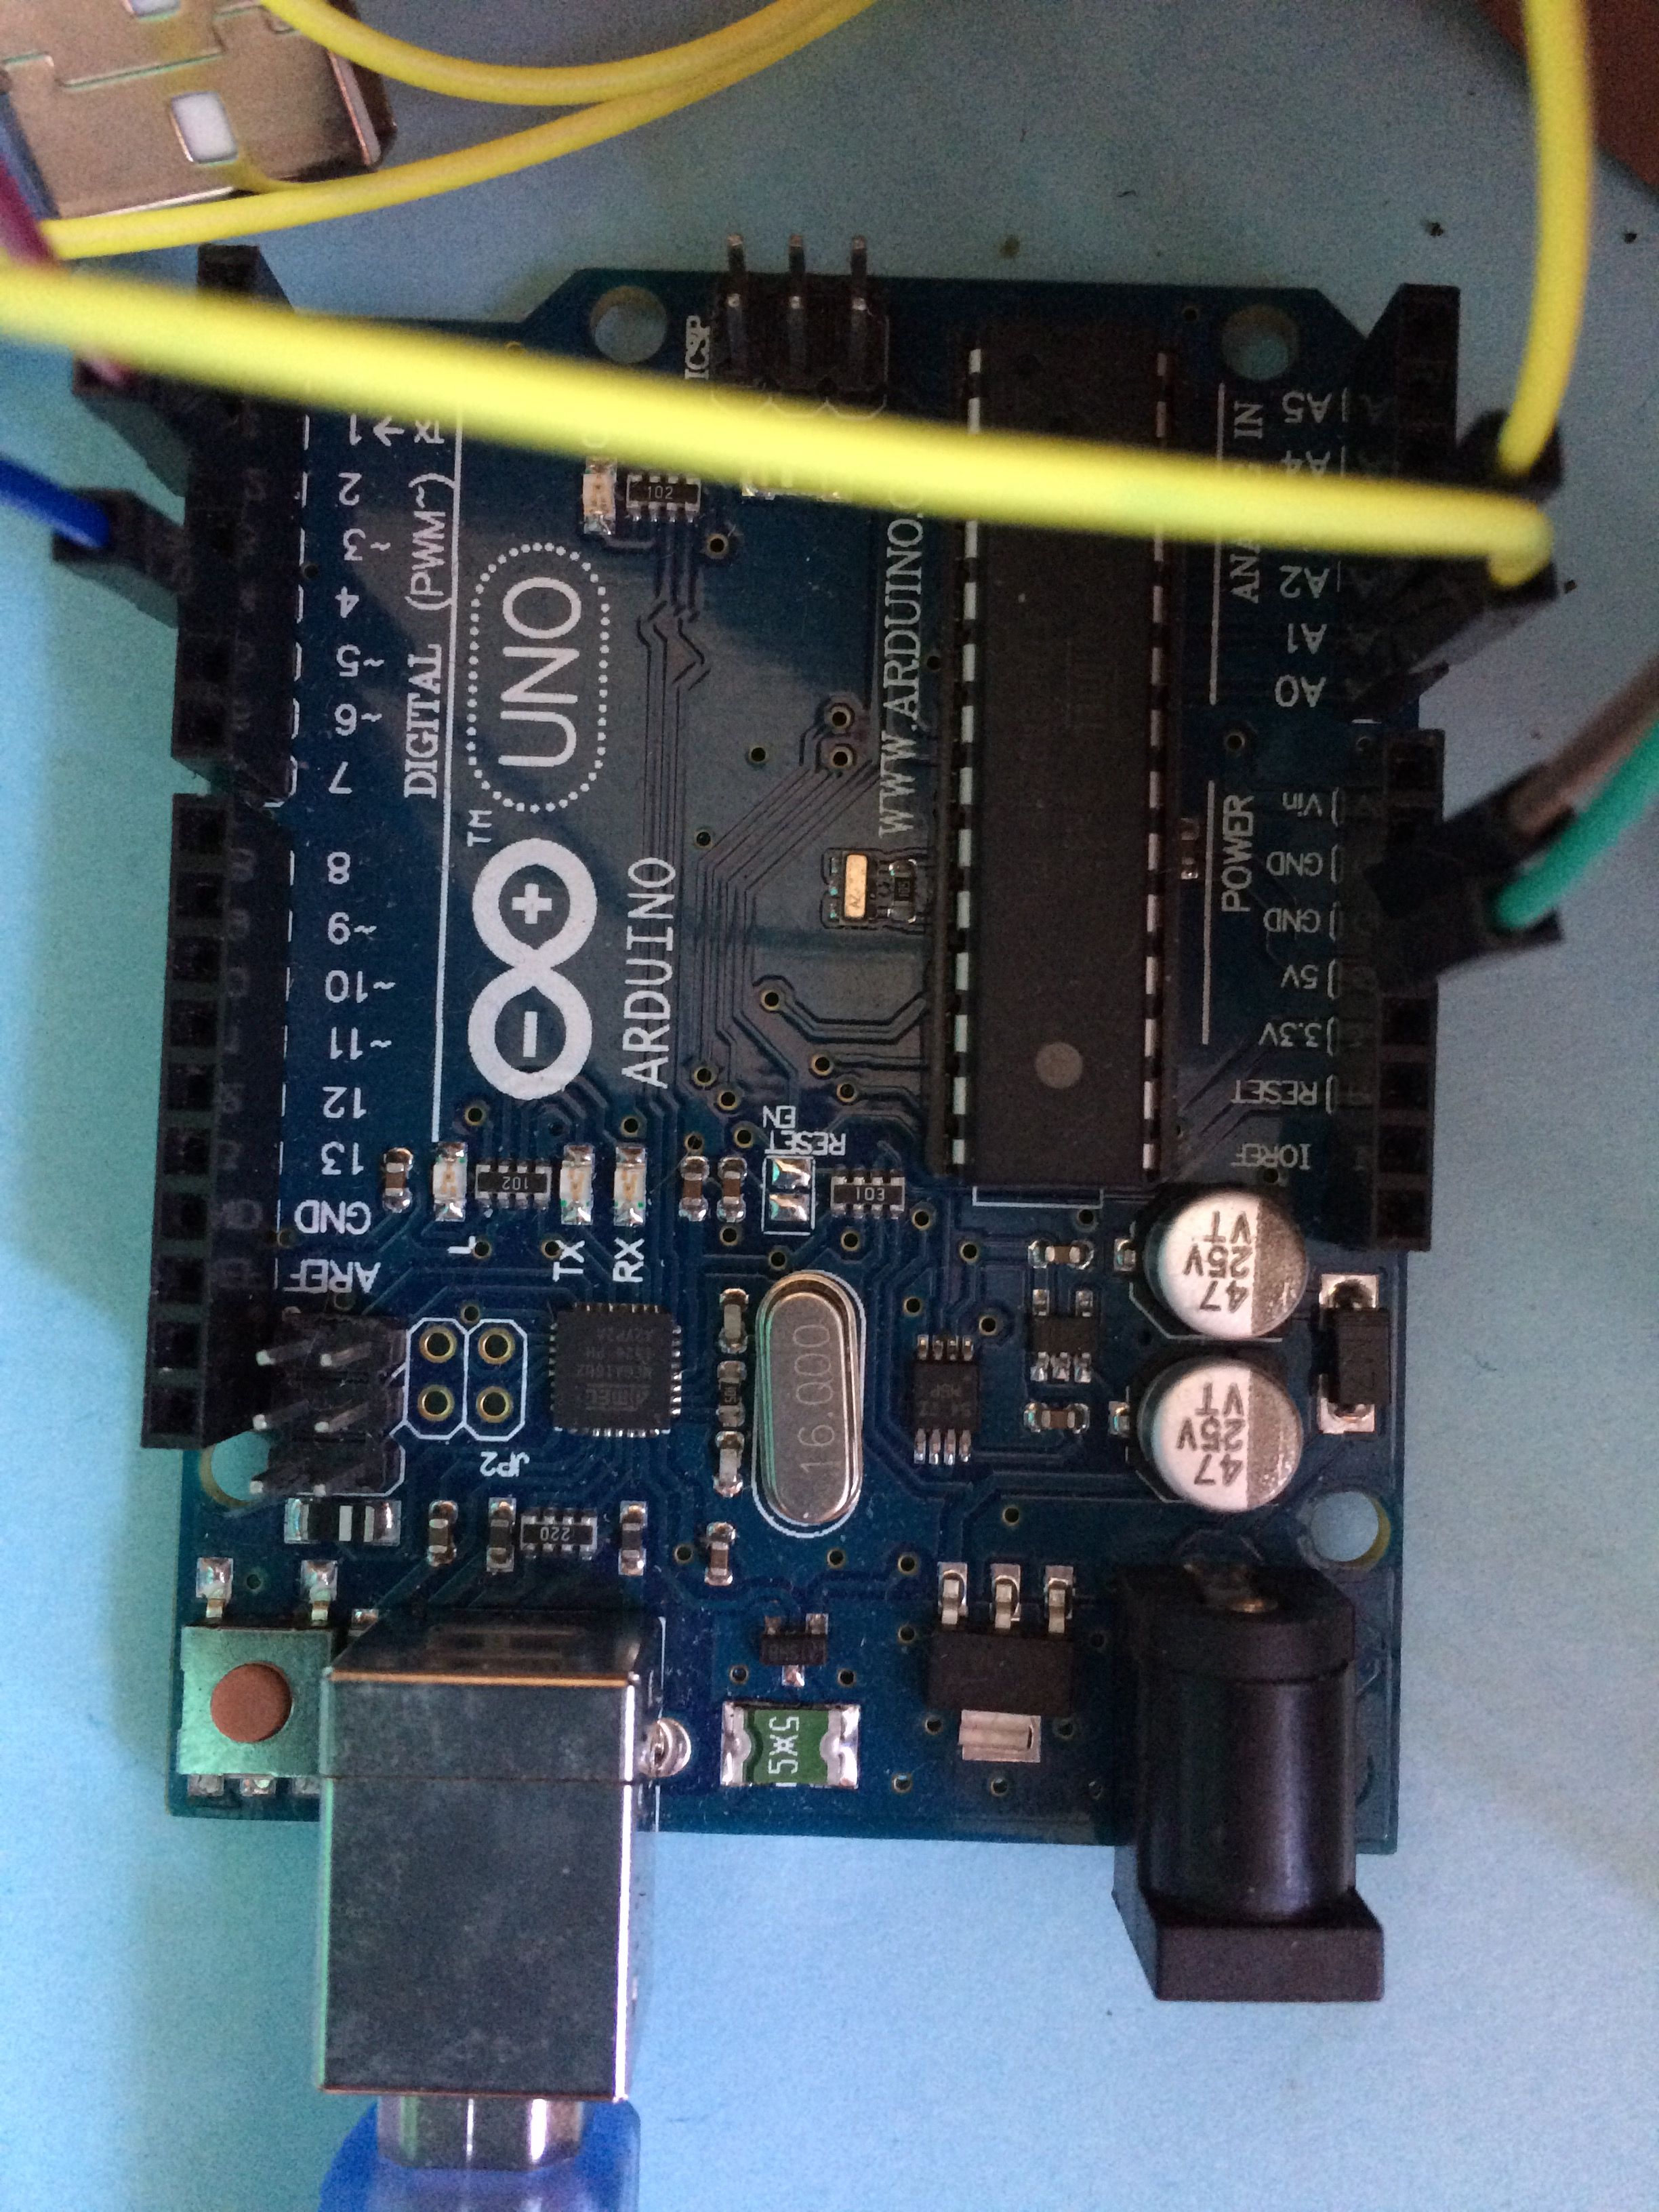
You can change it somewhat, if you are still unsure I will be creating a how to video shortly.
Breadboard connections

Make sure that the + side of the buzzer goes to the 5v and the - goes to a gnd. Notice I have used the breadboard to increase the amount of 5V and gnd ports available. Also make sure the + side of the LED goes to the digital pin (in this case 5) and the - side to ground. You can add a resistor in series to increase the life span of the LED.
Coding
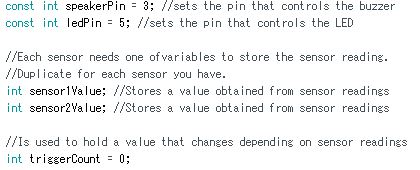
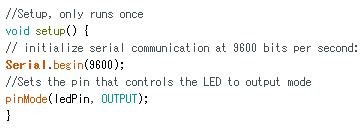
Here are the global variables and void setup code.
Pay attention to the comments
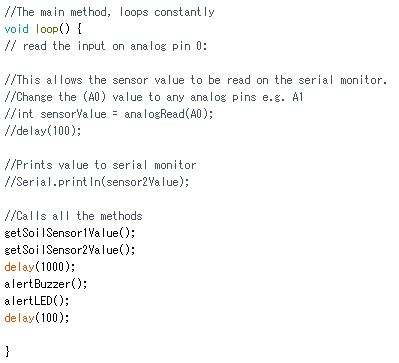
Here is the content of the void loop Method
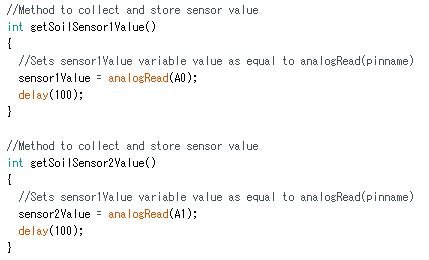
The soil sensor method
alertBuzzer method

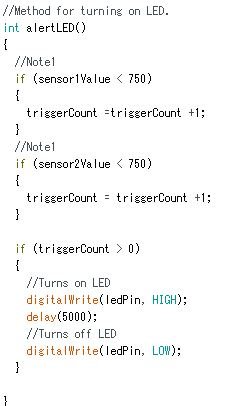
The alertLED method
Making it prepper/survivalist friendly
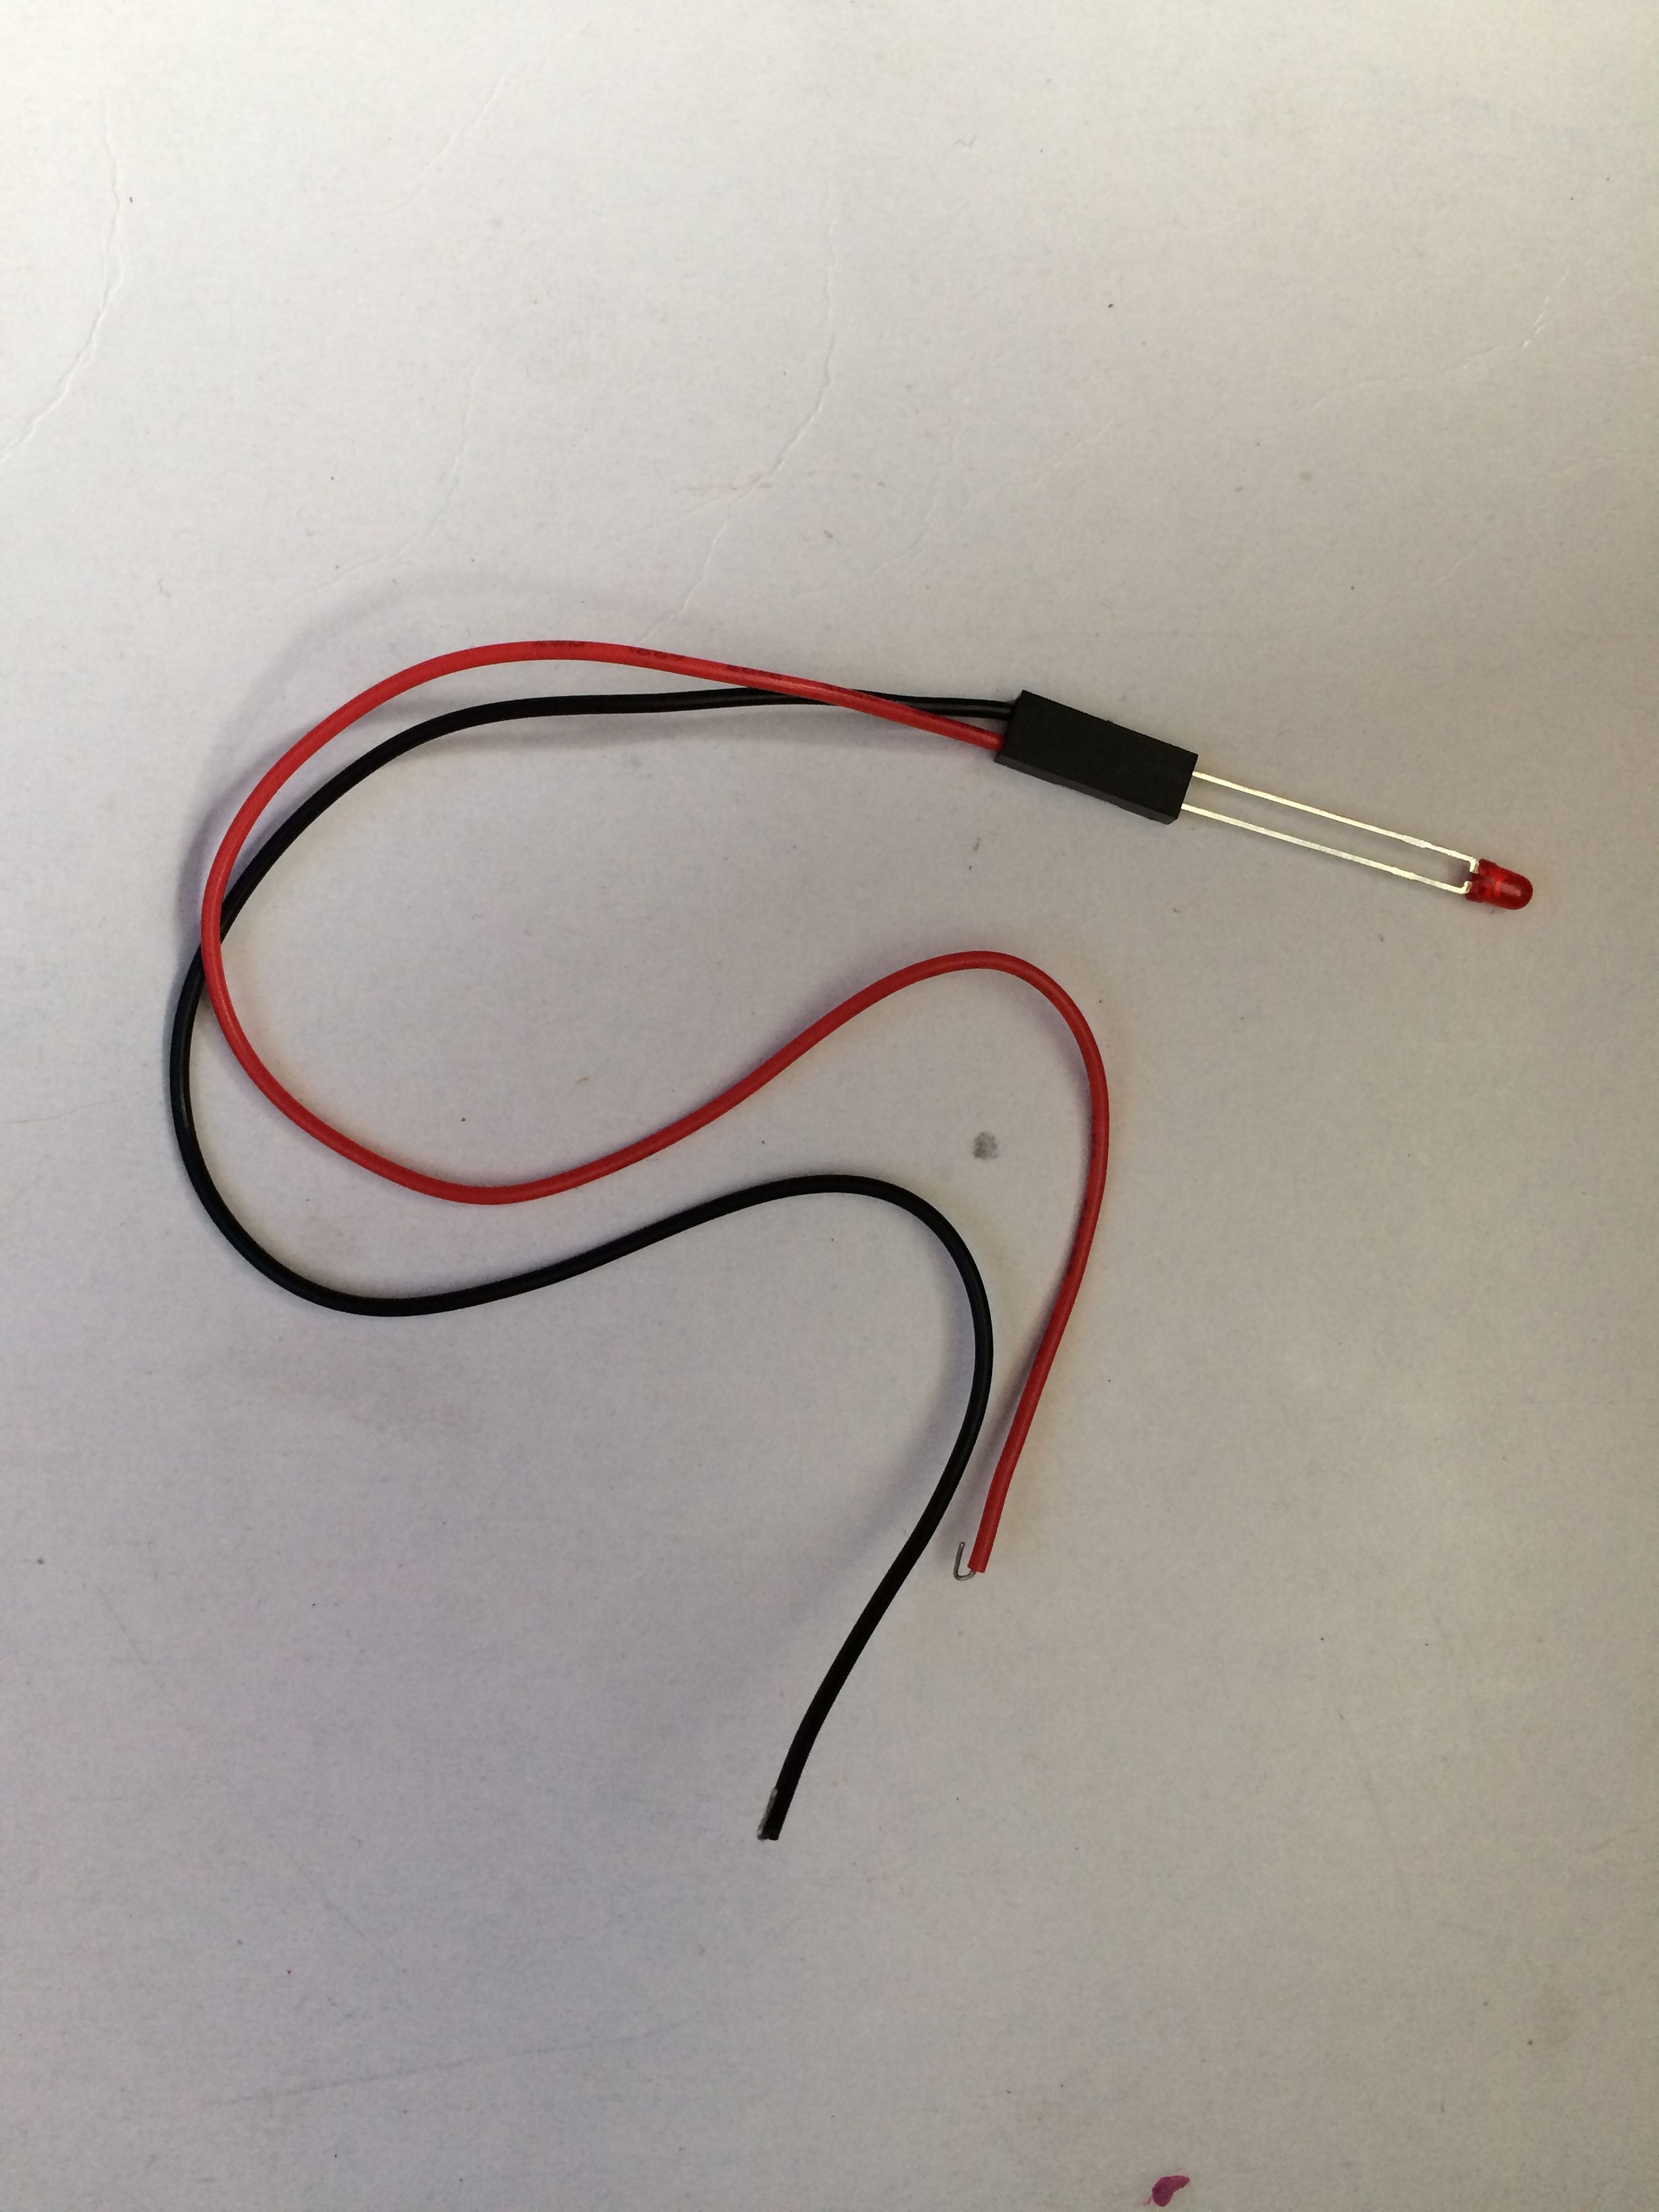
Use an LED extension cord, this will allow you to control the light output. Redirecting it from windows is the best way of using this.
This is what they look like
You can also change the alertBuzzer method to change the tone. Making the tone higher makes it travel further, making it deeper may stop people hearing it.
Final Thoughts
I hope you have enjoyed this little project, if you need more help wait for my how to video. This content was originally premium only, but as Steemit pays me per post I have posted it here. Please do not 'share' this project outside of Steemit as this may affect my funding. If you like Resteem!
Note1: The sensor values from the soil sensors have a range. On these sensors 1000 = low water and 376 = high water. These values will have to be changed to suit the plants you are growing.
Note2: In order to increase the lifespan of the soil sensors you can change the intervals in which they sense by changing the delay time in the main method. 1000 = one second, soil sensors can rust, this is caused my the voltage passing across them with water being present.
Thanks its so nice
Ipvote my post also sir
Your article has been re-steemed and upvoted by @steemhelper , great article! Keep up writing quality content like this.
do you also want to get your great content resteemed if it is good enough? Check the link below:
https://steemit.com/whale/@steemhelper/introducing-worlds-first-re-steem-whale-how-can-it-benefit-the-steemit-community-how-can-steemians-profit-from-it
Please recommend this initiative to your friends.