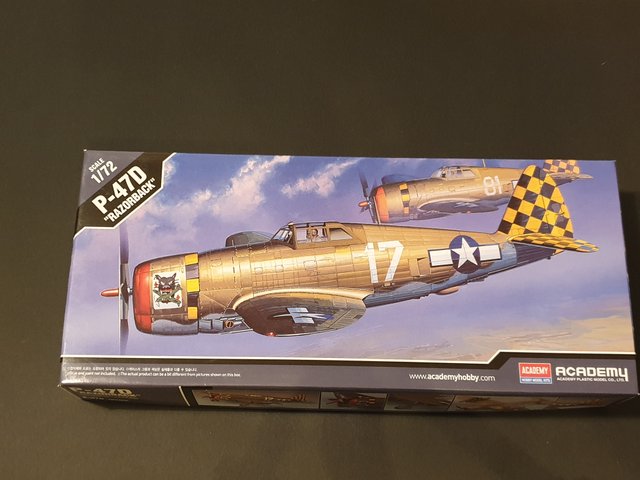
My build of the ACADEMY 1/72 P-47 Thunderbolt with CMK aftermarket Gun Bay. Part 1 of 2
You may have seen my review of this little kit some time ago, it was finally time to build it! :-) Most of the build on this kit is very simple and straight forward, so I decided to change a few steps.
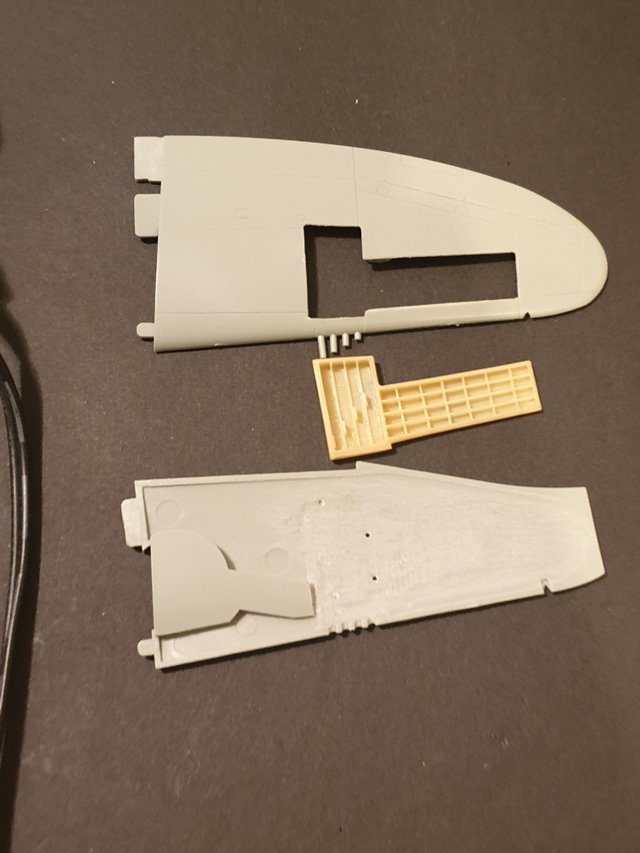
The first major change I made to this kit was the addition of the CMK aftermarket resin gun bays for the port wing. The detail of the parts was excellent however I needed to make a lot of modifications to the wing to fit them. First step was to carefully cut out the top of the bays on the wing. Parts will be added from the CMK kit to replace these. Next step was to sand down the inside sections of both pieces of the wing and well as the bottom of the gun bays in order to make everything fit.
This was a fairly time consuming process but the parts won't fit without it. Though it is hard to see it in these photos the parts are so thin that you can see through them if held up to the light lol.
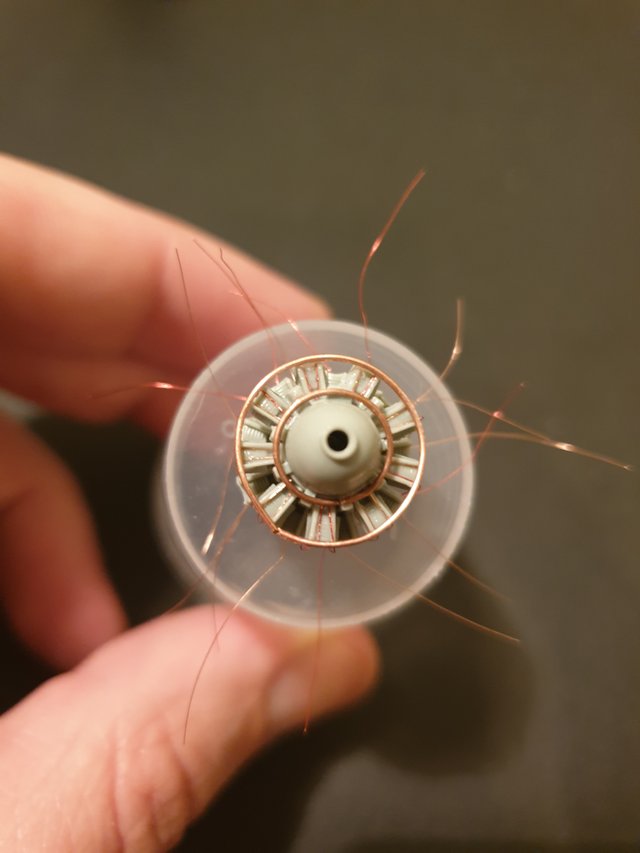
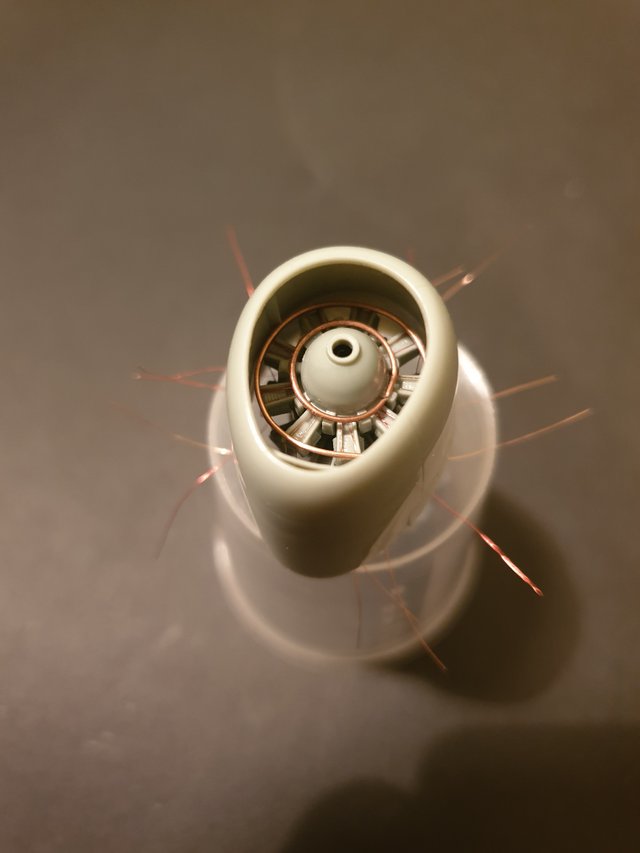
Next I add more detail to the radial engine. I use electrical wire to do the rings around the engine and all of the fine wires. Most of this detail will end up hidden on the final model but I wanted to try my hand at it firstly for a little practice, secondly as I wasn't sure if I wanted to try and open the engine bay. Even though I was very happy with the detail achieved I decided opening the engine cowl might prove to be the straw that broke the camels back so I gave it a miss.
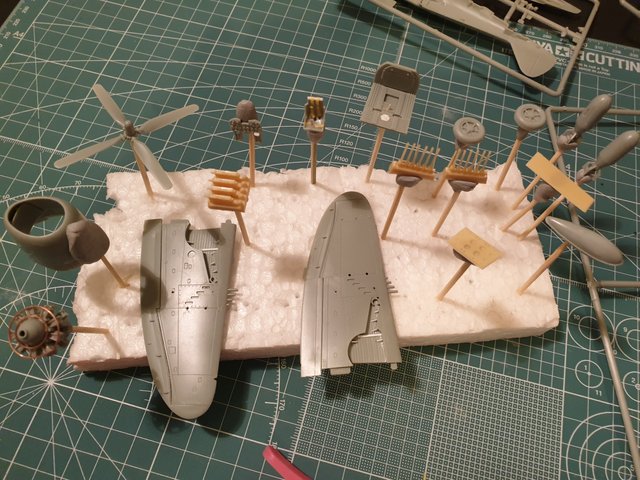
Above I have all the parts ready for painting. I took the opportunity to add a little extra detail to the wheel bays and the cockpit. I pay extra attention the pilot seat as the kit version is fairly simple.
Once those parts have been sprayed I complete assembly of the kit interior and start on the outside. The overall color of the kit is an olive drab. I decide to use a khaki drab to make the paint look somewhat faded.
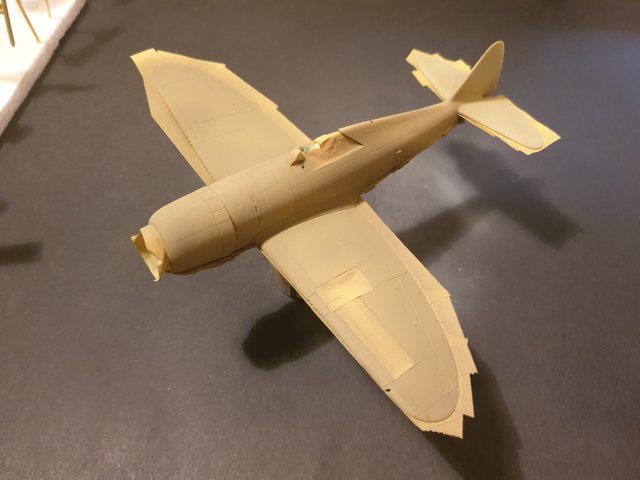
Above is the base coat, to this I add slightly different colors or shade of paint in select areas to stop the model from being "TOO DRAB", :-) And as always to add more visual interest. You will see on the box art from the model kit that it has a chequered tail pattern. The kit does come with decals to this if you like. However I decided the would look that little bit better being painted. Yup... Idiot ;-)
I start by masking off the rest of the plane to protect the paintwork then I spray the back of the planes yellow. Once again to add a little interest I add a tiny but if red to the paint and spray on select areas to make the paintwork less uniform.
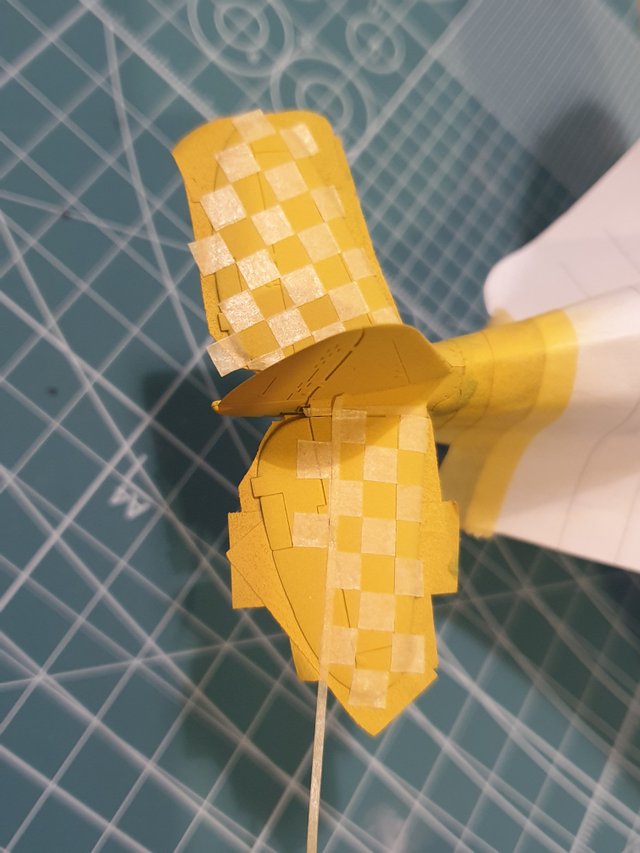
Once this was done I start the time consuming process of cutting out individual squares to mask off the yellow paint so I may spray the black. I cut each square to 4mm by 4mm to match the size of the ones provided in the kit. Most people would go a little crazy doing this but for some reason I find it very relaxing, and hugely rewarding once I have completed the paint work. In the image above you can see the long narrow piece of tape I use as guide to ensure that my lines are straight. It is very easy to make small errors that end up ruining the whole effect further on so take your time.
And yes as I am slightly crazy both sides of the plane match. So the port side squares are mirrored on the starboard side. Something you may not notice if I don't point out but just adds that little bit of complexity to the paintwork and like always, hopefully more visual interest.

And here it is! notice the mirroring I mentioned earlier. :-) I am very pleased with the results. However I mask the plane off again and repaint the base of the tailplane where you see the solid black paint. I thought I may try this too see how it looked but I ended up not liking it and resprayed it the khaki drab again as it should have been normally. But I keep the yellow border lines as I really like the look of these.
If you look at the main wings you can also see the variation in the panel color I did earlier.
That's all for today, bee sure to look at tomorrows upload where I almost completely ruin the paint job :-) HAHA no I am not kidding. Thanks for looking, I hope you enjoyed it. BIG, BIG, BIG thank you to everyone who has been commenting, voting and re-steeming. I really appreciate all the help and support.
Very nice checkerboard pattern. I have does some freehand checks on a Warhammer 40,000 Ork Deff Dread, and it is very hard to make it look good up close. My only saving grace is that Orks are slapdash by nature in the background material. These are also quite small. I now have 1mm masking tape in my arsenal for the next time I try something like this.
Very nice work for freehand painting mate. Much better than I could do free hand.
This is cool, I love that you are adding in extra detail. The tail checker paint turned out great I think.
@tipu curate
Upvoted 👌 (Mana: 25/30 - need recharge?)
Thanks mate. 👍
Hi andrewsmodels,
Visit curiesteem.com or join the Curie Discord community to learn more.
I think I read you earlier about airplane models. I like the construction of this model and the details you provide to do it. Everything, everything is very interesting. It is a very laborious hobby! Regards @andrewsmodels
Thankyou. I will have another update shortly 👍I must be crazy as I love the small intricate work. 🤣
Wow, what I like most is the amount of detail that the models have built. More than hobby is a passion
That gun bay in the wing must have been a lot of work to get fitted properly, especially in the small scale. It certainly looks good!
Thank you. It was a fair bit of work but I am happy with the result.