11 ways you can keep your Facebook profile from revealing too much

Facebook brings people a lot of pleasure – it’s an easy way to keep in touch, share photographs and it’s also a great source of information. And with over 2 billion users, it's one of the most popular services in the world.But there is certain information you might want to keep private. There are also things you might want to hide from certain people - especially those who are acquaintances rather than friends.
Tip 1: Lock down your profile
Before you start tweaking what personal information your friends can see, start by checking your Facebook profile is private, rather than public.
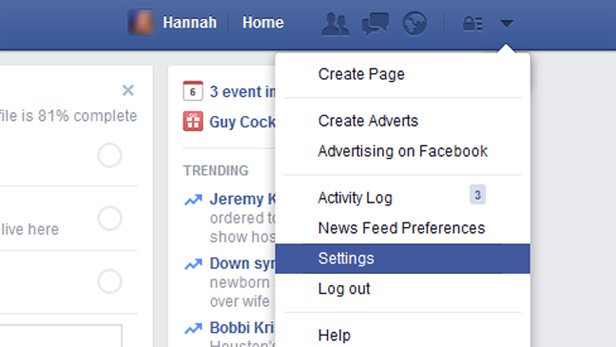
Click the drop-down arrow at the top right, select Settings and click Privacy from the options on the right. Look for Who can see your future posts? and click Edit.
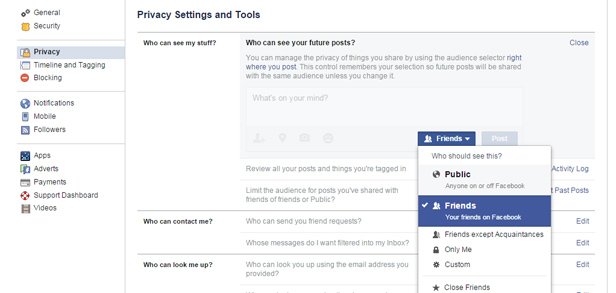
In the drop-down menu make sure Friends is selected rather than Public. Alternatively if you want everything to be private and to set the privacy in individual posts (see Tip 3) select Only Me.
Tip 2: Limit who can see old posts
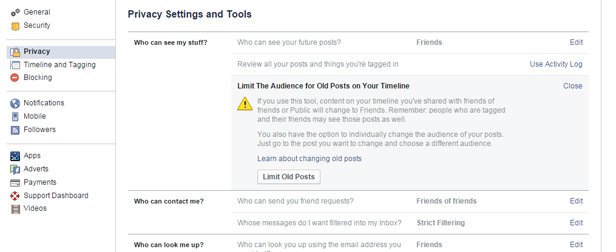
If you’ve changed your privacy setting old posts may still be public.Under ‘Who can see my stuff?’ look for the option Limit the audience for posts you’ve shared with friends of friends or Public and click the Limit Past Posts link on the right.The menu will expand, click Limit Old Posts.A warning box will appear, click Confirm
Tip 3: Post to selected friends
It’s possible to make Facebook status updates, but restrict who can see it on a post by post basis.
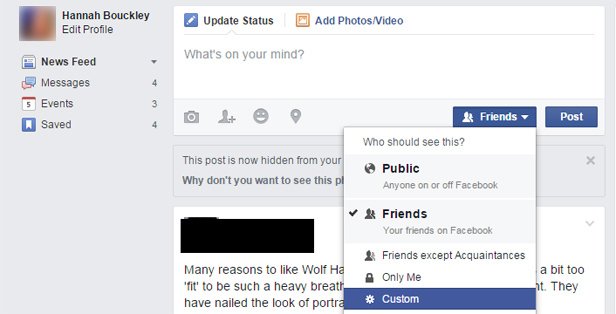
Click Update Status as if you are going to post something, and click drop-down arrow next to Friends, select More Options to extend the list and click Custom.
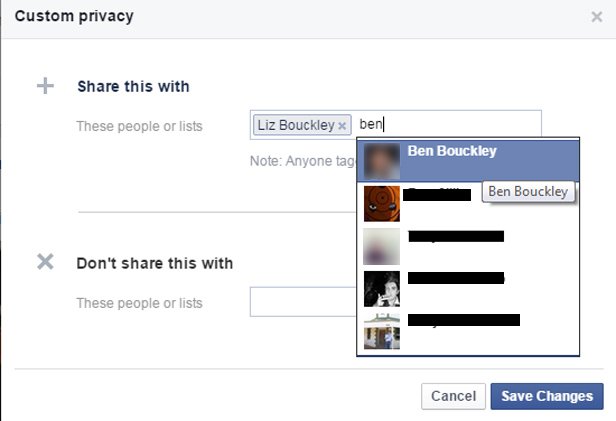
A pop-up box entitled Custom privacy will appear. Under Share this with click the small blue cross next to Friends to remove it, and enter the name of the people you want to share the post with.
Facebook will make suggestions based on your friend list and the names will come up automatically, which you click to select.
When you are happy click ‘Save Changes’To return to posting to everyone click the drop-down and select Friends.
Tip 4: Hide your age
Not everyone wants their date of birth visible on Facebook - either for personal reasons or for security reasons.
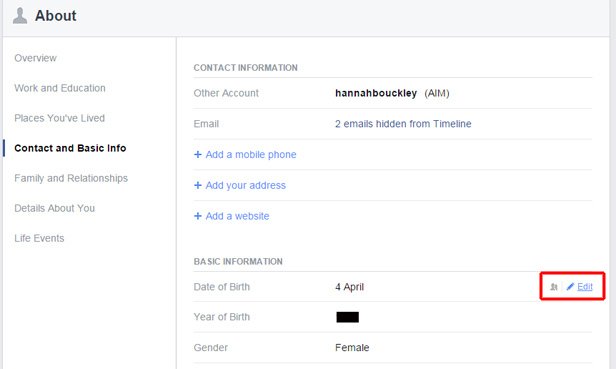
To conceal your age, log into Facebook and click Edit Profile under your name on the left-hand column.You’ll see a section called About appear in the middle of the page.
Select Contact and Basic Info and under Basic Information you’ll see your date of birth which you supplied when you joined Facebook.
Hover the mouse on the same line as Date of Birth and an Edit option will appear.
Click it and using the drop-down arrows you can determine who sees your date and month of birth, and who sees your year of birth. Choose between Public, Friends, Friends except acquaintances, Only Me and Custom.
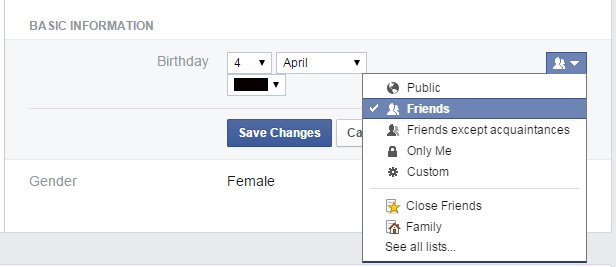
We don’t advise choosing Public for either of these. You may want to select Friends for your day and month of birth, so your Facebook friends will get an alert when it’s your birthday, and select Only Me for your year of birth, so you can keep your age to yourself.
Click Save Changes when you are happy.
Tip 5: Relationship status

Not everyone wants to share their current romantic situation. To change it remain within the About section from Tip 4 and this time click Family and Relationshipsfrom the options on the left.
The drop-down menu contains a dozen options, including Single, Divorced and It’s complicated.
At the top of the list you’ll see a horizontal line.
Select this and your relationship won’t appear on your profile at all. Tip 6: Hide your Friend list
Tip 6: Hide your Friend list
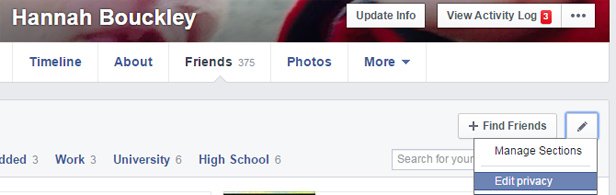
To keep your Friend list private, click on your name on the top menu bar. Across the middle of the screen running horizontally you’ll see options for Timeline, About, Friends, Photos and More, click Friends. Next to Find Friends you’ll see a pencil, click this and select Edit Privacy.
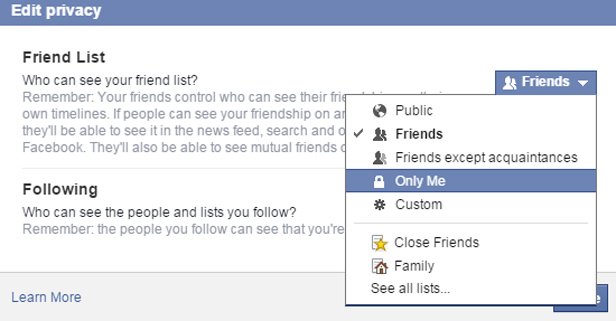
In the Edit privacy box are two options.
Click the drop-down arrow next to Friend List and select Only Me.
The next option Following lets you decide determine who can see the people and lists you follow, to keep this private change it to Only Me as well
Tip 7: Limit friend requests

To avoid getting friend requests from strangers right-click the drop down arrow at the top right and select Settings (as in Tip 1) and select Privacy on the right-hand side.
Under ‘Who can contact me?’ select Friends of friends. If you do get a request from someone you don’t like (or more often don’t know) simply hit Ignore.
Tip 8: Blocking
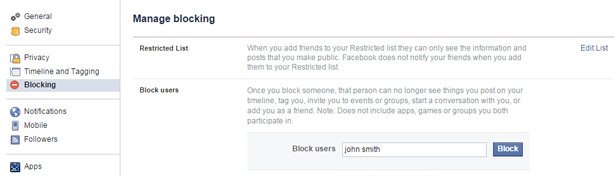
If there’s someone you want to avoid contacting you the best thing to do is block them. Click the drop-down arrow on the top right menu bar and select Settings.
Select Blocking on the left and under Block users enter the name of the person you want to block.
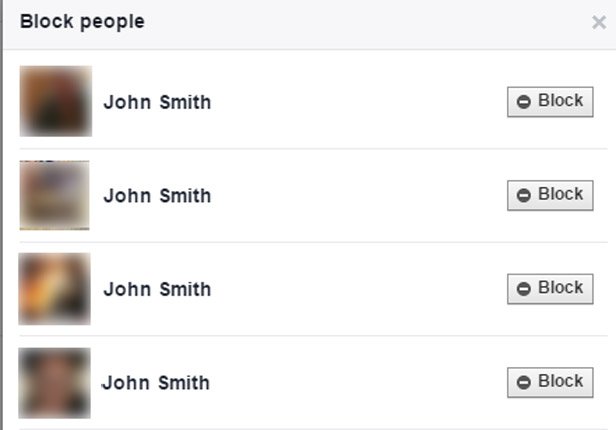
Select the person from the Block people and click Block on the right.
Once they are on the list they can’t see what you post, add you as a friend or invite you to events.
Tip 9: Remove location information
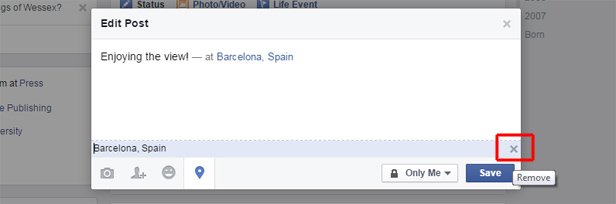
When you make a Facebook post it sometimes suggests a location, we advise you don’t do this because it means everyone knows where you are.
To remove a location, find the offending post, click the down arrow and select Edit Post.
Tap the location pin at the bottom and click on the cross next to the location to remove it.
Tip 10: Keep photos private
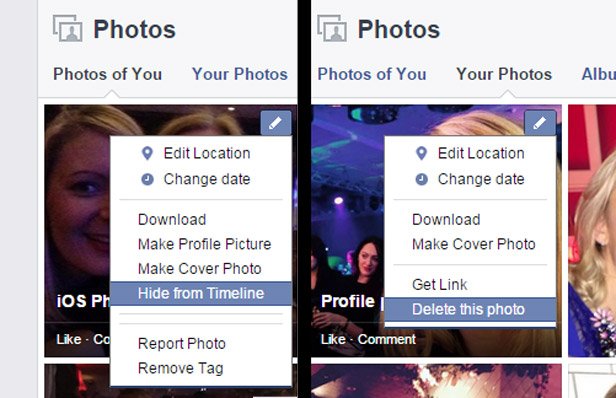
If you’ve had a Facebook account for years, there’s a good chance you’ve amassed a lot of photographs, which you might not want everyone to see. If you chose to Limit Old Posts (Tip 2 above) only your friends can see them, but you still may want to hide individual photos.
Click your name at the top and select Photos.
Photos of You comprises of photos you are tagged in, hover over the photo you want to hide, click the pencil icon and select Hide from Timeline.
Your Photos comprises of photos you’ve taken, hover over photos you want to hide, click the pencil icon and select Delete this photo to remove it.
Tip 11: Events
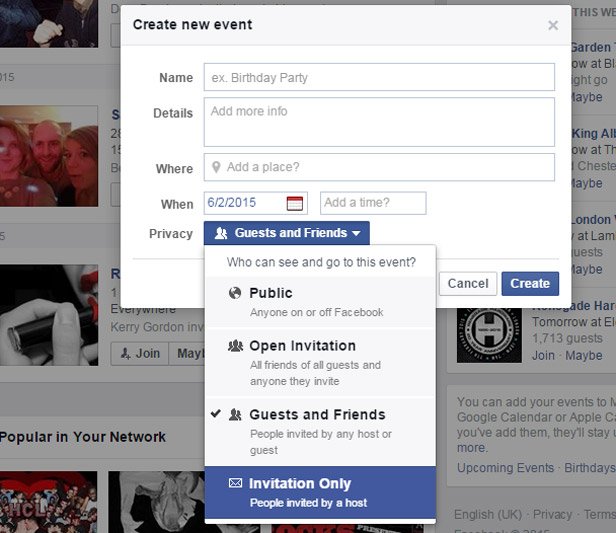
Facebook is a useful way of organising events, you can invite multiple people, make updates and they can easily accept or decline.
Click Home on the top menu bar and select Events from the right-hand side.
This will show what events you’ve been invited too and those popular in your network.
To invite people to an event click the +Create option, look for Privacy and click the drop-down menu next to it.We’ve all heard horror stories about Facebook parties getting out of hand and you don’t want strangers to attend, so don’t select Public.
The safest option is Invitation Only so only people you invite will be able to attend or click on the page.